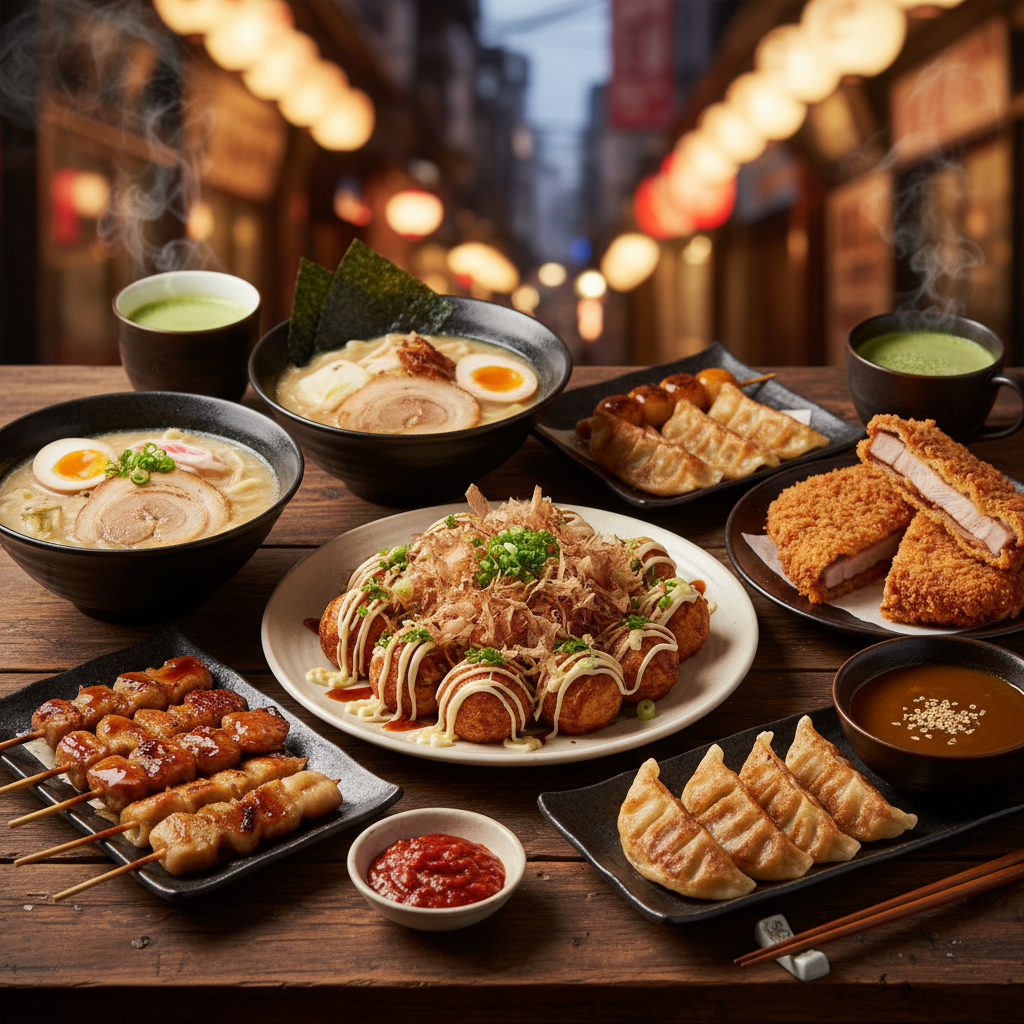
A Flavorful Exploration of Japanese Street Food: Must-Try Dishes and Recipes for Home Cooks
Japanese street food captures the essence of a culture that values both simplicity and flavor. Streets bustling with life are filled with vendors offering an array of delicious and innovative treats. It's a scene that boasts intoxicating aromas, vibrant colors, and the joy of sharing food with friends and family. For both locals and visitors, the experience of wandering through alleys filled with lively chatter while savoring these delectable bites is a cherished routine, revealing gastronomy that transcends the mere act of eating. As we dive into the world of Japanese street food, get ready to discover how to replicate these flavors and experiences in your own kitchen.
Across Japan, street food is as varied as the regions that host it. Each locale boasts its own specialties, born from a rich tapestry of culinary traditions and local ingredients. In the bustling city of Osaka, you might find people reveling in takoyaki, little balls of octopus batter cooked in specialty pans. Meanwhile, in Hiroshima, the enticing aroma of okonomiyaki wafts through the air—an irresistible savory pancake filled with various toppings. These flavorful offerings highlight how Japanese street food is rooted in the use of fresh ingredients, precise techniques, and a deep respect for culinary traditions. Through this blog post, we aim to explore some must-try Japanese street foods while also sharing practical recipes and tips to help you recreate these iconic dishes at home.
As you embark on this culinary adventure, remember that Japanese street food is not just about the food itself; it's about the experience. Cooking these dishes in your kitchen is an opportunity to engage with vibrant flavors and connect with Japanese culture. The beauty of preparing street food lies in the flexibility and creativity it often allows. Whether you are a seasoned cook or just beginning your culinary journey, there’s something for everyone in the realm of Japanese street food. So roll up your sleeves, gather your ingredients, and let’s get cooking some authentic street food right in your own kitchen!
Takoyaki: A Flavorful Octopus Ball Delight
The Origin of Takoyaki
Takoyaki is one of the most beloved street foods in Japan, hailing from Osaka. This iconic dish, which translates to "grilled octopus," was created in the 1930s and has since evolved into a culinary staple not only in Japan but also across the globe. Each ball is a perfect bite-sized morsel, filled with tender pieces of octopus (tako) mixed into a savory batter. The cooking method involves a specialized round pan, which ensures that each ball is perfectly cooked to achieve a crispy exterior while retaining a fluffy interior.
“Takoyaki is a testament to Japan’s culinary ingenuity—simple ingredients transformed into something magical on the streets of Osaka.”
Ingredients You’ll Need
To create authentic takoyaki at home, you will need the following ingredients:
For Toppings:
Cooking Method
In a bowl, combine the flour, dashi, egg, and water. Whisk until smooth and free of lumps.
Place the takoyaki pan over medium heat and allow it to heat up for about 5 minutes. Add oil to each mold generously to ensure the takoyaki don’t stick.
Pour the batter into the molds until they are about 3/4 full. Add a piece of octopus, some green onions, pickled ginger, and tempura scraps to each mold. Then, cover the fillings with more batter.
After about 2-3 minutes, you will notice the batter beginning to set. Using a skewer or chopsticks, start turning the balls. The goal is to form a round shape—keep turning them every couple of minutes until they are golden brown all around. This should take about 8-10 minutes.
Once cooked, remove the takoyaki from the pan and place them on a plate. Drizzle with takoyaki sauce, followed by a swirl of mayonnaise, and sprinkle with aonori and katsuobushi.
“Perfecting the art of turning takoyaki takes practice, but the delightful taste of your first batch will leave you wanting to make more!”
Serving Suggestions
Takoyaki is best served hot and freshly made. Pair it with a chilled glass of sake or a light beer to enhance your dining experience. You can also experiment with different fillings, such as cheese, shrimp, or vegetables, for a fun twist on traditional takoyaki.
Okonomiyaki: The Japanese Savory Pancake
Understanding Okonomiyaki
Okonomiyaki, translating to "grilled as you like it," is often referred to as a Japanese savory pancake. While there are various regional styles, Hiroshima and Osaka are two cities known for their unique versions of this dish. The dish features a batter made from flour, grated yam, water, and eggs, layered with a variety of ingredients, including shredded cabbage, meat, seafood, and toppings, and then grilled to perfection. It is as much about the ingredients you choose as it is about how you prepare it, making it an ideal dish for home cooks to customize.
Key Ingredients for Okonomiyaki
To whip up a delightful okonomiyaki at home, gather the following ingredients:
For Toppings:
Cooking Instructions
In a large mixing bowl, combine flour, dashi broth, grated yam, and egg, mixing until smooth. The batter should have a pourable consistency.
Fold in the shredded cabbage, green onions, and pork belly until everything is well-coated with the batter.
Heat a non-stick skillet over medium heat and add a bit of oil. Pour a ladleful of batter into the skillet, forming a circle about 1 inch thick. Cook for about 4-5 minutes, or until the bottom is golden brown.
Carefully flip the okonomiyaki using a large spatula, cooking the other side for another 4-5 minutes until it's also golden and cooked through. You can press down gently with the spatula to ensure even cooking.
Once cooked, transfer the pancake to a serving plate. Drizzle with okonomiyaki sauce and Japanese mayonnaise, then sprinkle with aonori and katsuobushi.
“Okonomiyaki is a fantastic way to get creative in the kitchen—the possibilities for fillings and toppings are endless!”
Enjoying Your Okonomiyaki
The beauty of okonomiyaki is that it can easily be a meal or a snack. Pair it with a refreshing side salad or enjoy it on its own. It’s even fun to serve it at gatherings where everyone can customize their toppings. Cooking together with family or friends makes it an engaging and interactive culinary experience.
Yakitori: Grilled Chicken Skewers
The Tradition of Yakitori
Yakitori, which means "grilled chicken," embodies the essence of Japanese izakaya culture. This simple yet flavorful dish consists of bite-sized pieces of chicken—skewered and grilled over charcoal. This technique allows the meat to achieve a beautiful char, enhancing its natural flavors while providing a smoky undertone that's hard to resist. While chicken is the star, yakitori can also be made with various other ingredients, providing an array of flavor profiles to indulge in.
Essential Yakitori Ingredients
For a fantastic yakitori experience at home, prepare the following ingredients:
The Preparation Process
In a bowl, whisk together the soy sauce, mirin, sake, and sugar. Cut the chicken into bite-sized pieces and place them in the marinade. Allow it to marinate for at least 15-30 minutes for maximum flavor absorption.
Soak wooden skewers in water for about 30 minutes to prevent them from burning. After marinating, thread pieces of chicken onto the skewers, alternating with pieces of green onion.
Preheat your grill or grill pan over medium-high heat. Lightly oil the grill to prevent sticking, then place the skewers on the grill. Grill for about 4-5 minutes on one side, then flip and grill for another 4-5 minutes until the chicken is cooked through and beautifully charred. Brush with leftover marinade during the last few minutes of cooking to deepen the flavor.
Once grilled, remove the skewers from the grill, and let them rest for a couple of minutes. Sprinkle sesame seeds over the top before serving.
“Sweet, smoky, and savory—yakitori is the perfect finger food for any gathering.”
Serving Suggestions
Yakitori is best enjoyed hot off the grill. Pair it with a side of rice and a fresh salad for a complete meal. If you're feeling adventurous, consider serving it with a dipping sauce made from soy sauce and vinegar for added depth. Yakitori is also a fantastic appetizer for gatherings—it's simple, fun to eat, and delicious!
Korokke: Japanese Croquettes
Korokke: A Crunchy Comfort Food
Korokke, or Japanese croquettes, are a delightful snack made by breading and frying patties filled with mashed potatoes or ground meat. Borrowed from French croquettes, this beloved dish has been adapted to suit Japanese tastes, often featuring ingredients like curry powder or fresh vegetables. Their crispy exterior and comforting, creamy interior make them a popular street food option and a cherished homemade dish.
Ingredient List for Korokke
To make korokke at home, gather the following ingredients:
Steps to Make Korokke
Steam or boil the potatoes until tender (about 15-20 minutes). Drain and mash them in a bowl. Allow to cool.
In a skillet over medium heat, sauté the onion and carrots until soft (about 5-7 minutes). Add the ground meat and cook until browned. Stir in soy sauce, and season with salt and pepper. Combine with the mashed potatoes.
Once the mixture is cool enough to handle, form small patties (about 2-3 inches in diameter) with your hands.
Dip each patty first into flour, then into the beaten egg, and finally coat generously with panko breadcrumbs. This triple breading ensures a super crispy texture when fried.
Heat oil in a deep pan over medium heat. Once hot (350°F/175°C), carefully add the patties, frying them until they are golden brown, about 3-4 minutes per side. Remove and place on paper towels to drain excess oil.
Enjoying Your Korokke
Korokke can be served with a drizzle of tonkatsu sauce or a sprinkle of salt for added flavor. They're a suitable appetizer or a comforting side dish. Serve them warm with a side of tossed salad or Japanese pickles for contrast.
“Each bite of korokke promises a satisfying crunch, transporting you to the vibrant streets of Japan with every taste.”
Conclusion: Replicating Japanese Street Food at Home
Japanese street food offers a myriad of flavors and textures, making it an exciting category for home cooks to explore. From the crispy delights of takoyaki and okonomiyaki to the savory tenderness of yakitori and the comforting crunch of korokke, these dishes not only satiate hunger but also encapsulate the essence of communal eating and culinary tradition.
Remember, the key to mastering these recipes lies in mindfulness and practice. Don't rush through the process—enjoy the experience of cooking and the anticipation of sharing delicious food with friends and family. Feel free to adapt these recipes to suit your personal tastes, and continue experimenting with ingredients and techniques.
Final Thoughts
Embrace the richness of Japanese street food in your kitchen by trying these recipes. The satisfaction of creating authentic dishes that encapsulate the vibrant spirit of Japan is truly rewarding. As you explore, don’t hesitate to share your culinary experiences with others, bringing a piece of Japan to your home one dish at a time. With each bite, you’re not just enjoying delicious food; you’re connecting with a culture steeped in culinary ingenuity and rich tradition. Happy cooking!

Get the Next Recipe
Weekly recipes, techniques, and gear picks — straight to your inbox.
