Best Stand Mixer for Bread Dough (2026)
There is a certain romanticism attached to the art of bread making that every home cook eventually pursues, but the reality of the process is often far more grueling than the rustic imagery suggests. While kneading dough by hand is a soulful, rhythmic practice that builds a deep connection with your ingredients, it is also undeniably exhausting and time-consuming. When you are looking to scale up your production or simply save your wrists from the repetitive strain of high-hydration sourdough, the search for the best stand mixer becomes a pivotal moment in your culinary journey. By 2026, the technology behind these heavy-duty appliances has advanced significantly, offering more torque, better heat management, and refined motor control than ever before.
Choosing the right equipment is not merely about convenience; it is about achieving consistency in crumb structure and gluten development. A high-quality stand mixer acts as a mechanical extension of your own hands, providing the necessary friction and force to build a robust protein network without the human error of over-kneading or uneven aeration. We are no longer just looking for a machine that can spin a hook; we are looking for a reliable partner that can handle low-hydration bagel doughs as easily as it whips up a delicate meringue. Investing in a professional-grade machine transforms bread making from an occasional labor-intensive chore into a seamless, repeatable part of your weekly kitchen rhythm.
In this comprehensive guide, we will dissect the technical specifications that differentiate a mediocre mixer from a true workhorse. We will explore motor wattage, gear construction, and the nuances of planetary mixing actions that ensure your ingredients are perfectly incorporated from the bottom of the bowl to the sides. Whether you are a sourdough enthusiast aiming for that perfect blistered crust or a baker focused on enriched brioche doughs that require sustained, high-speed emulsification, understanding your machine’s limitations is key. Let us dive deep into the world of planetary mixers and determine which ones are truly worthy of taking up permanent residence on your countertop for years to come.
The Science of Gluten and Mechanical Kneading
To understand what makes a mixer effective for bread, you must first understand what happens to your dough at a molecular level during the kneading process. When flour meets water, the proteins glutenin and gliadin begin to bond, forming the foundation of the gluten network. Mechanical kneading is designed to align these protein strands into a coherent, elastic sheet that can trap carbon dioxide bubbles produced by yeast. A subpar mixer will simply push the dough around, failing to provide the translational force necessary to develop this structure, often resulting in a dense, disappointing loaf.
A superior mixer utilizes a specialized gear system and a heavy-duty dough hook design that mimics the folding and stretching motion of human hands. You want a machine that offers high torque at low speeds, as bread dough is a high-viscosity substance that can easily burn out an underpowered motor. If a mixer constantly labors or "walks" across your counter, it is a sign that the gearing is not robust enough to handle the stress of thick, leavened doughs. For the serious home baker, metal gear construction is non-negotiable, as plastic gears inevitably strip under the pressure of stiff flour-to-water ratios.
Understanding Hydration Ratios and Motor Load
The hydration percentage—the ratio of water to flour by weight—plays a massive role in how your mixer performs. A 70% hydration dough is far more forgiving than a stiff, 50% hydration pasta or bagel dough. When working with lower hydration, your mixer must exert significantly more force. We always recommend starting your mixer on the lowest speed setting and slowly increasing it to the second speed. Never exceed the second speed for bread dough, as this can generate excessive friction and heat, potentially killing your yeast or prematurely oxidizing your dough.
A professional stand mixer is not an accessory in a bread baker’s kitchen; it is the engine that drives the consistency of every loaf you produce. If your motor cannot handle the resistance of a lean, high-protein flour dough, you are limited in your artistic expression.
Evaluating Motor Power: Watts vs. Torque
When shopping for a stand mixer in 2026, many novice bakers fall into the trap of obsessing over wattage. They assume that a higher number of watts equates to a better machine, but this is a common culinary fallacy. Wattage is merely a measure of electricity consumption, not necessarily output efficiency. What you should be looking for instead is torque—the actual rotational force delivered to the bowl. A well-engineered 500-watt direct-drive motor will almost always outperform a 1,000-watt motor that relies on inefficient, heat-prone belt-driven components.
The best machines for bread are often direct-drive mixers, where the motor is positioned directly over the attachment point. This design minimizes power loss and allows for a more consistent speed under load. Because bread dough is dense, it creates a "feedback loop" where the mixer must work harder as the gluten tightens. A machine with a sophisticated governor or speed-sensing technology will detect this resistance and adjust its power output accordingly, ensuring the dough hook never stalls during the critical window of development.
Thermal Overload Protection
Advanced mixers now include thermal overload protection, a crucial feature for any baker who makes multiple batches of bread in a single day. If the internal components reach a dangerous temperature threshold, the machine will automatically shut down to prevent permanent damage to the motor windings. This feature might seem annoying when it triggers, but it is a vital safeguard that prevents the premature death of your appliance. Always allow your mixer to rest for at least 15 to 20 minutes between heavy-duty mixing cycles to ensure the internal grease and motor remain within safe operating temperatures.
The Ergonomics of Bowl Design and Attachments
The design of the mixing bowl is often overlooked, yet it is where the physical interaction between the hook and the dough happens. For bread, a deep, narrow bowl is generally superior to a wide, shallow one. A narrower bowl keeps the dough concentrated in the path of the hook, ensuring that the ingredients are consistently incorporated. If the bowl is too wide, the dough tends to cling to the sides, requiring the baker to stop the machine repeatedly to scrape it down—a nuisance that disrupts the rhythm of the process.
The material of the bowl—be it brushed stainless steel, glass, or ceramic—also influences thermal retention. While glass bowls are aesthetically pleasing, they are significantly heavier and lack the thermal conductivity of stainless steel. If you are working with a warm, enriched dough that needs to maintain a specific temperature for fermentation, stainless steel can be chilled in the refrigerator beforehand, acting as a heat sink to keep your dough from overheating during a vigorous knead.
Essential Dough Hook Styles
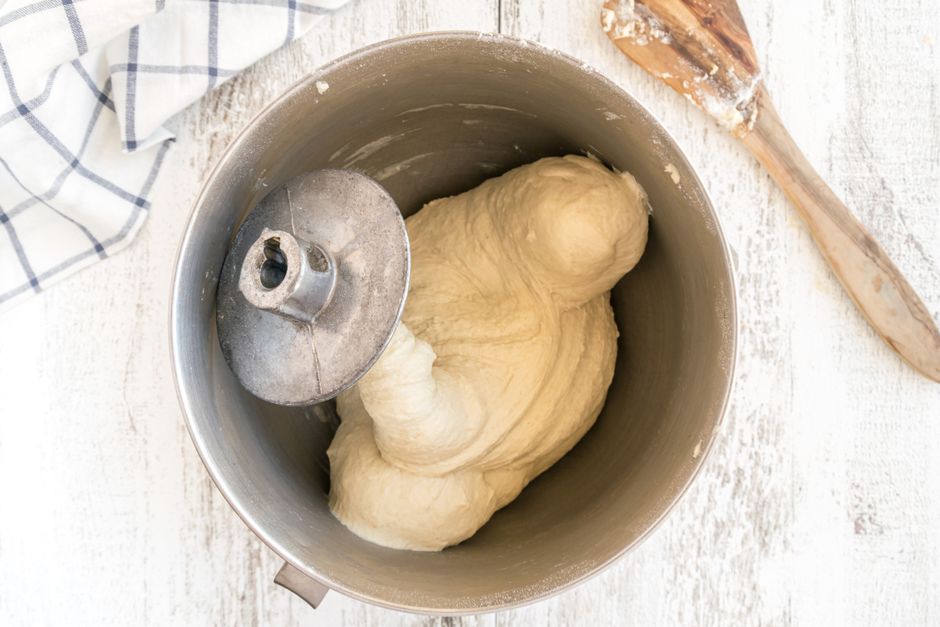
There are two primary types of dough hooks on the market: the C-hook and the Spiral hook. The C-hook, commonly found on tilt-head models, pushes the dough against the side of the bowl. While functional, it is prone to causing the dough to "crawl" up the hook, which can put strain on the mixer's neck. The Spiral hook, standard on most professional bowl-lift models, is vastly superior. It uses a corkscrew motion to pull the dough downward, creating a much more efficient kneading action that is better for gluten development and easier on the motor’s internal components.
The secret to a perfect crumb is not just in the flour quality, but in the efficiency of the machine that develops the gluten structure. A spiral hook combined with a high-torque motor creates the ideal environment for professional-grade results at home.
Managing Dough Temperature During Mixing
One of the most important professional tips for bread bakers is the management of Dough Temperature (DT). Friction is the enemy of high-quality bread. When your dough is mixed at high speeds, the friction of the hook against the dough increases the temperature, which can cause the yeast to activate too quickly, leading to poor flavor development and an overly porous, weak crumb structure. Ideally, you want your finished dough to land between 75°F and 78°F (24°C - 26°C) for optimal fermentation.
To control this, many professionals use chilled water or even ice water when calculating their friction factor. If your mixer produces significant heat, you must account for the "mixer friction factor" in your calculations. If you find your dough coming out of the mixer at 85°F or higher, you are likely working the machine too hard or too long. Adjusting your speed downward or reducing your total mix time by a few minutes can save your bread from the negative effects of heat-induced over-fermentation.
The Role of Mixing Times
For a standard sourdough or white bread loaf, you are generally looking for a mix time of 8 to 12 minutes at low speed. You will know the dough is ready when it achieves the windowpane test: when a small piece of dough is stretched thinly between your fingers, it should be translucent enough to allow light to pass through without tearing. If it tears immediately, continue mixing for another 60 seconds and re-test. Over-mixing is just as detrimental as under-mixing; it can tear the newly formed gluten strands, leaving you with a sticky, lifeless mass that refuses to hold its shape during the bulk fermentation stage.
Maintenance and Long-Term Durability
Owning a high-end stand mixer is a long-term commitment. In 2026, the best brands are those that offer modular repairability. A machine that can be easily opened, cleaned, and re-greased is far more valuable than one that is hermetically sealed and disposable. Once every two years, you should consider performing a basic maintenance check: look for signs of grease leakage from the gear housing, ensure the head lock is tight, and check that the motor brushes (if applicable) are not worn down.
Professional chefs often treat their mixers with respect by never overloading them beyond the manufacturer’s specified capacity. Each machine has a maximum flour weight limit—usually around 800g to 1kg of flour for standard consumer models. Exceeding this limit places immense pressure on the planetary head and the gear train, leading to shortened product life. If you find yourself needing to bake in larger batches, do not strain your domestic mixer; instead, consider scaling your recipe down to two smaller batches. This approach produces better bread and keeps your equipment in perfect working order for decades.
Cleaning and Sanitization
After each use, ensure the mixing bowl and hook are thoroughly cleaned. While most stainless steel bowls are dishwasher safe, the attachments—especially those made of aluminum—should be hand-washed. The harsh chemicals in dishwasher detergents can oxidize aluminum, causing it to turn gray and leave residue on your dough. A quick scrub in warm, soapy water, followed by a thorough drying, is all that is required to keep your tools in prime condition. Remember to store your mixer in a clean, dry area where it is protected from dust and flour particles.
Advanced Techniques: The Autolyse and Add-ins
The autolyse technique is a game-changer for home bread bakers, and your stand mixer is the perfect tool to facilitate it. Simply mix your flour and water until just combined—do not add the salt or yeast yet—and let the mixture rest in the mixer bowl for 30 to 60 minutes. This resting period allows the flour to fully hydrate and the enzymes to begin breaking down starches, making the dough much more extensible and easier to work with. Once the autolyse is finished, you can add your yeast, salt, and leavening agent and start the primary kneading process.
When working with inclusions like raisins, walnuts, or olives, wait until the gluten network is fully developed before adding them. If you add inclusions too early, the sharp edges of the ingredients can tear your gluten strands, resulting in a dense, compact loaf. Add your inclusions during the final two minutes of mixing on the lowest possible speed. This ensures they are evenly distributed throughout the dough without disrupting the integrity of the protein matrix you have worked so hard to build.
The Art of Enrichment
For enriched doughs like brioche or challah, the order of incorporation is vital. Because these doughs contain high amounts of butter, eggs, and sugar, they require a specific mixing strategy. You must build the gluten structure with the flour and liquid components first, then incorporate the room-temperature butter in small increments. This allows the fat to coat the gluten strands slowly, preventing the dough from becoming a greasy, unmanageable mess. Use your mixer to perform the heavy lifting of emulsifying these ingredients, but be prepared to finish the dough by hand if it becomes overly tacky.
Never rush the development of your dough. A patient baker, supported by a reliable, high-torque machine, is always rewarded with superior flavor, better texture, and a crust that sings when it comes out of the oven.
Beyond Bread: Versatility in the Kitchen
While this guide focuses on bread, a great stand mixer is a versatile asset that justifies its price tag through its utility in other culinary tasks. The same high-torque motor that handles a heavy sourdough can also whip egg whites into stiff peaks for a perfect pavlova or cream butter and sugar into a light, airy base for sponge cakes. Look for a mixer that offers a wide range of speeds—the best machines provide a very slow "stir" setting for folding in delicate dry ingredients, which is essential for maintaining the aeration achieved during whipping.
By 2026, many of the top-rated mixers on the market offer a variety of hub-driven accessories that can turn your mixer into a pasta roller, a meat grinder, or even a vegetable slicer. While these are not strictly necessary for bread, they turn your mixer into a centralized culinary hub. Investing in a machine that has a history of reliable accessory support means your kitchen capabilities can grow alongside your skills. Just remember that no matter the task, the most important element is the consistency you bring to the process, supported by the machine that never misses a beat.
Final Thoughts
The pursuit of the perfect loaf is a lifelong endeavor that balances science, patience, and the right tools. When you select a stand mixer in 2026, you are not just purchasing an appliance; you are investing in a partner that will help you push the boundaries of what you can create in your own kitchen. Whether you gravitate toward the classic, robust design of a bowl-lift mixer or the aesthetic versatility of a modern tilt-head model, the goal remains the same: to provide the consistent, mechanical force required to transform basic ingredients into a masterpiece of texture and taste.
Remember to prioritize torque over wattage, choose a machine with durable metal gearing, and always pay close attention to your dough temperature to ensure the best possible results. Take care of your machine, keep it clean, and respect the limits of its motor, and it will serve you faithfully through hundreds, if not thousands, of bakes. The journey of bread making is often marked by trial and error, but with the right equipment as your foundation, the "errors" become fewer, the trials become more enjoyable, and the loaves that emerge from your oven reach a level of quality you once thought reserved only for professional bakeries.
As you continue to refine your technique, let your mixer take the strain of the physical labor so you can focus on the nuance of fermentation, the quality of your grain, and the joy of sharing fresh, crusty bread with your loved ones. The market is full of options, but by focusing on the core mechanics and engineering principles we have discussed, you are now equipped to make an informed, confident decision. Happy baking, and may your crust always be golden, your crumb perfectly airy, and your mixer always ready for the next challenge. Your journey into the heart of artisanal bread making is just beginning, and there is no better time than now to commit to the craft.



Get the Next Recipe
Weekly recipes, techniques, and gear picks — straight to your inbox.
