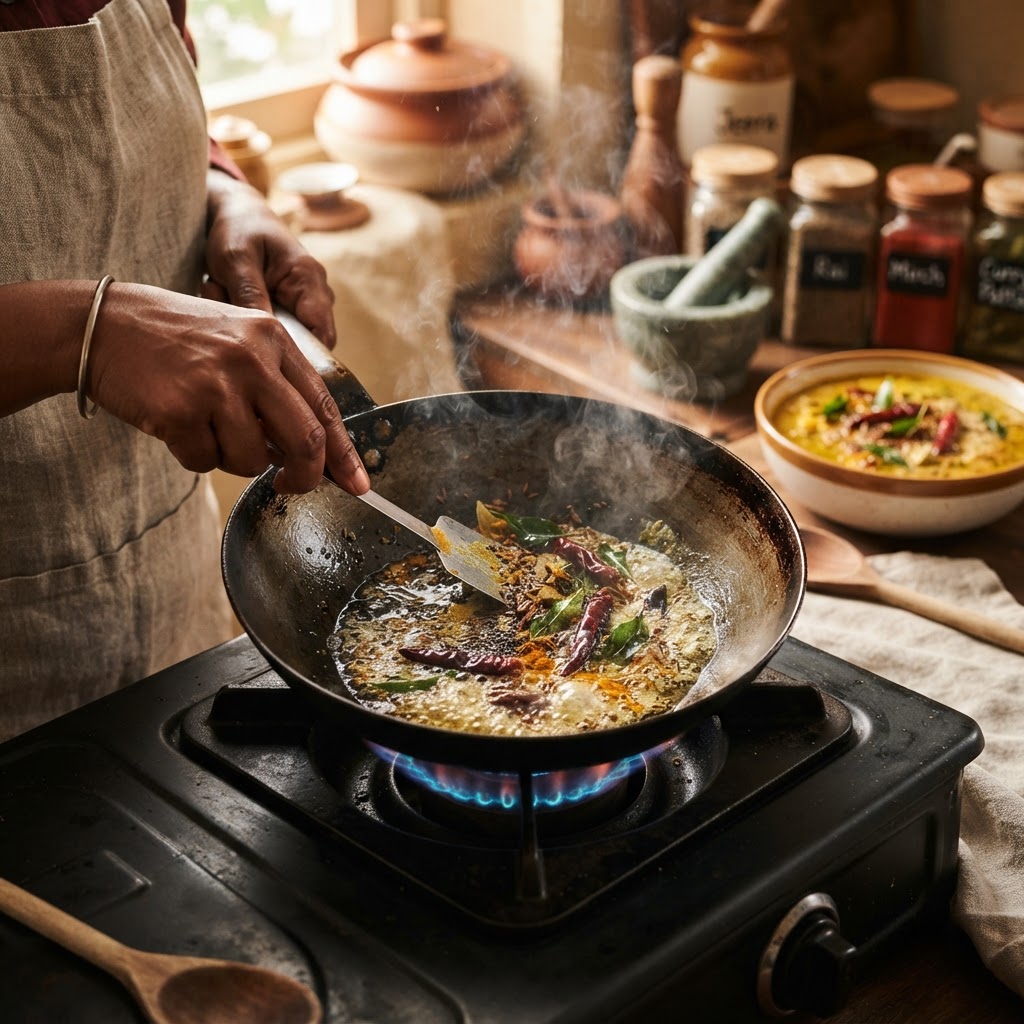
Beyond the Curry: Mastering the Subtle Art of Tempering Spices in Indian Cooking
There is a prevailing myth that Indian cuisine begins and ends with the heavy, cream-laden curries found in takeout menus across the globe. To the uninitiated, these dishes are defined by their sheer volume of spices, often resulting in a muddy profile where every flavor competes for dominance on the palate. However, the true soul of Indian home cooking does not reside in the simmering pot of sauce, but rather in the delicate, lightning-fast ritual known as tempering, or tadka. This is the moment where whole spices meet hot fat, transforming their molecular structure and releasing volatile oils that form the aromatic architecture of a dish. When you master the art of the tempering, you move away from the "curry-in-a-hurry" mindset and step into a world of nuanced, professional-grade depth.
At its core, tempering is a precise application of heat to spices in a medium of oil or ghee. Unlike the dry roasting of spices, which focuses on earthiness, the wet heat of tempering allows the hydrophobic compounds in seeds and barks to dissolve and permeate the entire vessel. It is a process governed by the laws of chemistry and timing, requiring the cook to be fully present and responsive to the sensory signals of the pan. A split second of distraction can turn a fragrant, golden infusion into a bitter, acrid disaster, making this a technique that demands both intuition and respect. By learning the sequence, temperature, and specific behavior of each spice, you unlock the ability to elevate even the humblest lentil soup into a restaurant-quality masterpiece.
In this deep dive, we are going to move beyond the superficial label of "curry" and focus on the technical mastery of these aromatics. We will explore the specific heat profiles required to bloom spices without burning them, the importance of spice order, and the essential tools you need to achieve the perfect tadka. Whether you are working with mustard seeds, cumin, fenugreek, or dried chilies, understanding the why behind the how will forever change the way you approach your kitchen. Prepare to slow down, lean in, and embrace the subtle, transformative power of the tempering process, a cornerstone of culinary artistry that has been perfected over thousands of years across the Indian subcontinent.
The Chemistry of Flavor: Why Tempering Matters
The Science of Volatile Oils
When we speak of tempering, we are essentially performing an extraction process. Most spices contain essential oils that are locked within the cellular matrix of the seed or bark. These oils are heat-sensitive and flavor-dense, but they are largely inaccessible to the palate when the spices are used in their raw, dry state. By introducing them to ghee or neutral oil at specific temperatures—typically between 300°F and 350°F—the cell walls break down, and the essential oils migrate into the fat. This fat then acts as a flavor carrier, distributing the aromatic essence throughout the entire dish, ensuring that every bite has a consistent backbone of flavor rather than isolated "hot spots" of seasoning.
The Role of Fat as a Medium
Fat is not merely a vehicle for heat; it is an active participant in the tempering process. Ghee, or clarified butter, is the gold standard in Indian cooking because it has a high smoke point and a distinct nutty flavor that complements the earthiness of spices. When you temper in ghee, you are essentially creating a flavorful compound butter that coats the spices and, eventually, your primary ingredients. The fat also serves as a stabilizer; it prevents the spices from scorching too quickly, provided you maintain control over the flame. Understanding the difference between high-smoke-point oils like mustard oil and the richness of ghee is critical for the home cook aiming for authenticity.
"Tempering is not just a step in a recipe; it is a conversation between the cook, the fire, and the ingredients. If you listen closely, the popping of the mustard seeds tells you exactly when the dish is ready to be transformed."
The Hierarchy of Hardness: Sequencing Your Spices
Understanding Particle Density
Not all spices are created equal, and they certainly do not cook at the same rate. When constructing a tadka, the sequence in which you add spices is dictated by their density and surface area. Hard, whole seeds like mustard seeds (rai), cumin seeds (jeera), and fenugreek seeds (methi) require the most heat and time to soften. If you add these alongside ground spices or delicate herbs, you will inevitably end up with raw, chalky seeds or burnt, bitter powder. Always begin with the hardest components, allowing them to crackle and release their oils before moving to the next phase of the infusion.
The Stages of the Tadka
A typical tempering sequence follows a logical progression of hardness. First, introduce your seeds into the hot fat; wait for them to pop—this is the "crackling" stage that signals the oil has successfully extracted the flavor. Second, add your aromatics, such as fresh ginger, garlic, or green chilies. These contain water content, so be prepared for a slight splatter. Finally, add your powdered spices like turmeric, red chili powder, or garam masala at the very last second. Powdered spices have a massive surface area and will burn in under five seconds if left on high heat. By lowering the temperature or pulling the pan off the heat entirely before adding powders, you ensure a vibrant color and a deep, toasted flavor without any charred aftertaste.
Essential Tools and Techniques for the Home Chef
The Tadka Pan
While you can temper in any small skillet, investing in a traditional tadka pan—a small, heavy-bottomed vessel with a long handle—is a game changer. The small diameter of the pan allows the oil to pool at a sufficient depth to cover the spices, ensuring even distribution. If you are using a large, wide skillet for a stir-fry, you will struggle to get the spices properly submerged in the fat, leading to uneven blooming. If you do not have a dedicated tadka pan, a small stainless steel butter warmer will suffice. The goal is to keep the oil concentrated so that a small amount of fat can hold a significant amount of aromatic impact.
Heat Control and Sensory Cues
Mastering the flame is the single most important skill in tempering. I recommend using a medium-low flame. If the oil is too hot, the spices will turn black instantly, releasing a harsh, acrid smell—this is a sign of bitterness and ruin. If the oil is too cool, the spices will simply soak in the fat without releasing their oils, resulting in a greasy, flavorless end product. Watch for the visual cues: mustard seeds should dance and pop, cumin should turn a shade darker, and garlic should become golden brown, not dark brown. If your garlic or chilies are turning dark brown, you have crossed the line into burnt territory.
Mastering the Aromatics: Ginger, Garlic, and Chilies
The Holy Trinity of Indian Aromatics
While seeds provide the structural base, fresh aromatics provide the aromatic top notes. Ginger and garlic are the bedrock of Indian cuisine. When tempering these, fine mincing or grating is essential. Large chunks will not cook through properly, leaving a raw, pungent taste that clashes with the delicate blooming of the seeds. For the best result, aim for a consistency that allows them to meld with the hot fat within 30 to 45 seconds. The goal is a light caramelization that brings out the natural sugars in the garlic and the sharp, zesty brightness of the ginger.
Managing Heat with Dried Chilies
Dried red chilies (sabut lal mirch) are often the final flourish of a tempering. These should be added to the hot oil for no more than ten to fifteen seconds. Because dried chilies are high in sugar and thin in skin, they scorch almost immediately. You want them to turn a bright, vibrant shade of red and become slightly crisp. If they turn black, discard the oil and start over; the bitterness of burnt chilies will permeate the entire dish and cannot be corrected. By keeping the chilies whole, you control the heat level—if you break them open, the capsaicin releases into the oil, significantly increasing the spice level of your final dish.
"True mastery in the kitchen is not about following a recipe to the letter; it is about learning how to manipulate the heat to coax the best out of your ingredients. When you master the tadka, you are no longer just cooking—you are composing."
The Final Marriage: Integrating the Tadka
Knowing When to Pour
The final act of the tempering process is the "sizzle"—pouring the hot, infused oil into your prepared dish, whether it be a dal, a vegetable curry, or a bowl of seasoned yogurt (raita). The sound should be audible and immediate. This sudden temperature shock serves two purposes: it creates a brief emulsion that helps the fat bind to the liquid base of your dish, and it releases a massive burst of aroma that captures the essence of the spices. Do not pour the tadka and immediately walk away; cover the pot for a minute or two. This "traps" the aromatic steam, allowing it to condense and settle back into the dish, creating a much deeper flavor profile.
Adjusting for Different Dish Types
The timing of your tempering depends heavily on the dish you are preparing. For thin, watery dishes like dal tadka, the tempering is added at the very end to provide a flavor contrast. For thicker, slow-cooked vegetable dishes or meat curries, the tempering is often the very first step, serving as the flavor base for the onions, tomatoes, and proteins to follow. In these cases, your aromatics should be cooked down further to build a "masala" base. Understanding this distinction is vital. If you add the tempering at the beginning, focus on building a robust foundation; if you add it at the end, focus on a quick, vibrant burst of fresh aromatics.
For Dal/Lentils:* Temper at the very end to keep the aromatics punchy and fresh.
For Vegetable Curries:* Temper at the start to build a long-lasting, flavorful gravy base.
For Raita/Yogurt:* Temper just before serving to ensure the spices remain crisp and fragrant.
For Grains:* Stir your tadka through cooked rice or quinoa for an instant flavor upgrade.
The Subtle Art of Balancing and Refining
Troubleshooting Common Mistakes
If your tempering is too bitter, it is almost certainly because the powdered spices or the chilies stayed in the oil too long. There is no salvaging a burnt tadka; it will ruin the entire pot of food. In the early stages of learning, I suggest keeping a small bowl of water nearby. If the spices start to darken too quickly, adding a tablespoon of water can stop the cooking process by lowering the temperature instantly. Another common error is using too much oil. Remember that the oil is a flavor carrier, not a sauce; you only need enough to coat the spices—typically one to two tablespoons for a standard family-sized portion.
Experimenting with Spice Blends
Once you are comfortable with the basic technique, begin experimenting with your own house blends. Many chefs create their own signature garam masala or panch phoron (a Bengali five-spice blend) to use in their tempering. Panch phoron—a mixture of mustard, cumin, fenugreek, fennel, and nigella seeds—is a perfect starting point for learning how different spices bloom at different rates. Because these seeds vary in size, you will find that some crackle before others, which teaches you to observe the pan dynamically. Don't be afraid to add a pinch of asafoetida (hing) to your oil; it adds an incredible umami depth that mimics the flavor of onions and garlic, making it a secret weapon for vegetarian cooking.
Final Thoughts
Mastering the art of tempering is a journey that moves you from a passive reader of recipes to an active, intuitive chef. By focusing on the movement of essential oils, the sequence of spice hardness, and the sensory cues of the pan, you gain a level of control that recipes simply cannot teach. Indian cuisine, at its most elevated, is not defined by its heat or its heaviness, but by its precision. When you treat your spices with care, they reward you with a complexity that transforms a home-cooked meal into an event.
As you continue your culinary exploration, remember that every mistake is a lesson in thermodynamics. Pay attention to how the oil changes consistency, how the color of the spices shifts as they toast, and how the aroma changes as the different elements hit the heat. These are the markers of a cook who is truly engaging with the ingredients. Whether you are tempering a handful of cumin for a simple pot of rice or crafting a complex blend for a celebratory feast, the principles of the tadka remain the same.
In the end, cooking is about bringing people together through flavor, and there is no better way to demonstrate your love and dedication than by putting the effort into the details that others might overlook. Stop blaming the chef and start becoming one. Go to your spice rack, reach for that heavy-bottomed pan, and let the sizzle of your next tempering be the start of a new, more flavorful chapter in your kitchen. Your curries will thank you, your palate will thank you, and everyone around your table will surely be asking for your secret. Enjoy the process, embrace the patience, and happy cooking.

Get the Next Recipe
Weekly recipes, techniques, and gear picks — straight to your inbox.
