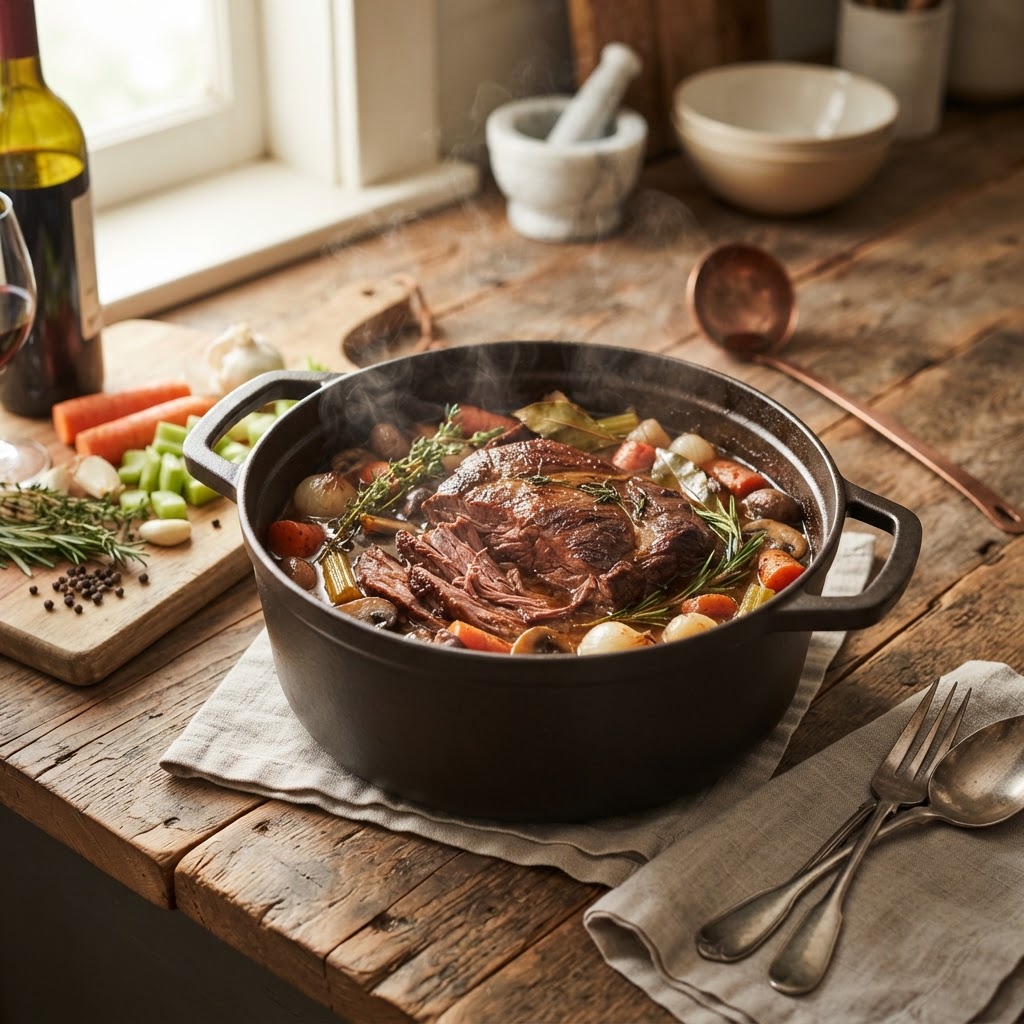
Beyond the Pan: The Essential Guide to Mastering Braising Liquids and Aromatics
Beyond the Pan: The Essential Guide to Mastering Braising Liquids and Aromatics
The allure of braising is undeniable. It's a culinary technique that speaks to comfort, patience, and the transformation of humble ingredients into something truly extraordinary. Think of the fall-apart tender pot roast, the deeply flavorful coq au vin, or the impossibly succulent lamb shanks that seem to melt off the bone. These are not dishes born of haste, but rather of time, gentle heat, and the magic that happens when ingredients are coaxed and cared for in a flavorful bath. At its heart, braising is about low and slow cooking, a process that allows tough cuts of meat to become incredibly tender while infusing them with the rich essence of the braising liquid.
But the true artistry of braising lies not just in the cooking vessel or the duration, but in the meticulous selection and application of two crucial components: the braising liquid and the aromatics. These are the unsung heroes, the silent orchestrators of flavor that elevate a good braise to a truly memorable one. The liquid isn't just there to prevent the food from drying out; it's a carrier, a flavor amplifier, and often, the foundation for a luxurious sauce. Similarly, aromatics are the perfumers of the pot, releasing their fragrant oils and building layers of complexity that would be impossible to achieve otherwise. Mastering these elements is key to unlocking the full potential of this time-honored cooking method.
For the home cook, the prospect of braising can sometimes feel a little daunting, conjuring images of elaborate preparations and precise measurements. However, the beauty of braising is its inherent forgiveness and its ability to deliver restaurant-quality results with a bit of understanding and mindful attention. This guide is designed to demystify the process, breaking down the essential elements of braising liquids and aromatics into actionable steps and invaluable insights. We'll explore the science behind why certain liquids work best, the art of selecting complementary aromatics, and the techniques that ensure your braises are consistently delicious, deeply satisfying, and utterly craveable.
The Foundation: Choosing Your Braising Liquid
The braising liquid is more than just a cooking medium; it's the soul of your dish. Its primary role is to provide moisture, allowing for slow, even cooking and tenderizing tougher cuts of meat. However, its secondary role, and arguably its most critical, is to impart flavor. The choices here are vast, and understanding the impact of each will dramatically elevate your braising game. Generally, a good braising liquid should have a balance of acidity, richness, and flavor. You’ll rarely use a single ingredient; instead, you’ll create a harmonious blend.
Broth and Stock: The Workhorses
Broth and stock are perhaps the most common and versatile braising liquids. While often used interchangeably, there's a subtle distinction. Stock, made by simmering bones (often with mirepoix – carrots, celery, and onions), extracts collagen, resulting in a richer, more gelatinous liquid with a more robust mouthfeel. Broth, on the other hand, is typically made by simmering meat and vegetables, yielding a lighter, more liquidy product. For braising, a good quality stock (homemade is always best, but a good store-bought one will suffice) is often preferred due to its inherent richness and body, which contributes to a more unctuous sauce.
Chicken stock, beef stock, and vegetable stock all have their place. Chicken stock is relatively neutral and pairs well with poultry and lighter meats. Beef stock offers a deeper, more intense flavor, ideal for red meats like beef and lamb. Vegetable stock provides a plant-based option that can be surprisingly complex, especially if made with a variety of flavorful vegetables and herbs. The key is to use a good quality, low-sodium stock so you can control the salt content of your final dish.
Wine and Alcohol: Adding Depth and Complexity
Wine, in its many forms, is a classic braising liquid and for good reason. The alcohol helps to degrease the pan and emulsify fats, while the acidity brightens flavors and tenderizes proteins. Red wine, such as Cabernet Sauvignon, Merlot, or Pinot Noir, is a natural partner for beef, lamb, and game. Its tannins add structure and a pleasing bitterness that can balance out the richness of fatty meats. White wine, like Chardonnay, Sauvignon Blanc, or Pinot Grigio, is excellent for poultry, pork, and some fish, offering a lighter, more delicate acidity.
Beyond wine, other alcohols can bring unique characteristics. Beer, particularly darker varieties like stouts and porters, can impart a malty sweetness and a subtle bitterness that is fantastic with pork and beef. Sherry or port can add a nutty depth or a concentrated fruitiness. The general rule of thumb is to use a wine you would happily drink. Cheap, acrid wine will translate its unpleasantness into your braise. Don't be afraid to use a small amount of spirits like brandy or cognac to deglaze the pan before adding your primary braising liquid; it adds an initial layer of aroma and complexity.
"Never cook with a wine you wouldn't drink. The quality of your braising liquid directly impacts the quality of your finished dish. Think of it as an investment in flavor."
Other Liquids: Beyond the Expected
While stock and wine are the most common choices, don't overlook other liquids. Canned tomatoes (crushed, diced, or puréed) can form the base of many braises, particularly for dishes like osso buco or Italian-inspired stews, providing acidity and body. Their natural sweetness also complements richer meats. Juices, such as apple cider or even prune juice, can add a unique sweetness and acidity, especially to pork or duck. For a richer, more unctuous braise, consider using cream or coconut milk in the final stages of cooking, though be mindful of curdling with high heat.
Even water can be a braising liquid, especially if you're relying heavily on other flavor components like mirepoix and herbs. However, using only water will result in a less flavorful and less rich final sauce. It's often best used in conjunction with other ingredients, or as a way to dilute a particularly potent stock or wine. Remember, the goal is to build flavor, and each liquid you choose should contribute to the overall taste profile you're aiming for.
The Aromatic Ensemble: Building Flavor Layers
Aromatics are the fragrant architects of a braise. They are the foundation of flavor, slowly releasing their essential oils and essence into the cooking liquid, infusing every fiber of the main ingredient. These are typically vegetables and herbs that, when cooked slowly, soften and become sweet, imparting a profound depth that’s hard to replicate. A well-chosen aromatic ensemble can transform a good braise into a masterpiece.
The Holy Trinity: Mirepoix and Beyond
The classic mirepoix – a combination of onions, carrots, and celery – is the cornerstone of many braising recipes. These three vegetables, typically cut into roughly equal-sized pieces (often 1/2-inch dice), form a flavor base that is both sweet and savory. Onions provide sweetness and depth, carrots add a natural sweetness and a touch of earthiness, and celery contributes a subtle, savory, slightly peppery note. Cooking them slowly in fat before adding the main ingredient and the braising liquid is crucial; this process is called sweating or soffritto (in Italian cuisine), and it caramelizes the natural sugars, intensifying their flavor and softening their texture.
While mirepoix is the classic, variations abound. For instance, in Cajun and Creole cooking, the "holy trinity" replaces carrots with green bell peppers, adding a distinct vegetal sweetness. Leeks can be used in place of or in addition to onions for a milder, sweeter onion flavor. Fennel, with its subtle anise notes, can be a beautiful addition to braises featuring pork or lamb. The key is to choose aromatics that complement your main protein and the overall flavor profile of the dish. Consider the intensity of each vegetable and how they will meld together.
Alliums: The Pungent Powerhouses
Beyond onions and leeks, other alliums bring their own unique pungency and sweetness to braises. Garlic is almost indispensable. While raw garlic can be harsh, slow-cooked garlic becomes mellow, sweet, and creamy, lending a comforting depth. You can add whole, unpeeled cloves to the braise, which will soften and sweeten, or mince or slice it and sauté it with the mirepoix. Be careful not to burn minced garlic, as it can turn bitter.
Shallots offer a more delicate, nuanced sweetness than onions and are excellent in lighter braises or when a subtler allium flavor is desired. For a bolder, more rustic flavor, consider adding whole shallots or even small pearl onions to the braise. They will soften beautifully and absorb the surrounding flavors, becoming sweet little flavor bombs.
Herbs and Spices: The Fragrant Accents
Herbs and spices are the artists’ final touches, adding complexity, fragrance, and specific flavor notes. Hardy herbs like thyme, rosemary, bay leaves, and sage are ideal for braising because they can withstand long cooking times without losing their potency. These can be added whole, tied together in a bouquet garni (a bundle of herbs tied with kitchen twine, often including parsley stems, thyme sprigs, and bay leaves), or placed directly in the pot. Their essential oils are released slowly, infusing the braising liquid and the food.
Softer herbs like parsley and cilantro are generally best added towards the end of cooking or as a garnish to preserve their fresh flavor and vibrant color. Spices like peppercorns, cloves, star anise, cinnamon sticks, and cumin seeds can also be used to add depth. Toasting whole spices briefly before adding them to the braise can unlock their aromatic oils and intensify their flavor.
"A bouquet garni is your secret weapon for infusing subtle, layered herb flavors into your braises without having to pick out individual stems later. It's simple, elegant, and incredibly effective."
The Searing Ritual: Preparing Your Protein
Before your chosen protein even meets the braising liquid, a crucial step precedes it: searing. This is not merely about browning; it's a fundamental technique that builds an immense amount of flavor through the Maillard reaction. When meat is seared at high heat, the amino acids and sugars on its surface undergo a chemical transformation, creating hundreds of new flavor compounds that contribute a rich, savory, and slightly caramelized taste to the dish. This browned crust also adds a pleasing textural contrast to the tender interior of the braised protein.
The Art of the Sear
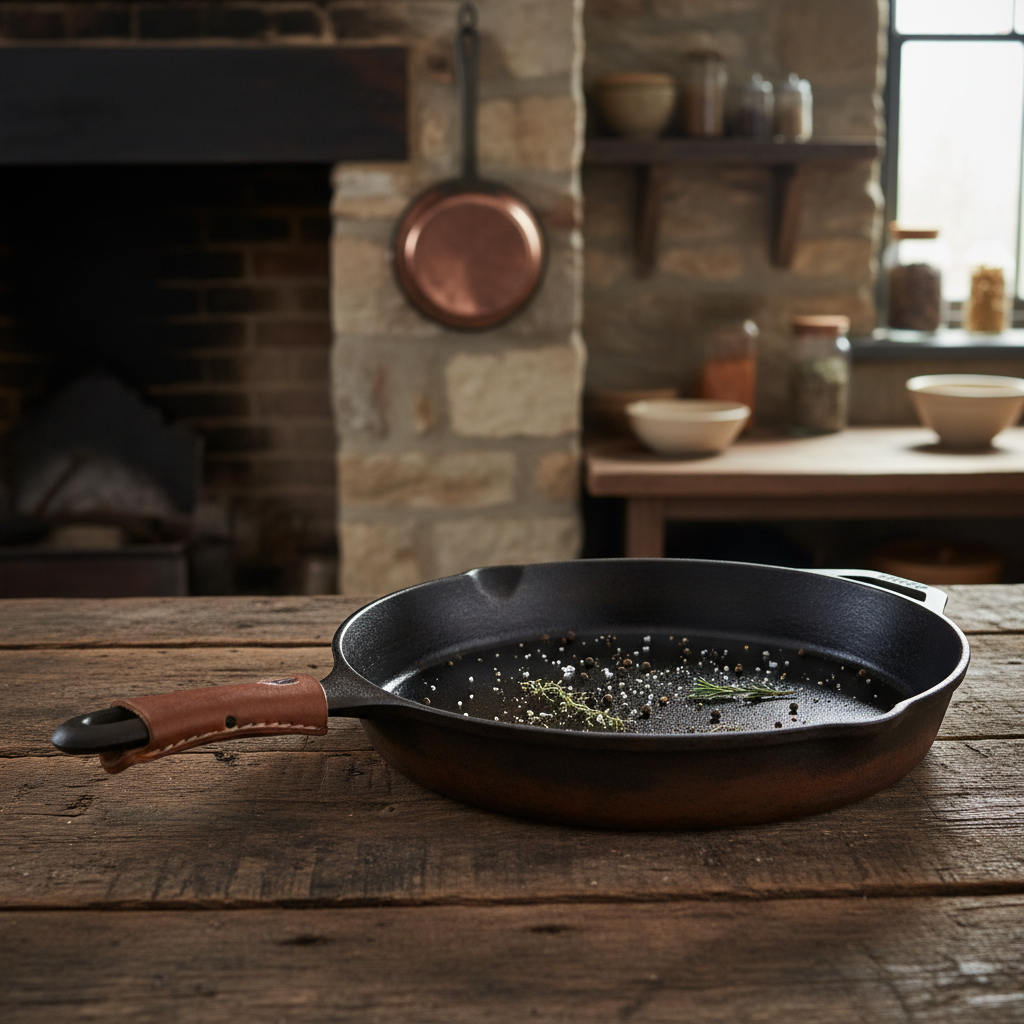
To achieve the perfect sear, start by ensuring your protein is completely dry. Pat it thoroughly with paper towels; moisture is the enemy of a good sear, as it steams the surface rather than browning it. Heat your braising vessel (a heavy-bottomed Dutch oven or oven-safe pot is ideal) over medium-high to high heat. Add a good amount of high-smoke-point fat, such as vegetable oil, canola oil, or clarified butter. You want the fat to be shimmering and almost smoking before adding your protein.
Don't overcrowd the pan. This is a common mistake that leads to steaming rather than searing. Sear the protein in batches, ensuring there's enough space around each piece for the heat to circulate and create a crust. Allow each side to develop a deep, golden-brown color before turning. This might take anywhere from 2 to 5 minutes per side, depending on the thickness and type of protein. Once seared on all sides, remove the protein from the pot and set it aside. The browned bits left in the bottom of the pot, known as fond, are pure flavor and will be deglazed in the next step.
Deglazing: Capturing the Fond
This is where the magic of the fond is unlocked. After searing your protein and removing it, add a splash of your chosen braising liquid (wine, broth, or even water) to the hot pot. Use a wooden spoon or spatula to scrape up all the browned bits stuck to the bottom. This process is called deglazing. These bits are packed with concentrated flavor from the searing process and will dissolve into your liquid, forming the base of your rich sauce.
If you're using wine, this is an excellent time to add it. Let the wine bubble and reduce slightly, scraping the bottom of the pot. This process not only captures the flavor but also burns off some of the alcohol, leaving behind its aromatic essence. If you’re not using wine, broth or water will work just as effectively to loosen those flavorful bits. This deglazed liquid will then be incorporated with your aromatics and the rest of your braising liquid.
"The Maillard reaction during searing is your culinary superpower. It’s not just about color; it’s about building the foundational flavor profile that will permeate your entire braise."
Liquid-to-Food Ratio: The Sweet Spot for Succulence
Achieving the perfect braise hinges on the correct ratio of braising liquid to the food being cooked. Too little liquid, and your food will dry out, becoming tough and unappealing. Too much liquid, and you risk creating a dish that tastes more like soup or stew than a rich, concentrated braise. The general principle is to partially submerge the main ingredient, allowing for a beautiful marriage of tender interior and flavorful exterior.
Partial Submersion: The Golden Rule
For most braises, the ideal is to have the liquid come about two-thirds to three-quarters of the way up the side of the protein. This allows the food to cook gently in the liquid while still having a portion exposed to the steam and the circulating heat of the oven or stovetop. This exposure helps to develop a more concentrated flavor on the surface and prevents the food from becoming waterlogged.
Imagine a pot roast. You want it to be partially submerged in that rich, savory liquid, allowing the top to brown slightly and develop a more intense flavor as the liquid slowly reduces. If the liquid completely covers the meat, it will essentially be boiling or poaching, which can dilute the flavors and prevent the development of that desirable crust. The exposed portion also allows for more evaporation, which concentrates the flavors in the remaining liquid.
Factors Influencing Ratio
Several factors can influence the ideal braising liquid ratio. The shape and density of the food play a role. A whole chicken might require a different level of submersion than a pile of short ribs. A dense cut of beef might benefit from slightly more liquid than a more delicate piece of fish. The type of cooking vessel also matters. A lidded Dutch oven will retain moisture much better than a skillet with a loose-fitting lid, meaning you might need to start with slightly less liquid in a well-sealed pot.
The duration of the braise is another consideration. Longer braises will naturally see more evaporation, so you might need to start with a slightly higher liquid level or be prepared to add more liquid during the cooking process. Always check your braise periodically and add more hot liquid if the level drops too low. Conversely, if you find you have too much liquid at the end, you can always reduce it over higher heat to create a more concentrated sauce.
The Braising Process: Heat, Time, and Patience
Once your ingredients are seared and your aromatic base is softened, it's time for the braising itself. This is where the magic of low and slow cooking truly takes hold. Braising is a moist-heat cooking method, meaning the food is cooked in a flavorful liquid over an extended period at a relatively low temperature. This gentle process breaks down tough connective tissues in meats, rendering them incredibly tender and succulent.
Stovetop vs. Oven: Where the Magic Happens
Braising can be accomplished on the stovetop or in the oven. Both methods have their advantages.
Stovetop Braising:* This is a more hands-on approach. You'll typically sear your ingredients in a heavy-bottomed pot (like a Dutch oven) on the stovetop, sauté your aromatics, deglaze, add the liquid, and then reduce the heat to the lowest possible setting. You'll need to monitor the heat closely to maintain a gentle simmer – just a few lazy bubbles rising to the surface. This method is good for smaller cuts or when you want to keep an eye on the process.
Oven Braising: This is often preferred for its even and consistent heat*, which reduces the risk of scorching or hot spots. After searing and sautéing on the stovetop, you’ll add your braising liquid, cover the pot tightly, and transfer it to a preheated oven. The oven’s ambient heat circulates around the pot, ensuring gentle and uniform cooking. This method is ideal for larger cuts of meat and for hands-off cooking.
"The oven provides the most consistent and even heat for braising. It’s a set-it-and-forget-it approach that guarantees tender results, allowing you more time to focus on other aspects of your meal."
Temperature and Timing: The Crucial Variables
The temperature for braising is typically low, generally between 275°F and 325°F (135°C to 160°C) in the oven. On the stovetop, this translates to the lowest possible heat setting that still maintains a gentle simmer. The key is to avoid boiling, which can toughen the meat and break down delicate ingredients. A slow, gentle simmer is what allows those tough connective tissues to break down into gelatin, creating that signature tender texture and rich sauce.
The timing for braising is highly variable and depends on the cut and size of the protein. Tougher cuts, like beef chuck, lamb shanks, or pork shoulder, can take anywhere from 2 to 4 hours, or even longer. More tender cuts, like chicken thighs or certain fish, might only require 45 minutes to 1.5 hours. The true indicator of doneness isn't the clock, but the texture. The protein should be fork-tender, meaning it easily shreds or falls apart when poked with a fork.
Checking for Doneness and Finishing Touches
Regularly check your braise, especially during the last hour of cooking. If the liquid level gets too low, add more hot braising liquid or water to maintain the desired level. You're looking for that "fork-tender" stage. Once your protein has reached this point, remove it from the braising liquid and set it aside to rest.
The braising liquid itself is a treasure trove of flavor and can be transformed into a magnificent sauce. Strain the liquid, discarding the solids (unless you want to include some of the softer vegetables in your final dish). Skim off excess fat from the surface using a ladle or a fat separator. You can then reduce the liquid over medium-high heat until it reaches your desired consistency and intensity of flavor. For a thicker, glossier sauce, you can whisk in a slurry of cornstarch or flour and water, or enrich it with a knob of cold butter (this is called monter au beurre). Taste and adjust seasoning with salt and pepper.
Understanding Different Braising Techniques
While the core principles of braising remain consistent, various cuisines and dishes employ specific techniques that add unique nuances to the final result. Understanding these variations can help you tailor your braising approach to achieve a wider range of delicious outcomes. From classic French stews to rich Italian ragùs, the subtle shifts in technique can significantly impact flavor and texture.
Classic French Braises: Pot-au-Feu and Boeuf Bourguignon
French cuisine is renowned for its masterful braises. Pot-au-feu, literally "pot on the fire," is a rustic, comforting dish where large cuts of beef and root vegetables are simmered in a rich broth until meltingly tender. It emphasizes the natural flavors of the ingredients, often served with the broth as a first course and the meat and vegetables as the second.
Boeuf Bourguignon is another iconic French braise, featuring beef slow-cooked in red Burgundy wine with bacon, mushrooms, and pearl onions. The wine is essential for its deep flavor and tenderizing properties. The process typically involves searing the beef, sautéing mirepoix, deglazing with wine, and then slow-cooking. Garnishes like bacon lardons and sautéed mushrooms are often added towards the end, preserving their texture and flavor. This dish exemplifies how a specific regional ingredient (Burgundy wine) defines a classic braise.
Italian Braises: Osso Buco and Ragù
Italian cuisine offers its own rich tapestry of braised dishes. Osso Buco, meaning "bone with a hole," refers to cross-cut veal shanks braised slowly with vegetables, white wine, and broth. It’s traditionally finished with a gremolata – a zesty mixture of lemon zest, garlic, and parsley – added at the very end to provide a bright contrast to the rich meat. The marrow in the bone is a prized delicacy, melting into the sauce during cooking.
Ragù, the quintessential Italian meat sauce, is a slow-cooked braise that forms the heart of dishes like Bolognese. It typically starts with a soffritto (onions, carrots, celery), then browned ground or finely chopped meat, often enriched with tomatoes, wine, and broth. The long, slow simmer allows the flavors to meld and deepen, creating a complex and satisfying sauce that clings beautifully to pasta. The key to a great ragù is patience; it often benefits from a cooking time of several hours.
Asian-Inspired Braises: Red-Cooked Pork and Korean Galbi Jjim
Asian cuisines also feature fantastic braising techniques, often with unique flavor profiles. "Red-cooking" (hong shao) is a Chinese method where ingredients, most famously pork belly or ribs, are simmered in a mixture of soy sauce, Shaoxing wine, sugar, star anise, and other spices, giving them a characteristic reddish-brown hue and a deeply savory-sweet flavor. The long simmer tenderizes the meat and allows it to absorb the rich, complex marinade.
Korean Galbi Jjim is a celebratory dish of braised beef short ribs. The ribs are typically marinated in a mixture of soy sauce, garlic, ginger, sesame oil, and pear juice (which helps to tenderize the meat). They are then simmered with vegetables like daikon radish and carrots in a flavorful broth until exceptionally tender. The balance of sweet, savory, and umami is key to this dish.
Troubleshooting Common Braising Pitfalls
Even with the best intentions, sometimes braises don't turn out quite as planned. Understanding common pitfalls and their solutions can save your dish and build your confidence as a cook. Don't be discouraged by an occasional less-than-perfect braise; these are learning opportunities that will ultimately make you a more skilled and intuitive cook.
My Braise is Bland
This is a common issue, especially if you've relied too heavily on plain water or a low-quality stock.
Solution:* Ensure you've properly seared your protein to develop the Maillard reaction. Deglaze the pan thoroughly to capture all those flavorful browned bits. Use a good quality, low-sodium stock or broth as your primary liquid. Don't skimp on the aromatics; sauté them until softened and slightly caramelized. Consider adding a splash of acidity at the end, such as lemon juice or vinegar, to brighten the flavors. A pinch of sugar can also balance savory notes. If the liquid is too thin, reduce it to concentrate the flavors.
My Meat is Tough or Dry
This usually stems from incorrect cooking temperature or insufficient liquid.
Solution: Braising requires low and slow heat*. If the temperature is too high, the meat will cook too quickly, becoming tough and dry before the connective tissues have a chance to break down. Ensure your oven is at the correct temperature (275-325°F or 135-160°C) or that your stovetop is at a very gentle simmer. Check your liquid level periodically; if it's too low, add more hot liquid. The protein should be at least partially submerged. Don't rush the process; the key is patience. Tougher cuts of meat need time to become tender.
My Sauce is Watery and Thin
This often happens when the braising liquid doesn't reduce enough or when too much liquid was used initially.
Solution: Remove the protein and vegetables from the pot. Place the pot back on the stovetop over medium-high heat and allow the liquid to simmer and reduce until it reaches your desired consistency. Skim off any excess fat. For a thicker sauce, you can create a slurry by mixing 1-2 tablespoons of cornstarch or flour with an equal amount of cold water until smooth, then whisking it into the simmering liquid until thickened. Alternatively, whisking in a knob of cold butter at the end (monter au beurre*) adds richness and a glossy finish.
My Aromatics Are Mushy and Undesirable
While aromatics are meant to soften, sometimes they can become unpleasantly mushy, especially if cooked for extremely long periods.
Solution:* Cut your mirepoix and other sturdy vegetables into slightly larger pieces than you might think necessary. This will help them hold their shape better during the long cooking time. If you prefer a cleaner sauce and distinct vegetable pieces, you can remove the vegetables partway through the braise, or strain them out with the liquid and reintroduce them at the end. Some braises, like ragù, are meant to have the aromatics break down and meld into the sauce, so this isn't always a pitfall, but rather a stylistic choice.
Final Thoughts
Mastering the art of braising is a journey of patience, flavor building, and understanding the interplay between ingredients and heat. The braising liquid and aromatics are not mere supporting players; they are the architects of depth, the creators of comfort, and the very essence of a truly spectacular braised dish. By thoughtfully selecting your liquids – whether it's a rich stock, a robust wine, or a tangy tomato base – and layering in complementary aromatics like the classic mirepoix, pungent garlic, and fragrant herbs, you lay the groundwork for culinary magic.
Remember the crucial steps: a thorough sear to build flavor through the Maillard reaction, careful deglazing to capture every last molecule of goodness, and the right liquid-to-food ratio to ensure perfect succulence. The gentle, slow cooking process, whether on the stovetop or in the oven, is where tough cuts transform into melt-in-your-mouth delights. Don't be afraid to experiment with different cuisines and techniques, from the rustic charm of French pot-au-feu to the complex layers of an Italian ragù.
Ultimately, braising is a forgiving technique that rewards intention and patience. Embrace the process, learn from any missteps, and savor the incredibly satisfying results. With this guide as your foundation, you're well on your way to creating braised dishes that are not just meals, but edible expressions of comfort, tradition, and culinary dedication. So, gather your ingredients, preheat your oven, and let the slow, delicious transformation begin. Happy braising!
Get the Next Recipe
Weekly recipes, techniques, and gear picks — straight to your inbox.
