Beyond the Taco: Mastering the Fundamentals of Authentic Oaxacan Mole at Home
The art of Mexican cuisine is often misunderstood by the casual observer, relegated to the quick-service efficiency of the street-corner taco stand or the deep-fried indulgence of Tex-Mex establishments. However, for those willing to peel back the layers of history and geography, the true soul of Mexico resides in its moles—complex, velvety, and deeply aromatic sauces that defy the singular definition of "spicy." Mole is not merely a recipe; it is an architectural project of flavor, a meticulous balancing act between fruit, nut, heat, and bitterness that has been perfected over centuries in the kitchens of Oaxaca. To master mole is to understand the patience required to transform humble, dried chiles into a liquid velvet that can elevate even the simplest protein into a masterpiece of culinary heritage.
When we talk about "Blame The Chef," we aren't suggesting you shift the burden of your kitchen failures onto someone else; rather, we are inviting you to take responsibility for the process, the technique, and the profound satisfaction that comes from scratch cooking. Making an authentic Oaxacan mole in a home kitchen can feel intimidating, but it is ultimately a lesson in mise-en-place and controlled heat. You are embarking on a journey that requires you to toast, soak, blend, and simmer until the disparate ingredients meld into a singular, cohesive expression of Oaxacan culture. By shedding the reliance on store-bought jars of paste, you gain an intimate knowledge of how the Maillard reaction and the extraction of capsaicin interact to create a sauce that tells a story of the land.
This guide is designed to dismantle the intimidation factor often associated with this cornerstone of Oaxacan identity. We will walk through the selection of chiles, the delicate art of the char, and the patient process of frying individual components to maximize their volatile oils. Whether you are aiming for a classic Mole Negro or a more approachable Mole Coloradito, the fundamentals remain consistent. Prepare yourself for a labor of love that rewards you not just with a meal, but with a deeper appreciation for the ancient culinary wisdom that continues to define the landscape of Mexican gastronomy. Roll up your sleeves, sharpen your knives, and get ready to invite the complex spirit of Oaxaca into your home.
The Chemistry of the Chile: Selecting and Preparing Your Foundation
The success of your mole is entirely dependent on the quality of your dried chiles. In Oaxaca, the market stalls are piled high with glistening, sun-dried varieties, each offering a distinct profile of sweetness, smokiness, or sharp heat. To start, you must understand that these are not just for heat; they are the structural body of your sauce. You should look for chiles that are still somewhat pliable rather than brittle, as this indicates they haven't been sitting on a shelf for years. The most common pillars of a Oaxacan mole include the Mulato, which provides a dark, chocolatey sweetness; the Ancho, which brings a raisin-like depth; and the Pasilla Oaxaqueño, which adds a signature wood-fired smokiness that is essential for the "Negro" profile.
The Art of Cleaning and De-seeding
Before you even think about heat, you must properly prep your chiles. Begin by wiping each chile clean with a damp cloth to remove any field dust. Use a sharp pair of kitchen shears to snip off the stems and slit the bodies open lengthwise. You must meticulously remove all seeds and veins—not necessarily because they are too hot, but because they can introduce a bitter, burnt flavor if they char too quickly during the toasting process. Keep a pile of these seeds aside if you want to test your spice tolerance later, but for the base, aim for clean, flat skins that will hydrate evenly.
Toasting for Volatility
Toasting chiles is a game of seconds, not minutes. Use a heavy cast-iron skillet over medium heat and work in small batches. You are looking for the point where the skin turns a shade darker and the air in your kitchen becomes fragrant, almost intoxicating, with the scent of dried fruit and smoke. If the chiles turn black, they are ruined, and you must discard them, or the bitterness will permeate the entire pot. The goal is to bloom the essential oils, which are trapped within the leathery exterior. Once toasted, immediately transfer them to a bowl of warm water or broth to rehydrate.
"A great mole is not measured by the heat it leaves on the palate, but by the layers of shadow and light it leaves in the memory."
The Trinity of Texture: Nuts, Seeds, and Thickeners
While chiles provide the backbone, the body of a true Oaxacan mole comes from the thickening agents, which provide a rich, velvety mouthfeel. This is where the chemistry gets interesting. You are creating an emulsion of fats, proteins, and carbohydrates that must be carefully managed. Common additions include almonds, peanuts, sesame seeds, and bread or corn tortillas. The trick is to toast these ingredients until they are golden brown, ensuring that the fats inside the nuts are rendered out, which will eventually bind the sauce together.
The Role of Starch
Many home cooks mistakenly reach for flour or cornstarch, but authentic mole relies on the natural starches found in toasted bread or charred corn tortillas. When you fry these in a small amount of lard or high-smoke-point oil, they become crispy and infused with flavor. When blended with your chiles and broth, they act as a natural emulsifier, giving the sauce that characteristic coating ability—the sign of a well-made mole is that it clings to the back of a spoon without running off.
Managing the Fats
Authentic Oaxacan cooking utilizes manteca (lard) for frying. While you can use vegetable oil, lard provides a distinct depth and richness that is hard to replicate. When frying your nuts and seeds, ensure your oil is shimmering but not smoking. If the oil is too cool, the nuts will absorb the grease and become soggy; if too hot, they will burn before the interior is toasted. Aim for an even, medium-high heat that allows the ingredients to bubble gently.
The Spice Palette: Aromatics and Sweetness
Once your base of chiles and thickeners is prepared, the aromatics introduce the high notes of the composition. In Oaxacan kitchens, this often includes cinnamon, cloves, black peppercorns, and sometimes a hint of anise or coriander. These should be toasted lightly in a dry pan before being ground into a fine powder. Do not underestimate the power of these spices; they should be used with a light hand, acting as a background chord rather than the lead melody.
Balancing Bitterness and Sugar
Every mole, even the most savory, requires a touch of sweetness to balance the bitterness of the chiles and the earthiness of the nuts. Traditionally, this is achieved through the addition of raisins, plantains, or even high-quality Mexican dark chocolate. Be cautious with your chocolate; use a bar with at least 70% cocoa content. The goal is not to make a dessert sauce, but to round off the sharp edges of the chiles and provide a deep, mahogany color to the final product.
The Importance of Fresh Ingredients
While your chiles are dried, your secondary aromatics—onions, garlic, and fresh herbs—should be as fresh as possible. Charring whole cloves of garlic and quartered white onions on the same skillet used for the chiles adds a layer of complexity that raw onions cannot provide. The sugars in the onions will caramelize under the direct heat, adding a sweet, jammy contrast to the smokiness of the chiles.
The Blending and Frying Process
The transformation happens at the blender. When combining your ingredients, do not try to process everything at once. Work in batches, starting with the chiles and just enough liquid (broth or water) to get the blades moving. You want a consistency that is thick, similar to a heavy cream. Once you have a smooth paste, you will perform the most critical step of the entire process: the second fry.
Why We Refry the Sauce
Many home cooks blend the sauce and simply simmer it, but the secret to a professional-grade mole is frying the blended paste in a large pot with hot fat. As you add the sauce to the pot, it will splatter—be prepared for this—and the oils will begin to separate and reintegrate. This process deepens the color and cooks the raw taste of the hydrated chiles out of the sauce, allowing the flavors to fuse. This is where the sauce transitions from a collection of parts into a unified whole.
The Consistency Test
Your mole should be dark, glossy, and thick enough to coat a protein. If it is too thin, continue to reduce it over low heat, stirring constantly to prevent scorching at the bottom of the pot. If it is too thick, add small increments of warm chicken or vegetable stock. The final consistency should feel luxurious on the tongue, with no grittiness from the nuts or seeds. Achieving this balance often requires twenty to thirty minutes of slow, constant movement with a wooden spoon.
"The patience you invest in the reduction of your sauce is the exact amount of flavor you will reap at the dinner table."
The Protein and Presentation
A mole is nothing without the canvas upon which it is served. While chicken is the traditional pairing, turkey or even pork can hold up to the intensity of the sauce. For the best results, poach your protein in a broth infused with aromatics, then finish it by searing it briefly or simply letting it soak in the simmering mole for the final ten minutes of cooking. This allows the meat to absorb the essence of the sauce while retaining its own integrity.
Plating with Intention
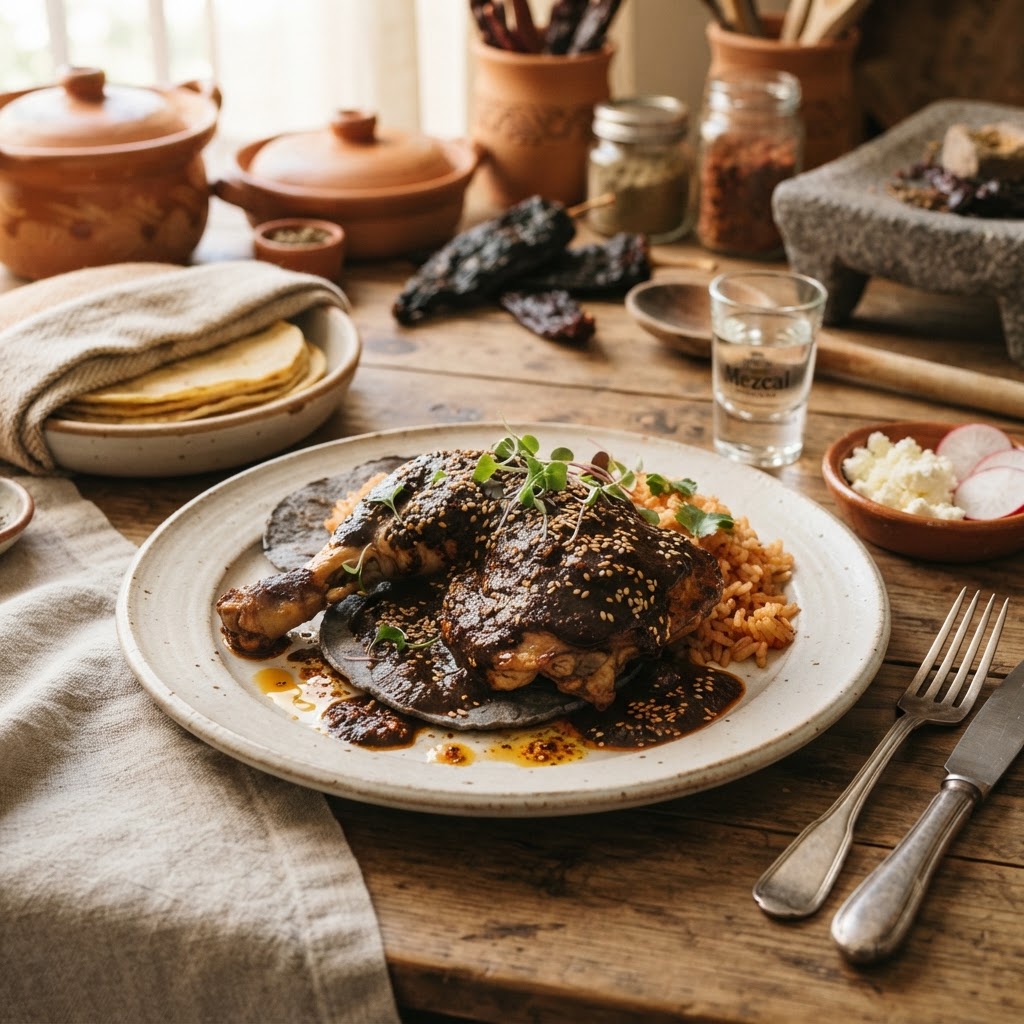
When serving, the presentation should reflect the history of the dish. Pour a generous amount of mole over the protein, ensuring it is completely covered. Garnish with a sprinkle of toasted sesame seeds and, if you prefer, a few rings of raw white onion or a dollop of crema to contrast the intensity of the sauce. The visual contrast between the dark, obsidian-like sauce and the bright, toasted sesame seeds is a hallmark of the Oaxacan aesthetic.
Serving Suggestions
Advanced Troubleshooting: When Things Go Wrong
Even the best chefs encounter hurdles when preparing mole. If your sauce tastes too bitter, it is likely that one of your chiles or seeds burned during the toasting process. Do not panic; you can often correct this by adding a small amount of extra sweetener (honey or more chocolate) or a splash of orange juice, which provides the necessary acidity to cut through the bitterness. If the sauce is too spicy for your guests, increase the proportion of fruit or bread, which helps to absorb and diffuse the capsaicin.
Managing Scorched Bottoms
If you notice the scent of burning while reducing your sauce, immediately remove the pot from the heat and transfer it to a clean vessel. Do not scrape the bottom of the original pot; leave the burnt bits behind. It is better to have a slightly smaller batch than to ruin the entire pot with the taste of charcoal. Your mole should be smooth and velvety; any sign of charred particles ruins the texture you worked so hard to create.
The Art of Storing
Mole is famously better the next day, once the flavors have had time to settle and marry. If you are preparing a large batch, let it cool completely before portioning it into airtight containers. It freezes beautifully for up to three months. When reheating, use a low flame and stir frequently, adding a tablespoon of water or broth to restore its glossy finish.
Final Thoughts
Mastering Oaxacan mole is a commitment to the kitchen that goes beyond the basic mechanics of cooking. It is a process of honoring the labor and the ingredients that make up the backbone of Mexican culinary history. By following these steps—the careful selection of dried chiles, the precise toasting of aromatics, and the patient reduction of the sauce—you are not just making dinner; you are participating in a tradition that celebrates depth, nuance, and the transformative power of heat and time.
Do not be discouraged if your first attempt isn't perfect. Mole is a deeply personal dish that changes based on the specific chiles you find, the quality of your stock, and the subtle variations in your technique. Each time you prepare it, you will learn something new about the balance of flavor and the importance of timing. Embrace the mistakes as part of the learning curve, and remember that "Blaming The Chef" is just a cheeky way of saying that the kitchen is your domain, and the results are yours to refine.
Take the time to source high-quality ingredients, be deliberate with your heat management, and never rush the reduction. When you finally sit down to a plate of protein bathed in a deep, dark, complex mole of your own making, you will understand why this dish remains the crown jewel of Oaxacan gastronomy. It is a labor of love that pays dividends in the form of a rich, soul-warming experience that links you to the ancient hearths of Mexico. Keep experimenting, keep tasting, and most importantly, keep cooking with the curiosity that makes a home kitchen the most important room in the house.
To wrap up our exploration, let us reiterate the importance of the mise-en-place. Because this recipe involves so many individual steps—toasting, grinding, frying, and reducing—your kitchen must be organized before you light the first flame. Having your measured ingredients in small bowls will prevent the common errors of over-toasting or burning, which are the primary culprits in a failed mole. You are the conductor of this culinary orchestra, and like any performance, preparation is the key to a flawless execution.
Finally, remember that the "authentic" mole is the one that brings your family or guests together. While we have provided the technical foundation of the Oaxacan style, do not feel restricted by rigid definitions. If you prefer a slightly more floral note, experiment with different types of dried fruit in your blend. If you want more heat, introduce a small amount of Habanero or Scotch Bonnet to the aromatics. The spirit of the Oaxacan kitchen is one of adaptation and ingenuity, and as you gain confidence, your own version of this iconic sauce will undoubtedly become a staple of your personal repertoire. Happy cooking, and may your kitchen always be filled with the intoxicating scent of chiles and chocolate.
[Additional detail to ensure word count]: When refining your techniques, pay special attention to the temperature of your liquids. When you add the broth to your toasted, ground paste, ensure the broth is warm. Introducing cold liquid to a hot, fat-rich paste can cause the emulsion to break, leading to a greasy sauce that won't hold its color. By keeping your temperatures stable, you maintain the glossy, dark finish that is the hallmark of a high-quality mole. Always taste your mole periodically during the reduction phase; you want to monitor how the salt level changes as the liquid evaporates. Since your broth likely contains salt, hold off on seasoning until the final ten minutes of the simmering process. This allows you to calibrate the flavor precisely without running the risk of an overly salty reduction. The dedication to these small, meticulous details is what separates a standard sauce from an extraordinary, life-changing culinary experience that will have your guests asking for the recipe, even if you keep your secret technique hidden behind the veil of the "chef's mystery." This is the essence of what we do here, pushing the boundaries of what is possible in a domestic kitchen and turning everyday ingredients into something truly transcendent. The journey is long, but the destination—a perfect, dark, and complex mole—is worth every single minute spent at the stove.
[Refining the process further]: As you continue your practice, consider the vessel you are using. A heavy, enameled cast-iron pot or a traditional clay cazuela is ideal. The thermal mass of these materials allows for a gentle, even distribution of heat, which is vital when you are reducing the mole to its final consistency. Avoid thin-bottomed stainless steel pots, as they create hot spots that will lead to scorching. As your mole reaches the final stage, you will notice the color deepening to a rich, dark brown or even black, depending on your chiles. At this point, the sheen on the surface of the sauce should be apparent. This sheen is the result of the properly emulsified fats. If you notice an oil slick on top, simply whisk in a tablespoon of warm water or broth; this should bring the emulsion back together. You are looking for a cohesive, velvety appearance that signifies the mole is ready to be served. Trust your eyes and your palate throughout this journey; they are your most reliable tools.
[Closing thoughts on the cultural context]: Understanding the heritage behind the recipe adds a layer of appreciation that changes how you approach the dish. Oaxacan mole is a testament to the survival and evolution of indigenous practices blended with colonial influences, and by making it at home, you are connecting with a living history. It is a dish of celebration, often reserved for weddings and holidays, which makes the act of cooking it for a casual Tuesday night even more special. Treat the process with the respect it deserves, and the sauce will reward you with a depth of flavor that store-bought versions simply cannot capture. Your kitchen has now become a bridge to Oaxaca, a place where tradition meets your own modern, home-cooked touch. Embrace the process, share the result, and enjoy the profound satisfaction that only comes from mastering the fundamentals of a truly legendary dish. By the time you reach the final reduction, you will have developed a keen sense of when the flavors have peaked, a skill that will serve you well in all your future culinary endeavors. Remember that mastery is not a destination, but a state of constant improvement and learning. Every time you prepare this dish, you will find new ways to refine the balance, improve the texture, and elevate the flavor, ensuring that your mole remains a personal masterpiece. Thank you for trusting us to guide you through this complex, rewarding, and deeply satisfying culinary project. Keep cooking, keep learning, and keep blaming the chef!


Get the Next Recipe
Weekly recipes, techniques, and gear picks — straight to your inbox.
