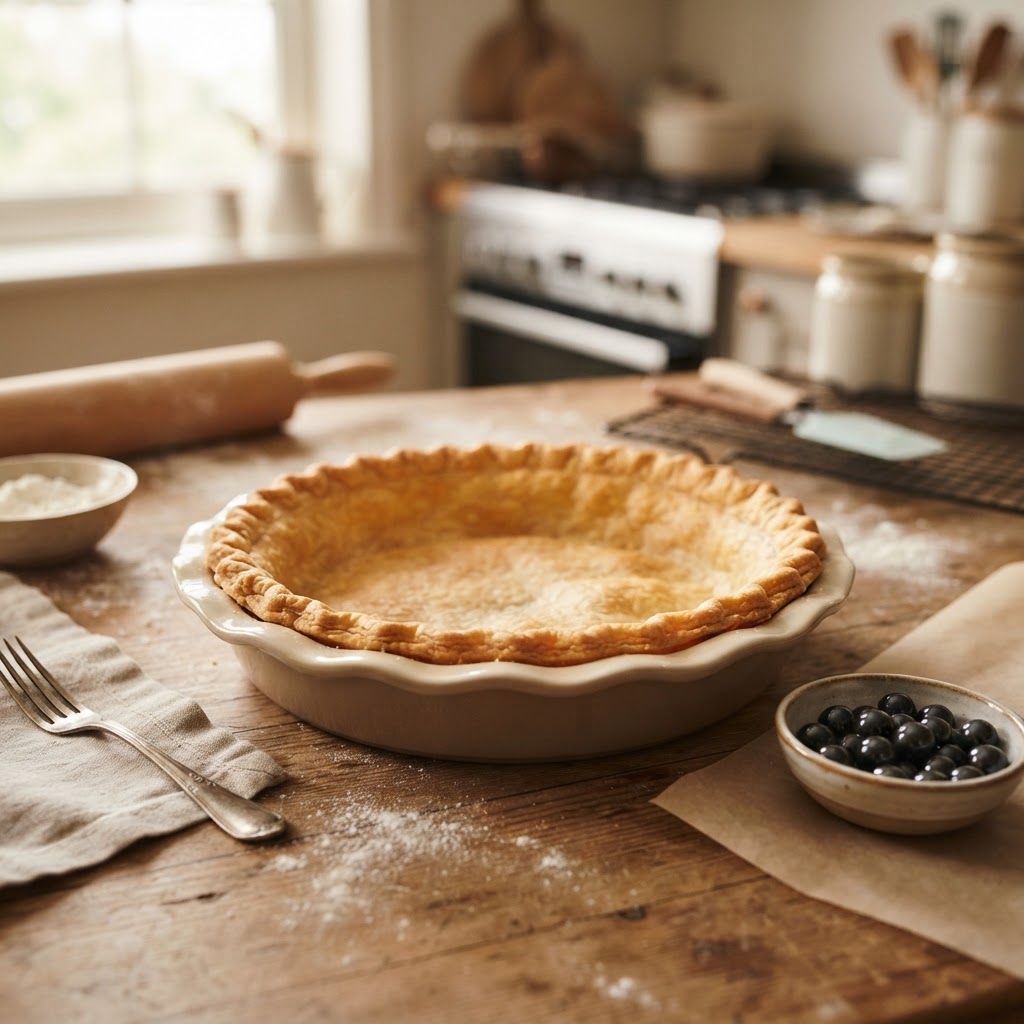
Blind Baking 101: How to Achieve Crisp, Non-Soggy Crusts for Every Pie and Tart
Baking, at its core, is both an art and a science. And among the many skills that separate an aspiring home baker from a master, blind baking stands out as one of the most crucial techniques—especially when it comes to creating perfect pies and tarts with crisp, non-soggy crusts. Despite its reputation for being a bit intimidating, once mastered, blind baking becomes an invaluable tool that ensures your pastry remains tender, flaky, and delightful, no matter what filling you choose to pour inside. Whether you're making a delicate lemon tart, a hearty quiche, or a classic fruit pie, understanding the ins and outs of blind baking can elevate your baking game immeasurably.
Many home bakers face the common frustration of ending up with a soggy bottom—an experience that can ruin an otherwise beautiful dessert. The problem often lies in the interaction between the moist filling and the pastry crust, especially if the crust isn't properly pre-baked. Without the right preparation, the moisture from the filling can seep into the dough, softening and ruining the texture. This is where blind baking steps in as the perfect solution. By pre-baking the crust, you create a solid barrier that can hold up against even the juiciest fillings, leaving you with a beautifully crisp crust every time.
However, blind baking isn't just about throwing some dough into the oven and hoping for the best. It requires understanding specific techniques, precise timing, and the right equipment. Overbaking can result in a tough, overly browned crust, while underbaking can lead to sogginess and a limp texture. Achieving that perfect balance is a science that requires attention to detail, patience, and practice. In this comprehensive guide, we'll explore everything from preparing your dough properly to the best methods for blind baking various types of crusts, so that you can confidently tackle any pie or tart recipe with professional finesse.
By the end of this post, you'll have a clear, step-by-step understanding of how to blind bake with consistent results, armed with tips from professional pastry chefs and tested techniques honed over years of experience. Whether you're a beginner eager to get started or a seasoned baker looking to refine your skills, the secrets to a perfect, crisp crust are within your grasp. So let’s dive into the essentials of blind baking and make every pie and tart a masterpiece of flaky, crunchy perfection.
---
What Is Blind Baking and Why Is It Important?
Blind baking, also known as pre-baking or par-baking, refers to cooking a pastry crust without the filling. Essentially, you bake the crust on its own, typically with some form of weight or barrier, to ensure it cooks evenly and develops a desirable crispiness. This technique is especially vital for fillings that are either very moist (like custard or fruit fillings) or require a short baking time that doesn’t allow enough time for the crust to fully cook through.
The Purpose of Blind Baking
The primary objective of blind baking is to prevent soggy bottoms—a common frustration among home bakers. When filling liquids release moisture during baking, if the crust isn’t fully baked or doesn’t have a barrier in place, that moisture can seep into the pastry, resulting in a soggy, limp crust. By pre-baking the shell, you set a barrier that maintains crispness, ensuring that each bite offers a perfect crunch.
Blind baking is also crucial for preventing shrinking and blistering. When properly pre-baked, the crust maintains its shape and texture, making for a professional presentation, especially in delicate tarts and mini pies. Furthermore, certain fillings, such as choux pastry or curd-based desserts, require a pre-baked shell to give structure to the final product.
When to Blind Bake
Not all recipes need blind baking, but understanding when it’s necessary is key to baking success:
The Science Behind Blind Baking
Understanding the science can help you perfect your technique. When the dough is baked, starch gelatinization and fat melting occur, creating a crisp, flaky structure. The key is to protect the dough from excess moisture and ensure even heat distribution. Using weights and proper temperature control ensures the crust doesn't puff up unevenly or collapse.
In addition, docking (piercing the dough to let steam escape) can help prevent bubbles and puffiness, creating a flat, uniform surface. It’s essential to keep an eye on the baking process and adjust timings based on your oven and ingredients to achieve that perfect, golden crust.
Now that we understand the importance of blind baking, let’s get into the fundamental steps of preparing your crust for success.
---
Choosing the Right Dough for Blind Baking
The foundation of a perfect crust begins with selecting the appropriate dough. Different types of pastry are better suited for blind baking depending on their texture, structure, and the desired final outcome. Your choice not only influences flavor but also affects how well the crust withstands the baking process and moisture from fillings.
Types of Pastry for Blind Baking
1. Shortcrust Pastry
Shortcrust is the most common choice for pies and tarts requiring blind baking. Made with flour, fat, and a small amount of liquid, it offers a tender yet sturdy base that holds up well against moisture.
“A well-made shortcrust is buttery, tender, and provides just enough firmness for a crisp crust that doesn’t shatter.”
2. Pâte Sablée
This rich, crumbly pastry resembles shortbread and is ideal for delicate tart shells where flavor and texture are paramount. It’s softer but still holds its shape well for blind baking.
3. Pâte Brisée
Similar to shortcrust but with a slightly different ratio, pâte brisée offers a flakier, more buttery texture and is also suitable for blind baking.
4. Puff Pastry & Phyllo
While less common for traditional blind baking, certain recipes like vol-au-vent or layered tarts might call for these, but their handling is more complex given their flaky and delicate layers.
Ingredient Ratios and Tips for the Best Dough
Preparing the Dough
By paying attention to these ingredient ratios and preparation techniques, you'll ensure your dough is resilient enough for blind baking and capable of producing a flaky, golden crust every time.
---
Perfecting Your Pie and Tart Crusts
Once you've selected your dough, the next step is mastering the process of shaping, chilling, and pre-baking to achieve that pristine, crispy foundation. Proper handling of the dough is essential to prevent shrinkage, buckling, or uneven baking.
Rolling Out and Shaping
Docking and Pricking
Chilling the Dough
Pre-baking the Crust
Mastering these shaping and handling techniques ensures a reliable foundation, giving you the confidence to blind bake any pastry with consistent, professional results.
---
How to Blind Bake Successfully
Blind baking is a delicate balance of timing, temperature, and technique. Here, we cover the core principles, the reasons behind each step, and pro tips to prevent common pitfalls.
Step-by-Step Guide to Blind Baking
Using Weights Effectively
Proper weights are essential. The goal is to maintain a flat, even crust surface during baking.
Pro Tips for Perfect Blind Baking
By following these methods and understanding each component, your blind-baked crusts will always turn out expertly crisp and tender, serving as a robust foundation for your fillings.
---
Different Techniques for Blind Baking
While the core process remains consistent, various techniques can enhance your results or suit specific types of crusts and fillings. Here are some professional tricks to diversify your approach.
Double Baking Method
Using a Temperature Shield
Freezer Chilling Before Baking
Blind Baking Without Weights
Par-Brying
Professional Tips for Uniform Results
---
Troubleshooting Common Blind Baking Problems
Even seasoned bakers encounter issues. Here are some typical problems and solutions to keep in mind.
Soggy Bottoms
Shrinkage or Warping
Over-Browning or Burning
Under-baking or Pale Crust
Uneven Cooking
By understanding these common challenges and their solutions, you'll develop an intuition for perfect blind baking that comes with experience—making each subsequent bake better than the last.
---
Special Considerations for Different Types of Crusts and Fillings
Not all recipes are created equal, and each type of crust or filling demands slightly different handling. Adaptive techniques ensure optimal results across various baked goods.
Fruit Pies with Juicy Fillings
Custard and Cream Pies
Quiches and Savory Tarts
Chocolate or Cream Tarts
Miniatures and Tartlets
In each case, understanding the interaction between filling moisture, dough type, and baking time is critical to achieving the perfect crust.
---
Professional Chef Tips to Elevate Your Blind Baking
Achieving professional results doesn’t just come down to technique—it also involves a few insider tricks that seasoned bakers use.
Use a Baking Stone or Steel
Brush with Egg Wash or Butter
Experiment with Different Weights
Bake in a Convection Oven
Invest in Quality Equipment
Keep a Baking Journal
Practice Patience
By combining these professional tips with consistent practice, you'll develop an intuitive sense of blind baking that produces reliably excellent crusts in every bake.
---
Final Thoughts
Mastering blind baking is an essential skill for any home baker aspiring to create restaurant-quality pies and tarts. It might seem complex at first—requiring precision, patience, and attention to detail—but with the right techniques, it becomes second nature. By choosing the appropriate dough, mastering shaping and chilling, understanding the delicate art of baking with weights, and troubleshooting common problems, you'll be well on your way to achieving beautifully crisp, non-soggy crusts every time.
Remember, perfection in baking rarely happens by chance; it’s the result of thoughtful preparation, careful monitoring, and lots of practice. Don’t be discouraged by initial setbacks—they’re just stepping stones toward mastery. As you develop your skills, you’ll find that blind baking opens the door to endless creative pies and tarts that impress friends and family alike.
So, gather your ingredients, preheat that oven, and approach each baking session with confidence. Your future masterpieces await—crisp, flaky, and utterly delicious. Happy baking!
---



Get the Next Recipe
Weekly recipes, techniques, and gear picks — straight to your inbox.
