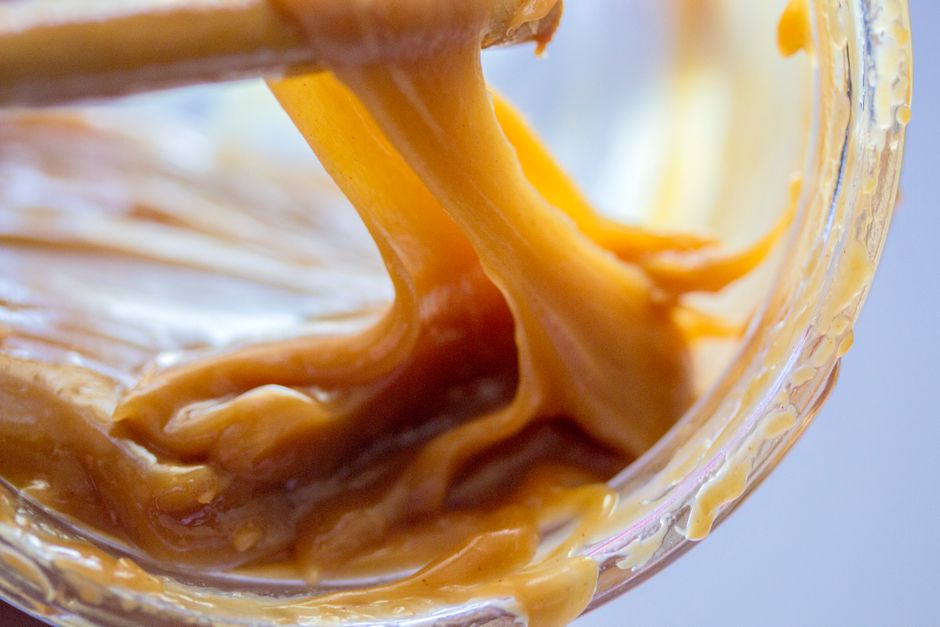
Caramel: From Wet to Dry Methods
Caramel is often considered one of the more elusive components of baking, a celebratory sweet that can induce both delight and anxiety. The duality of caramel lies in its versatility and its propensity to veer into the territory of potential disasters. A chef’s triumph can quickly turn into a kitchen catastrophe if the correct methods are not followed. Yet, when mastered, caramel transforms any dish into a showcase of culinary excellence. From luscious caramel sauces to beautifully shaped candies, the magic of caramel lies in understanding the fundamental techniques that drive its creation.
At the heart of caramel-making are two primary methods: wet and dry. While the names may suggest casual processes, the nuances and finesse required can be surprisingly intricate. Each technique has its own merits and disadvantages, calling for different skills and tolerances for temperature and timing. Advancing your knowledge of both methods allows you to choose your culinary adventure wisely and adapt to whatever recipe or craving strikes. Whether you desire a velvety sauce to drizzle over desserts or crunchy candies to enjoy as a sweet snack, mastering these methods will elevate your baking to impressive new heights.
Understanding the science behind caramel is essential. As sugar is heated, its molecules undergo a transformation, changing from solid to liquid and then into caramel. This transformation requires precision in both temperature and timing. A well-executed caramel can complement savory dishes, enhance the flavors of desserts, or serve as a fundamental technique for even the most basic dessert recipes. Dive into this exploration of caramel-making, and let your taste buds revel in the sweet adventure that awaits.
The Science of Caramel
Before we dive into the specifics of the wet and dry methods, it’s essential to understand the science behind caramel. Sugar, primarily in the form of sucrose, is the cornerstone of caramelization. When sugar is heated, it melts to form a syrup before undergoing complex chemical changes that create the rich flavor and color we associate with caramel.
The Maillard Reaction
While caramelization specifically refers to the cooking of sugar, another significant process that contributes to flavor development in various foods is the Maillard reaction. This occurs between sugars and amino acids, resulting in browning and flavor enhancement. In baking, both reactions can occur, often at the same time, when you are creating rich desserts.
Temperature Matters
Key to successful caramel-making is understanding the precise temperature at which sugar transitions from one state to another.
Monitoring temperature can make or break your caramel experience. To achieve the best results, using a candy thermometer is advised, as it provides precise readouts and can help mitigate the risk associated with overcooking.
Sugar Varieties and Their Impact
Another area to consider is the type of sugar used in caramel recipes.
Understanding these variations allows you to customize your caramel recipes and delve into richer, more complex flavors.
Wet Caramel Method
Now that you have a fundamental understanding of the science of caramel, let's explore the wet caramel method. This technique involves dissolving sugar in water, which assists in the even sweating of sugar crystals. For those who have battled crystallization before, this method provides a helpful safeguard.
Ingredients and Equipment Needed
To create wet caramel, gather the following ingredients and equipment:
- 1 cup granulated sugar
- 1/4 cup water
- Optional: a splash of corn syrup to help stabilize the mixture
- Heavy-bottomed saucepan
- Candy thermometer
- Wooden spoon or silicone spatula
- A clean glass jar for storage
Step-by-Step Process
Tips and Techniques
"Patience is key when making wet caramel; the timing can transform a sweet success into a bitter loss."
With the wet method, you’ll produce a beautifully smooth caramel sauce perfect for drizzling over ice cream, pies, or even using as a base for caramels.
Dry Caramel Method
The dry caramel method is remarkable in its simplicity. You use only granulated sugar, relying on the sugar's inherent properties to melt and caramelize. This method can be a bit trickier as it’s all about controlling the heat.
Ingredients and Equipment Needed
For the dry caramel method, you’ll require:
- 1 cup granulated sugar
- Heavy-bottomed saucepan or skillet
- Candy thermometer (optional but recommended)
- Wooden spoon or silicone spatula
Step-by-Step Process
Tips and Techniques
"Dry caramel is a balancing act; too high heat turns sweet into sour in seconds."
Utilizing the dry method of caramel will yield deeply flavored, crunchy caramels perfect for a variety of confections or a delightful addition to charcuterie boards.
Flavored Caramels
Once you've mastered the basic caramel techniques, why not explore some flavored variations? Flavors can take your caramel to the next level, introducing levels of complexity that marry beautifully with the sweet base.
Adding Extracts and Spices
One quick and easy way to infuse flavor is by adding roughly a teaspoon or two of extracts. Consider these:
Infusing with Herbs
Going beyond extracts, consider infusing your caramel with herbs or spices.
Chocolate and Other Additions
Chocolate fans may want to experiment:
Managing Flavors
When adding flavors, balance is critical:
Creating flavorful variations not only enriches the caramel but can also make for captivating additional elements in your desserts, from cheesecakes to tarts.
Common Mistakes in Caramel Making
Even the most seasoned bakers can make mistakes when crafting caramel. Understanding the common pitfalls and learning to avoid them can save you from frustration and wasted ingredients.
Crystallization
A prevalent issue in both wet and dry methods is crystallization, which can produce a gritty texture.
#### How to Avoid It:
Burning Sugar
Another common error is burning your sugar, which occurs typically when the temperature rises too high or is cooked too long.
#### How to Prevent:
Seizing
Caramel can seize unexpectedly when moisture comes into contact with it.
#### Tips to Prevent Seizure:
Understanding these common mistakes, along with how to prevent them, will boost your confidence in caramel-making and help facilitate the ongoing experimentation process.
Storage and Uses for Caramel
Once you've created your beautiful caramel, storage and proper use are critical for maintaining its quality and flavor.
Storing Caramel
Proper storage helps extend the longevity of your caramel. Here are some essential guidelines:
"Caramel has a way of elevating the simplest of desserts — a drizzle over vanilla ice cream transforms it into something extraordinary."
Uses in Baking and Desserts
Now that your fabulous caramel is safely stored, let’s explore the myriad of ways in which you can incorporate it into your baking.
Conclusion
Caramel is not merely a sweet treat; it is an exploration into the heart of culinary technique and precision. Mastering both the wet and dry methods of caramel-making will arm you with skills that enhance both your baking endeavors and everyday indulgences. From classic sauces that complement your favorite desserts to flavored gems that elevate the palate, the possibilities are nearly endless.
Whether you opt for the safety net of the wet method or the daring challenge of dry caramel, the paths to achieving success are clear: respect the temperature, remain vigilant against adverse conditions like crystallization, and most importantly, use your senses to guide you. Cooking is as much about intuition as it is about technique, and nothing teaches this more than patience and practice.
As you experiment, remember that caramel is just a starting point. Its deep flavors and silken textures lay the groundwork for a world of creativity in the kitchen. Extend your knowledge of this confection, and let each batch of caramel lead you toward new culinary creations. Your next dessert masterpiece is only a caramel away.




Get the Next Recipe
Weekly recipes, techniques, and gear picks — straight to your inbox.
