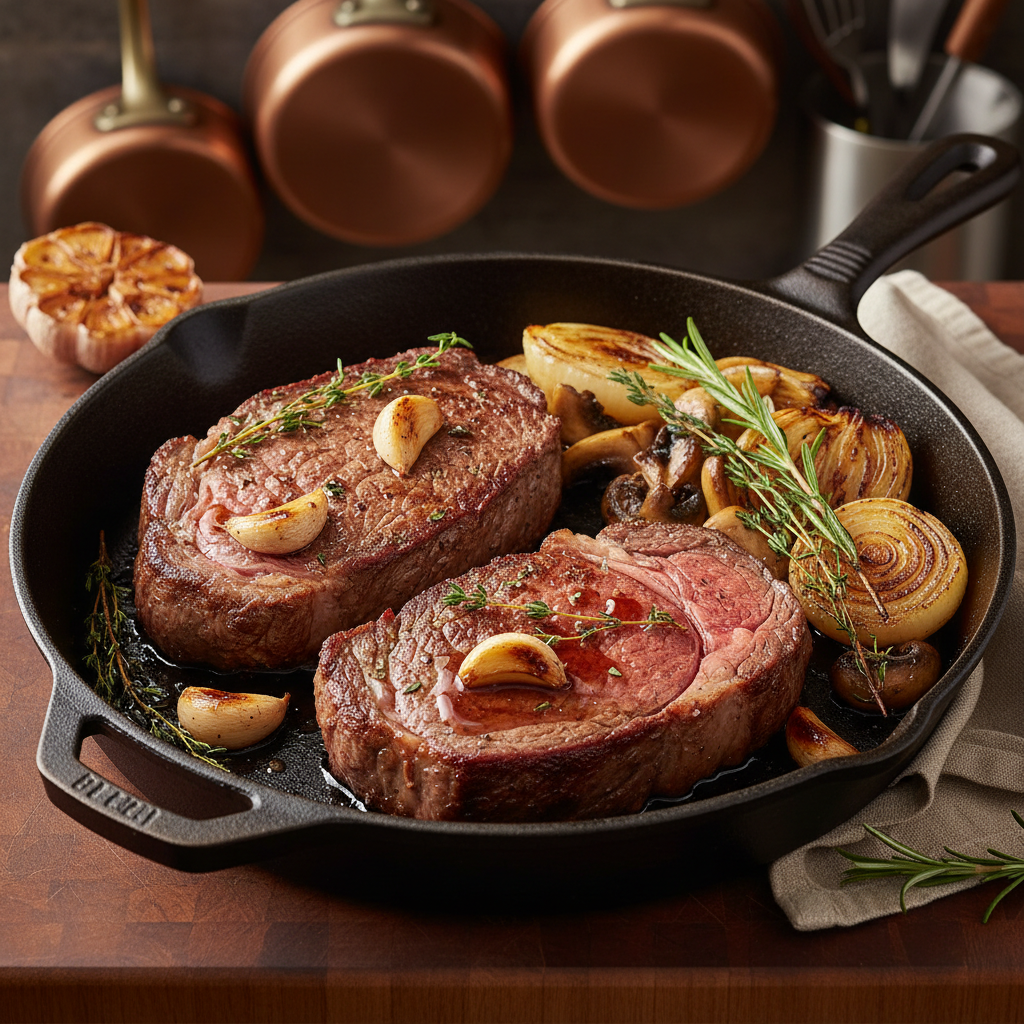
Caramelization: The Maillard Reaction Deep Dive
Understanding caramelization and the Maillard reaction is essential for any home cook looking to elevate their culinary skills. These two processes are responsible for the beautiful colors, complex flavors, and appealing aromas that develop in many of our favorite dishes. When you heat sugars, they undergo caramelization, creating a sweet and nutty flavor profile. Meanwhile, the Maillard reaction involves the interaction between amino acids and reducing sugars, resulting in a multitude of flavors that vary depending on the ingredients being used.
As we explore these two fascinating chemical reactions, we’ll go over the science that underpins them and provide practical techniques to master each. The objective is not only to inform but also to equip you with the skills necessary to replicate these reactions in your kitchen, whether you're roasting vegetables or searing meats. With an understanding of how temperature affects these processes, you will soon be producing dishes that sing with depth and nuance, impressing your family and friends alike.
This post will walk you through the fundamental principles of caramelization and the Maillard reaction, their importance in cooking, and provide tips and tricks so you can achieve perfect results. Armed with this knowledge, you can start experimenting and bringing out the best in your ingredients. By the end of this article, you'll appreciate how these two chemical reactions contribute dramatically to the joy of cooking and eating.
Understanding the Basics of Caramelization
To begin our exploration, let's get a bit technical. Caramelization is a chemical reaction that occurs when sugars are heated to high temperatures, typically above 320°F (160°C). Unlike the Maillard reaction, caramelization involves only sugars. During this process, the sugar molecules break down and transform, creating new compounds that contribute to the distinct flavor and color of caramel.
Here are a few key points about caramelization:
- Light caramel: 320°F - 338°F (160°C - 170°C)
- Medium caramel: 338°F - 350°F (170°C - 177°C)
- Dark caramel: 350°F - 375°F (177°C - 190°C)
Achieving the desired level of caramelization depends on the cook's intention. Do you want a mild, sweet flavor or a deep, complex one? Understanding these temperature stages will allow you to control the final flavor and color.
The Stages of Caramelization
The stages of caramelization are crucial to understand because they indicate how the sugar will behave and taste once your process reaches completion. Here’s a breakdown of what happens at each stage:
Consider these factors:
Knowing how to perform each stage creates the possibility of custom caramel flavors marking a significant improvement in your cooking repertoire.
The Maillard Reaction Demystified
In contrast to caramelization, the Maillard reaction is a complex series of chemical reactions between sugars and proteins that gives enhanced flavors and an appealing brown color to food. This reaction begins at around 285°F (140°C) and continues until the food reaches around 400°F (204°C), yielding a variety of rich flavors and aromas that characterize many cooked foods.
What makes the Maillard reaction unique is its versatility and reliance on certain key factors that can dramatically alter the end result:
The possibility for complex flavors arising from the Maillard reaction makes it a fundamental technique in culinary arts.
The Stages of the Maillard Reaction
Similar to caramelization, the Maillard reaction can also be broken down into stages:
Key Factors That Influence the Maillard Reaction
Cooking experts often emphasize three main factors that affect the Maillard reaction:
Practical Applications of the Maillard Reaction in Cooking
The Maillard reaction is essential for creating depth in flavors in a range of dishes. Here are some practical applications you can experiment with in your cooking:
Differences and Intersections: Caramelization vs. Maillard Reaction
While both caramelization and the Maillard reaction amplify flavor, they are distinct processes serving unique purposes:
- Caramelization involves sugars alone.
- The Maillard reaction requires both sugars and proteins.
- Caramelization tends to produce sweeter, nutty flavors.
- The Maillard reaction offers more complex, savory flavors.
- Caramelization generally begins around 320°F (160°C) and occurs best at higher temperatures.
- The Maillard reaction starts around 285°F (140°C) and thrives up to 400°F (204°C).
- Caramelization is visualized through the amber color of caramel syrup.
- The Maillard reaction results in a rich brown crust on meat or baked goods.
Understanding these differences helps you choose the right technique for the right application, leading to better results in your cooking.
Techniques and Tips for Mastering Caramelization
As you delve deeper into mastering caramelization, employing a few techniques can significantly enhance outcomes. Here are some important points to keep in mind:
Choosing the Right Pan and Utensils
Best Types of Sugar for Caramelization
Step-By-Step Caramelization Process
Professional Tips:
Techniques and Tips for Perfecting the Maillard Reaction
Just as with caramelization, successfully employing the Maillard reaction requires understanding and technique. Here are important tips to enhance your cooking results:
Preparing Foods for Searing
Cooking Techniques That Enhance the Maillard Reaction
Cooking Steps for Optimal Maillard Results
Types of Protein and Their Browning Effects
Different proteins yield a variety of Maillard flavor profiles:
Cooking Techniques That Combine Both Reactions
To take your culinary skills further, it’s beneficial to learn how to combine techniques that involve both caramelization and the Maillard reaction. Here are some dishes and methods to try:
Sautéed Vegetables with Both Reactions
Braising
Braising is a technique that integrates both reactions by first searing the meat (activating the Maillard reaction) and then simmering it in liquid (allowing for some caramelization from the sugars in the meat and the added vegetables).
Making Sauces
Sauces often benefit from both caramelization and the Maillard effect:
Conclusion
Mastering caramelization and the Maillard reaction is crucial to elevating your culinary skills. By understanding their foundations, stages, and practical applications, you'll be able to create an array of rich, flavorful, and visually appealing dishes that showcase the beauty and complexity of cooked foods. With proficiency in these techniques, your home cooking will not just be meals but rather a gastronomic experience full of layers and depth that delights the senses.
As you embark on this flavorful journey, practice patience and explore each method on a range of ingredients. Remember, experimentation is a key part of cooking, enabling you to discover the unique flavors and aromas that each ingredient brings to the table. Now, get out there and start cooking—the world of caramelization and the Maillard reaction awaits!


Get the Next Recipe
Weekly recipes, techniques, and gear picks — straight to your inbox.
