Cast Iron Cooking: Seasoning, Care, and Recipes That Make Your Skillet Shine
There is a profound, almost primal satisfaction that comes from cooking with a well-worn cast iron skillet. Unlike modern non-stick pans that have a predetermined expiration date, a piece of cast iron is a generational investment, an heirloom that arguably gets better with every single meal prepared in it. Many home cooks approach these heavy, dark vessels with a sense of trepidation, fearing the dreaded rust or the myth that they are impossible to clean. In reality, once you understand the science of the polymerized oil layer—what we call seasoning—the cast iron becomes the most forgiving and versatile tool in your arsenal. It is the bridge between the professional kitchen and the home hearth, capable of searing a steak to perfection while simultaneously baking a delicate, crumbly cornbread.
When you invest in a skillet, you are essentially partnering with a piece of metal that will hold heat with an intensity that thin aluminum simply cannot replicate. This thermal mass is the secret weapon for achieving a deep, mahogany crust on proteins and a beautiful char on vegetables. Whether you are searing a thick ribeye or sautéing delicate aromatics, the skillet responds to temperature changes with a reliable consistency that makes it an indispensable asset. The goal of this guide is to demystify the care process and provide you with the technical foundation to transform a basic pan into a non-stick powerhouse. By the time you reach the end of this exploration, you will understand why chefs everywhere return to cast iron time and time again.
The culinary magic of cast iron lies in its ability to facilitate the Maillard reaction, a chemical process that creates complex, savory flavors through the browning of amino acids and reducing sugars. When you place a protein into a preheated, properly seasoned cast iron pan, the surface temperature remains high even as the meat hits the metal. This ensures that you aren't just steaming your food in its own juices, but actually creating a crispy, flavorful exterior crust that locks in moisture. Beyond the sear, these pans offer incredible heat retention, which is perfect for oven-to-stove techniques. Once you master the rhythm of preheating, oiling, and cleaning, you will find yourself reaching for your cast iron for everything from breakfast scrambles to late-night pan-seared desserts.
The Science and Art of Seasoning
The term seasoning is often misunderstood by novice cooks, who assume it refers to flavorings like salt and pepper. In the context of cast iron, seasoning is a thin, durable layer of polymerized oil that has bonded to the surface of the metal. When you heat oil past its smoke point, the molecules undergo a chemical transformation, turning from a liquid fat into a solid, plastic-like substance. This layer serves two primary purposes: it prevents the iron from oxidizing and rusting, and it creates a natural, non-stick surface that improves with every single use.
The Polymerization Process
To build a strong foundation, you must begin with high-quality fats. Use oils with high smoke points, such as grapeseed oil, canola oil, or refined avocado oil. Avoid using butter or extra virgin olive oil for the seasoning process, as their low smoke points will lead to a sticky, gummy residue rather than a hard, slick finish. The secret here is "less is more." If you use too much oil, the pan will become tacky. Wipe the oil on, and then wipe it off as if you made a mistake and are trying to remove it all.
Step-by-Step Maintenance
"Seasoning is not a one-time event; it is a living, breathing process that requires constant care and repetition to reach its full potential."
This process should be repeated several times when you first purchase a new skillet. You are building up layers of protection. Think of it like painting a fence; the first coat is essential, but the subsequent layers provide the true durability required for daily cooking. Once you have a base of three to four layers, you are ready to start cooking foods that will further enhance that surface.
Daily Care and Cleaning Rituals
One of the most persistent myths in the culinary world is that you should never use soap on a cast iron pan. This stems from the days of harsh lye-based soaps, which could indeed strip seasoning. Modern dish soaps are mild and perfectly safe to use in small amounts. The real enemy of your skillet is not soap, but standing water. If you leave your pan to soak in the sink, you are inviting rust, which can compromise the integrity of your hard-earned seasoning layer.
The Proper Cleaning Technique
Immediately after cooking, while the pan is still warm, scrape away any excess food particles. If there are stuck-on bits, use a chainmail scrubber or a stiff nylon brush. Avoid steel wool unless you are intentionally trying to strip the seasoning back to the bare metal. Once the food is removed, rinse the pan with hot water. Using a tiny drop of dish soap is acceptable to remove residual oils, but keep it brief.
Drying and Protecting
The most crucial step in the cleaning ritual is the "stove-top dry." Place the pan over medium heat for about two minutes. You want to evaporate every molecule of water from the iron’s microscopic pores. Once it is bone dry, add a tiny drop of oil—about the size of a pea—and buff it in with a paper towel. This ensures that the pan is protected until the next time you need it. Storing your pan in a dry place is essential; never stack heavy items inside it if they have the potential to scratch the surface.
If you ever notice a slightly dull or gray appearance, that is a sign that your seasoning is thinning. This is not a catastrophe; it is merely a signal that you should perform a quick "maintenance bake." Rub a thin coat of oil over the surface and bake it at 400°F (200°C) for 30 minutes. This will fill in any microscopic gaps in the polymer layer and restore that signature dark, glossy look that every chef strives for.
Essential Cooking Techniques
Cooking in cast iron requires a slight change in mindset compared to cooking in stainless steel or non-stick pans. Because cast iron holds onto heat so effectively, it is a master of thermal inertia. You cannot simply turn the dial down and expect an immediate temperature drop. You must learn to work with the pan’s heat, rather than against it. This is why preheating is the single most important technique you can master.
Mastering the Pre-Heat
Always preheat your skillet empty for at least five to seven minutes over medium-low heat before adding your fat. You want the entire surface of the metal to be at the same temperature. If you add food to a cold or unevenly heated pan, the protein will stick to the iron, leading to frustration. You can test the heat by flicking a few drops of water into the pan; they should dance and evaporate within a second. If they sit there and hiss, the pan needs more time.
Searing and Basting
Once the pan is hot, add your high-smoke-point oil. When the oil begins to shimmer, it is time for the protein. Whether you are searing a pork chop or a filet mignon, place it in the pan and leave it alone. The crust needs time to form, and the meat will naturally release from the pan once the Maillard reaction has completed. If it feels like it is stuck, it’s not ready to flip yet. Wait another minute.
"Patience is the secret ingredient in cast iron cooking. Never force your food off the metal; wait for the pan to tell you when the sear is complete."
To take your searing to a professional level, use the butter-basting technique. In the final three minutes of cooking, add a knob of unsalted butter, two smashed cloves of garlic, and a sprig of fresh thyme to the skillet. Tilt the handle up slightly so the butter pools at the bottom, and use a large spoon to continuously baste the protein with the foaming, aromatic butter. This imparts a deep, nutty richness that you simply cannot achieve with any other method of cooking.
Recipes for the Cast Iron Skillet
Now that we have covered the science, it is time to put your skillet to work. The following recipes are designed to leverage the unique properties of cast iron, specifically its heat retention and oven-safety. These recipes are staples in my kitchen, and they serve as excellent "training wheels" for those just starting their journey with cast iron.
The Perfect Cast Iron Steak
For a 1.5-inch thick ribeye, start by patting the meat dry with paper towels—moisture is the enemy of a good crust. Season generously with kosher salt at least 30 minutes before cooking. Preheat your skillet until it is smoking slightly. Sear the steak for 3–4 minutes per side, then reduce the heat, add butter and aromatics, and baste for an additional 2 minutes until it reaches an internal temperature of 130°F (54°C) for medium-rare. Let it rest for 10 minutes.
Skillet Cornbread
Cast iron cornbread is a classic for a reason. Preheat your skillet in a 425°F (218°C) oven with a tablespoon of bacon fat or butter. When the pan is screaming hot, pour your batter directly into the skillet. The edges will immediately begin to fry, creating a crunchy, golden exterior that is the hallmark of professional-quality cornbread. Bake for 20-25 minutes until the center is set and the edges have pulled away slightly. The result is a texture that is impossibly moist on the inside and perfectly crisp on the outside.
Crispy-Skin Chicken Thighs
Lay chicken thighs skin-side down in a cold pan, then turn the heat to medium. As the skillet heats up, the fat will render slowly, creating a crisp, golden skin. Cook undisturbed for 12-15 minutes. Once the skin is deep brown and crispy, flip the thighs and finish in the oven at 400°F (200°C) for another 10 minutes. This method ensures perfectly rendered fat and the crispiest skin imaginable.
Troubleshooting Common Issues
Even the most seasoned chefs occasionally encounter issues with cast iron. Whether it is a sudden patch of rust or a sticky surface, don’t panic. These pans are virtually indestructible. If you find food sticking repeatedly, it usually means your heat was too low, your pan wasn't preheated, or your oil layer has been compromised. The fix is almost always the same: clean, dry, oil, and re-season.
Handling Rust
Rust looks like orange or red spots on your pan. If you see this, use a paste made of baking soda and a little water to scrub the affected area. If the rust is deep, use a piece of fine-grit sandpaper or steel wool to remove the corrosion, then wash it and perform a rigorous seasoning cycle. Remember, iron is a reactive metal; as long as you keep it covered in a thin, polymerized oil barrier, rust will never have the opportunity to take hold.
Dealing with Stickiness
If your pan feels tacky or gummy to the touch, you have used too much oil during your last seasoning session. The best way to fix this is to turn your oven up to 450°F (232°C) and let the pan bake for two hours. This will continue the polymerization process and eventually harden the sticky residue into a smooth, solid surface. If it still feels off, give it a good scrub with hot soapy water and start the process over.
Tip 1:* Avoid cooking highly acidic foods like tomato sauce or lemon juice for long periods in a brand-new skillet. These can strip the seasoning. Wait until your skillet has a few months of regular use under its belt.
Tip 2:* If you ever burn food, don't throw it out. Use that as an opportunity to deep-clean and re-season.
Tip 3:* Invest in a sturdy wooden or silicone turner. Metal spatulas are great for scraping, but they can be hard on the seasoning if you are aggressive.
The Versatility of the Heavy Pan
It is important to remember that cast iron is not just for searing steaks. Its thermal mass makes it an incredible tool for baking. Because the pan stays hot for a long period, it provides a consistent, bottom-up heat that produces incredible results for pastries and breads. You can bake a dutch baby pancake, a skillet cookie, or even a frittata with professional-level results. The heat management is consistent throughout the entire cooking process, ensuring your crusts are set and your centers are perfectly cooked.
Oven-to-Stove Transitions
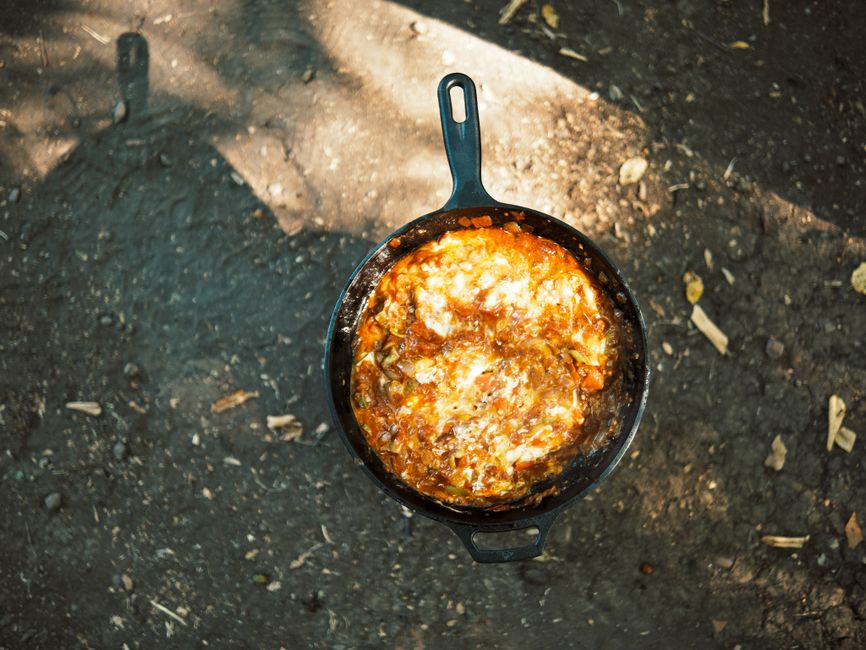
The ability to move a pan from the stovetop directly into a 500°F (260°C) oven is the ultimate culinary hack. For dishes like shepherd’s pie or shakshuka, this means you can sear your aromatics and proteins on the flame to build depth and then move the entire pan to the oven to finish the cooking process. This eliminates the need for extra pots and pans, which is a major win for cleanup and flavor concentration.
Developing Complex Flavors
When you cook in cast iron, you are building a history of flavors. Over time, the microscopic surface of the iron holds onto the essence of the oils and proteins you have cooked before. This is why many people claim that a 50-year-old skillet makes better eggs than a brand-new one. You are effectively seasoning the pan with years of culinary experience. This "flavor memory" is subtle, but it adds a layer of depth that is difficult to replicate with modern materials.
"A cast iron skillet is the only kitchen tool that gains value and performance the more you use it, making it the most sustainable and rewarding piece of equipment you will ever own."
Be bold with your heat. Many home cooks are afraid to turn their burners up, but cast iron thrives on medium-to-high heat. As long as you have good ventilation in your kitchen, don't be afraid to let that pan get hot enough to create that beautiful, dark crust. This is where the magic happens. This is where the "Blame The Chef" attitude comes into play—because when your food tastes this good, they’ll definitely be blaming the chef for making them want seconds.
Advanced Techniques and Beyond
As you progress in your journey with cast iron, you will begin to understand the "soul" of your pan. You will know exactly how much oil is needed to get the perfect sear on a scallop and how to adjust the heat for a delicate scramble. At this stage, you might want to experiment with different types of cast iron, such as enameled versions or vintage pieces. Vintage cast iron, often found at estate sales, is thinner and smoother than modern mass-produced options, and many collectors swear by their superior thermal qualities.
Working with Vintage Iron
If you come across an old piece of iron, look for smooth surfaces and no cracks. A little rust is fine, as it is easily cleaned. Vintage pans are often lighter and better balanced, which makes them easier to handle for tasks like sautéing or tossing ingredients. Restoring an old pan is a rite of passage for any serious home cook, and it creates a connection to the culinary past that is deeply satisfying.
Expanding Your Collection
While one good 10-inch or 12-inch skillet is enough to handle 90% of your cooking needs, consider adding a Dutch oven or a griddle. A Dutch oven, with its heavy lid, is perfect for braising meats or baking sourdough bread, as it mimics the environment of a professional bread oven by trapping steam. A griddle is excellent for pancakes, flatbreads, and large-format breakfasts. Each piece will teach you something new about heat distribution and maintenance.
Building Your Culinary Confidence
The more you use your cast iron, the less you will worry about the rules. You will realize that the "rules" of cast iron care are really just guidelines to help you get the most out of the material. If you scratch the surface, don't worry. If you get a bit of rust, fix it. If you burn your dinner, take it as a learning experience. The pan will always be there, ready to be reset and reused. Your skill as a cook is defined by your ability to adapt, and cast iron is the ultimate training partner for that adaptability.
Conclusion
The journey into cast iron cooking is not just about learning how to use a pan; it is about embracing a more intentional, deliberate approach to the kitchen. It is about understanding the properties of the tools you use and respecting the craft of heat management. When you choose to cook with cast iron, you are rejecting the disposable, low-effort nature of modern appliances in favor of something that is durable, effective, and deeply connected to the history of food preparation. It requires you to be present while you cook, to watch the oil, to listen to the sear, and to care for your equipment as you would a prized instrument.
Remember that there is no shortcut to a perfectly seasoned pan. It takes time, usage, and a little bit of patience. Do not be discouraged if your first few attempts at searing or cleaning don't meet your expectations. Every mistake is a step toward mastery, and every meal you cook is another layer of seasoning on your skillet. As you refine your skills, you will find that your cast iron becomes an extension of your own hand, capable of producing professional-quality results that will impress even the harshest critics at your dinner table.
Take the time to preheat your pan properly, learn to control your heat, and treat your skillet with the care it deserves. If you do this, you will be rewarded with a piece of equipment that will serve you for decades, if not generations. From that first perfectly seared ribeye to the comfort of a Sunday morning cornbread, your cast iron skillet will be the silent partner in all your best culinary memories. Keep the fire hot, keep the oil thin, and most importantly, keep cooking. There is always more to learn and more to taste.
Final Thoughts
We have covered the essentials of seasoning, the rigors of cleaning, the precision of searing, and the joy of experimenting with new recipes. But beyond these techniques lies the true essence of cast iron: the joy of the process. In a world that is increasingly focused on convenience and speed, there is something deeply rewarding about taking the time to care for your tools and using them to create something delicious. It is a slow, steady, and incredibly rewarding practice.
Whether you are a beginner looking to understand the basics or a seasoned home cook hoping to refine your technique, I hope this guide has given you the confidence to turn your stove into a high-performance workspace. When you master your skillet, you master your kitchen. The result will be better food, more consistent results, and the quiet satisfaction of knowing you are using the best tool for the job. So, go ahead, grab that handle, preheat that surface, and prepare to elevate your cooking to the next level. Your skillet is ready when you are.
Every meal is an opportunity to improve. Every time you wipe down your pan, you are engaging in a tradition that spans back hundreds of years. You are part of a community of cooks who appreciate the beauty of functional, durable, and highly effective tools. Don't be afraid to push the limits of what you think your skillet can do. Bake, sear, fry, and roast. Explore the nuances of heat and fat. Above all, enjoy the journey of becoming a more competent, confident, and skilled chef in your own home kitchen. Happy cooking, and keep that cast iron shining bright.

Get the Next Recipe
Weekly recipes, techniques, and gear picks — straight to your inbox.
