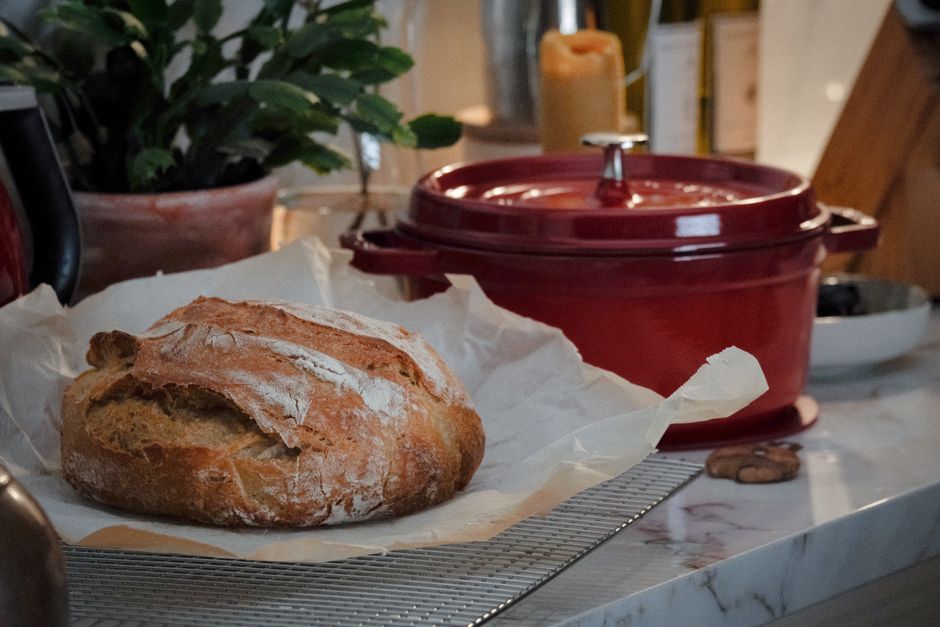
How to Clean a Scorched Enameled Dutch Oven
There is perhaps no greater heartbreak for a home cook than lifting the lid of a prized enameled Dutch oven only to find a dark, crusty ring of burnt-on carbon clinging to the interior. You were likely aiming for a slow-cooked beef bourguignon or perhaps a delicate tomato-based braise, and somewhere between the heat management and the distraction of a busy evening, the bottom scorched. It happens to the best of us, even the professionals who spend their lives surrounded by top-tier equipment. The good news is that your investment is rarely ruined, and with the right set of tools and a bit of patience, you can restore that pristine, glassy finish without compromising the integrity of the enamel coating.
When we talk about enameled cast iron, we are discussing a marriage of two durable materials that require a specific kind of care. The glass-like enamel is essentially a ceramic coating fused to the cast iron base, which provides incredible heat retention while preventing the metallic tang that raw cast iron might impart to acidic foods. However, this surface is susceptible to thermal shock and mechanical damage. When food scorches, it forms a carbonized layer that bonds tightly to the microscopic pores of the enamel. Understanding that we are dealing with a ceramic surface allows us to approach the cleaning process with the necessary caution, avoiding harsh abrasives that would leave behind dull scratches and make the pot more prone to sticking in the future.
Restoration is a skill that elevates your culinary journey, turning you into a steward of your kitchen rather than just a user of tools. By learning how to reclaim a scorched pot, you are ensuring that your Dutch oven remains a centerpiece of your kitchen for decades to come, perhaps even becoming an heirloom piece you pass down. Many home cooks make the mistake of discarding scorched cookware or, worse, scrubbing it with steel wool, effectively stripping the sheen and ruining the non-stick capabilities of the finish. In the following guide, we will break down the chemistry of cleaning, the essential ingredients you need, and the techniques that prioritize the longevity of your cookware. Prepare to breathe new life into your most trusted kitchen companion.
Understanding the Chemistry of the Scorched Pot
The black, hardened crust that forms at the bottom of your Dutch oven is technically referred to as carbonized organic matter. When sugars and proteins in your food are subjected to high heat for an extended period, they undergo the Maillard reaction and eventually cross-reference into carbon deposits. If you have been cooking at temperatures exceeding 350°F to 400°F (175°C to 200°C) with low liquid content, the moisture evaporates, leaving behind a concentrated, glue-like substance. This substance is stubborn, but because the enamel is a non-porous surface, the bond is primarily surface-level rather than deep-seated.
Why Avoid Metal Scrapers?
One of the most common mistakes is reaching for a stainless steel scouring pad or a metal spatula the moment you see a burn. While these tools are fantastic for stainless steel pans, they are disastrous for enamel. The Mohs hardness scale places metal tools higher than the enamel glaze. Using them creates micro-abrasions that you might not see immediately, but they serve as "landing pads" for future burnt bits, making your pot progressively harder to clean every time you use it.
The Role of pH in Cleaning
To break down these stubborn bonds, we need to alter the pH level of the surface. Acidic solutions like vinegar are excellent for loosening mineral deposits (like limescale), but when dealing with polymerized oils and carbonized proteins, we need an alkaline solution. Baking soda (sodium bicarbonate) is our primary tool here. It provides a mild abrasive action that is physically softer than the enamel, while its alkalinity helps to saponify fats and break down the structure of the burnt carbon, essentially lifting it away from the surface of the pot.
"A scorched Dutch oven is not a sign of failure, but a test of your dedication to your craft; handle it with patience, and it will reward you with years of service."
The Gentle Simmer Technique
The most effective way to remove moderate scorching without applying any direct force is the simmer method. This technique uses heat and liquid to create a pressure-like environment that softens the carbonized layer. It is the safest method for your cookware and requires almost no physical exertion on your part. This should be your first line of defense before you attempt anything more rigorous.
The Process
The Science of the Simmer
As the water reaches 212°F (100°C), the heat penetrates the carbon layer, while the baking soda works to neutralize the acids in the charred food. The steam generated helps to lift the debris away from the pores of the enamel. If the scorch marks are particularly heavy, you can add a tablespoon of mild dish soap to the mix, which helps break the surface tension and aids in lifting any lingering grease that might be holding the burnt particles in place. Once the water begins to brown, you know the solution is doing its job.
The Baking Soda Paste Method
If the simmer method does not remove 100% of the scorching, it is time to move to the baking soda paste. This is a more concentrated application of the same chemistry, allowing you to focus on specific hotspots rather than the entire vessel. The goal here is to create a mechanical but safe friction that acts like a micro-exfoliant for your pan.
Preparing the Paste
To create the perfect cleaning paste, mix three parts baking soda to one part water in a small bowl. You are looking for a consistency similar to wet mortar or thick toothpaste. If the paste is too runny, it will not provide enough friction; if it is too dry, it may be too abrasive. Add a few drops of white vinegar to the paste only if you have stubborn, mineral-heavy deposits, though be prepared for the fizzing reaction as the bicarbonate reacts with the acid—it is a harmless chemical display, but it happens quickly.
Application and Technique
Apply the paste liberally over the scorched areas using a silicone spatula or your fingertips. Let the mixture sit for at least an hour. For extreme cases, I often leave it overnight, covering the pot to prevent the paste from drying out completely. The extended exposure time allows the alkalinity of the baking soda to break down the carbon chains in the food debris, effectively turning the burn into a manageable sludge that wipes away easily.
Use a non-scratch nylon scrubbing pad* to work the paste into the scorch marks in a circular motion.
* Avoid circular scrubbing that is too aggressive; focus on the area rather than the surrounding healthy enamel.
* Always rinse with warm water, never cold, to prevent the temperature shock from causing the enamel to crack.
Addressing Stubborn Stains with Hydrogen Peroxide
Sometimes, the scorched area leaves behind a "ghost" stain—a brownish discoloration that isn't physical debris, but rather a permanent discoloration of the enamel. This often happens if the food was high in tannins or pigments. In these cases, we shift our strategy from physical removal to mild chemical bleaching.
The Hydrogen Peroxide and Baking Soda Combination
Hydrogen peroxide is an excellent oxygen-based bleaching agent that is safe for enameled surfaces. When combined with baking soda, it creates an effervescent paste that is significantly more powerful than baking soda and water alone. This method is particularly effective for removing the darkened residue from tomato-based sauces or red wine reductions that have scorched deep into the surface.
Step-by-Step Execution
"The secret to a long-lasting Dutch oven is not in how hard you scrub, but in how intelligently you treat the surface; never force what you can gently dissolve."
Specialized Cleaning Agents and When to Use Them
While household staples are often sufficient, there are times when a specialized cleaner is necessary. Brands like Le Creuset or Staub offer their own proprietary cleaners designed specifically for enameled cast iron. These products contain polishing agents that are calibrated to be harder than carbon deposits but softer than the enamel glaze, effectively buffing away stains without removing the material.
Evaluating Commercial Cleaners
If you opt for a commercial cleaner, always check the ingredients. You want to avoid any product containing ammonia or high concentrations of harsh bleach. Ammonia can etch the surface over time, making it dull and prone to attracting food in the future. A high-quality enamel cleaner will usually have a creamy consistency and include a mild surfactant and fine-grit mineral abrasive.
Best Practices for Maintenance
* Always perform a "spot test" on the exterior bottom of the pot if you are using a new cleaner for the first time.
* Only use these cleaners for deep cleans, not for daily washing.
* After using a chemical cleaner, ensure the pot is washed with hot soapy water and dried completely to remove any chemical residue before your next cooking session.
Preventing Future Scorching: The Art of Heat Management
The best way to clean a scorched Dutch oven is to ensure it never gets scorched in the first place. This sounds like an obvious piece of advice, but in the heat of cooking, many home chefs fail to account for the heat retention properties of cast iron. Cast iron is a conductor that holds onto energy long after the flame is turned down. Once it hits a certain temperature, it wants to stay there, and it will continue to cook whatever is in the pan even when removed from the burner.
Master the Low-and-Slow Approach
Enameled cast iron is designed for slow cooking. You should rarely, if ever, use high heat. Medium-high heat is sufficient for searing meats, but for the majority of braises and stews, low to medium-low is the sweet spot. By keeping your heat source lower, you allow the ambient heat within the heavy iron to do the work, which provides a much more consistent, gentle cook that avoids the aggressive carbonization of sugars.
Proper Oil Usage
Another cause of scorching is the burning of fats. If your oil reaches its smoke point—the temperature at which the oil begins to break down—it will form a sticky, polymerized layer that is incredibly difficult to remove. Know the smoke point of your fats:
Extra Virgin Olive Oil:* ~325°F to 375°F (160°C to 190°C)
Canola or Vegetable Oil:* ~400°F (200°C)
Ghee or Clarified Butter:* ~485°F (250°C)
Always use a fat appropriate for your cooking temperature. If you are doing a high-heat sear, use oil with a higher smoke point. If you find your oil smoking, you have already gone too far, and the burnt flavor will likely have permeated your entire dish. Remove the pot from the heat immediately if you notice the oil darkening or smoking excessively.
Post-Cleaning Care and Storage
Once you have successfully removed the scorched layer, the final step is ensuring the pot is properly prepared for its next use. Your Dutch oven has been through a significant cleaning process, and it needs to be restored to its baseline state. This means ensuring it is absolutely dry and properly stored to protect the rim and the interior.
Drying and Protecting
Never air-dry a cast iron Dutch oven by leaving it in a dish rack. Even though it is enameled, the rim—where the lid meets the pot—often has raw iron that can rust if exposed to moisture. After washing, dry the pot thoroughly with a lint-free towel, then place it on a low burner for one minute to evaporate any remaining moisture from the pores of the iron. If you have any exposed iron at the rim, apply a tiny drop of neutral cooking oil to the edge with a paper towel to create a barrier against ambient humidity.
Storing for Longevity
When stacking your cookware, place a pot protector or even a folded tea towel between your Dutch oven and any other pans. This prevents the bottom of one pan from scratching the interior enamel of the Dutch oven below it. A little care in storage goes a long way in preventing the small scratches that lead to future burnt-on messes. By maintaining a smooth, unmarred surface, you ensure that your cleanup routine stays simple and that your Dutch oven continues to be the workhorse of your kitchen.
Final Thoughts
Restoring a scorched Dutch oven is a rite of passage for every dedicated home cook. It moves you past the point of treating your tools as disposable items and into the realm of being a true custodian of your kitchen equipment. The beauty of enameled cast iron lies in its resilience; it is a material that, with the right touch, can survive decades of culinary experimentation. Whether you are dealing with a minor ring of burnt-on onions or a significant scorched layer from a forgotten long-simmer, the techniques outlined here—the gentle simmer, the baking soda paste, and the careful heat management—will see you through.
As you move forward in your cooking, remember that heat is a variable you control, not a force you should submit to. Listen to your pot, observe the behavior of your ingredients, and don't be afraid to pull back the heat when the situation demands it. When you treat your equipment with respect, it responds by becoming an extension of your own intuition. You are no longer just making a stew; you are managing the interaction between heat, fat, and iron, and in that process, you are becoming a better, more thoughtful chef.
May your kitchen always be filled with the rich aromas of successful, well-executed meals, and may your Dutch oven remain a pristine, functional, and well-loved centerpiece of your home. Keep your techniques sharp, your heat low, and your patience high. The next time you see a scorch, don't blame the chef—simply reach for your baking soda, settle in for a gentle cleaning, and get ready for the next delicious meal. Your journey toward culinary excellence is a process of learning, failing, and restoring, and every clean pot is a testament to that ongoing evolution. Happy cooking.


Get the Next Recipe
Weekly recipes, techniques, and gear picks — straight to your inbox.
