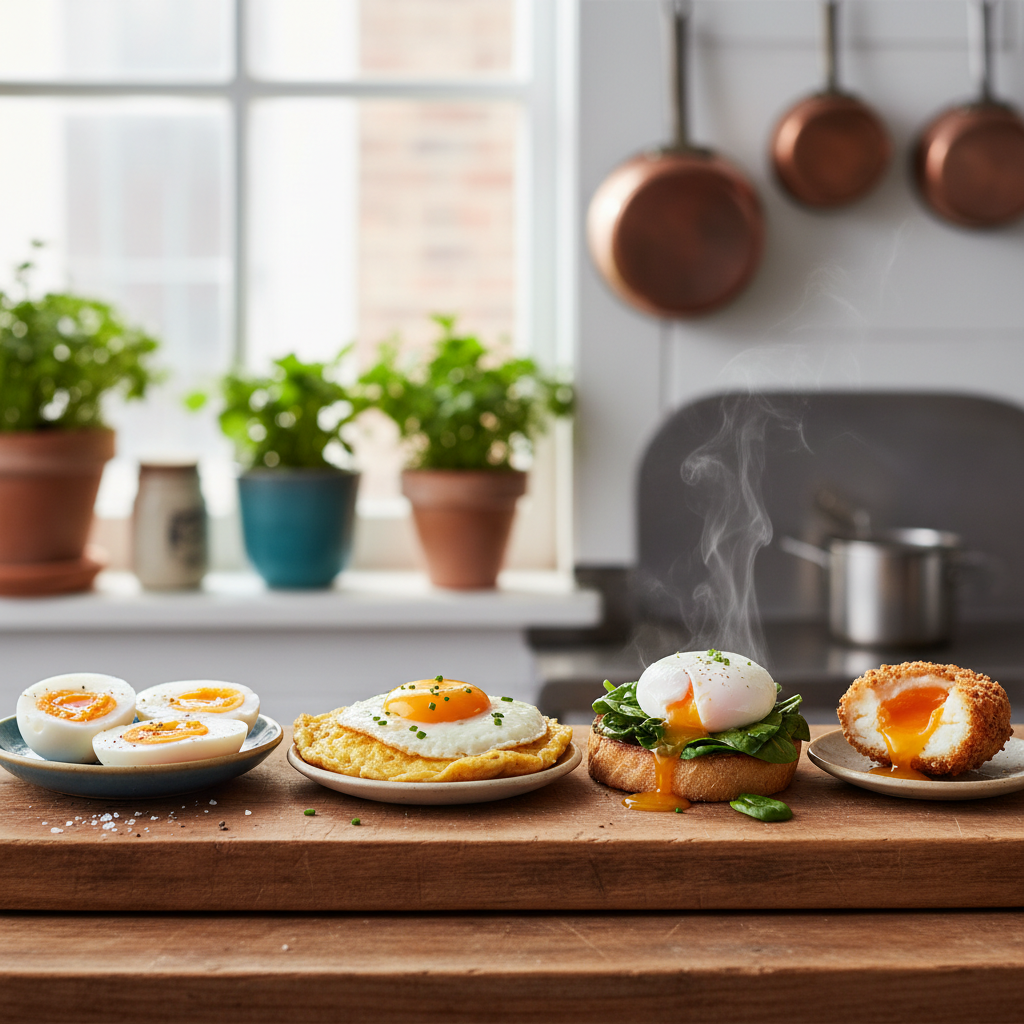
Mastering the art of cooking eggs opens a world of culinary possibilities, from simple breakfasts to sophisticated entrées. Each method—whether soft boiling, poaching, or frying—brings out different textures and flavors, elevating the humble egg into something truly remarkable. Understanding the science behind these techniques transforms the cooking process from a mundane task into an exciting culinary adventure. This journey will not only enhance your kitchen skills but will also give you the confidence to experiment and personalize your egg dishes.
Cooking eggs perfectly is both an art and a science. The delicate proteins in eggs require careful handling to achieve the desired consistency without overcooking or undercooking. Factors such as temperature, time, and technique interact to create various textures—from runny yolks to creamy whites. With the right knowledge and skills, you can adapt these techniques to suit your taste and preference, whether that’s a perfectly runny yolk spilling over a slice of sourdough toast or a firm yet tender poached egg atop a vibrant salad.
In this blog post, we will explore multiple egg cooking techniques, from soft-boiled to poached, providing you with details that make these techniques easy to master. We will guide you with step-by-step instructions, tips from professional chefs, and troubleshooting advice to ensure every egg you cook is perfectly executed. Let’s crack into the world of eggs and learn how to cook them to perfection.
Understanding the Egg: Types and Quality
Before diving into specific cooking techniques, it's crucial to understand the different types of eggs and what makes a great quality egg. When you’re at the grocery store or farmer's market, you'll often come across chicken eggs, duck eggs, quail eggs, and even specialty eggs like organic or free-range. Here’s what you need to know:
Types of Eggs
1.Chicken Eggs: The most common egg type, available in various sizes, typically sold as large, medium, and small. The standard size for most recipes is large.
2.Duck Eggs: Richer and larger than chicken eggs, duck eggs have a higher fat content, making them excellent for baking or custard recipes.
3.Quail Eggs: Small and delicate with a slightly gamey flavor, quail eggs are popular in gourmet dishes. They are often served unpeeled in salads or as an hors d'oeuvre.
4.Other Poultry Eggs: Eggs from geese, turkeys, and other birds are also available but are less common. They tend to have unique flavors and can be used similarly to chicken eggs.
Factors Affecting Egg Quality
●Freshness: The freshness of eggs is paramount. A fresh egg will have a firm white and a round yolk, while older eggs have flatter whites and yolks that spread out. Always check for the sell-by date and consider purchasing from reputable sources.
●Storage: Eggs should be stored in the refrigerator to maintain their freshness. Ideally, they should be kept in their original carton to prevent them from absorbing odors.
●Color and Shell Quality: Color (white or brown) has no effect on taste or nutrition. However, a clean, uncracked shell is important for safety, as cracks can allow bacteria to enter.
Understanding your ingredients will prepare you for the cooking techniques that follow, allowing you to choose the best eggs for each method.
Soft Boiling Eggs: The Art of Timing
Soft-boiling eggs strikes a perfect balance between a well-cooked white and a gooey yolk. This technique is ideal for breakfast or as an elegant addition to salads and ramen. The key to success here lies in precise timing and temperature.
Equipment Needed
●A saucepan
●A slotted spoon
●A bowl of ice water
●A timer
Steps for Perfectly Soft-Boiled Eggs
1.Prepare the Eggs: Take your eggs out of the refrigerator and allow them to come to room temperature for about 30 minutes. This helps to prevent cracking when they hit hot water.
2.Boil Water: Fill a saucepan with enough water to cover the eggs by at least an inch. Bring the water to a rolling boil over medium-high heat.
3.Lower the Eggs: Using a slotted spoon, gently lower the eggs into the boiling water. Be careful to avoid splashing.
4.Timing: Set a timer for 6 to 7 minutes depending on your preference. For a very runny yolk, aim for 6 minutes; for a slightly firmer yolk, go for 7 minutes.
5.Ice Bath: While the eggs are cooking, prepare an ice bath with cold water and ice in a large bowl.
6.Stop Cooking: Once the timer goes off, promptly transfer the eggs to the ice bath. This stops the cooking process and helps to achieve the desired softness.
Serving Suggestions
Soft-boiled eggs can be enjoyed simply with a sprinkle of salt and pepper, or used in dishes like:
●Ramen: Halve the eggs and place them atop a steaming bowl of ramen for a rich flavor boost.
●Salads: Slice and add them to green salads or grain bowls for added protein and creaminess.
"The secret to a perfect soft boil is timing and ice water – don’t skip the chill!"
Poached Eggs: Pearls of Perfection
Poached eggs are often seen as a sign of cooking finesse, perfect for elegant brunch dishes. Achieving the ideal poached egg requires careful attention to water temperature and vinegar addition to create those beautifully shaped pearls.
The Science Behind Poaching
Poaching eggs involves cooking them in simmering water, encouraging the egg white to envelop the yolk without any outer shell. Adding a splash of vinegar helps the whites coagulate more quickly, forming a neater shape.
Steps for Perfect Poached Eggs
1.Prepare the Water: Fill a deep saucepan with water, approximately 3 inches deep. Bring the water to a gentle simmer over medium heat. You should see small bubbles forming on the bottom.
2.Add Vinegar: Add about 1 tablespoon of white vinegar to the water. This step is crucial for a tidy poached egg.
3.Crack the Egg: Crack a fresh egg into a small bowl, ensuring not to break the yolk. This makes transferring the egg into water easier.
4.Create a Whirlpool: Use a spoon to stir the water, creating a gentle whirlpool in the center. This movement helps the egg white wrap around the yolk.
5.Slide the Egg In: Gently slide the egg from the bowl into the center of the whirlpool. This technique helps maintain a round shape.
6.Cook Time: Allow the egg to poach for 3 to 4 minutes for a runny yolk. If you prefer a firmer yolk, extend the cooking time to 5 minutes.
7.Remove and Drain: Use a slotted spoon to gently lift the egg out of the water. Let it drain on a paper towel to eliminate excess water.
Serving Suggestions
Poached eggs are versatile and can elevate many dishes:
●Eggs Benedict: Serve on toasted English muffins with ham or smoked salmon, topped with hollandaise sauce.
●Avocado Toast: Place a poached egg atop mashed avocado on whole grain bread, sprinkled with red pepper flakes and lemon juice.
Tips for Success
●Use Fresh Eggs: The fresher the egg, the better it holds its shape when poached.
●Monitor Water Temperature: It’s important to keep the water just below boiling—look for tiny bubbles, not a rolling boil!
Scrambled Eggs: Fluffy or Creamy?
Scrambled eggs are a breakfast classic that showcases the egg's versatility. They can be prepared in numerous styles—fluffy, creamy, or even loaded with ingredients like cheese and fresh herbs.
The Importance of Technique
The technique used can significantly affect the outcome. Cooking over a low flame yields creamier scrambled eggs, while higher heat can create a fluffier texture.
Steps for Perfect Scrambled Eggs
1.Choose the Right Eggs: Fresh large eggs work best.
2.Whisking: In a bowl, whisk together 2 to 3 eggs with a splash of milk or cream, and a pinch of salt and pepper, until completely combined.
3.Preheat the Pan: Heat a non-stick skillet over medium-low heat. Add a pat of butter and let it melt until it bubbles but doesn’t brown.
4.Add Eggs: Pour your egg mixture into the skillet. Stir gently with a spatula, pushing the eggs from the edges toward the center.
5.Cooking Time: Keep stirring continuously for 3 to 5 minutes until the eggs start to set but are still soft and slightly runny. Remove them from heat slightly before they reach your desired doneness; they will continue to cook off the heat.
6.Finishing Touches: Add cheese, herbs, or vegetables according to your preference just before they finish cooking, allowing them to meld in slightly.
Tips for Perfect Scrambles
●Low and Slow: Cooking on low heat is essential for achieving creamy texture.
●Don’t Overcook: Eggs should be soft and slightly wet when you take them off the heat.
●Experiment with Add-Ins: Ingredients like feta cheese, spinach, or smoked salmon can add delightful flavors.
"For creamier scrambled eggs, low heat and good stirring technique are key—don't rush the process!"
Fried Eggs: Crisp and Sunny-Side-Up
Fried eggs are one of the simplest yet most satisfying forms of cooking eggs. Whether you like them sunny-side-up, over-easy, or crispy, understanding the nuances will help you master the technique.
Different Styles of Fried Eggs
1.Sunny-Side-Up: Cooked on one side until the whites are set while the yolk remains liquid.
2.Over-Easy: Cooked on both sides briefly; the yolk remains slightly runny.
3.Over-Hard: Cooked until the yolk is fully cooked through and firm.
Steps to Perfect Fried Eggs
1.Preheat the Pan: Heat a non-stick skillet over medium heat. Add butter or a small amount of oil to coat the bottom.
2.Crack the Egg: Crack an egg into a bowl first to avoid shell fragments, then gently slide it into the pan, keeping the heat steady.
3.Cooking Time:
- For sunny-side-up, cook for about 2 to 3 minutes. You want the whites to be set but the yolk runny.
- For over-easy, cook for an additional 30 seconds after flipping.
- For over-hard, cook until the yolk is fully firm, about 3 to 4 minutes total after the initial crack.
4.Seasoning: Add salt and pepper while cooking to season the eggs thoroughly.
5.Removing from the Pan: Use a spatula to gently lift the eggs from the skillet. Serve immediately while they're warm.
Serving Suggestions
Fried eggs can be the star of the show or a delightful accompaniment:
●Breakfast Burritos: Layer with beans, cheese, salsa, and avocado.
●English Breakfast: Serve alongside sausages, baked beans, and toast.
The Ultimate Frittata: Baked Egg Perfection
Frittatas are wonderful for breakfast, brunch, or dinner—versatile and adaptable to whatever ingredients you have on hand. They’re essentially a baked omelet and can be filled with meats, vegetables, and cheese.
Creating the Perfect Frittata
A frittata differs from a traditional omelet in that it is cooked slowly in a skillet and finished in the oven, allowing it to develop a fluffy texture without flipping.
Steps for a Perfect Frittata
1.Preheat the Oven: Preheat your oven to 375°F (190°C).
2.Whisk the Eggs: In a bowl, whisk together 6 to 8 eggs, a splash of milk or cream, and season with salt and pepper.
3.Prepare Stir-Ins: Cook your choice of vegetables (like bell peppers, spinach, or onions) and meats (like bacon or sausage) in an oven-safe skillet with a bit of oil until softened.
4.Combine Eggs and Fillings: Pour the egg mixture over the cooked ingredients in the skillet. Stir gently to combine, but don’t overmix.
5.Cook on Stovetop: Let the frittata cook on the stovetop over low heat for about 5 minutes, or until the edges start to set.
6.Bake: Transfer the skillet to the oven and bake for 15 to 20 minutes until the frittata is puffed and golden brown. A toothpick inserted into the center should come out clean.
Serving Suggestions
Frittatas are incredibly versatile and can be served warm or at room temperature, ideal for buffets or potlucks. Consider serving with:
●Fresh herbs: Sprinkle fresh herbs on top for flavor.
●Sides: Accompany with a refreshing salad or crusty bread.
Troubleshooting Common Egg-Cooking Problems
With all things culinary, there’s a chance that your eggs may not turn out as expected. Here are some common issues and how to solve them:
Soft-Boiled Egg Problems
●Cracked Shells: This often occurs due to the temperature shock. Bring eggs to room temperature before cooking to prevent this.
●Overcooked Eggs: Keep a close eye on timing; using an ice bath can help stop cooking promptly.
Poached Egg Problems
●Eggs Spreading in Water: Ensure that the water is at a gentle simmer before adding your egg, and don't skip the vinegar.
●Undercooked Whites: If your eggs aren’t setting nicely, increase the simmering time slightly.
Scrambled Egg Problems
●Rubbery Texture: This is commonly a result of cooking at too high a heat. Remember—low and slow is your mantra for scrambled eggs.
●Watery Eggs: This can happen if you add too much liquid. Keep it minimal.
Conclusion
Egg cooking mastery is not just about following recipes; it involves understanding techniques, temperature control, and the science behind how eggs behave under various conditions. As you become familiar with methods like soft-boiling, poaching, and frying, you will find new levels of satisfaction in each successful dish you create.
Utilizing fresh, high-quality eggs will only enhance your culinary exploits. As you experiment with different cooking styles and combinations, remember that practice makes perfect. Each mistake is merely a stepping stone towards expertise. With time and persistence, you will elevate your egg-cooking skills to new heights, impressing family and friends alike.
Embark on these techniques in your kitchen; experiment, enjoy, and most importantly, don’t forget to blame the chef—for bringing an indispensable ingredient into your culinary repertoire!