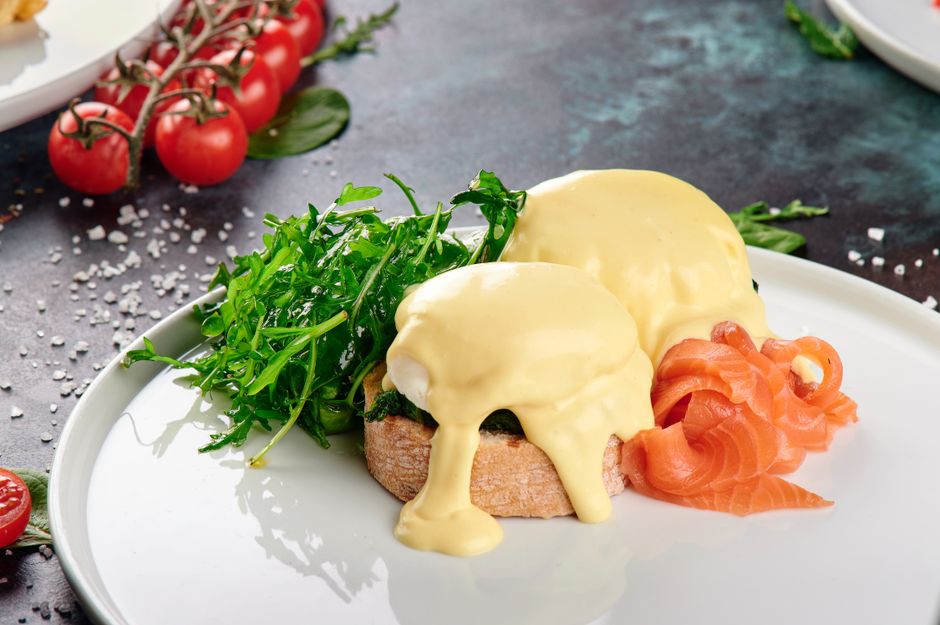
Eggs Benedict and the Art of Hollandaise
Eggs Benedict is a classic brunch dish that seems to have an indelible place in the hearts of breakfast lovers across the world. When you order it at a café, the tangy richness of Hollandaise sauce over perfectly poached eggs and a toasted English muffin evokes a sense of indulgence and warmth. This dish not only highlights the beauty of simplicity in cooking but also celebrates the art of mastering a few key techniques. As we dig deeper into the nuances of making Eggs Benedict, we will focus particularly on the creation of Hollandaise sauce, which is often cited as the most challenging aspect of this dish, but fear not! With a little patience and practice, you can easily become a pro.
Before we start peeling back the layers of this culinary joy, it’s essential to understand the components of Eggs Benedict. At its core, the dish consists of a toasted English muffin split in half, lightly buttered and crisped; topped with Canadian bacon or a similar protein, beautifully poached eggs, and finally enveloped with the luxurious Hollandaise sauce. Each layer plays a vital role in contributing to the overall taste and mouthfeel of the dish. When prepared correctly, the juxtaposition of textures and flavors creates a harmonious experience that is quite satisfying. Whether you’re preparing this exquisite plate for yourself or entertaining guests, mastering the individual elements will enhance your culinary repertoire.
As we delve further, we will explore not only the traditional methods of creating Hollandaise but also variations and tips for achieving the perfect poached eggs, and suggestions for making your own English muffins. So grab your apron, clear your countertop, and let’s embark on the culinary adventure that is Eggs Benedict.
The History of Eggs Benedict
Origins and Evolution
The exact origins of Eggs Benedict are somewhat murky, akin to many classic dishes. Some food historians trace its roots back to the United States in the late 19th century. One popular theory claims that it was created in 1860 by a Wall Street broker named Lemuel Benedict. According to this tale, he ordered a dish of buttered toast, poached eggs, crisp bacon, and hollandaise sauce as a cure for his hangover at the Waldorf Hotel in New York. The dish caught the attention of the hotel's maître d', who added it to the breakfast menu, thus giving birth to what we know as Eggs Benedict.
Another story points towards a variation of the dish originating from London, linked to the culinary traditions of the British. Various adaptations sprang forth, with the notion of combining poached eggs with a rich sauce becoming popular across both sides of the Atlantic. Over time, this quintessential brunch dish transformed, with restaurants adding twists featuring different proteins or sauces like sriracha aioli or even avocado for a modern flair.
For the home cook, understanding the history allows for greater appreciation of the dish's significance and will inspire creativity in the kitchen. By mastering Eggs Benedict, you are not just recreating a meal but also partaking in a culinary tradition that has evolved through generations.
Key Ingredients and Their Importance
To create a successful Eggs Benedict, sourcing quality ingredients is imperative. You may think that the dish is simple, but the flavors and textures hinge on the ingredients you choose. Here’s a detailed breakdown of the key components:
Choosing quality ingredients will be your foundation for achieving a spectacular Eggs Benedict experience.
Mastering Hollandaise Sauce
Understanding Hollandaise
Hollandaise is a classic French sauce in the family of emulsified sauces, made primarily from egg yolks, butter, and an acid, typically lemon juice. Its luxurious silky texture and rich flavor enhance many dishes beyond Eggs Benedict, making it a valuable sauce to master in your kitchen repertoire. Though often elusive for home cooks, attaining your Hollandaise confidence is well within reach. The key to this sauce lies in careful temperature control, steady whisking, and timing, which we will detail in the upcoming sections.
Traditional Preparation Method
When preparing traditional Hollandaise, the aim is to create an emulsion – a mixture of fat (butter) and liquid (lemon juice). Here’s a step-by-step guide to crafting your Hollandaise sauce:
- Start by melting your butter gently over low heat. Once melted, allow it to sit for a few minutes until the milk solids settle at the bottom. Carefully pour the clear liquid into a measuring cup, leaving the solids behind.
- Chef Tip: Use a small, glass measuring jug to help you pour without disturbing the solids.
- In a stainless steel or heatproof bowl, whisk together 3 large egg yolks and 1 tablespoon of water (or you can use more lemon juice for extra flavor) and a pinch of salt.
- Place the bowl over a pot of simmering water (double boiler). The bottom should not touch the water to ensure a gentle heat.
- Whisk the egg yolk mixture continuously until it thickens and becomes a pale, frothy color – usually around 3-5 minutes.
- Gradually add the clarified butter in a slow, steady stream while continuing to whisk vigorously. This helps stabilize the emulsion.
- Once all the butter has been added and the sauce is thickened, whisk in the juice of half a lemon (about 1 tablespoon) and taste. Adjust seasoning with salt and more lemon if desired.
- Keep the sauce warm by placing it off heat near the pot of water or in a warming bowl.
- Use immediately, or if you need to hold it for a while, be mindful that Hollandaise can separate if it gets too cool or too hot.
Common Mistakes to Avoid
Despite its bad reputation as tricky, Hollandaise can be mastered with a few precautions. Here are some common pitfalls to avoid:
"Remember, patience is key. A rushed Hollandaise is a broken Hollandaise."
Alternative Methods
If the traditional method feels daunting, look to these alternative approaches:
These alternatives can offer a faster route while still yielding delicious results, especially when time is of the essence.
The Perfect Poached Egg
Techniques for Poaching Eggs
Achieving the perfect poached egg can be the difference between an outstanding Eggs Benedict and a mediocre one. The texture of the egg should be delicate, with soft whites encasing a runny yolk. Here are the techniques you can use:
- Use fresh eggs, ideally within a week of purchase, as fresh eggs hold their shape better when poached.
- Fill a deep saucepan or skillet with about 3 inches of water. Bring it to a boil and reduce to a gentle simmer, creating small bubbles at the bottom of the pan.
- Add a splash (about 1 tablespoon) of white vinegar to the water. This helps the egg whites coagulate more quickly, resulting in a neater poached egg.
- Crack each egg into a small bowl – this allows you to gently lower the egg into the water without breaking the yolk.
- Using a spoon, stir the water to create a gentle whirlpool. Then gently slide the egg into the center. The whirlpool helps the whites wrap around the yolk.
- Let the egg poach for about 3-4 minutes for a runny yolk. If you prefer a firmer yolk, allow it to cook for about 4-5 minutes.
- Use a slotted spoon to lift the egg from the water. Allow excess water to drain off before placing it on a paper towel briefly to absorb moisture.
Alternate Poaching Techniques
If water poaching feels challenging, consider these variations:
Using these methods allows room for experimentation and brings consistent results to your Eggs Benedict.
Tips for Success
"A perfectly poached egg should slide out like a dream—silky and smooth, with a golden yolk ready to burst!"
Homemade English Muffins
Why Make Your Own
While store-bought English muffins can work in a pinch, homemade muffins provide an unmatched flavor and texture. You’ll taste the difference in quality, and it’s easier than you think! Homemade muffins possess that delightful nooks and crannies characteristic that holds the Hollandaise sauce, making each bite sublime.
Ingredients and Tools
- 1 cup warm milk (110°F)
- 2 teaspoons sugar
- 1 packet active dry yeast (2 ¼ teaspoons)
- 3 cups all-purpose flour
- 2 tablespoons melted butter
- 1 teaspoon salt
- Cornmeal for dusting
- Mixing bowl
- Wooden spoon or dough scraper
- Rolling pin
- Biscuit cutter or a glass
Step-by-Step Instructions
- In a mixing bowl, combine warm milk and sugar. Sprinkle the yeast and let it sit for about 5 minutes until foamy.
- Stir in melted butter, then add the flour and salt. Mix until a dough forms.
- On a floured surface, knead the dough for about 5-7 minutes until it becomes smooth and elastic.
- Place the dough in a greased bowl, cover it with a damp cloth, and let it rise in a warm place until doubled in size, about 1-2 hours.
- Once risen, roll out the dough to about ½ inch thick. Use a biscuit cutter to cut out rounds and place them on a baking sheet dusted with cornmeal.
- Cover the muffins and let them rise again for about 30 minutes while you preheat a griddle or skillet to medium-low.
- Cook muffins on the griddle for about 5-7 minutes on each side until golden brown, making sure to control the heat to avoid burning.
- Let them cool on a wire rack before slicing.
Storing Homemade English Muffins
Homemade muffins can be stored in an airtight container for up to a week or frozen for longer storage. Ensure they are cooled completely before sealing. When ready to enjoy, simply toast them for a fresh experience.
Making your own English muffins not only enhances your Eggs Benedict but also connects you with the dough-to-table experience.
Assembling the Perfect Eggs Benedict
Arrangement of Ingredients
Now that we have tackled each individual component of our Eggs Benedict, it’s time to put them together. Follow these steps to ensure a stunning presentation that your guests will rave about:
- Slice your English muffins in half and toast them until golden brown. A light brushing of melted butter at this stage enhances both flavor and texture.
- Place a slice of Canadian bacon or your choice of protein on each muffin half. Lightly warm or sear them to develop flavor.
- While preparing the eggs, you can also keep your Hollandaise sauce warm. The timing here is crucial; you want to serve everything hot.
- Gently lift the poached egg onto the protein and muffin. Drizzle or spoon the Hollandaise sauce generously over the top, allowing it to cascade down the sides.
- For an elegant touch, finish with a sprinkle of paprika, or chopped chives or parsley, which adds color and a burst of fresh flavor.
Serving Options
Eggs Benedict can stand alone as a brunch favorite, but you can elevate the experience by serving side dishes such as:
Consider offering a champagne cocktail or freshly brewed coffee to complete the experience.
"Presentation is key – a beautifully composed plate will elevate the experience even before the first bite."
Troubleshooting Common Issues
Hollandaise Sauce Troubles
It’s common for even the most seasoned cooks to face challenges while making Hollandaise. Here are some troubleshooting tips:
Poaching Eggs Problems
Sometimes poached eggs can be less than perfect. Here’s how to salvage them:
With these troubleshooting tips, your journey to mastering Eggs Benedict will be much smoother.
Conclusion
Eggs Benedict and Hollandaise sauce are not just a meal; they are an experience, one that brings comfort and joy to many. By embracing the techniques and tips laid out in this guide, you will learn not only how to make this classic dish but also become empowered in your cooking skills overall. Revisit the history, explore the ingredients, practice the techniques, and customize the dish to suit your style. Whether it’s a late weekend brunch or a special event, your mastery of making Eggs Benedict will surely impress family and friends alike.
In your kitchen, remember that cooking is as much about the journey as it is about the destination. Allow yourself grace while you experiment and have fun. Don’t forget to share your creations and inspire others to try their hand at this delightful dish. Happy cooking!


Get the Next Recipe
Weekly recipes, techniques, and gear picks — straight to your inbox.
