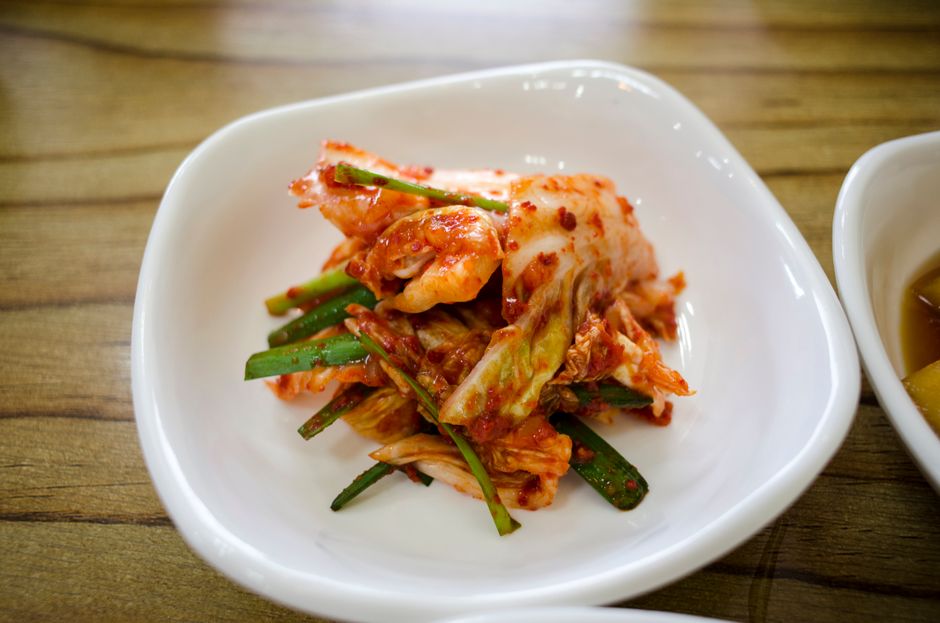
Fermentation is a culinary technique that has been practiced for thousands of years, yet it remains intriguing and somewhat intimidating to many home cooks. The process involves converting sugars into acids, gases, or alcohol using microorganisms like bacteria and yeast. From the tangy richness of sourdough bread to the vibrant crunch of kimchi, and the effervescent nature of kombucha, fermentation transforms everyday ingredients into something sophisticated and complex. Understanding fermentation not only allows a home cook to explore new flavors, but it also fosters a deeper appreciation for the science and art behind food.
At its core, fermentation is a natural process that has been harnessed by humanity to preserve food and enhance its nutritional value. The principles of fermentation revolve around creating an environment where beneficial microorganisms can thrive, often at specific temperatures and timeframes. Each fermented product has its own unique IS, influenced by a variety of factors, including the ingredients used, environmental conditions, and the specific strains of microorganisms involved. By mastering the fundamentals, cooks can experiment confidently, tailoring their creations to fit their preferences.
Throughout this guide, we will delve into various forms of fermentation, starting with one of the most beloved: sourdough. We will explore the basic principles behind this slow-rising bread, as well as how to care for your sourdough starter. From there, we will journey into the world of fermented vegetables, specifically kimchi and sauerkraut, techniques that can brighten up any meal with their tartness and crunch. We’ll wrap it up with discussions on kombucha, a fizzy, probiotic-rich tea that has taken health trends by storm. With insights, tips, and step-by-step instructions, you will be well equipped to embrace the fermentation craze in your kitchen.
The Basics of Fermentation
Fermentation fundamentally involves the breakdown of carbohydrates by microorganisms. The two most common types of fermentation are lactic acid fermentation and alcoholic fermentation. Lactic acid fermentation is utilized by bacteria to produce lactic acid as a byproduct, whereas alcoholic fermentation, primarily associated with yeast, produces alcohol and carbon dioxide. The complexity and nuances of these processes are worthy of exploring, especially as they apply to various culinary endeavors.
The Science Behind Fermentation
To understand fermentation, one must first grasp the role of microorganisms. Bacteria, yeast, and even molds play vital roles in the fermentation process. The environment in which these organisms thrive is crucial. Key factors that affect fermentation include:
●Temperature: Most fermentations occur between 60°F (15°C) and 75°F (24°C). Each strain of microorganism has an optimal temperature range where it ferments most effectively.
●pH levels: Lactic acid bacteria thrive in lower pH environments. For example, the addition of salt to vegetables lowers pH, creating a favorable environment for fermentation while inhibiting spoilage and harmful bacteria.
●Time: Fermentation is inherently a time-consuming process. As fermentation continues, flavors develop and complexity increases. This can range from hours, as in quick ferments, to weeks or months for carefully crafted beverages or cured products.
“Fermentation is not just a technique; it’s an ancient tradition that brings life and flavor to our food.”
Equipment and Ingredients
While most home cooks might think they need specialized equipment for fermentation, many common kitchen items can suffice. Here are essential tools and ingredients for getting started:
●Containers: Glass jars, ceramic crocks, or food-grade plastic containers. Avoid using metal, which can interact harmfully with acidic foods.
●Weights: For keeping vegetables submerged under brine. You can use clean stones or specially designed fermentation weights.
●Thermometers: Accuracy is vital to maintain optimal fermentation temperatures.
●Starter culture: Whether it's a sourdough starter, whey from yogurt, or a kombucha SCOBY (Symbiotic Culture of Bacteria and Yeast), these help kick off the fermentation process.
●Spices and Flavorings: Use herbs, spices, or other flavorings like garlic, ginger, or coriander to add dimension to your ferments.
Monitoring Fermentation
As a home cook, one of your key tasks during the fermentation process is monitoring. Different signs indicate that fermentation is progressing properly:
●Bubbles: Active fermentation will produce carbon dioxide, resulting in visible bubbles.
●Odor: With time, a pleasant tangy aroma will develop. A sour smell may signal over-fermentation.
●Texture Changes: In vegetable ferments, look for a satisfying crunch; over-fermentation can lead to mushiness.
Understanding these signs can help guide when to stop fermentation and either transfer the product to the refrigerator or proceed with further processing.
Sourdough Bread: The Art of Wild Yeast
Sourdough bread has found its place not just as a classic staple but also as a culinary trend with its wonderful sour flavor and chewy texture. It's a perfect example of fermentation, using wild yeast and lactic acid bacteria from a sourdough starter, a culture of flour and water. This section will walk you through the steps to create and maintain your starter, as well as the bread-making process itself.
Creating Your Sourdough Starter
Creating a sourdough starter is straightforward but requires patience. Here’s how to do it:
1.Combine 100 grams of all-purpose or whole wheat flour with 100 grams of water (filtered or distilled).
2.Mix until there are no dry lumps. Loosely cover the jar with a cloth or a lid to allow airflow.
3.Let it sit at room temperature (about 70°F to 75°F) for 24 hours.
4.Feed your starter: After 24 hours, discard half the mixture and add another 100 grams of flour and 100 grams of water each day. Continue this process for about 5-7 days. You’ll know it’s ready when it’s bubbly, has doubled in size within 4 to 6 hours of feeding, and has a pleasant sour smell.
“The beauty of sourdough lies in its wild nature. Each starter has its unique flavor profile, a delightful reflection of its origin and environment.”
Making Sourdough Bread
Once you've established a healthy sourdough starter, it's time to bake. Here’s a basic recipe:
#### Ingredients
●500g bread flour (or a mix of flours)
●350g water (room temperature)
●100g active sourdough starter
●10g salt
#### Steps
1.Autolyse: In a large bowl, combine the bread flour and water, and let it sit for 30 minutes. This allows the flour to absorb water and gluten to develop.
2.Mix in Starter and Salt: Add your active sourdough starter and salt. Mix until everything is well incorporated. The dough will be sticky.
3.Bulk Fermentation: Cover the bowl and let it rise at room temperature for about 4 hours, performing stretch and folds every 30 minutes during the first 2 hours. To stretch, dampen your hand, take one edge of the dough, stretch it up, and fold it over the center. Rotate the bowl and repeat this process 4 times.
4.Shaping: Once the dough has doubled and is airy, turn it out onto a lightly floured surface. Shape it into a round or oval loaf.
5.Proofing: Place the shaped dough into a floured banneton (a proofing basket) seam-side up, and cover it with a cloth. Let it rise for 1-2 hours at room temperature or overnight in the refrigerator for more complex flavors.
6.Preheat Oven: About 30 minutes before baking, preheat your oven to 450°F (232°C) with a Dutch oven inside.
7.Baking: Carefully transfer the dough into the preheated pot (you can slash the top for aesthetics and to control where it expands during baking). Cover and bake for 30 minutes, then uncover and bake for another 15-20 minutes until the crust is a deep golden brown.
8.Cooling: Let the bread cool on a wire rack for at least one hour before slicing.
Troubleshooting Sourdough
Even experienced bakers encounter issues. Here are some common problems and solutions:
●Dense Bread: Might indicate insufficient gluten development or an inactive starter. Ensure your starter is bubbly and strong before use.
●Sour Flavor Too Strong: If your bread tastes overly sour, consider reducing fermentation time or using a cooler environment during proofing.
●Crust Too Hard: If your crust is excessively tough, try reducing the baking time or lowering the oven temperature slightly.
Fermented Vegetables: Kimchi and Sauerkraut
Kimchi and sauerkraut exemplify how fermentation can transform vegetables into something extraordinary. These traditional side dishes not only add a punch of flavor but also benefit your health with probiotics and vitamins. In this section, we will explore the techniques to create both kimchi and sauerkraut, giving you the foundation to experiment with other vegetables too.
Kimchi: The Fiery Ferment
Originating from Korea, kimchi varies widely based on the region and seasonal ingredients. Classic recipes use napa cabbage, but numerous vegetables can be utilized.
#### Essential Ingredients
●1 medium napa cabbage
●1/2 cup coarse sea salt
●4 cups water
●1 medium carrot, julienned
●5-6 radishes, sliced
●4-5 green onions, chopped
●1 tablespoon grated ginger
●4-5 cloves garlic, minced
●2-4 tablespoons Korean red pepper flakes (gochugaru)
●2 teaspoons sugar
●2 tablespoons fish sauce or vegan alternative
#### Steps to Ferment Kimchi
1.Brining the Cabbage: Cut the napa cabbage into quarters and remove the core. Dissolve the sea salt in water to create a brine, then soak the cabbage in it for 2 hours.
2.Rinsing and Draining: After two hours, thoroughly rinse the cabbage under cold water to remove excess salt and drain.
3.Creating the Paste: In a mixing bowl, combine garlic, ginger, gochugaru, fish sauce, and sugar to create a spicy paste.
4.Mixing: Add the rinsed cabbage, carrots, radishes, and green onions to the paste. Use your hands (gloves recommended) to thoroughly coat everything, ensuring the paste gets into every crevice.
5.Fermentation: Pack the kimchi into a clean glass jar, pressing down to eliminate air pockets. Leave about an inch of headspace and seal the lid. Place the jar at room temperature for about 1-5 days depending on the ambient temperature until it develops a sour flavor.
6.Storage: Once fermented to your liking, transfer the kimchi to the refrigerator where it can last for several weeks.
Sauerkraut: The Classic Ferment
Sauerkraut, a staple in Central and Eastern European cuisines, is primarily made from cabbage, showcasing a simpler approach to fermentation compared to kimchi.
#### Essential Ingredients
●1 medium green cabbage (about 2 pounds)
●1 tablespoon coarse sea salt (about 2% salt by weight of cabbage)
#### Steps to Ferment Sauerkraut
1.Shredding the Cabbage: Remove the outer leaves and core the cabbage. Shred it finely or coarsely, your preference.
2.Salting: In a large bowl, sprinkle the salt over the cabbage. Massage the cabbage with your hands for about 10 minutes until you notice the cabbage releasing its juices.
3.Packing: Transfer the cabbage to a clean fermentation crock or jar, packing it down tightly to submerge it under its brine. If needed, add some water to ensure the cabbage is completely covered.
4.Fermentation: Cover the jar with a cloth secured with a rubber band, allowing airflow. Let the sauerkraut sit at room temperature for 1-4 weeks, tasting it along the way to check for your desired sourness.
5.Storage: Once ready, seal the sauerkraut in a glass jar and store it in the refrigerator, where it can last for several months.
Tips for Fermenting Vegetables
●Use Fresh Produce: The fresher the vegetables, the better the flavor and texture of the final product.
●Experiment with Flavors: Feel free to add spices like caraway seeds, juniper berries, or even whole peppercorns during the fermentation process.
●Keep an Eye on the Brine: The vegetables should always be submerged; if not, add more brine made from water and salt.
Kombucha: The Fizzy Ferment
Kombucha, a sweetened tea fermented with a SCOBY, is known for its refreshing taste and purported health benefits. This effervescent drink has gained a massive following, and making it at home can be as rewarding as it is delicious.
Ingredients and Tools
●1 SCOBY
●1 cup white sugar
●4-6 bags of black or green tea
●8 cups of water
●1-2 cups of starter tea from a previous batch or store-bought kombucha
●Fermentation jar (glass or food-grade plastic)
●Tea towel and rubber band for covering
Making Kombucha: Step-by-Step
1.Prepare the Sweet Tea: Boil the water and steep the tea bags for about 5-10 minutes. Remove the bags and stir in the sugar until fully dissolved.
2.Cool: Allow the sweet tea to cool to room temperature, ensuring the heat doesn't kill the beneficial bacteria and yeast in the SCOBY.
3.Combine: Pour the cooled tea into your fermentation jar. Add the starter tea and gently slide the SCOBY into the jar.
4.Ferment: Cover the jar with a tea towel secured with a rubber band. Let it ferment at room temperature, away from direct sunlight, for about 7-14 days. Longer fermentation results in a less sweet and more sour flavor.
5.Bottling: Once your kombucha has reached your desired flavor, remove the SCOBY and reserve some kombucha for your next batch. Transfer the rest into bottles, leaving some space at the top. Optionally, add flavorings like ginger, fruit, or spices.
6.Second Fermentation: Seal the bottles and let them sit at room temperature for 3-7 days to build carbonation. Be cautious to release some pressure daily to prevent explosions.
7.Refrigerate: After the second fermentation, refrigerate to halt the fermentation process, and enjoy!
Understanding Flavorings and Variations
Experimenting with flavors can elevate your kombucha:
●Fruits: Berries, citrus slices, or tropical fruits add natural sweetness and complexity.
●Herbs: Fresh mint, basil, or even lavender can create refreshing botanical notes.
●Spices: Adding ginger, cinnamon, or cloves during the second fermentation can result in warming notes and depth.
#### Troubleshooting Kombucha
●Mold: If you see any mold (which looks like fuzzy spots), discard it immediately. A clean environment is crucial.
●Taste: If your kombucha is too sweet, it needs more time to ferment; if too sour, reduce fermentation time on your next batch.
Final Thoughts
Embracing fermentation opens up a world of culinary possibilities that not only enhance flavors but also enrich the nutritional profile of your food. From the fragrant, crispy bites of homemade kimchi to the warm, sour loaves of freshly baked sourdough, each fermented product tells a unique story of time, patience, and creativity. Remember that fermentation is about experimenting, so allow yourself to adjust flavors, try new ingredients, and even combine techniques. The possibilities are endless, and the rewards—both in taste and health—are profound.
As you embark on your fermentation journey, stay curious and persistent. Each attempt, whether successful or not, offers valuable insights and experiences. Keep track of your progress, develop a flavor palette that resonates with you, and most importantly, relish the transformative nature of fermentation in your culinary adventures. With practice, you will not only be able to replicate these classic dishes but also develop your own signature ferments that showcase your unique touch and interpretation of this ancient technique. Through the alchemy of fermentation, every meal can become an exciting exploration of flavors, textures, and cultures. Happy fermenting!