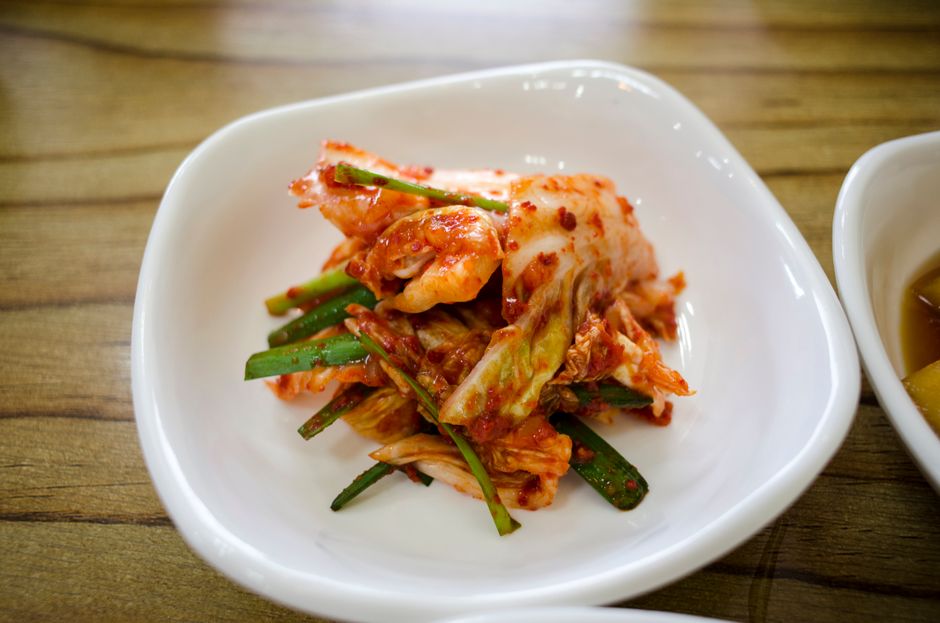
Fermentation 101: How to Make Your Own Kimchi at Home
Fermentation has gained widespread attention in recent years, capturing the interest of home cooks and chefs alike. It’s a culinary technique steeped in tradition, rich in flavor compounds, and brimming with health benefits. The art of fermentation can seem intimidating at first, but with a little guidance, anyone can embark on this flavorful journey. Among the myriad of fermented foods, kimchi stands out—not just for its complex flavor profile, but also for its versatility and nutritional benefits. It’s a staple in Korean cuisine and offers endless possibilities for enjoyment, from sides to main dishes.
In essence, kimchi is broadly defined as a dish made by fermenting vegetables, primarily napa cabbage and radishes, with spices that often include gochugaru (Korean red pepper flakes), garlic, and ginger. The beauty of making your own kimchi at home lies in the ability to tailor ingredients, textures, and levels of spice to your personal taste. Additionally, the fermentation process unlocks not only unique flavors but also probiotic benefits, aiding digestion and boosting the immune system. Let’s explore the delightful world of kimchi, from its storied history to the simple step-by-step process for making your own batch at home.
Before diving into the recipe, it’s essential to understand the fundamentals of fermentation itself. At its core, fermentation involves the transformation of microorganisms, most commonly bacteria and yeast, which break down sugars in food and beverages. This metabolic process not only preserves the food but also enhances its taste and nutritional value. With fermented foods gaining traction for their health benefits, including improved gut health, a rich microbiome, and enhanced mental well-being, the question isn't why to make kimchi, but why not?
The History of Kimchi
Kimchi isn’t just about flavor; it’s a dish steeped in history, culture, and tradition. Its origins date back over two thousand years in Korea, initially crafted as a means to preserve vegetables through the winter months. This necessity transformed over time into a complex art form uniquely tied to Korean identity. Historically, kimchi was developed in a variety of regional styles, depending on climate and seasonal ingredients available at the time.
The Evolution of Recipes
Traditionally, kimchi recipes have variations based on the season, available produce, and personal preference. Early types of kimchi were primarily simple pickled vegetables, as refrigeration was nonexistent. As Korean cuisine evolved, so did kimchi, morphing into a bold dish featuring ingredients like fermented shrimp paste and various spices to enhance flavor and boost preservation.
Regional variants also play a significant role in the diversity of kimchi. For instance, Baechu-kimchi, made with napa cabbage, is perhaps the most internationally recognized version. Other varieties include Kkakdugi, a cube-shaped radish kimchi that delivers a crunchier texture, and Oi Sobagi, or cucumber kimchi, perfect for summer. Each variant reflects local flavors and ingredients, making exploration an exciting culinary venture.
Cultural Significance
Beyond its nutritional and culinary aspects, kimchi also holds a prominent place in social interactions and traditions within Korean culture. It's customary for families to come together for kimjang—the process of making large quantities of kimchi before the winter months, fostering community spirit and sharing food. The dish is so integral to Korean culture that UNESCO recognized Making and Sharing Kimjang, a Social Practice in Korea as an Intangible Cultural Heritage of Humanity in 2013.
Understanding kimchi’s rich background not only enhances the cooking experience but also deepens appreciation for the meticulous process involving family recipes passed down through generations.
Ingredients for Your Kimchi
To craft your own kimchi at home, gathering the right ingredients is essential. While there are countless recipes with varied ingredients, here’s a simple yet flavorful list to get started.
Essential Ingredients
Flavor Components
Optional Ingredients
Feel free to customize your kimchi by adding some of the following ingredients:
As you gather your ingredients, be mindful of quality; fresh, in-season vegetables yield the most flavorful results. Consider visiting a local Asian grocery store for authentic ingredients, ensuring you’ll capture that true kind of kimchi experience.
Preparing the Cabbage: Salting and Brining
One of the most crucial steps in making kimchi is the salting process, which not only draws water out of the cabbage but also creates an environment that's less hospitable to undesirable bacteria while allowing good bacteria to flourish.
Salting the Cabbage
The Brining Process
The brining phase is crucial, as it sets the stage for fermentation. The objective is to create an environment that encourages the growth of beneficial bacteria while inhibiting harmful organisms.
Making the Spice Paste
Creating the spice paste is the heart of kimchi-making. This mixture can vary wildly based on personal taste, but here’s a solid base recipe to kick off your kimchi.
Ingredients for the Spice Paste
Instructions
Mixing the Cabbage with the Paste
With your brined cabbage ready and the spicy paste prepared, it’s time for the exhilarating step of combining these components.
Fermentation Time
Fermentation is where the magic happens. For kimchi, timing and temperature can greatly influence the final flavor and texture of the dish. Understanding how fermentation works will allow you to fine-tune your kimchi to suit your taste.
Ideal Fermentation Conditions
Signs of Fermentation
Serving and Storing Your Kimchi
Once fermented to your satisfaction, your homemade kimchi is ready to serve. It can be enjoyed in numerous ways—served alongside rich Korean dishes, as a topping on rice bowls, or even part of fusion recipes.
Serving Suggestions
Storage Tips
"Fermented foods like kimchi can elevate your culinary adventures, transforming simple meals into extraordinary experiences."
Troubleshooting Your Kimchi
Even the most seasoned cook encounters a hiccup now and then when trying something new. If your kimchi isn't quite going as planned, don't worry! Here are common issues and solutions.
Common Issues
Final Adjustments
You can always create new versions of your kimchi with leftover batches. Use it in stews, or mix it with mayonnaise and spread on sandwiches—endless delights await you!
Conclusion
The pursuit of making kimchi at home is an incredibly gratifying endeavor. With each step—from selecting fresh ingredients to mixing the spicy paste and monitoring fermentation—you are engaging with a time-honored tradition that adds value and flavor to your dining experience. Creating your own kimchi allows for a level of customization that store-bought versions can’t offer.
So roll up your sleeves, don your gloves, and embrace the beauty of fermentation. Whether you aim for a mild or spicy, crunchy or soft variety, the process is about more than just flavor; it’s about connection, tradition, and exploration. As you take your taste buds on an adventure, remember that making kimchi is about personal expression—don't hesitate to experiment.
Take pride in your culinary creations, and enjoy every bite!


Get the Next Recipe
Weekly recipes, techniques, and gear picks — straight to your inbox.
