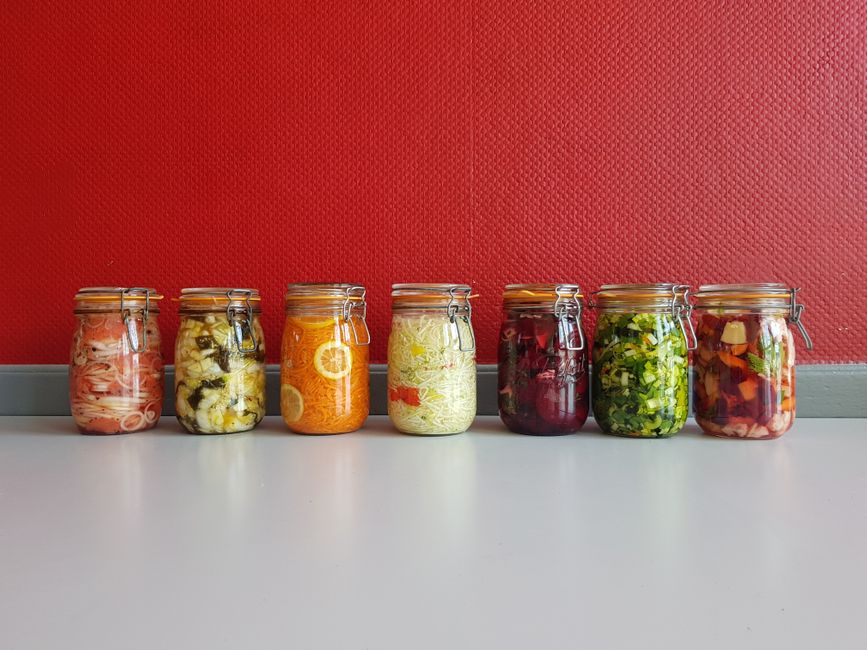
Fermentation Fundamentals: Creating Your Own Kimchi, Kombucha, and Sauerkraut
Fermentation has become a globally celebrated culinary technique, with a rich history and an array of health benefits. As more home cooks dive into this ancient practice, it’s essential to understand the fundamentals to create authentic, delicious fermented foods. This guide will delve into the world of fermentation, focusing on three popular and accessible options: kimchi, kombucha, and sauerkraut. By understanding the basics of these processes, you can start to experiment and create your own unique blends, allowing you to explore various flavors and health benefits, while also enjoying the creative aspect of cooking.
Fermentation is a natural process that transforms food using microorganisms such as bacteria, yeasts, and fungi. These tiny agents convert sugars into acids, gases, or alcohol through the process of anaerobic digestion. This not only preserves food but also enhances its nutritional profile and introduces beneficial probiotics, which are essential for gut health. Engaging in fermentation is both a culinary adventure and a practical way to reduce food waste, as it enables you to use up surplus produce in delicious ways. This dynamic form of food preservation empowers home cooks to take control of their kitchen while experimenting with flavors and textures that can elevate simple dishes into exceptional creations.
In this post, you’ll learn how to create your own kimchi, kombucha, and sauerkraut at home. Each section will guide you through the essential ingredients, techniques, and timing necessary to master these recipes. You’ll discover tips and tricks from professional kitchens, including ideal fermentation temperatures, the importance of cleanliness, and ways to adjust flavors to suit your personal palate. Whether you are seeking to enhance your meals with robust flavors or to enjoy the health benefits associated with fermented foods, this guide will provide you with the foundational knowledge and confidence to embark on your fermentation journey.
Kimchi: The Quintessential Fermented Vegetable
What is Kimchi?
Kimchi is a traditional Korean dish made from fermented vegetables, usually napa cabbage, along with a variety of seasonings. This dish is renowned for its health benefits, spicy flavor, and versatility in the kitchen. While napa cabbage is the most common base for kimchi, other vegetables like radishes, cucumbers, and green onions can also be used. Kimchi is rich in probiotics due to the fermentation process and contains vitamins A, B, and C, making it a nutritious addition to any meal.
Kimchi’s flavor profile is complex. It combines elements of sweetness, spice, and umami with a tangy finish. The key ingredients that contribute to this are gochugaru (Korean red pepper flakes), garlic, ginger, and fish sauce or soy sauce. The fermentation time can vary based on your desired level of tanginess and the temperature at which you ferment your kimchi.
Essential Ingredients for Kimchi
To make basic napa cabbage kimchi, you will need the following ingredients:
Step-by-Step Guide to Making Kimchi
- Cut the napa cabbage into quarters lengthwise, then chop into bite-sized pieces.
- Dissolve ½ cup of sea salt in 4 cups of filtered water to create a brine.
- Soak the cabbage in the brine for about 2 hours, flipping every 30 minutes to ensure even salting. The salt will help draw moisture out of the cabbage and create a crispy texture.
- In a mixing bowl, combine the minced garlic, grated ginger, fish sauce, sugar, and gochugaru. Adjust the amount of gochugaru based on your heat level preference. The mixture should create a thick paste.
- Once the cabbage is brined, rinse it thoroughly under cool water to remove excess salt, and drain well.
- In a large bowl, toss the cabbage, daikon radish, carrot, and green onions.
- Add the seasoning paste and mix thoroughly, using your hands (wear gloves to protect your skin from the spice) to ensure that the paste evenly coats all the vegetables.
- Pack the kimchi mixture tightly into clean glass jars, leaving about 1 inch of space at the top to allow for expansion during fermentation.
- Seal the jars and leave them out at room temperature for 1 to 3 days, depending on your desired fermentation level. A warmer environment speeds up fermentation, while cooler temperatures slow it down. Taste your kimchi each day until it reaches your preference.
- Once fermented to your liking, transfer your kimchi to the refrigerator. It can last for several months, though the taste will continue to evolve over time.
"A good kimchi should be spicy, tangy, and packed with crunchy vegetables. Adjust the spice and fermentation time to suit your palate!"
Tips for Perfecting Your Kimchi
Kombucha: The Effervescent Brew
The History and Health Benefits of Kombucha
Kombucha, often referred to as "mushroom tea," is a slightly effervescent drink made from sweetened tea and a symbiotic culture of bacteria and yeast (SCOBY). This fermented beverage has roots that date back over 2,000 years, originating in Northeast China. Today, kombucha has taken the health and wellness world by storm due to its potential probiotics, antioxidants, and detoxifying properties.
The fermentation process creates a unique flavor profile that can vary from sweet to tangy, depending upon the length of fermentation and the type of tea used. While traditionally made with black tea, various herbal blends can also create special flavor profiles and additional benefits.
Essential Ingredients for Making Kombucha
To make your own batch of kombucha, you will need:
Step-by-Step Guide to Making Kombucha
- In a large pot, bring 8 cups of filtered water to a boil.
- Once boiling, remove from heat and steep the black tea bags for about 15 minutes.
- Remove the teas bags and stir in 1 cup of sugar until dissolved. Allow the sweetened tea to cool to room temperature.
- Once cooled, pour the sweet tea into a clean glass jar.
- Add 1-2 cups of previously brewed kombucha or store-bought kombucha to jumpstart the fermentation process.
- Gently place the SCOBY on top of the tea mixture. It may float or sink; either is fine.
- Cover the jar with a breathable cloth and secure it with a rubber band or string. This allows air to circulate while keeping out contaminants.
- Place the jar in a warm, dark spot (around 70-85°F) for 7 to 14 days, depending on your taste preference. The longer it ferments, the less sweet and more tart it will become.
- Once the flavor is to your liking, remove the SCOBY and set it aside for your next batch.
- Pour the kombucha into bottles, leaving some headspace at the top, and consider adding flavors at this stage, such as ginger, fruit puree, or herbs (like mint or basil).
- Seal the bottles and leave them at room temperature for another 3 to 7 days to develop carbonation. You may want to "burp" the bottles daily to release gas build-up and avoid explosions.
- After the second fermentation, transfer the kombucha to the refrigerator to halt fermentation and chill. Your homemade kombucha is now ready to enjoy!
"The beauty of kombucha lies in its adaptability. Play with flavors, experiment with teas, and find your perfect brew!"
Tips for Perfecting Your Kombucha
Sauerkraut: The Art of Fermentation
Understanding Sauerkraut
Sauerkraut, which translates to "sour cabbage" in German, is one of the simplest fermented foods you can make at home. It requires just two basic ingredients: cabbage and salt. The beauty of sauerkraut lies in its versatility; while it’s traditionally made with green cabbage, incorporating red cabbage, carrots, or other vegetables can take it to new flavor dimensions. Known for its crunchy texture and tangy bite, sauerkraut is rich in probiotics and dietary fiber, making it excellent for digestive health.
Essential Ingredients for Sauerkraut
To create your own sauerkraut, gather the following:
Step-by-Step Guide to Making Sauerkraut
- Remove any outer leaves from the cabbage, then cut the cabbage into quarters and finely slice it into thin shreds.
- Place the shredded cabbage into a large mixing bowl.
- Add 1-3 tablespoons of sea salt to the cabbage. Start with 1 tablespoon and adjust to taste in later batches.
- Using clean hands, massage the salt into the cabbage for about 5-10 minutes, until you see juices begin to release. The cabbage should become wilted and the liquid should cover it.
- Transfer the salted cabbage to clean glass jars. Pack it tightly, pressing down to release more liquid. The liquid should submerge the cabbage completely; if not, you can add a little more brine (1 cup of water mixed with ½ teaspoon salt).
- Leave some headspace at the top to allow for expansion during fermentation.
- Cover the jars with a airtight lid or a cloth secured with a rubber band, allowing air to circulate while keeping contaminants out.
- Place the jars in a cool, dark place (around 65-72°F) for 1-4 weeks. Check the sauerkraut every few days, pressing it down under the brine if necessary. Sample it periodically until you reach your desired flavor and tang.
- Once fermented to your liking, seal the jars with airtight lids and transfer them to the refrigerator. Properly fermented sauerkraut can keep for several months.
"Sauerkraut is the embodiment of simplicity and flavor. Just cabbage and salt can create a product that's rich in both taste and health benefits."
Tips for Perfecting Your Sauerkraut
Conclusion
Incorporating fermented foods like kimchi, kombucha, and sauerkraut into your culinary repertoire can be a gateway to a healthier and more vibrant lifestyle. Not only do these foods offer exceptional flavors and textures, but they also provide a potent dose of probiotics, vitamins, and minerals that can positively impact your gut health.
Mastering these fermentation processes allows you to take charge of what goes into your food, encouraging creativity and personalization in each batch. By experimenting with flavors, timings, and ingredients, you can create a range of fermented foods that cater to your taste and dietary needs. Always ensure cleanliness throughout the process to maintain safety and flavor integrity.
By understanding the fundamentals of fermentation, you can open the door to a realm of new culinary experiences that will not only elevate your cooking skills but also delight your taste buds. So, roll up your sleeves, gather your ingredients, and embark on this exciting gastronomic journey of fermenting your way to flavor perfection. Happy fermenting!


Get the Next Recipe
Weekly recipes, techniques, and gear picks — straight to your inbox.
