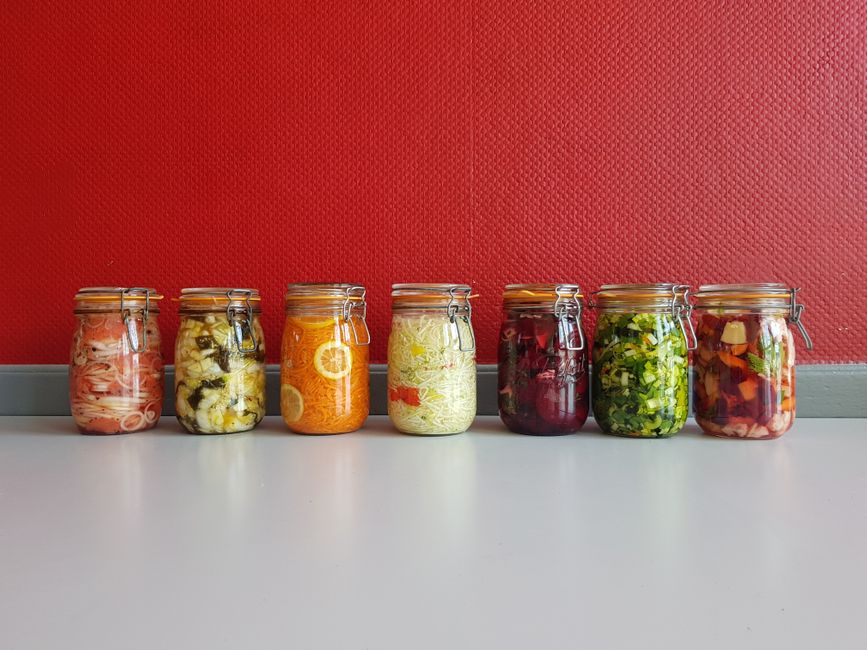
Fermentation Fundamentals: Creating Your Own Sauerkraut, Kimchi, and Kombucha at Home
The culinary world is often perceived as a rigorous, high-stakes environment where only those with years of formal training can achieve perfection. However, some of the most profound flavors in gastronomy do not emerge from a searing hot sauté pan or a delicate reduction, but from the patient, quiet transformation of raw ingredients through the ancient art of fermentation. By inviting microbes into your kitchen, you are essentially partnering with invisible artisans who work around the clock to enhance textures, unlock complex nutritional profiles, and develop tangy, savory depths that simply cannot be replicated by commercial heat-processing. Whether you are looking to improve your gut health or simply chasing that elusive "umami" punch in your home cooking, understanding the science of fermentation is the ultimate leveling-up moment for any aspiring home chef.
Many beginners approach the concept of fermenting their own food with a sense of trepidation, fearing that they might accidentally cultivate something harmful rather than something delicious. In reality, fermentation is an incredibly safe and forgiving process when you respect the fundamental rules of salt ratios, anaerobic environments, and temperature control. We have spent centuries perfecting these techniques precisely because they were the primary methods of food preservation long before the convenience of refrigeration existed. When you start your journey into krauts, kimchis, and kombuchas, you are not just making a side dish; you are participating in a global culinary lineage that spans every culture, continent, and era, connecting your modern kitchen to the very foundations of human nourishment.
At "Blame The Chef," we believe that true mastery comes from understanding the why behind every technique rather than just following a sterile recipe. When you ferment, you are selecting for beneficial Lactobacillus bacteria while inhibiting the growth of pathogens through the creation of an acidic, saline environment. It is a balancing act of microbiology that rewards patience with a product that is vibrant, alive, and fundamentally superior to store-bought varieties that have been pasteurized into oblivion. Prepare your jars, sharpen your knives, and clear some counter space, because once you experience the satisfaction of popping a lid on a ferment you crafted from scratch, you will never look at the grocery store shelf the same way again.
The Chemistry of Success: Salt, Temperature, and Time
At its core, fermentation is a race between the beneficial bacteria you want to encourage and the spoilage bacteria you want to avoid. The most critical tool in your arsenal during this process is sea salt or any high-quality, non-iodized salt. Salt does three essential things: it draws moisture out of the cellular structure of your vegetables, it creates an inhospitable environment for rot-inducing bacteria, and it helps to maintain the crisp, structural integrity of the vegetable tissue during the weeks of fermentation. Without the correct ratio—typically 2% to 3% of the total vegetable weight—you risk a mushy, unsafe product.
Temperature is the invisible hand that guides the speed of your fermentation. Most lactic acid fermentations thrive at a "room temperature" range of 65°F to 75°F. If your home is significantly colder, the fermentation will be sluggish and require more time to develop its characteristic sourness. If your kitchen is hot—say, above 80°F—the fermentation will move rapidly, and you run the risk of the vegetables softening too much before they have had a chance to develop deep flavor profiles. Consistency is key; avoid placing your jars in direct sunlight or directly above a heat source like an oven, as fluctuating temperatures can stress the microbial community and lead to inconsistent results.
Time is the final variable, and it is perhaps the most difficult for a novice to master. People often ask, "When is it done?" The professional answer is always: "When it tastes like you want it to taste." There is no arbitrary countdown clock that dictates perfection. You must taste your ferments throughout the process. Start by taking a small, clean sample with a sanitized spoon after seven days. As the pH levels drop, the ferment will become tangier and more complex. Once it reaches a point where the acidity and the texture meet your personal preference, it is ready to be moved into the refrigerator, which effectively acts as a pause button for the fermentation process.
"Fermentation is not merely about preservation; it is an act of culinary transmutation. By harnessing the power of simple microbes, we elevate humble cabbage and tea leaves into complex, living condiments that challenge and delight the palate."
Sauerkraut: The Gateway Ferment
Sauerkraut is the quintessential starting point for any home cook because of its simplicity and the reliability of its results. The formula is remarkably elegant: cabbage, salt, and time. To start, select a heavy, dense head of green cabbage. The weight of the cabbage is your primary indicator of freshness; it should feel solid, almost like a bowling ball. Remove the outer, damaged leaves—set one or two clean ones aside—and quarter the cabbage. Using a sharp chef's knife or a mandoline, slice the cabbage into thin, uniform ribbons. The thinner the slice, the easier it will be to draw out the liquid, or brine.
The Art of the Massage
Once your cabbage is sliced, weigh it precisely using a kitchen scale. This is not a time for "eyeballing" the measurements. Calculate 2% of that weight in salt. For example, if you have 1,000 grams of cabbage, you will need 20 grams of salt. Sprinkle the salt over the cabbage and begin the process of massaging. This is a labor of love. You must use your hands to squeeze, crush, and knead the cabbage. As you do this, the salt draws water out of the cells, creating the brine that will eventually submerge the cabbage and protect it from oxygen. Do not stop until the cabbage has reduced in volume by nearly half and there is a significant amount of liquid pooled at the bottom of the bowl.
Packing the Vessel
When packing your sterilized glass jar, layer the cabbage in handfuls, pressing down firmly after each addition. You want to remove as many air pockets as possible, as oxygen is the enemy of a clean, lactic acid ferment. Once the jar is full, use the clean outer leaves you saved earlier to create a "follower." Place the leaf on top of the cabbage and weigh it down with a glass fermentation weight or a small, sanitized shot glass. The goal is to ensure the cabbage is fully submerged under its own brine. If you find you don't have enough liquid, you can add a small amount of brine solution (dissolve 1 tablespoon of salt in 2 cups of water) until everything is covered.
Exploring the Spice of Kimchi
Kimchi is to Korea what sauerkraut is to Germany, yet the flavor profile is exponentially more dynamic. While sauerkraut relies on the purity of cabbage and salt, Kimchi introduces a symphony of aromatics, including gochugaru (Korean chili flakes), garlic, ginger, fish sauce, and scallions. This is a more complex ferment that requires a two-stage preparation. The first stage involves brining the Napa cabbage to soften the fibers, followed by a second stage of applying the flavor-rich paste.
The Brining Phase
Napa cabbage is much more delicate than the firm green cabbage used for kraut. Split the heads lengthwise and submerge them in a concentrated salt brine for several hours. This "salting out" process is crucial for removing excess water and ensuring that the cabbage doesn't end up soggy. You are looking for a state where the thick white ribs of the cabbage can be bent without snapping. Once the cabbage is flexible, rinse it thoroughly under cold running water. Neglecting to rinse away the excess surface salt will lead to a finished kimchi that is unpalatably salty.
The Porridge and the Paste
A professional-grade kimchi often uses a small amount of glutinous rice flour porridge as a binder for the spices. Cook a small amount of rice flour with water until it becomes a thin, translucent gel, then whisk in your gochugaru, minced garlic, fresh ginger, fish sauce (or salted shrimp), and a touch of sugar. This paste acts as the "glue" that coats every leaf of the cabbage, ensuring the seasonings penetrate deep into the fibers. Wearing food-safe gloves is highly recommended during this stage, as the chili and garlic will stain your skin and can cause irritation. Thoroughly coat every leaf, fold the cabbage into compact bundles, and pack them tightly into your jar.
Mastering the Kombucha Brew
Kombucha is a different beast entirely. Unlike sauerkraut and kimchi, which are anaerobic lactic acid ferments, kombucha is an aerobic ferment involving a SCOBY (Symbiotic Culture of Bacteria and Yeast). The process relies on sweetened black or green tea. The SCOBY consumes the sugar in the tea, producing a variety of organic acids, trace amounts of alcohol (which are then converted into acetic acid), and carbon dioxide. It is a biological balancing act that requires a bit more equipment and attention to detail than vegetable ferments.
The First Fermentation
The "First Ferment" occurs in a wide-mouth glass jar. You begin by brewing a strong tea—use unflavored, organic loose-leaf tea if possible—and dissolving pure cane sugar into it. It is vital that the tea cools to room temperature before you introduce the SCOBY. If the liquid is too hot, you will kill the live cultures, effectively ruining your batch before it begins. Cover the jar with a tight-woven cloth or coffee filter secured with a rubber band. This allows the culture to breathe oxygen while keeping out dust and fruit flies.
Secondary Fermentation and Carbonation
After about 7 to 14 days, your kombucha will have a balance of sweet and tart that signals it is ready for the second stage. This is where you introduce flavor. Bottle the liquid in airtight, flip-top glass bottles and add fruit juice, fresh herbs, or ginger. Because the bottles are sealed, the yeast will consume the remaining sugar from the fruit, creating carbonation that builds up inside the bottle. Be careful: store these bottles in a dark place and check them daily. If the room is warm, pressure can build quickly, and the last thing you want is a bottle exploding in your pantry.
"The SCOBY is more than just a rubbery disc of cellulose; it is the living memory of your fermentation cycle. Treat it with the respect due to any heirloom starter, and it will reward you with a lifetime of effervescent, probiotic-rich tonics."
Equipment: What You Actually Need
You do not need to spend hundreds of dollars on fancy fermentation crocks or specialized gadgets to be successful. While there are many high-end tools on the market, the professional kitchen often relies on the simplest methods. A standard wide-mouth Mason jar is the gold standard for most home ferments. They are easy to sanitize, easy to seal, and allow you to see exactly what is happening inside the vessel.
Essential Gear List
The Myth of the "Perfect" Crock
You will often see beautiful, glazed ceramic crocks in gourmet shops. While these are excellent for large-batch fermentation, they are not strictly necessary. They offer a stable, light-free environment, but they are heavy, hard to clean, and opaque—meaning you cannot see the progress of your ferment. For the beginner, transparent glass allows you to spot issues early, such as bubbles that indicate healthy fermentation or white, filmy growth on the surface that needs to be addressed. Stick to glass until you have developed your confidence and your palate.
Troubleshooting: When Things Go Wrong
Even the best chefs encounter a batch that doesn't go according to plan. However, most "ruined" ferments are actually just minor hiccups that can be avoided with better technique. The most common issue is mold. If you see fuzzy, colored spots (green, black, or pink) on the surface, discard the entire batch. Do not try to scoop it off. Mold indicates that the pH did not drop fast enough or that there was too much oxygen exposure. It is not worth the risk to your health.
Understanding Kahm Yeast
Kahm yeast is often confused with mold. It appears as a thin, white, powdery, or film-like layer on the surface of the brine. Unlike mold, it is not fuzzy, and it does not penetrate deep into the vegetables. It is harmless but can impart a slightly off-flavor or a yeasty smell. If you see this, you can skim it off and continue to monitor the ferment. It usually appears when the temperature is too warm or the salt content is on the lower side. To prevent it, ensure your brine levels are sufficient and try to keep your fermentation space a few degrees cooler.
The "Soft" Vegetable Problem
If your sauerkraut or kimchi becomes mushy, you have likely suffered from an enzyme breakdown or the use of too much heat. This often happens if the vegetables were not fresh to begin with or if the ambient temperature was too high. To ensure crunch, always use the freshest vegetables you can find. Adding a small amount of tannin-rich leaves—such as grape leaves, black tea leaves, or oak leaves—to the jar can also help preserve the crunch, as the tannins inhibit the enzymes that break down plant cell walls.
Elevating Your Culinary Craft
Once you have mastered the basics of sauerkraut, kimchi, and kombucha, you can begin to experiment with more advanced techniques. Fermentation is a gateway to culinary creativity. Try adding toasted caraway seeds to your kraut, or experiment with adding Asian pear and fermented salted shrimp to your next batch of kimchi. The world of lacto-fermented vegetables extends far beyond cabbage; try fermenting carrots, radishes, cauliflower, or even green beans.
Incorporating Ferments into Meals
The goal of all this work is, of course, to eat. Don't just serve your ferments on the side of a plate. Use the brine from your sauerkraut to add acidity to salad dressings or to deglaze a pan after searing pork chops. Incorporate kimchi into fried rice or as a topping for a gourmet burger. The complexity of these fermented products adds a layer of depth that elevates simple home-cooked meals into restaurant-quality dishes.
The Philosophy of the Living Kitchen
When you embrace fermentation, you change your relationship with your food. You move away from the "dead" convenience of shelf-stable, pasteurized products and toward a vibrant, living diet. You start to pay attention to the seasons—fermenting ramps in the spring, cucumbers in the summer, and hearty root vegetables in the autumn. This is the mark of a true chef: the ability to work with the ingredients you have and to coax the maximum possible flavor out of them through knowledge, patience, and a little bit of help from the microbial world.
Conclusion
Fermentation is one of the most rewarding skills a home cook can develop. It requires only the most basic ingredients—vegetables, salt, tea, sugar, and water—and yet it offers the most sophisticated results. By mastering the delicate balance of salt ratios, controlling your environment, and learning to trust your senses, you are doing more than just following a recipe; you are engaging in a process that is as much about science and history as it is about taste.
Do not be discouraged by a failed batch or a less-than-perfect experiment. Even in the most professional kitchens, fermentation is an iterative process. It is about learning to observe, to adjust, and to appreciate the nuances of the living environment in your jar. Whether you start with a simple jar of sauerkraut or a complex brew of kombucha, the act of fermentation will make you a more conscious, skilled, and intentional cook.
So, head into your kitchen and begin your journey. Start small, be precise with your measurements, and always keep a notebook to track your timings and results. You will soon find that the sour, tangy, and effervescent flavors you produce are far superior to anything you can buy in a store. You are now the captain of your own kitchen’s microbial ecosystem, and the rewards—in health, flavor, and culinary satisfaction—are infinite. Keep experimenting, keep tasting, and most importantly, remember that every great chef started exactly where you are right now. Happy fermenting!


Get the Next Recipe
Weekly recipes, techniques, and gear picks — straight to your inbox.
