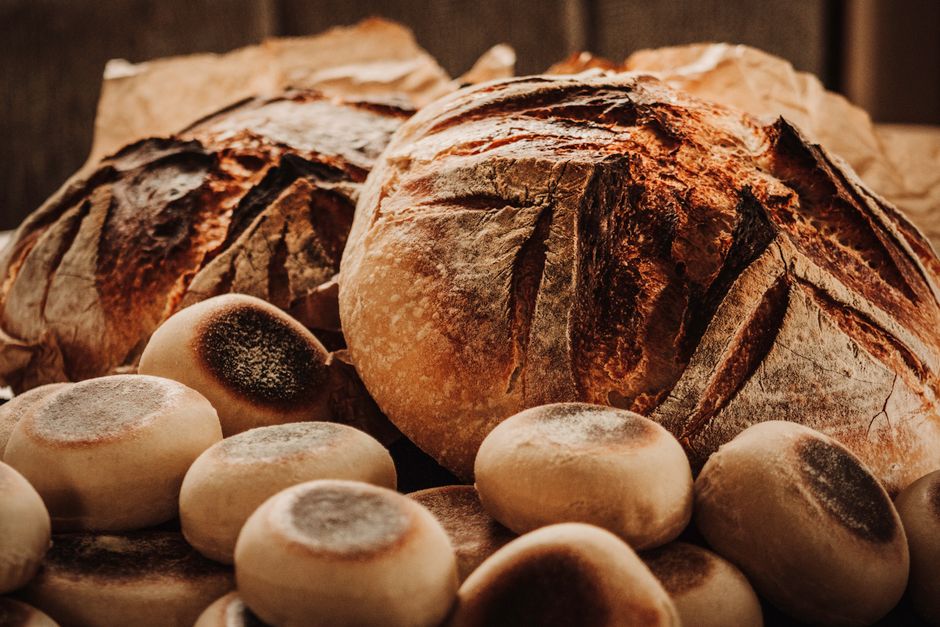
Fermentation Fundamentals: Creating Your Own Sourdough Starter
Technique

Fermentation Fundamentals: Creating Your Own Sourdough Starter

C
By The Chef
|July 2, 2026|11 Min Read

Creating your own sourdough starter is like embarking on a delicious journey steeped in tradition and the magic of fermentation. The beauty of sourdough bread lies not just in its unique flavor but also in its incredible texture and the satisfaction that comes from nurturing a live culture. Unlike store-bought yeast, which can produce bread quickly, sourdough relies on the natural fermentation process involving wild yeasts and bacteria. This method not only enhances the nutritional value of the bread but also grants it a complexity of flavor that is often unmatched.

The process of maintaining a sourdough starter can seem daunting at first, but it truly is accessible to anyone willing to invest a little time and patience. With just flour and water, and the right conditions, you can cultivate a thriving starter that will transform your baking forever. While each starter develops its own unique personality based on the environment, local climate, and the specific microorganisms in the air, the fundamental principles of creating and maintaining a starter are universally applicable.

In this lengthy guide, we’ll take you through every aspect of sourdough starter creation, from the science behind fermentation to practical steps for feeding and storing your culture. By understanding these fundamentals, you will not only create your own starter but also gain the confidence to experiment with different flours, hydration levels, and even the nuances of shaping and baking your sourdough bread.

Understanding the Science of Fermentation

Fermentation is a natural process that has been utilized for thousands of years, not just in baking, but in making products like yogurt and sauerkraut. At the core of this transformation are microorganisms—yeasts and bacteria—that thrive in environments rich with sugars, such as those found in flour. The primary yeast in sourdough is Saccharomyces cerevisiae, but other wild yeasts can contribute as well. Lactic acid bacteria (LAB) work collaboratively with yeasts to create the tangy flavor characteristic of sourdough.

The Role of Wild Yeasts and Bacteria

When you mix flour and water and expose it to the air, you invite a variety of microorganisms to the party. This is where the magic happens. Wild yeasts feast on the sugars in the flour, producing carbon dioxide, which causes dough to rise, while the lactic acid bacteria contribute acidity, enhancing flavor and extending shelf life.

●Wild Yeasts: There are many species of wild yeasts, which can contribute to different flavor profiles depending on their specific behavior.
●Lactic Acid Bacteria: These bacteria produce lactic acid, which gives sourdough its characteristic tang and helps with bread's preservation.

The Fermentation Timeline

The fermentation process is gradual and can take anywhere from a few hours to a couple of weeks, depending on the temperature, hydration levels, and the specific strains of yeast and bacteria present. Here’s a simplified timeline of what you can expect:

1.Day 1: Combine flour and water; no visible activity will occur immediately.
2.Days 2-3: Observe bubbles forming as wild yeasts and bacteria begin to multiply. You might notice a pleasant, slightly tangy smell.
3.Day 4-7: As the culture develops, it should rise and fall predictably. It will become more fragrant and bubbly, indicating that it's becoming strong enough for baking.

Making your starter successful requires a bit of monitoring and adjusting for these environmental factors, which brings us to the practical aspects of creating your starter.

Getting Started: The Ingredients

Creating a sourdough starter is a straightforward process, but selecting the right ingredients will set you up for success. The flexibility allows for various flours and hydration levels, but some foundational guidelines can significantly improve your starter's performance.

Flour Choices

Wheat flour is the traditional choice for sourdough starters due to its high gluten content and rich nutrient profile, especially:

●All-Purpose Flour: Readily available and great for beginners. It provides a good balance of gluten and nutrition.
●Whole Wheat Flour: Denser and richer in nutrients, this option often requires a bit more water due to its high absorption capacity.
●Rye Flour: This flour is high in nutrients and yields a very vibrant starter, but it can be a bit strong for those just starting out.

When you're selecting flour, ensure you're purchasing unbleached, as the bleaching process can inhibit the growth of wild yeasts.

Water Quality

The quality of water can also impact fermentation. Here are some critical points:

●Chlorinated Water: Tap water that has been treated with chlorine can kill or inhibit yeast and bacteria growth. If using tap water, let it sit out for 24 hours to allow the chlorine to evaporate.
●Filtered or Spring Water: Opt for these if you want to ensure a more vibrant and active starter. They are free of chemicals.

The Ratios

A classic ratio to start with is 1:1 (by weight) of flour to water—this means if you add 100g of flour, you should mix it with 100g of water. However, you can adjust the hydration level based on your flour type:

●For Whole Wheat: A slightly higher hydration level (around 1:1.5) may yield better results.
●For Rye Flour: You can use equal weights, but rye flour starters may ferment faster due to their nutrient density.

Necessary Equipment

While the ingredients are crucial, a few tools will simplify the process:

●Scale: Accurate measurements are vital for feeding your starter and maintaining consistency.
●Mixing Bowl: A glass or plastic bowl is ideal; avoid metal, as it can react with the acidity.
●Jar or Container: A wide-mouth glass jar or container works best for monitoring activity.
●Lid or Cheesecloth: Use either a loose-fitting lid or cheesecloth to keep out contaminants while allowing airflow.

Step-by-Step: Creating Your Sourdough Starter

Now that you understand the science and ingredients, it's time to dive into the actual process of creating your sourdough starter. This section will provide a detailed guide to help you cultivate your wild culture.

Step 1: Mixing the Initial Ingredients

1.Combine Flour and Water: Start with 100g of your chosen flour and 100g of lukewarm water (about 75°F/24°C).
2.Mix Thoroughly: Use a wooden spoon or a spatula until you have a thick, smooth paste. Ensure no dry flour remains. This is crucial for fermentation.
3.Transfer to Container: Place the mixture into your clean jar or container, scraping down the sides to minimize waste.

Step 2: Initial Fermentation Period

1.Cover: Loosely cover the jar with a lid or cheesecloth, allowing it to breathe while keeping out unwanted debris.
2.Let It Sit: Place the jar in a warm, draft-free area. Ideal temperatures for fermentation range between 68°F and 75°F (20°C-24°C).
3.Wait and Watch: Over the next 24 hours, observe for bubbles and separation. It’s normal if you don’t see many signs at first.

Step 3: Feeding the Starter

After 24 hours, it’s time to feed your starter. Here's how:

1.Discard Some of the Starter: Remove about half of your mixture (approximately 100g)—this keeps the overall volume manageable and focuses the growth of your starter's beneficial bacteria.
2.Add New Flour and Water: To the remaining starter, add 100g of flour and 100g of water. Mix thoroughly until no dry bits remain.
3.Repeat the Process: Continue this feeding process every 24 hours. You should start seeing bubbles and some rising activity.

Step 4: Building Strength

By days 3-7, your starter should show noticeable bubbles and a puffy texture after feeding. Here’s what to keep in mind:

●Adjust Feeding Frequency: If the starter is bubbling but not rising as expected, consider increasing the feeding frequency to every 12 hours.
●Smell Test: A healthy starter will have a pleasant, slightly sour aroma. If it smells off or develops a layer of liquid (known as “hooch”), it’s time to discard and feed it again.

Step 5: Ready for Baking

Your starter is ready for baking when it reliably doubles in size within 4-6 hours of being fed. To test for readiness, perform the “float test”—take a small spoonful of your starter and drop it into a glass of water. If it floats, your starter is active and ready to use!

Maintaining Your Sourdough Starter

Once you’ve created your sourdough starter, you'll want to maintain it for long-term use. Regular feeding schedules and storage methods play a critical role in keeping your culture lively and usable for all your baking endeavors.

Regular Feeding and Storage

You can choose to keep your starter either at room temperature or in the refrigerator, depending on how often you plan to bake.

#### Room Temperature Maintenance

●Feed Daily: If you plan to bake often (at least once a week), keep your starter at room temperature. Regular feeding (every 12-24 hours) helps keep your starter vibrant.
●Use It or Lose It: Don’t forget to use it! Baking with your starter regularly will keep it strong and healthy.

#### Cold Storage

●Refrigerate: If you’re baking less frequently, store your starter in the fridge. This slows down fermentation and requires less frequent feedings.
●Feeding Schedule: Feed your starter once a week. When you want to bake, bring it to room temperature and feed it 1-2 times in preparation before using it.

Troubleshooting Common Issues

Even the most experienced bakers face challenges with their sourdough starters. Here are common issues and solutions:

●Starter Isn’t Bubbling: If your starter is sluggish, increase the feeding frequency and ensure it’s kept in an adequately warm environment.
●Off Smells: If your starter smells foul or develops pink or orange hues, discard it. This might indicate contamination.
●Separation and Liquid “Hooch”: A layer of liquid on top indicates it’s hungry. Simply stir it back in or discard some, then feed.

“Every culture has its quirks. Don’t be afraid to get to know your starter; it’s like training a new pet.”

Baking with Your Sourdough Starter

Now that your starter is thriving, let's get into the fun part—baking! The possibilities are endless when it comes to sourdough, and it’s a versatile ingredient for many different types of bread and baked goods.

Basic Sourdough Bread Recipe

Here’s a simple recipe to get you started on your sourdough journey.

#### Ingredients

●500g Bread Flour
●375g Water (75% hydration)
●100g Active Sourdough Starter (at room temperature)
●10g Salt

#### Instructions

1.Mixing: In a large bowl, combine the flour and water. Mix until all flour is hydrated. Let this mixture rest for 30 minutes (this is called autolyse).
2.Add Starter and Salt: Add your sourdough starter and salt. Mix well until fully incorporated.
3.Bulk Fermentation: Cover the bowl with a damp cloth or a lid and let it sit at room temperature for 4-6 hours, or until it has doubled in size. During this time, perform stretch and folds every 30 minutes to build gluten structure.
4.Shaping: Once bulk fermentation is complete, turn the dough out onto a lightly floured surface. Pre-shape it into a round and let it rest for 20 minutes. Shape it as desired for your final loaf.
5.Proofing: Transfer your shaped dough into a proofing basket lined with flour, seam side up. Cover and let it rise for another 2-4 hours at room temperature or overnight in the fridge for a cold proof.
6.Baking: Preheat your oven to 450°F (232°C) with a Dutch oven inside. Once preheated, carefully place the dough into the hot pot, score the top, and cover. Bake for 30 minutes covered and another 15-20 minutes uncovered until golden brown.
7.Cooling: Allow your bread to cool completely on a wire rack before slicing. This is crucial for the texture!

Variations and Tips

●Add Ingredients: Feel free to incorporate ingredients like olives, seeds, or herbs to customize your sourdough.
●Experiment with Hydration: Higher hydration doughs tend to be more flavorful but require more skill to handle.
●Tweak Fermentation Times: Adjust the duration of bulk fermentation and proofing based on your kitchen environment and personal taste preferences.

“Baking sourdough is as much an art as it is a science. Learn the basic principles, and then let your creativity flow.”

Conclusion

Creating and maintaining a sourdough starter is a gratifying culinary adventure. From the first steps of mixing flour and water to the savory aroma of freshly baked bread, the entire experience can be both educational and rewarding. Each starter holds a unique story shaped by its environment, and as you cultivate yours, you'll develop not just skills but a deeper relationship with the craft of bread-making.

With patience and practice, you can lift the curtain on the world of fermentation and enjoy not only the deliciousness of sourdough bread but also a connection to a centuries-old tradition of culinary artistry. Remember, every starter has its personality; embrace it, nurture it, and allow it to lead you down a path of endless baking possibilities. Happy baking, and may your sourdough journey be vibrant and fulfilling!


🧰 Gear for this recipe
Tools our chefs reach for when cooking this
Lekue Sourdough Bread Maker Bake Kit
Baking
Lekue Sourdough Bread Maker Bake Kit
★★★★★4.4
$35-$50
View on Amazon
Ceramic Fermentation Crock 2L
Storage
Ceramic Fermentation Crock 2L
★★★★★4.5
$40-$65
View on Amazon
Round Banneton Proofing Basket 9-inch
Baking
Round Banneton Proofing Basket 9-inch
★★★★★4.7
$20-$30
View on Amazon
Dexas Stainless Steel Bench Scraper
Baking
Dexas Stainless Steel Bench Scraper
★★★★★4.7
$10-$15
View on Amazon

As an Amazon Associate we earn from qualifying purchases.

🍳

Get the Next Recipe

Weekly recipes, techniques, and gear picks — straight to your inbox.

No spam, ever. Unsubscribe anytime.

YesChef - Learn from the world's best chefs
© 2026 Blame The Chef
🍳

Never Miss a Recipe

Weekly recipes, kitchen tips, and gadget picks — straight to your inbox.

No spam, ever. Unsubscribe anytime.

