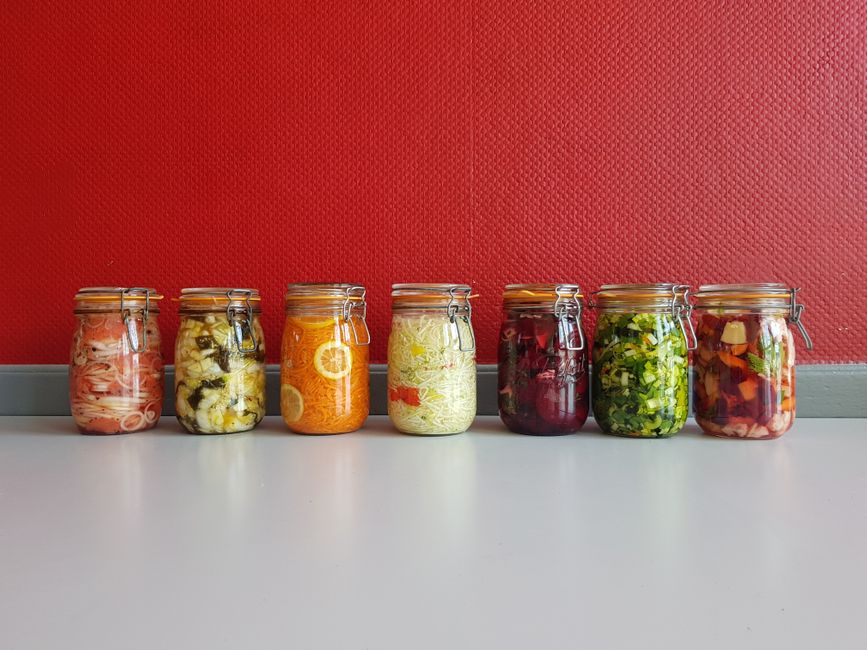
Fermentation Fundamentals: Preserving Vegetables Like a Pro
The world of fermentation is both ancient and exciting, providing home cooks the opportunity to explore and elevate their culinary repertoire. In recent years, this age-old technique has surged in popularity, with many individuals turning to fermentation as a way to preserve seasonal vegetables while enhancing their flavors and nutritional profiles. The process not only allows you to store surplus produce but also transforms it into tangy, succulent delights that can elevate any dish they accompany. From tangy sauerkraut to aromatic kimchi, mastering the fundamentals of fermenting vegetables can open up a whole new avenue of culinary creativity.
Understanding the science behind fermentation is crucial for any aspiring home chef. At its core, fermentation leverages the power of microorganisms—specifically, bacteria and yeast—to convert sugars and starches into acids, gases, or alcohol. This transformation not only preserves food but also creates complex flavors that enhance the overall dish. The environment you create during fermentation—such as temperature, time, and salt concentration—plays a significant role in determining the outcome of your vegetables. Thus, it’s imperative to grasp these foundational principles to ensure successful preservation.
Fermenting vegetables is not just a means of extension; it's an art form that encourages experimentation. Each jar can be a canvas on which flavors blend, evolve, and surprise. With just a few simple tools, some fresh vegetables, and a curious spirit, you can pave your way into the transformative world of fermentation. Whether you're looking to make a jar of spicy kimchi or a classic dill pickle, this post will guide you through the nuances of vegetable fermentation, leaving you equipped with both the knowledge and confidence to create your own fermented treasures.
The Science of Fermentation
To deepen our understanding of fermentation, let's delve into the science behind it. Fermentation is a metabolic process where microorganisms break down sugars in the absence of oxygen—this is also known as anaerobic fermentation. This process is not just limited to vegetables; it’s a fundamental technique seen across various culinary traditions, including bread-making, beverage production, and dairy processes. When you introduce salt to vegetables and allow them to sit in their own juices or a brine, you're creating an ideal environment for beneficial bacteria to flourish.
Microorganisms at Work
At the heart of fermentation are lactic acid bacteria (LAB). These good bacteria naturally occur on the surface of many vegetables and thrive in salty environments. LAB is responsible for converting the sugars in vegetables into lactic acid, which not only preserves the food but also imparts a unique sour flavor. The pH level becomes crucial during fermentation; a lower pH means a more acidic environment, which is less hospitable to spoilage bacteria and molds.
While lactic acid bacteria are the stars of the show, yeasts also play a role, particularly in the fermentation of foods like kimchi. This is especially true for complex ferments with added sugars, including fruits. Each strain of bacteria or yeast contributes its unique flavor profile, meaning your choice of starter culture—whether it's from the vegetables themselves or from a previous successful batch—can dramatically affect your results.
Phases of Fermentation
Fermentation can be broken down into several phases:
This multi-phase process is what allows for flavors to deepen and evolve, creating culinary products that are lively, vibrant, and full of personality.
Choosing Your Vegetables
Not all vegetables are created equal when it comes to fermentation. Some lend themselves to the process better than others due to their sugar content, structure, and water composition.
The Best Vegetables for Fermentation
Below are some of the best vegetables suited for fermentation:
Seasonal Considerations
When selecting vegetables for fermentation, it’s best to choose those that are in season. Seasonal produce is generally more flavorful and fresher, leading to better fermentation results. Additionally, remember that organic vegetables often have a higher concentration of natural bacteria, which can enhance the fermentation process.
Tools of the Trade
Embarking on the journey of fermentation requires a few essential tools to ensure consistency and success.
Essential Equipment
Cleanliness is Key
Before you get started, ensure all your tools are sanitized. This reduces the risk of introducing spoilage organisms into your ferment. Wash everything in hot, soapy water, or use a sanitizing solution.
Temperature and Environment
Fermentation ideally occurs in a cool, dark place. A temperature range of 65°F to 75°F is generally optimal. Too warm, and your vegetables may ferment too quickly and possibly spoil; too cold, and fermentation may stall altogether.
Preparing the Vegetables
The preparation of your vegetables can significantly impact the quality of your fermented products. With careful attention to detail, you can create the perfect canvas for your fermentation endeavors.
Cleaning and Cutting
Start with washing your vegetables thoroughly to remove any dirt and residues. For most vegetables, cutting them into uniform sizes allows for even fermentation:
Salting and Brining
Salt is essential not just for flavor, but also for controlling the fermentation process. It draws out moisture and creates an environment conducive to lactic acid bacteria while inhibiting spoilage.
#### Salt Ratios
A common salt concentration for vegetable fermentation is 2% to 5% of the total weight of the vegetables. Use this simple formula:
For example, if you have 1,000 grams of vegetables:
Always use non-iodized salt; sea salt or kosher salt are excellent choices as they lack additives that might impede fermentation.
Massaging and Mixing
Once you've added salt, massage or knead the vegetables by hand. This process helps break down the cell walls and releases the vegetable juice, forming a natural brine. The goal is to get your vegetables well-coated in salt, allowing them to soften and release their juices effectively.
The Fermentation Process
Once your vegetables are prepared and assembled in your fermentation vessel, it’s time to start the fermentation process.
Filling the Jar
Covering and Sealing
Cover the jar with a lid, cloth, or airlock. If using a cloth, secure it with a rubber band to keep dust and insects out while allowing gases to escape.
#### Timing and Temperature
Fermentation time can vary based on personal taste and environmental conditions. Generally, here are some guidelines:
Taste your ferment after the minimum time to assess its acidity and flavor. If it’s not quite ready, allow it to sit longer, checking every few days.
Storing and Enjoying Your Ferments
Once your fermentation reaches your desired tanginess, it’s essential to store it properly to maintain flavor and texture.
Transferring to the Fridge
When finished fermenting, transfer your jars to the refrigerator. Cool temperatures slow down fermentation, allowing the flavors to mature without the risk of over-fermentation.
Enjoying Your Ferments
Your home-fermented vegetables can be enjoyed in countless ways:
Long-Term Storage
Properly fermented vegetables can last several months in the refrigerator. As they age, their flavors will deepen—some even believe they become better with time. Always check for signs of spoilage, like off-smells or visible mold, and when in doubt, discard.
Flavor Enhancements
While vegetables alone can create enticing flavors, you can elevate your ferments with the addition of various herbs, spices, or even fruits.
Spice Additions
Consider adding these spices during the fermentation process:
Sweet Fruits
Incorporating fruits like apple, pear, or pineapple can introduce natural sweetness and acidity, creating an exciting balance in your final product. Be cautious with the quantity, as fruits can increase fermentation activity.
Troubleshooting Common Issues
Even the most seasoned fermenter may encounter challenges along the way. Here are some common issues and how to remedy them.
Mold Formation
Mold can sometimes appear on the surface of your ferment—don’t panic! As long as the vegetables beneath are submerged in brine, they are safe to eat. Skim off the mold and continue as usual.
Off Smells
If your ferment smells off or rancid, it’s best to err on the side of caution. Discard the batch, but take notes on the process for next time—the cause could be anything from insufficient salt to overheating.
Insufficient Fermentation
If your vegetables aren't fermenting, they could be too cold, in which case simply move them to a warmer spot. If the brine lacks salt, add a bit more to help kickstart the process.
Conclusion
The world of fermentation is a vibrant tapestry rich with flavors, cultures, and techniques. With a solid understanding of the fundamentals, you can confidently navigate the art of preserving vegetables like a pro. It’s not only a rewarding skill but also a sustainable way to extend the life of your harvest, reduce food waste, and promote health through the addition of probiotics.
As you embark on your fermentation journey, remember to embrace experimentation. Tweak recipes to fit your taste, try different vegetables and spices, and most importantly, enjoy the creative process. With each jar that you fill, you'll not only preserve the seasons but also create gastronomic gems that can elevate any meal. Happy fermenting, and may your taste buds rejoice!

Get the Next Recipe
Weekly recipes, techniques, and gear picks — straight to your inbox.
