
Fermented Hot Sauce: From Chili Mash to Bottled Fire
There is something fundamentally transformative about the process of fermentation. It is the bridge between a simple, raw ingredient and a complex, flavor-dense masterpiece that can elevate the most mundane meal to something restaurant-worthy. When you look at a fresh chili pepper, you see a bit of heat and perhaps a touch of fruitiness, but when you introduce the magic of lacto-fermentation, you are inviting a community of beneficial microbes to rewrite the chemistry of that vegetable. This isn't just about preserving food; it is about harnessing biological time to develop a depth of flavor that can never be replicated in a vinegar-heavy, mass-produced hot sauce. As home cooks, we often shy away from the idea of "culturing" food, fearing the unknown variables of bacteria, but once you master the ratios and the environmental control, you realize that nature is actually doing all the hard work for you.
The journey from a garden-fresh harvest to a shelf-stable, punchy fermented hot sauce is a lesson in patience and observation. While some kitchen projects can be rushed, fermentation demands that you slow down and tune into the subtle signs of activity—the rhythmic bubbling in an airlock, the shifting acidity levels, and the aromatic evolution of your mash. I always tell my students that fermentation is the chef’s best-kept secret because it allows for a "set it and forget it" approach that results in an incredibly sophisticated finish. Whether you are aiming for a blistering habanero fire or a nuanced, earthy serrano blend, the principles remain the same. By controlling the salt concentration and the anaerobic environment, you create a sanctuary for Lactobacillus to thrive, ensuring that your final product is not only delicious but also brimming with probiotic integrity.
Stepping into the world of hot sauce alchemy requires a shift in mindset from "cook" to "curator." You are not just tossing ingredients into a pan; you are managing an ecosystem. Throughout this guide, we will explore the science of brine ratios, the importance of choosing the right vessel, and the nuances of pH balancing to ensure that your sauce is safe, shelf-stable, and vibrant. We will cover the selection of peppers, the integration of aromatics, and the final blending process that determines the texture of your bottled fire. If you have been looking for a way to bring professional culinary techniques into your home kitchen, look no further. Welcome to the art of the ferment—let’s turn those peppers into something truly legendary.
The Science of the Mash: Why Fermentation Matters
At its core, lacto-fermentation is a process where lactic acid bacteria break down the sugars in your vegetables. In a hot sauce mash, this is particularly beneficial because the lactic acid produced by these bacteria doesn't just act as a natural preservative; it also cuts through the sharp, raw heat of the capsaicin, resulting in a sauce that feels "rounder" on the palate. Unlike vinegar-based sauces that rely on the immediate, acidic bite of acetic acid, fermented sauces develop a complex, funky tang that sits at the back of the throat and lingers, providing a much more sophisticated finish to your grilled meats or tacos.
The beauty of the mash method—as opposed to a brine-fermented liquid—is the concentration of flavor. When you pulverize the peppers with salt, you release their juices, creating a self-brining environment that keeps the pulp submerged. This reduction in surface area exposure helps prevent mold growth while concentrating the enzymatic activity. As the mash sits, the cell walls of the peppers begin to soften and break down, creating a silky consistency that is hard to achieve with fresh-blended raw sauces.
Mastering the Salt Ratio
The most critical factor in any fermentation project is your salt-to-vegetable ratio. For hot sauce, I recommend sticking to a strict 3% to 5% salinity by total weight. Anything less than 2% puts you at risk of unwanted spoilage, while anything above 6% may inhibit the growth of the beneficial bacteria you are trying to cultivate.
* Weigh your peppers and aromatics in grams.
* Calculate 3.5% of that weight to determine the exact amount of sea salt needed.
Always use high-quality, non-iodized sea salt or kosher salt*, as iodine can sometimes interfere with the fermentation process.
"Fermentation is the alchemy of the modern kitchen. It transforms a simple, volatile chili into a stable, complex condiment that ages with grace. Never rush the process; the bacteria know exactly how much time they need to reach the peak of perfection."
Ingredients: Beyond the Chili
While the chili is the protagonist, your supporting cast is just as important. The beauty of this recipe is its modularity. You can start with a base of jalapeños or serranos for a green, grassy profile, or opt for red habaneros or Scotch bonnets for a fruity, tropical heat. I always advise beginners to keep their first batch simple: red chilis, garlic, and perhaps a touch of onion. Once you understand how these ingredients behave over the course of a month, you can start experimenting with stone fruits like peaches, aromatic herbs like cilantro or basil, or even toasted spices.
Garlic is a staple in my mashes because it contains naturally occurring sugars that feed the bacteria and add a savory punch. However, remember that garlic is potent. If you use too much, it can become overly pungent and dominate the delicate floral notes of the peppers. I recommend using a ratio of roughly one clove of garlic for every ten peppers. Similarly, onions add a nice sweetness but add a high moisture content that needs to be monitored during the first few days of the ferment.
Sourcing Your Produce
Quality matters. If you can, source your peppers from a local farmers market where they have been picked at the peak of ripeness. Avoid any chilis with soft spots or signs of rot, as the goal is to introduce healthy wild yeasts and bacteria, not mold or decaying matter. If your store-bought peppers have a wax coating, give them a quick wash with cool water, but don't scrub too hard—we want to preserve some of the natural microflora living on the skins of the peppers.
Preparing the Vessel and Environment
The environment in which your ferment occurs is just as important as the recipe itself. Because you are dealing with a live process, you need a vessel that allows for the escape of carbon dioxide without letting oxygen back into the jar. If oxygen enters the system, you increase the risk of kahm yeast—a harmless but unsightly white film—or, worse, surface mold. A glass mason jar with a silicone airlock lid is the gold standard for home fermentation, though a traditional airlock system works just as well.
Before you begin, ensure your equipment is scrupulously clean. While you don't need a medical-grade sterile environment, you do need to wash your jars in hot, soapy water and rinse them thoroughly. A residual film of dish soap or grease can easily derail a batch. Avoid metal lids or containers if possible, as the acidity of the fermenting chili mash can corrode metal and leach metallic flavors into your sauce.
The Role of Temperature
Temperature is the accelerator of your fermentation engine. Ideally, keep your mash in a location that stays between 68°F and 75°F (20°C - 24°C). If your kitchen is colder, the process will simply take longer; if it is warmer, the bacteria will work rapidly, which can lead to a less complex flavor profile. Avoid direct sunlight, which can kill off beneficial bacteria and heat the jar unevenly, causing fluctuations that the culture won't appreciate.
* Keep it out of direct sunlight.
* Ensure the jar is placed on a plate or tray to catch any overflow, as the fermentation process can be quite vigorous in the first 48 hours.
* Consistency is key: find a "cool, dark corner" and leave the jar there. Constant moving and shaking are not necessary and can disturb the protective layer of CO2 that builds up at the top.
The Fermentation Process: Watching the Magic
Once your mash is prepared, weighed, and sealed, the clock begins. Over the next 7 to 28 days, you are going to witness a fascinating transition. In the first few days, you might see small bubbles forming throughout the mash. This is a sign of intense biological activity—the bacteria are gorging on the sugars and off-gassing carbon dioxide. If your jar has an airlock, you might hear a faint, rhythmic "glug" as the pressure releases. This is exactly what you want to see and hear.
Do not be alarmed if the color of your mash dulls slightly during the first week. This is normal. The vibrant, bright green or red of the fresh peppers will shift into something more muted as the cell structure breaks down. You might also notice a thin, white, powdery substance on the surface—this is typically just a harmless layer of bacteria or yeast. However, if you see fuzzy, colored growth (like blue, green, or black fuzz), your batch has been compromised and should be discarded. Trust your nose: a healthy ferment smells sharp, tangy, and slightly fruity. A spoiled ferment smells like rotting garbage.
Managing the Mash
While most ferments are "set and forget," I recommend giving your jar a gentle swirl every few days to keep the surface of the mash moist. Because the mash is a mixture of solids, the liquid will naturally settle at the bottom. By gently swirling it, you ensure that the top layer of peppers doesn't dry out and remains protected by the brine.
"A well-managed mash is a symphony of microbiology. You are the conductor, and the bacteria are the orchestra. Keep the rhythm steady, provide the right environment, and the resulting performance will be a sauce that holds its own against any store-bought bottle."
Harvesting and Blending: The Final Transformation
Once you have reached your desired level of tang, it is time to harvest. Most people find that a 2-week ferment provides a great balance of flavor, but if you want something with more depth and funk, you can push it to 4 or even 6 weeks. When you open the jar, you should be greeted by an aroma that is distinctly acidic and savory—a precursor to the final sauce.
Before blending, you have a crucial decision to make: the brine. Do you want a thinner, dash-style sauce, or a thick, chunky condiment? Many chefs reserve the liquid brine separately and add it back into the blender slowly. This allows you to control the final viscosity perfectly. If you want a shelf-stable sauce that can live in your pantry, you may choose to boil the sauce briefly after blending, but be aware that this kills the probiotic benefits. If you prefer to keep the probiotics alive, store the finished bottles in the refrigerator immediately.
The Art of the Finish
At this stage, you can add a small amount of high-quality vinegar, such as apple cider vinegar or sherry vinegar, to round out the flavor. While your mash already has natural acidity, a splash of vinegar can provide a bright, "top-note" flavor that cuts through the fat of rich foods. This is also the time to adjust the salt content. If the sauce feels a bit flat, a tiny pinch of salt or a small drop of honey can bring the profile back into alignment.
Troubleshooting and Pro-Tips
Even the most experienced chefs run into hiccups. If your sauce is too thin, it might be that your peppers had high water content. In the future, you can dehydrate your peppers slightly before mashing or add a thickener like xanthan gum. Xanthan gum is a professional secret; a tiny, microscopic pinch goes a long way. It stops the solids from separating from the liquid, giving your sauce that professional, uniform cling that you see on high-end artisan bottles.
If your sauce is too salty, don't throw it out! You can easily balance this by adding a bit of fruit (like roasted mango or pineapple) or by thinning the sauce with a bit of plain water or un-fermented vinegar. Remember that the saltiness will mellow out once it is integrated into a dish. When applying your sauce to food, remember that fermented hot sauce is not just heat—it is flavor. Use it to deglaze a pan, stir it into a marinade, or drizzle it over a fried egg to see how the complexity shines.
Safety Considerations
Safety is paramount in fermentation. While the acidity of the fermented mash makes it very difficult for harmful pathogens to survive, it is essential to follow the pH guidelines. If you are planning on bottling your sauce for shelf stability, you should aim for a pH of 4.6 or lower. You can easily check this with a simple digital pH meter. Anything above 4.6 is technically in the "danger zone" and should be kept strictly refrigerated.
* Always keep a food-grade pH meter on hand if you are serious about selling or gifting your sauces.
* Label your jars with the start date and the percentage of salt used.
* If you are unsure about the safety of a batch, follow the golden rule of the kitchen: "When in doubt, throw it out."
Bottling and Storage
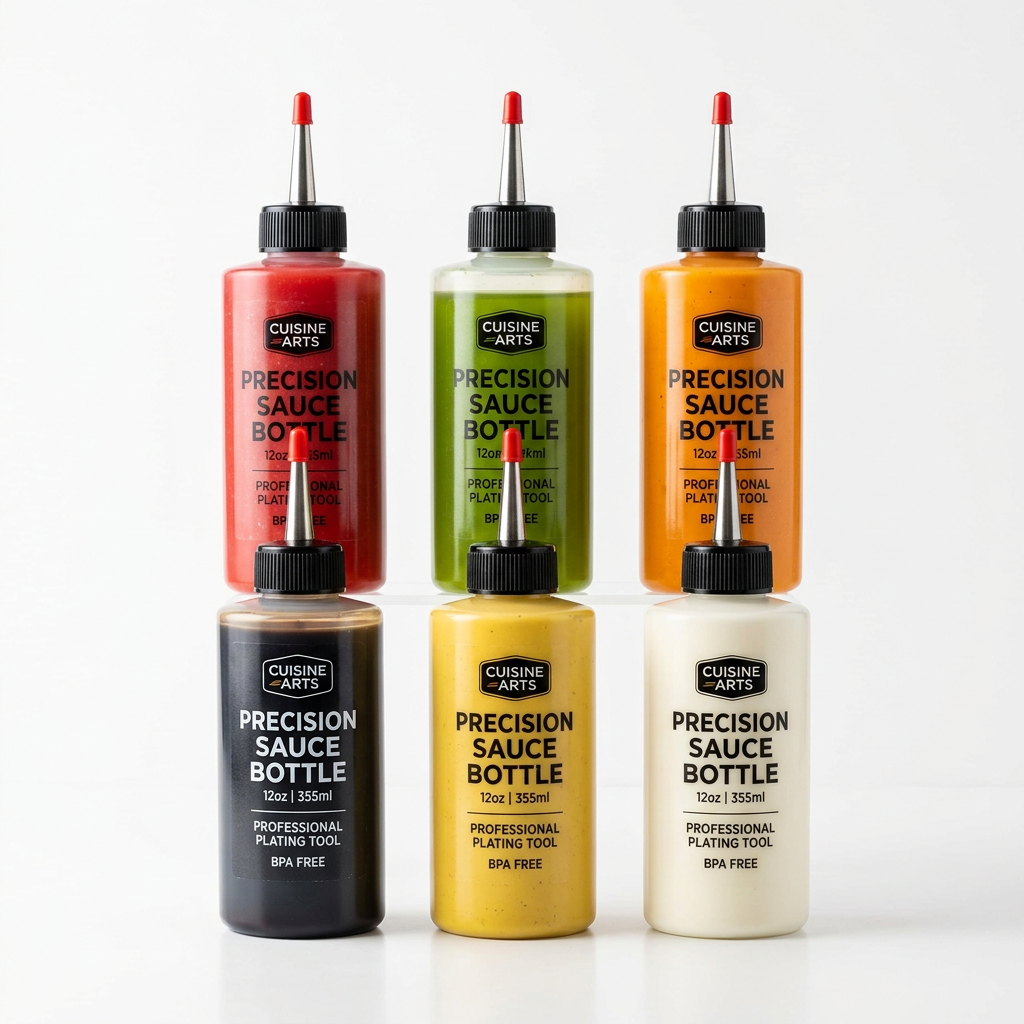
Congratulations, you have reached the finish line. The final step is getting your sauce into bottles. I prefer glass woozy bottles because they look professional and allow for a controlled pour. Use a small funnel to fill the bottles, leaving about half an inch of headspace at the top. If you have added xanthan gum, the sauce will be stable and won't separate, but if you have opted for a natural approach, don't be surprised if you see a bit of settling. Simply give the bottle a good shake before use.
Storage is simple: if you boiled your sauce to pasteurize it, it can live in the pantry for up to a year (or until the seal is broken). If you kept it raw to preserve the probiotics, it should live in the fridge. Raw, fermented hot sauces tend to continue developing flavor over time, so you might notice that a bottle you open in three months tastes different—and often better—than a bottle you opened the day you made it.
Scaling Up for the Future
Once you have conquered your first batch, the sky is the limit. Start looking at your garden or local produce with a new eye. Can you incorporate fermented garlic scapes? How about adding some roasted carrots for a deeper, earthier body? The principles of the 3% salt ratio and the anaerobic mash remain the same regardless of what you throw into the blender. You are now equipped with the fundamental knowledge to create unique, artisanal condiments that reflect your specific tastes and culinary style.
"The final pour into the bottle is the culmination of a month of patience. You aren't just bottling peppers; you are bottling time, care, and a biological process that humans have relied on for millennia. Enjoy the fire you have created."
Conclusion
Creating your own fermented hot sauce is a journey that rewards both the palate and the intellect. We have moved from the initial selection of fresh, vibrant chilis to the nuanced science of managing a lacto-fermenting mash, and finally, to the blending and bottling of a product that is uniquely your own. You have learned that fermentation is not about conquering nature but working in tandem with it. By mastering these ratios—the 3% to 5% salt concentration, the temperature control, and the careful selection of aromatics—you have elevated your kitchen game to a professional level.
Remember that every batch is a learning experience. Don't be discouraged if your first attempt isn't exactly the heat level or consistency you envisioned. The beauty of this craft lies in the iteration. Taste your sauce at different stages, experiment with new ingredients, and refine your process with every harvest. You now possess the tools to create a condiment that will leave your friends and family wondering, "How did you get this flavor?" and when they ask, you can simply smile and say, "I let the bacteria do the heavy lifting."
As you move forward, keep your tools clean, your pH levels monitored, and your curiosity peaked. Whether you are using these sauces to brighten up a morning scramble, add complexity to a slow-cooked brisket, or provide a sharp edge to a vegetable stir-fry, you are participating in a culinary tradition that spans centuries. There is a deep, primal satisfaction in producing something that is alive, changing, and intensely flavorful. So, grab your jars, weigh your salt, and get your fermentation station ready. The world of bottled fire is yours to define. Stay bold, stay curious, and keep those fermenting jars bubbling. Happy fermenting, and may your future batches be even more legendary than your first.


Get the Next Recipe
Weekly recipes, techniques, and gear picks — straight to your inbox.
