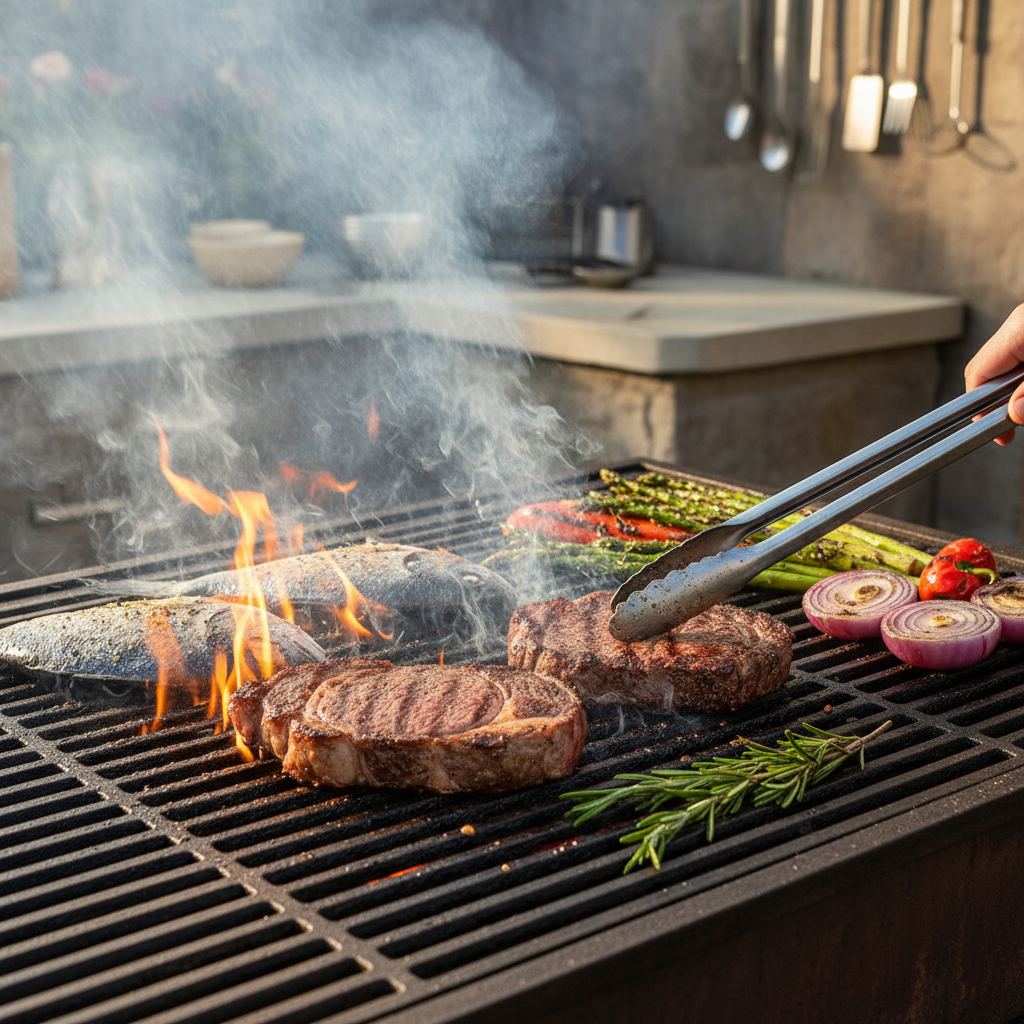
Grilling Mastery: Direct Heat and Smoke
Grilling is more than just a method of cooking; it's an art form and a time-honored tradition that invites camaraderie and celebration. As the warm sun shines down and the aroma of sizzling meat fills the air, the grill becomes the centerpiece of outdoor gatherings. The essence of grilling lies in its simplicity—utilizing fire, heat, and smoke to transform raw ingredients into mouthwatering dishes. However, mastering these fundamental elements can be a game changer for home cooks looking to elevate their grill game from basic fare to exceptional BBQ delights.
Utilizing direct heat and smoke in grilling is a technique that every aspiring chef should embrace. Direct heat cooking allows for achieving perfect sears and beautiful char while maintaining juicy interiors. On the other hand, incorporating smoke into your grilling not only enhances flavor but also infuses a richness that is synonymous with barbecue. By understanding how to balance these two techniques, home cooks can create unforgettable meals that please the palate and connect people through shared experiences around the grill.
As we dive deeper into the nuances of grilling mastery, we will explore essential tips for using direct heat and smoke, along with practical advice on selecting the right equipment, flame management, and flavoring techniques through marinades, brines, and wood choices. The goal is to bring forth the essence of grilled cuisine that transcends backyard cooking, hinting at the sophisticated techniques employed by professional chefs. Whether you’re grilling for everyday meals or preparing for a festive gathering, this guide serves as your companion in achieving barbecue greatness.
Understanding Direct Heat Grilling
Direct heat grilling involves cooking food directly over the heat source, which creates a charming char and locks in flavors. The power of this method lies in its ability to deliver high-temperature cooking, turning proteins like steaks, chicken, and fish into delectable, crispy-skinned masterpieces. Generally, direct heat grilling is characterized by two primary setups: high heat and medium heat.
Setting Up Your Grill for Direct Heat
Before you even start grilling, it's crucial to prepare your grill correctly. Here’s a quick guide for gas and charcoal grills:
- Arrange the charcoal in a single layer in the grill’s base and light it, allowing it to burn until covered with white ash (about 20-30 minutes).
- Spread the coals evenly for direct grilling or divide them for a two-zone fire (direct and indirect cooking).
- Preheat the grill by turning on the burners to high heat and closing the lid; this usually takes about 10-15 minutes.
- Once preheated, adjust the burners to your preferred cooking temperature, whether high for searing or medium for cooking through without burning.
Tip: Always ensure your grill grates are clean and well-oiled before placing food on them. This practice not only helps prevent sticking but also contributes to achieving attractive grill marks.
The Right Temperature for Success
Knowing the right temperature for direct heat grilling can be the difference between a perfectly cooked dish and a culinary disaster. Here’s a quick reference to optimal temperatures for various foods:
The Role of Smoke in Grilling
While grilling is often associated with high heat, the secret spice of barbecuing lies in the addition of smoke. Introducing wood chips or chunks can infuse subtle or robust flavors into your meats, vegetables, and even fruits. Understanding different woods and their flavor profiles, as well as how to integrate them into your cooking process, is fundamental for mastering smoky goodness.
Choosing the Right Wood for Smoking
Not all woods are created equal when it comes to smoking. The type of wood can dramatically alter the flavor of your grilled foods. Here are some popular choices broken down by flavor profile:
How to Smoke on the Grill
To achieve that smoky flavor while grilling, you can use two methods depending on your setup:
- Soak wood chips in water for at least 30 minutes to prevent them from burning too quickly. Place the chips directly on the coals once they are glowing hot and begin grilling immediately.
- Use a smoker box filled with soaked wood chips or foil packets (make small holes in a foil pouch). Place them on the grill grates above the burner flames, allowing the smoke to circulate throughout the grill.
Chef Tip: For an interesting variation, try combining wood types to create a unique smoke profile that enhances the natural flavors of your ingredients.
“Great grilling is an exploration of flavors—the interplay of smoke and direct heat can elevate even the simplest of ingredients into something extraordinary.”
Marinades and Brines: Building Flavor
Flavors matter when it comes to grilling. Marinades and brines are the heroes of preparation, adding depth, moisture, and complexity to your grilled items. These techniques can enhance tenderness and invoke an even greater interaction between the smoke and your proteins.
How to Create Marinades
Creating an effective marinade involves balancing acid, oil, and seasonings. Here’s a basic guide:
Basic Marinade Recipe:
Combine all the ingredients in a bowl or a resealable plastic bag and let your proteins marinate for at least 30 minutes to several hours, depending on their type.
Brining for Extra Moisture
Brining is another technique that's definitely worth exploring, especially for proteins that tend to dry out, like chicken breasts or turkey. A simple brine consists of salt and water, but it can be enhanced with sugar, herbs, and aromatics.
Basic Brine Recipe:
“A good marinade or brine isn’t just about flavor; it’s about creating a more succulent piece of grilled meat that keeps your guests coming back for more.”
Grilling Protein to Perfection
Now that you are equipped with the foundational skills for direct heat and smoke, let's delve deeper into specific proteins. Each type of meat has its own unique characteristics and best practices to ensure they are grilled to perfection.
Chicken
Chicken can be one of the most versatile proteins on the grill, but it often requires careful temperature control to avoid dryness.
Cooking Times:
Steak
Steaks benefit immensely from direct heat grilling, allowing for a beautiful sear that locks in flavors.
Cooking Times:
Fish
Fish might seem daunting on the grill, but with direct heat and proper techniques, it can transform into a delicately cooked masterpiece.
Pro Tip: Use a fish basket or cooking spray on the grates to prevent sticking when using delicate fillets.
Vegetables and Fruits on the Grill
Grilling isn't exclusively for proteins. Fresh vegetables and fruits can be transformed on the grill, bringing out their natural sweetness and adding a smoky depth that can't be replicated indoors.
Preparing Vegetables
Ideal Vegetables for Grilling:
Grilling Fruits
Grilled fruits can serve as a delicious side or dessert, caramelizing the sugars and creating a smoky-sweet flavor.
Fruits that Grill Well:
Cooking Method:
“Vegetables and fruits can surprise you, showcasing a new layer of flavor that can easily steal the spotlight from grilled meats.”
Cleaning and Maintaining Your Grill
Once your grilling session is over, maintenance is key to preserving your beloved grill for many seasons to come.
Cleaning Your Grill
A clean grill not only enhances flavor but also prolongs the lifespan of your cooking grate. Here are some steps for effective cleaning:
Protecting Your Grill
If you’re grilling seasonally, don’t forget to cover your grill securely and store it in a sheltered area when not in use. Consistent maintenance is what will uphold your grill’s integrity and cooking capabilities.
Conclusion
The journey toward grilling mastery is an exciting venture full of flavors, aromas, and the warm connections formed while gathered around the grill. Through understanding the intricacies of direct heat, the benefits of smoke, and the art of marinating and brining, even the most novice home cook can achieve outcomes rivaling those seen in fine dining establishments.
So grab your tongs, fire up that grill, and let the flames lead you on your culinary adventure. Remember, the key to grilling is not just in the ingredients you choose, but also in the love and care you pour into the cooking process. Each meal prepared outside is a chance to enjoy life, family, and friends while celebrating the delicious charm of grilled food. With practice, patience, and a few well-honed techniques, you'll be well on your way to becoming the grill master that everyone is eager to gather around.


Get the Next Recipe
Weekly recipes, techniques, and gear picks — straight to your inbox.
