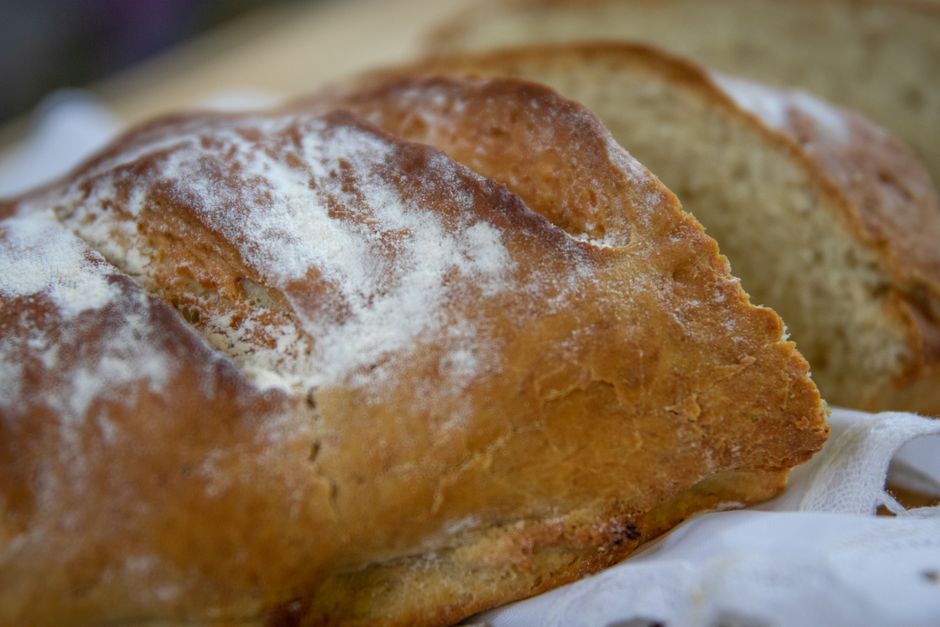
Homemade Bread Without a Machine
Baking bread at home is a time-honored tradition that connects us to the very essence of cooking. The smell of fresh bread rising in the oven is not only a signal of warmth but also a reminder of the creativity and patience involved in homemade culinary projects. For many, the idea of baking bread may feel daunting, primarily due to the misconception that it requires specialized machines and complicated processes. However, homemade bread can be accomplished quite simply with just your hands, some basic ingredients, and a little bit of guidance.
Imagine the pleasure of slicing into a loaf you've created from scratch, the crust golden brown, and the crumb airy and tender. Crafting your bread allows you to customize flavors, textures, and shapes to suit your taste. Whether you're new to baking or an experienced cook looking to explore the art of bread-making without relying on machines, this guide will arm you with tips, techniques, and easy-to-follow recipes that will lead you to your perfect loaf.
In this post, we will explore the world of homemade bread, equipped only with a few essential tools and your determination. From understanding the key ingredients and their roles, to mastering the various techniques involved in kneading, rising, shaping, and baking, every step will be thoroughly detailed. By the end, you will not only feel confident in your ability to bake bread but will also develop a deeper appreciation for this timeless skill. Get ready to roll up your sleeves and embark on a flavorful journey—the humble yet magnificent loaf awaits!
Key Ingredients for Homemade Bread
Before we dive into the actual process of making bread, it’s important to familiarize ourselves with the essential ingredients. Each one plays a crucial role in creating the structure, flavor, and texture of the bread. Understanding these components will not only enhance your baking skills but also empower you to make informed substitutions if needed.
Flour
The foundation of any loaf is flour. Most bread recipes call for bread flour, which has a higher protein content (about 12-14%) compared to all-purpose flour. This extra protein is crucial for developing gluten, providing the structure necessary to hold air and moisture within the loaf. If you don’t have bread flour on hand, here’s a basic guideline:
An equally fascinating option is whole wheat flour, which imparts a nutty flavor and adds nutritional benefits. However, it requires additional water due to its higher fiber content. A combination of all-purpose and whole wheat flour can yield a wonderfully textured loaf.
Water
Next up is water, an often-overlooked hero in bread-making. Water acts as a solvent, activating the proteins in flour and yeast to create that magical gluten network. The temperature of the water is crucial; generally, you’ll want it to be around 100°F to 110°F. Water that is too hot can kill the yeast, while cold water will slow down fermentation.
A standard ratio for most bread recipes is roughly 60% to 70% hydration, meaning for every 100 grams of flour, you’ll add 60 to 70 grams of water. This ratio can be adjusted slightly depending on the desired crust (lower hydration for a crisper crust) and crumb (higher hydration for a more open and airy texture).
Yeast
Then, there's yeast, the magical micro-organism that causes your dough to rise. You can use either active dry yeast or instant yeast. Active dry yeast needs to be activated in warm water prior to mixing, while instant yeast can be added directly to the dry ingredients, making it a time-saver.
A general guideline is to use about 1 packet (2 ¼ teaspoons) of yeast for around 4 cups of flour. If you find yourself with fresh yeast, a good conversion is to use roughly 3 times the amount of fresh yeast as dry yeast.
Salt
Salt is the enhancer, elevating the flavors of your bread while also playing a role in gluten development and fermentation. It’s essential not to skip this ingredient; however, it should be added thoughtfully, as too much salt can hinder yeast activity. A typical amount is around 1 to 2 teaspoons for every 4 cups of flour.
Optional Ingredients
Lastly, bread can be flavored and enriched with a variety of optional ingredients, such as:
By understanding these core components, you will be well-equipped to experiment with various bread recipes and customize them to your liking.
Essential Bread-Making Equipment
While baking bread can be performed almost entirely with your hands, having a few essential tools can make the process smoother and yield better results. You don’t need the fanciest gadgets, but the right items can enhance your workflow and enhance the quality of your baking.
Mixing Bowls
Having a few mixing bowls in different sizes is crucial. A large bowl is essential for mixing and kneading the dough, while smaller bowls can be used for measuring out ingredients. Make sure you have at least one bowl that feels durable and is easy to clean.
Measuring Cups and Spoons
Precision is key in baking, so invest in a set of dry and wet measuring cups, along with measuring spoons. Using the correct measurements ensures consistency in results. A kitchen scale is also a great tool to have, as it allows for a more precise measurement of ingredients.
Dough Scraper
A dough scraper is an invaluable tool for any home baker. It's used for dividing dough, transferring it to shapes, and cleaning your work surface. If you don’t have one, a spatula can serve as a substitute.
Rolling Pin
While not always necessary, a rolling pin can help flatten dough and shape it more evenly, especially for recipes requiring rolled dough, like baguettes or flatbreads.
Baking Sheet or Stone
For baking bread, you can choose between a baking sheet or a baking stone. If you’re looking to achieve a crisp crust, a baking stone can help mimic the environment of a brick oven. Preheat it in the oven before placing your bread on top to yield an irresistible crust.
Oven Thermometer
Most home ovens can be inaccurate by up to 25°F, which can affect baking times. An oven thermometer ensures you're baking at the precise temperature, leading to perfectly baked loaves time and time again.
Cooling Racks
After baking, letting your bread cool on a wire rack allows air circulation, avoiding a soggy bottom and improving the texture. Patience is key—don’t slice into that loaf too soon!
While you can certainly bake bread with minimal tools, having the right equipment can elevate your baking experience and ensure successful outcomes.
The Bread-Making Process
With a strong understanding of ingredients and essential tools, it's time to dig into the actual bread-making process. This section will guide you through the steps from mixing to baking, making bread from scratch without any machinery.
Step 1: Mixing the Ingredients
Begin by gathering your ingredients and tools. In a large mixing bowl, combine the measured flour, salt, and yeast (if using instant yeast). If you’re using active dry yeast, dissolve it in your warm water with a pinch of sugar to activate it before combining with the flour.
- 4 cups of bread flour
- 2 teaspoons of salt
- 2 ¼ teaspoons of instant yeast (or the activated active dry yeast)
Step 2: Kneading the Dough
Kneading is an essential technique that develops gluten, giving your bread its structure and chew. Here’s how to do it effectively:
As you knead, the dough should become smoother and slightly more elastic. If at any point it seems too sticky, incorporate a sprinkle of flour until it’s manageable.
“Kneading is like a workout for your dough – give it time and attention, and it will reward you with a beautiful structure.”
Step 3: First Rise (Fermentation)
Once you’ve kneaded the dough, it’s time for the first rise. Place the dough into a lightly greased bowl, cover it with a damp towel or plastic wrap, and leave it in a warm, draft-free area. The ideal rising temperature is around 75°F to 80°F.
Step 4: Shaping the Loaf
After the dough has risen, it’s time to shape it into your desired loaf form. Gently punch the dough down to release excess gas and turn it out onto a floured surface. Here’s how you can shape your loaf:
Step 5: Second Rise
Place the shaped loaves seam-side down on a greased baking sheet or in a loaf pan. Cover again and allow to rise until doubled in size (about 30 to 60 minutes). At this point, preheat your oven to 375°F to get it ready for baking.
Step 6: Scoring and Baking
Before placing the loaves in the oven, it’s essential to score the top with a sharp knife or bread lame. This technique allows the bread to expand properly during baking, preventing it from tearing in unexpected places.
“Scoring is like giving your bread a voice; it allows for a beautiful rise and creates a canvas for the crust.”
Your bread should take on a lovely golden color, signaling that it’s done. A hollow sound when tapped on the bottom is another great indicator of doneness.
Step 7: Cooling
Once baked, transfer the bread loaves to a wire rack, and resist the urge to cut into them immediately. The cooling process helps the interior crumb to set, enhancing the final texture of your loaf.
Troubleshooting Common Issues
Baking bread can sometimes lead to unexpected results. Don’t be discouraged; even professional bakers encounter challenges. Here are a few common issues and solutions:
Dense Bread
If your bread turns out dense, it’s often due to:
Flat Loaf
If your bread doesn’t rise adequately:
Gummy and Unfinished Interior
If the inside of your bread is gummy:
Crust Too Hard
If you end up with a particularly hard crust, consider:
By familiarizing yourself with these common issues and their solutions, you’ll become a more confident baker, ready to tackle any challenges that arise in your bread-making adventures.
Flavor Variations and Advanced Techniques
Once you’ve mastered the classic homemade bread, the real fun begins. You can start experimenting with flavors, shapes, and advanced techniques, turning a simple loaf into a culinary masterpiece.
Flavor Enhancements
There are endless possibilities when it comes to adding flavor to your bread. Here are some ideas to inspire creativity:
Shaping Techniques
Experimenting with different shapes can elevate your bread game. Here are a few methods:
Advanced Techniques
If you’re feeling adventurous, try these techniques for an elevated baking experience:
As you explore these variations and techniques, you’ll refine your personal baking style and discover what makes your bread uniquely yours.
Conclusion
Baking bread at home is more than just a culinary task; it’s a satisfying journey that allows for creativity, exploration, and the joy of sharing something delightful with others. Throughout this post, we’ve covered the essential ingredients, tools, processes, and troubleshooting methods that will help you conquer bread-making without the aid of a machine.
It’s important to remember that bread-baking is a balance of science and art. Each loaf is a reflection of your care and attention, skillfully honed through practice. So roll up your sleeves, don your apron, and embark on this incredible baking adventure.
Once you've mastered the basics, remember to enjoy the process—experiment with flavors, shapes, and techniques you’ve learned. Share your freshly baked loaves with family and friends and relish in their delight. With practice, you will gain confidence and creativity, turning your kitchen into a haven of warmth and the beautiful smell of homemade bread.
Now, go forth and bake—your perfect loaf awaits!




Get the Next Recipe
Weekly recipes, techniques, and gear picks — straight to your inbox.
