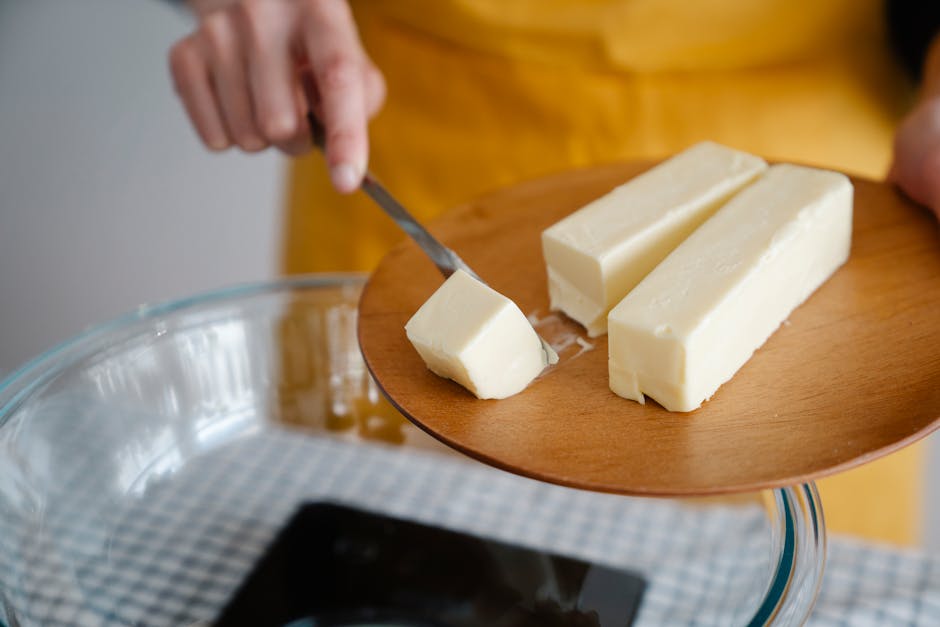
How Many Grams in a Cup of Butter? Chart
Precision is the silent partner of every great baker, the invisible hand that turns a chaotic mess of ingredients into a golden, flaky masterpiece. In the professional kitchen, we rarely measure by volume because the humble cup can be as unreliable as a poorly calibrated oven. Flour settles, brown sugar packs down, and butter—our most temperamental fat—can shift its density depending on its temperature and aeration. By mastering the conversion from volume to mass, you are moving away from mere guesswork and stepping into the realm of true culinary science. This transition is not just about accuracy; it is about building a reliable foundation that allows you to troubleshoot your bakes with confidence rather than confusion.
When you begin to weigh your ingredients, you will notice an immediate change in the consistency of your cookies, cakes, and pastry doughs. A "cup" of butter, for instance, might sound straightforward, but its physical state changes everything about how it interacts with leavening agents and proteins. If your butter is too soft, it won’t hold the air necessary for a light crumb, and if it is too cold, your emulsion will break entirely. Understanding the grams behind the cup ensures that your ingredient ratios remain perfect, regardless of how much you are scooping or how long your butter has been sitting on the counter. We are here to dismantle the myths surrounding measurements and replace them with the cold, hard facts that professional pastry chefs rely on every single day.
Over the next few sections, we will explore the precise mathematics of baking fats, the tools required to master your kitchen, and why grams will quickly become your new best friend. You will learn how to adjust for different varieties of butter, how to handle the temperature nuances of high-fat versus standard options, and how to maintain the structural integrity of your doughs through meticulous weighing. Forget the stress of "packing" your measuring cups or wondering if you accidentally left an extra tablespoon in the wrapper. By the time you reach the end of this guide, you will be well-equipped to execute complex recipes with the precision of a head pastry chef, ensuring that every batch you pull from the oven is as consistent as the one before.
The Importance of Precision in Baking
Baking is chemistry, and chemistry demands exact measurements to reach a successful reaction. When you rely on volume—using cups and spoons—you introduce variables that can fundamentally alter the outcome of your recipe. For example, a cup of butter is typically considered 227 grams, but if you are scraping out a measuring cup, you might lose five to ten grams clinging to the sides, which is enough to ruin a delicate shortbread recipe. Professional kitchens favor mass-based measurements because they are objective, repeatable, and entirely unaffected by the technique of the person doing the scooping.
The Problem with Volumetric Measurements
Volumetric measurements are prone to human error, specifically regarding the "packing" density of ingredients. While butter is a solid fat, it is often measured by visual estimation on the wrapper, which can be inaccurate if the manufacturer’s markings are slightly off or if the butter has become misshapen. When you transition to a digital scale, you remove the human element. You are no longer guessing if you have reached the line on the measuring cup; you are simply watching the numbers climb until you hit your target mass.
Precision is not about being rigid or boring; it is about providing the framework necessary for your creative culinary freedom to flourish without the anxiety of failure.
Mastering the Kitchen Scale
If you haven’t yet invested in a high-quality digital kitchen scale, make it your next culinary purchase. Look for a scale that measures in both grams and ounces, with a tare function that allows you to reset the display to zero after placing a bowl on the platform. This tare technique is vital, as it allows you to weigh your butter directly into the mixing bowl, saving time on cleanup and minimizing the transfer of ingredients. Place your bowl on the scale, hit tare, add your butter, and verify the weight against your recipe requirements. It is that simple, yet it is the single most effective way to improve your output.
The Gram Conversion Chart for Butter
To make your life easier, we have compiled a standard conversion chart. Keep in mind that in the United States, one standard stick of butter weighs exactly 113 grams (or 4 ounces). Because most baking recipes are built around this standard, you can easily use these numbers to adjust your mise en place before you ever turn on your oven. Always remember that room temperature butter—ideally between 65°F and 68°F—is the standard for most creaming methods.
Standard Butter Conversions
Here is a breakdown to keep pinned to your refrigerator or inside your favorite cookbook:
* 1 tablespoon: 14 grams
* 2 tablespoons: 28 grams
* 4 tablespoons (1/4 cup / half stick): 57 grams
* 8 tablespoons (1/2 cup / 1 stick): 113 grams
* 16 tablespoons (1 cup / 2 sticks): 227 grams
* 32 tablespoons (2 cups / 4 sticks): 454 grams (or 1 pound)
Why Consistency Matters
When a recipe calls for 227 grams of butter, using exactly that amount is crucial for the hydration and aeration of your dough. If you use too little, your cookies may be dry and crumbly; use too much, and they will spread across the baking sheet into an unrecognizable puddle. By sticking to the gram measurements, you ensure that the ratio of fat to flour, sugar, and leavening agents remains exactly as the recipe developer intended, leading to a much more predictable and professional result every single time you bake.
Understanding Butter Varieties and Fat Content
Not all butter is created equal, and the differences between brands and styles can influence your bake. European-style butter generally contains a higher fat percentage—usually around 82% to 86%—compared to standard American butter, which sits around 80%. This extra fat provides a richer flavor and a different melting point, which can be a game-changer for laminated doughs like puff pastry or croissants.
The Role of Water Content
The remaining percentage in butter is water and milk solids. When you are making delicate emulsions, like a buttercream frosting or a genoise, that water content matters. Higher-fat European butters contain less water, meaning your emulsions will be more stable and less prone to breaking. If you find your buttercream "weeping" or looking grainy, consider checking the fat percentage of the butter you are using. The weight remains the same—a gram is still a gram—but the chemical behavior changes significantly.
Salted vs. Unsalted Butter
As a general rule for baking, always default to unsalted butter unless a recipe specifically asks for salted. Using unsalted butter gives you total control over the sodium content of your final product. If you accidentally use salted butter, you have no way to remove that sodium later, which can make delicate pastries taste aggressive. When a recipe calls for unsalted butter but you only have salted, you can subtract roughly 1/4 teaspoon of salt from the recipe per half-cup of butter used, though this is a rough estimate and should be done with caution.
The secret to a perfect pastry isn't just following the recipe; it is understanding how each ingredient behaves at different temperatures and textures.
Techniques for Measuring and Preparing Butter
Proper preparation is the second half of the battle. Even if you have the perfect weight, the temperature of the butter will dictate how it behaves during the mixing process. We often talk about "room temperature" butter, but what does that really mean? It means the butter should be pliable, allowing you to press your finger into it with little resistance, but it should still hold its shape and not be greasy or oily.
The Creaming Method
In most cookie and cake recipes, you will use the creaming method. This involves beating butter and sugar together until the mixture is light, fluffy, and pale yellow. The sugar crystals cut into the butter, creating tiny air pockets. If your butter is too warm, these pockets will collapse. If it is too cold, the sugar won’t incorporate properly, and you’ll end up with dense, hard results. By weighing your butter and ensuring it is at the correct temperature—ideally 68°F—you ensure the creaming method works exactly as it should.
How to Soften Butter Correctly
Avoid the temptation to use the microwave to soften butter. Microwaving often leads to uneven patches where the fat liquefies before the center softens, which ruins the emulsion. Instead, cut your measured butter into small, 1/2-inch cubes and let them sit at room temperature for 15 to 20 minutes. The increased surface area will allow the butter to come to temperature uniformly, ensuring it is ready for your mixer without any hot, melted spots that can destroy your dough’s structure.
Troubleshooting Common Butter Mistakes
Even experienced bakers have days where the butter just won’t cooperate. Understanding the warning signs of a broken emulsion or an improperly incorporated fat is key to becoming an authoritative home baker. If your dough looks separated or "curdled," it usually means the temperature of your ingredients was too far apart, or the butter was slightly too soft when you began the mixing process.
Fixing a Broken Emulsion
If you are making a butter-based cake and the batter looks like it has curdled, do not panic. This often happens if the eggs were cold and the butter was warm. You can often save the batter by adding a tablespoon or two of your measured flour from the recipe. The flour acts as a binding agent, helping the emulsion to stabilize. Once it is stable, you can continue incorporating the rest of your ingredients as normal.
The Importance of Chill Time
For recipes like pie crusts or biscuits, you want the exact opposite of the creaming method. You want your butter to remain in distinct, small, cold pieces. This creates flaky layers as the water in the butter evaporates during baking, leaving behind tiny pockets of steam. Always use cold butter, often cut into cubes and placed in the freezer for ten minutes before using. Again, scale your butter by weight, then keep it chilled until the very last second before it hits your flour.
Advanced Baker Tips for Butter Usage
Once you are comfortable with grams, you can begin to explore advanced techniques like brown butter or compound butter. Brown butter, also known as beurre noisette, is created by cooking butter until the milk solids toast, resulting in a deep, nutty flavor profile. When browning butter, remember that you will lose about 15% to 20% of the weight to water evaporation. If a recipe calls for 100 grams of brown butter, start with at least 120 grams of raw butter to account for that loss.
Infusing Flavors
Compound butters are a fantastic way to elevate your baking. By creaming softened butter with herbs, spices, or citrus zest, you create a flavor base that can be added to doughs or used as a finishing touch for breads. Once you have infused your butter, you can roll it into a log, wrap it in parchment, and chill it. Because you are working with precise gram measurements, you can easily replicate your favorite compound butter infusions time after time.
The Science of Spread
If your cookies are spreading too much, it might be that your butter was too soft or the oven temperature is too low. Conversely, if your cookies aren't spreading enough, the butter may have been too cold or you may have accidentally used too much flour. When you use a scale, you eliminate the flour and fat variables, leaving you to focus solely on the temperature. This is the hallmark of a professional approach—isolating the variables to refine the final product.
The Cultural Shift Toward Grams
We are currently witnessing a global shift in home baking. As more high-quality, international-style recipes become accessible through the internet, the demand for precision has increased. Home bakers are realizing that the "cup" method is an American anomaly, and that the rest of the world has been successfully using scales for centuries. By making the switch, you are aligning yourself with a global standard of excellence that will serve you for a lifetime of baking.
Building Your Culinary Confidence
Confidence in the kitchen comes from understanding your materials. When you know that 227 grams of butter will behave predictably, you aren't just following a recipe; you are exercising control. This knowledge allows you to troubleshoot, adapt, and innovate. You will find yourself looking at recipes and thinking about the ratios rather than just the instructions. That is the moment you transition from a "recipe follower" to a "baker."
Investing in Your Future
The tools you choose to use define your path. A digital scale is inexpensive and lasts for years, and it will pay for itself in the quality of the food you produce. Do not settle for the frustration of overflowing measuring cups or the inconsistency of sticky, packed sugar and butter. Embrace the data, trust your scale, and watch as your baking reaches new heights of consistency and flavor. Your family and friends will certainly notice the difference, and you will find that the process of baking becomes significantly more rewarding when you know exactly what is happening in the bowl.
Conclusion
Mastering the conversion of butter from cups to grams is perhaps the simplest yet most effective upgrade you can make to your baking repertoire. We have moved from the unreliable world of volume-based measuring into the scientific precision of mass, ensuring that every batch of cookies, every loaf of brioche, and every delicate buttercream frosting comes out exactly as intended. When you rely on the scale, you eliminate the "blame the chef" moments that arise from inconsistent results. You become the master of your oven, capable of repeating successes and diagnosing failures with a clinical eye.
Remember that baking is a journey, not a destination. There will always be new techniques to learn, new fat ratios to explore, and new ingredients to incorporate. However, the foundation of your practice—your precision—will remain the constant that supports all your culinary adventures. As you continue to bake, keep your scale clean, your butter at the right temperature, and your measurements exact. By adhering to the gram-based approach, you are not just making better food; you are developing the mindset of a professional pastry chef. Keep experimenting, keep measuring, and most importantly, keep enjoying the process of creating something beautiful from scratch. Your kitchen is now a space of reliable excellence, and the results will speak for themselves on every plate you serve.
Final advice? Never stop learning. Even the most seasoned chefs return to the basics, and double-checking your math is never a waste of time. Whether you are baking for a holiday gathering or just a quiet Tuesday evening, treat every ingredient with the respect it deserves, and your rewards will be delicious, golden, and perfectly consistent every single time. Happy baking to all of you, and may your butter always be the right temperature and your measurements always be spot on. We look forward to seeing the incredible treats you create with this newfound precision. Continue refining your skills, and soon enough, you will find that your friends will be asking for your secrets, and you’ll be able to tell them exactly how you did it—down to the very last gram.


Get the Next Recipe
Weekly recipes, techniques, and gear picks — straight to your inbox.
