How Many Grams in a Cup of Rice? (Chart)
Measuring rice accurately is one of those fundamental kitchen tasks that seems simple on the surface but often leads to inconsistent results. As a chef, I have seen countless home cooks struggle with the "too wet" or "too crunchy" dilemma, usually stemming from a fundamental misunderstanding of volume versus weight. Relying on a standard measuring cup for dry grains is inherently flawed because rice particles settle differently depending on the grain type, age, and humidity of your kitchen. By shifting your mindset toward using a kitchen scale, you gain total control over your final product, ensuring that your pilafs are fluffy, your risottos are creamy, and your sushi rice has the perfect bite every single time.
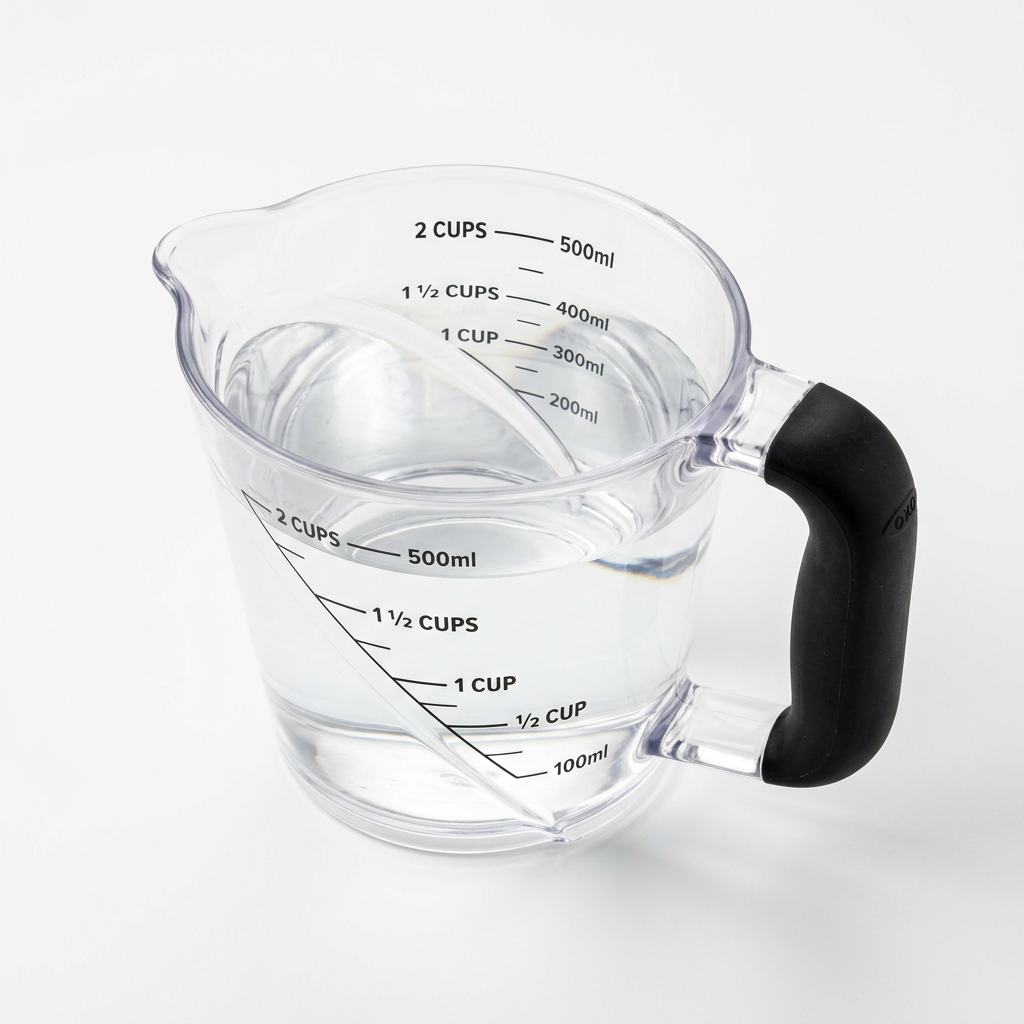
In this guide, we will dismantle the myth that volume is the gold standard for baking and cooking grains. While a cup is a convenient unit for liquids, it is an unreliable metric for dry, granular ingredients that vary in density. When you start measuring in grams, you eliminate the guesswork associated with packing, shaking, or leveling a measuring cup. We are going to dive deep into the specific weights for various types of rice, from long-grain Basmati to short-grain Arborio, providing you with the data you need to stop blaming your stove and start taking ownership of your results.
Precision is the hallmark of a professional kitchen, and transitioning to weighing your ingredients is the single most effective way to elevate your culinary game. It is not about being overly fussy or turning your kitchen into a science laboratory, but rather about building consistency so that you can reliably replicate your favorite recipes. Whether you are a beginner looking to master the perfect pot of steamed rice or an experienced home cook aiming for higher levels of accuracy, this post will serve as your definitive resource. Put down the measuring cup, grab your digital scale, and let us refine your technique for better grains, every single time.
The Case for Weighing Your Rice
Volume measurements are notoriously imprecise because dry ingredients like rice are subject to aeration. A cup of Jasmine rice might settle differently in the measuring vessel than a cup of Carolina Gold, depending on whether you scooped it directly from the bag or poured it gently. When you use a digital scale, you are measuring the actual mass of the starch, which remains constant regardless of how it is placed in your container. This eliminates the "density variable" that often ruins recipes when the moisture ratio is calculated based on volume.
Furthermore, most professional recipes and high-end cookbooks are increasingly transitioning to weight-based measurements for this exact reason. If a recipe calls for a 2:1 ratio of water to rice, that ratio is based on the assumption of a specific volume, but if your cup is packed more tightly than the recipe developer's, you will end up with a smaller ratio of water to rice. By weighing, you ensure that the hydration level is mathematically perfect, which is crucial for achieving the correct texture in the finished grain.
"The difference between a mediocre home-cooked meal and a restaurant-quality dish often comes down to the refusal to accept approximation. Weight is the language of precision, and for a chef, it is the only way to speak with authority in the kitchen."
Why Volume Fails the Home Cook
The primary issue with volume is the human element. We often tap the side of the cup to level it off, or we scoop directly into the bag, which compresses the grains at the bottom. This compaction means you are fitting more rice into the same volume than the recipe intended. Conversely, if you shake the cup too much, you create air gaps. These inconsistencies translate directly to the pot, resulting in under-hydrated or mushy grains.
How to Properly Use a Scale
To start, place your bowl or pot directly onto the scale and hit the "tare" or "zero" button. This ensures you are measuring only the weight of the rice, not the vessel holding it. Always measure in grams for the highest level of accuracy, as ounces can be too imprecise for small adjustments. Once you have measured your rice to the exact gram, you can then add your liquid based on the target weight ratio, which is far more reliable than filling a measuring cup to a line.
Understanding Rice Varieties and Their Densities
Not all rice is created equal. The length of the grain, the processing method, and the starch content all influence the density of the product. Generally speaking, a standard cup of long-grain white rice weighs approximately 185 to 200 grams. However, if you switch to a short-grain or glutinous rice, you might find that the density shifts because the smaller, rounder grains pack more tightly into the measuring cup, often pushing the weight closer to 210 or 215 grams per cup.
It is vital to recognize these differences because the water absorption rate is intrinsically linked to the starch profile of the variety. A high-starch rice like Arborio requires a different liquid-to-grain ratio compared to a low-starch, parboiled long-grain rice. When you weigh your ingredients, you don't just achieve a consistent baseline; you also allow yourself the freedom to adjust your liquid ratios with surgical precision if you find that a specific brand of rice consistently thirsts for more water.
Long-Grain vs. Short-Grain
Long-grain rice, such as Basmati or Jasmine, is prized for its ability to remain separate and fluffy after cooking. Because these grains are slender, they contain less amylopectin and more amylose, which results in a drier, firmer texture. When measuring these, keep in mind that they are lighter by volume than short-grain varieties, which are designed to be sticky or creamy.
Brown Rice Considerations
Brown rice still contains the bran and germ, which adds weight and volume that is distinct from white rice. A cup of brown rice typically weighs about 190 to 200 grams, but because the bran acts as a physical barrier to water absorption, the cooking time and the water requirement are significantly higher. When working with whole grains, weight-based measuring is even more critical because the margin for error in the liquid ratio is smaller; under-cook it, and the bran remains tough and unpleasant.
The Chart: Grams Per Cup for Common Varieties
To help you standardize your pantry, I have compiled a reference guide based on the average weight of popular rice varieties when measured using a standard, leveled-off measuring cup. Please remember that these are averages; individual brands may vary slightly based on their milling process. Always look at your scale to confirm, and keep a small notebook nearby to record the weight of your favorite brands for future reference.
Long-Grain White Rice:* 190 grams per cup
Jasmine Rice:* 185 grams per cup
Basmati Rice:* 180 grams per cup
Arborio/Risotto Rice:* 210 grams per cup
Sushi/Short-Grain Rice:* 205 grams per cup
Brown Rice (Long-Grain):* 195 grams per cup
Wild Rice:* 175 grams per cup
How to Use This Data
When preparing a meal, decide on the total serving size you need. If a standard serving is 1/2 cup of dry rice, you now know that you are looking for approximately 95 grams of white rice. From there, you can calculate your water. For most white rices, a ratio of 1.5 to 1 (water to rice by weight) is a fantastic starting point. This means for 100 grams of rice, you add 150 grams of water.
Adjusting for Personal Preference
If you prefer your rice slightly softer, increase your liquid weight by 5-10%. If you prefer it al dente, decrease the liquid by the same margin. Because you are using weight, you can make these tiny adjustments with total confidence, knowing that the next time you cook, you can simply repeat your exact "recipe" without wondering if your cup was packed differently than the time before.
"Cooking is an art, but baking and grain preparation are sciences. Once you embrace the scale, you stop guessing and start mastering the alchemy of heat and moisture."
Professional Techniques for Perfect Steamed Rice
Once you have your weight-based measurements locked in, the technique you use to cook the rice becomes the final variable. The "Absorption Method" is the gold standard for most home kitchens. Start by rinsing your rice in a fine-mesh sieve under cold running water until the water runs clear. This removes excess surface starch that causes clumping. While some argue that rinsing removes nutrients, for the sake of texture, it is a non-negotiable step for high-quality results.
Next, place your weighed rice and measured water into a heavy-bottomed pot. Bring the water to a boil, then immediately turn the heat down to the lowest possible setting and cover the pot with a tight-fitting lid. This is the most critical stage: do not lift the lid. Lifting the lid releases steam and disrupts the temperature equilibrium, which is the primary cause of unevenly cooked grains. Allow the rice to cook for the specified time, then remove it from the heat and let it rest, covered, for at least 10 minutes.
The Importance of the Rest
The resting period is not just a suggestion; it is a vital part of the cooking process. During this time, the internal moisture of the grains continues to redistribute. This ensures that the bottom layer of rice isn't soggy and the top layer isn't dry. Think of it as a cooling-down phase where the structure of the starch firms up, making the grains easier to fluff without them breaking.
Using a Kitchen Towel
For an added professional touch, place a clean kitchen towel between the pot and the lid during the resting phase. This towel will absorb excess condensation that would otherwise drip back onto the surface of your rice, potentially causing the top layer to become gummy. It is a simple, low-cost trick that yields noticeably better results in the texture and fluffiness of your finished dish.
Troubleshooting Common Grain Failures
Even with a scale, variables like altitude, burner intensity, and the age of your rice can occasionally lead to less-than-perfect results. If you find your rice is still coming out too hard, check your lid seal. A lid that doesn't fit tightly allows steam to escape, which significantly changes the water-to-rice ratio by evaporation. You can easily fix this by using a piece of foil to create a tight seal around the rim of the pot before placing the lid on top.
If your rice is coming out mushy, you are likely using too much water. Remember, the ratio isn't just about the cup; it is about the starch content. Some brands are pre-processed or parboiled, meaning they require less water than others. Start by reducing your water weight by 10 grams per 100 grams of rice. It is always easier to add a tablespoon of hot water if the rice seems under-done than it is to fix a pot of water-logged, mushy grains.
The Impact of Rice Age
Older rice has less moisture than freshly harvested rice, which means it will actually absorb more liquid and require a longer cooking time. If your bag of rice has been in the pantry for several months, do not be surprised if it acts differently than a fresh bag. This is why keeping a simple log of your cooking results can be incredibly helpful—you learn to adjust on the fly based on the performance of the specific batch you are currently using.
Troubleshooting Scorch
If your rice is burning on the bottom, your heat is likely too high, or your pot is too thin. Using a heavy-bottomed saucepan or a Dutch oven provides even heat distribution, which helps prevent hotspots. If your stove's "low" setting is still too aggressive, consider using a flame tamer or a diffuser plate to further insulate the pot from the direct heat source.
Mastering Specialized Rice Dishes
Now that you have the basics down, you can apply your knowledge of weights to more complex dishes like risotto or paella. In risotto, the goal is to draw out the starch to create a creamy sauce, which requires a completely different approach to liquid. Instead of a fixed ratio of water to rice, you use a variable ratio, adding warm stock in small, incremental additions. However, even here, starting with an accurate weight of your Arborio or Carnaroli rice is vital for calculating the correct amount of stock you will need to prepare for the session.
For pilafs, you want to toast your grains in fat—butter, oil, or schmaltz—before adding your liquid. This technique, often called nacre, coats the grains in fat, which helps maintain their structure and flavor absorption. Weigh your grains, toast them until they are fragrant and look slightly translucent at the edges, then add your measured boiling liquid. The combination of weighing your fat, rice, and liquid ensures that your pilaf is consistently flavorful and perfectly textured.
Understanding Risotto Ratios
For a proper risotto, you typically want a ratio of roughly 1:3 by weight for rice to liquid (stock). However, because you are evaporating some liquid during the stirring process, you should always have a bit of extra stock on hand. By knowing that you started with exactly 200 grams of rice, you can keep track of how much liquid you have added and develop a better intuition for when the rice is perfectly al dente.
The Role of Acid and Salt
Always season your rice water as if you were seasoning a soup. Salt inhibits the starch from releasing too quickly, which actually helps maintain the integrity of the grain. If you are adding acidic ingredients like lemon juice or wine, wait until the final stage of cooking for delicate grains like Jasmine, or incorporate them early if you are making a risotto where you want the acid to brighten the overall profile of the dish.
Advanced Tips for the Modern Chef
If you truly want to take your rice game to the next level, start experimenting with different water temperatures. Some chefs swear by starting with cold water to allow the grain to heat up slowly, while others prefer the immediate impact of boiling water to "shock" the starch. I recommend experimenting with both and noting the texture difference. Usually, boiling water provides a slightly more consistent texture for long-grain varieties, while cold water is better for absorption-based cooking of whole grains like brown rice.
Lastly, consider the quality of your water. If your tap water has a high mineral content or chlorine taste, it will affect the flavor of your rice. Since rice is essentially a sponge for whatever liquid it is cooked in, using filtered water can make a significant difference in the final taste profile. It is a small detail, but in the world of professional cooking, the difference between "good" and "great" is almost always the accumulation of small, intentional choices.
The Temperature Factor
If you are cooking a high-quality Basmati, you might even consider soaking the rice in cold water for 20 to 30 minutes before cooking. This hydrates the grain evenly, leading to a much longer, fluffier individual grain once finished. When you do this, you must adjust your liquid ratio downwards, as the rice has already absorbed a portion of its required moisture. Weighing the rice before and after the soak can give you a rough estimate of how much water was absorbed.
Investing in Tools
A high-quality digital scale is the most important tool in your arsenal. Look for one that has a high sensitivity (0.1g increments) and a large, flat surface that is easy to clean. A clear, backlit display is a nice bonus when you are working in a dimly lit kitchen. Beyond the scale, a fine-mesh strainer and a heavy-duty, tight-fitting lid are the only other pieces of equipment you really need to elevate your grain game from amateur to master.
Conclusion
Mastering the humble grain of rice is one of the most rewarding journeys a home cook can take. It teaches you about the importance of patience, the value of precise measurements, and the beautiful science behind the food we eat every day. By shifting from the erratic nature of volume measurements to the steadfast reliability of weight, you open the door to a world where "failed" rice dishes become a thing of the past.
We have explored the nuances of grain density, the importance of rinsing and resting, and the strategic advantages of using a digital scale. Armed with these techniques and the knowledge of how different rice varieties behave, you are no longer just following a recipe—you are actively managing the outcome of your cooking. You will find that you are more confident in the kitchen, more consistent in your results, and better equipped to experiment with new recipes and techniques.
Never underestimate the power of the fundamentals. While fancy gadgets and complex cooking methods have their place, the ability to produce a perfect, fluffy bowl of rice is a skill that will serve you for the rest of your life. It is the foundation upon which countless delicious meals are built, from simple weekday stir-fries to elaborate, festive rice dishes. Keep your scale handy, keep your techniques sharp, and never be afraid to learn more about the ingredients you use every day.
As you move forward in your culinary practice, remember that the "Blame The Chef" philosophy is all about empowerment. When you have the knowledge and the right tools, you don't need to look for someone else to blame for a lackluster meal; you have everything you need to fix it, adjust it, and make it better. Practice these measurements, refine your cooking times, and above all, enjoy the process of turning simple pantry staples into extraordinary food. The perfect pot of rice is waiting for you, and now you have the tools to ensure it happens every single time you step up to the stove.
Continue to challenge yourself with different varieties, explore the unique cooking times, and trust in the precision of your scale. The more you practice, the more intuitive the process becomes, eventually leading to a point where you won't even need to look at a chart anymore. Your hands will know the weight, your eyes will know the look of the steam, and your kitchen will become a place of true culinary artistry. Happy cooking, and may every pot of rice you make from here on out be a testament to your commitment to excellence.


Get the Next Recipe
Weekly recipes, techniques, and gear picks — straight to your inbox.