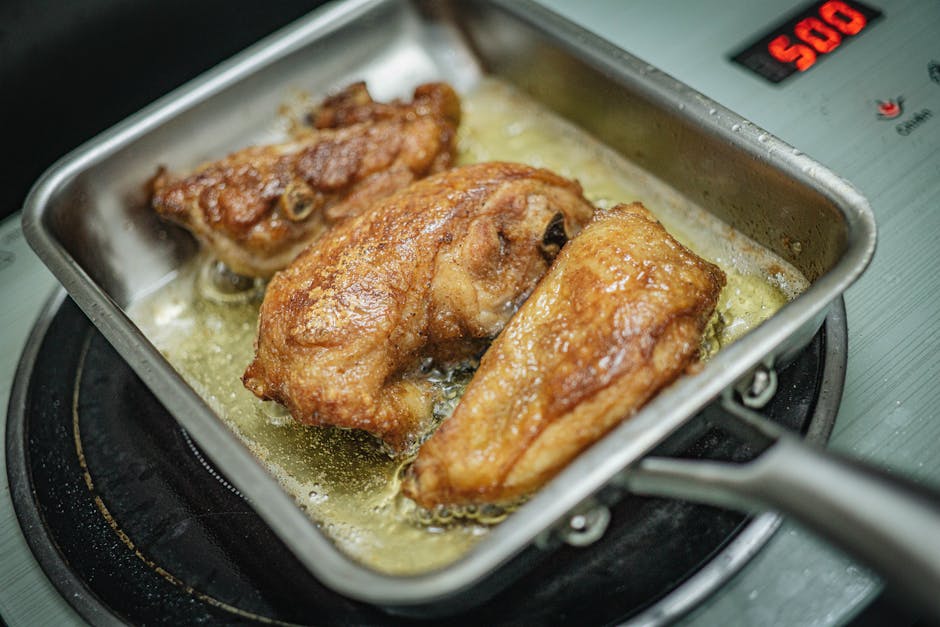
How to Clean Burnt Food Off a Stainless Pan
Every home cook, from the enthusiastic amateur to the seasoned veteran, has faced the dreaded moment of distraction. You are searing a beautiful, dry-aged ribeye or reducing a delicate balsamic glaze, and for just one moment, you turn your attention to the salad greens or a ringing phone. In that split second, the pan sings a different song—a high-pitched hiss followed by the unmistakable, pungent aroma of carbonizing food. We have all been there, standing over a ruined meal, staring at a blackened, crusty layer fused onto a pristine piece of stainless steel. It feels like a culinary catastrophe, but I am here to tell you that it is merely a rite of passage in the professional kitchen.
Stainless steel is the workhorse of the culinary world because of its durability, its ability to withstand extreme heat, and its non-reactive nature. Unlike non-stick pans, which can release toxic fumes if overheated and are easily scratched, a stainless steel pan is built to endure a lifetime of intense heat and rigorous cleaning. When food burns onto the surface, it is rarely a sign that the pan is ruined; rather, it is a sign that the pan was doing exactly what it was designed to do—conducting heat efficiently to facilitate a Maillard reaction. The burnt bits are simply organic matter that has hardened into a polymer, and with the right techniques, they can be removed without compromising the integrity of your equipment.
In the world of "Blame The Chef," we don't view burnt pans as failures; we view them as challenges that sharpen our skills. Cleaning a scorched pan is an exercise in understanding chemistry and heat management. By learning how to restore your cookware, you gain a deeper appreciation for the tools of the trade and the confidence to push your cooking limits further. Whether you are dealing with a light sear residue or a thick, charcoal-like layer of protein and sugar, there is a path to restoration. Let’s dive into the science, the tools, and the methods required to bring your stainless steel back to its mirror-like finish.
The Chemistry of the Burn
Understanding what actually happens when food burns on stainless steel is the first step toward effective removal. When you cook proteins or sugars, they undergo the Maillard reaction, which is a chemical reaction between amino acids and reducing sugars that gives browned food its distinctive flavor. When heat is applied for too long or at too high a temperature, this reaction proceeds too far, causing the food particles to dehydrate and bond directly to the microscopic pores of the metal. This is not just a surface-level stain; it is a thermal fusion.
Breaking the Molecular Bond
To remove this debris, you need to break the bond between the carbonized food and the metal surface. Heat is often your best ally in this process because it causes the metal to expand slightly while the burnt material stays brittle. When you combine heat with an acidic or alkaline solution, you create a chemical reaction that softens the organic bonds holding the carbon to the pan. This is why professional kitchens rely on simple, effective solutions like baking soda and vinegar rather than harsh, caustic chemicals that can actually damage the surface of the steel over time.
Why Stainless Steel Holds On
The microscopic surface of stainless steel is not perfectly smooth; it is covered in tiny "valleys" and "peaks." As you heat the pan, it expands, and food particles settle into these crevices. As the pan cools, it traps these particles in a firm grip. This is why you must avoid using steel wool on a regular basis, as it can create more surface area and deeper crevices, making the pan more prone to future sticking. Instead, we want to lift the debris out of these microscopic pockets using the gentle force of a chemical reaction.
The secret to a perfect sear is heat control, but the secret to a long-lasting kitchen is knowing how to undo the damage when your heat control slips. Do not fear the burn; respect the process of restoration.
Method One: The Deglazing Technique
The first and most immediate defense against burnt food is the technique of deglazing. If you have just finished cooking and noticed a layer of browned bits (the fond) that has turned into a hard, burnt crust, do not reach for the soap yet. Add a small amount of liquid—water, broth, or wine—while the pan is still hot. This creates steam that works from underneath the burnt particles, loosening them before they have a chance to cool and solidify into the metal’s pores.
Proper Temperature Management
For this technique to work, the pan must be hot but not scorching. If you add liquid to a pan that is smoking, you risk warping the metal or creating a violent steam eruption that can cause burns. Ensure you are using a wooden or silicone spatula to scrape the bottom of the pan as the liquid bubbles. The liquid acts as a solvent, and the mechanical agitation of the spatula helps to lift the material. If the burn is severe, you may need to repeat this process several times, discarding the liquid and adding fresh water each time.
The Power of Steam
Steam is an incredibly effective cleaning agent because it penetrates deeper into the carbonized layer than liquid alone. By covering the pan with a lid after adding a small amount of water and letting it simmer for three to five minutes, you create an environment where the steam can soften the charred organic material. Once the steam has done its work, the burnt matter will often slide off with a light wipe of a paper towel. This method is the safest for your cookware, as it relies on water and heat rather than abrasives.
Method Two: The Baking Soda and Vinegar Miracle
If the burn is too deep for simple deglazing, we turn to the most effective cleaning duo in the culinary world: sodium bicarbonate and acetic acid. Baking soda is mildly abrasive and alkaline, while vinegar is acidic. When combined, they produce a vigorous fizzing reaction that can help lift stubborn stains by creating carbon dioxide bubbles that physically nudge the debris away from the pan's surface. This is a staple in professional kitchens where harsh scouring powders are forbidden to protect the finish of high-quality cookware.
The Paste Method
For localized, stubborn spots, create a thick paste using two parts baking soda and one part water. Apply this paste generously over the burnt areas and let it sit for at least thirty minutes. For exceptionally stubborn burns, I recommend letting the paste sit for several hours or even overnight. The baking soda will draw out the oils and loosen the carbon. After the wait, use a non-scratch scrub sponge to work the paste in circular motions. You will notice the paste turning a brownish color as it absorbs the charred material.
The Boiling Bath
If the entire bottom of the pan is scorched, place the pan on the stove, fill it with enough water to cover the burnt area, and add a half-cup of baking soda. Bring the mixture to a boil and let it simmer for ten minutes. As it boils, the baking soda will help break down the proteins and starches. Once the water has boiled down, remove the pan from the heat, pour out the contents, and give it a thorough rinse. Any remaining residue will usually surrender to a standard sponge and a bit of dish soap.
Cleaning a professional pan is not about scrubbing harder; it is about working smarter. The goal is to lift the carbon off the surface, not to scrape the metal until it screams.
Method Three: Using Bar Keepers Friend
While I prefer home-based solutions for day-to-day cleaning, there is one product that every serious home cook should keep in their cabinet: Bar Keepers Friend. This product contains oxalic acid, which is specifically designed to react with the rust and mineral deposits often found on stainless steel. It is the gold standard for restoring a professional-grade pan to its original, brilliant shine, and it does so with far less effort than traditional scrubbing.
Correct Application Technique
To use this effectively, always start with a damp surface. Dust a small amount of the powder onto the burnt area, then add just enough water to create a creamy consistency. Use a soft cloth or a non-scratch sponge to spread the product over the affected area. Let it sit for about one minute—never let it dry completely on the surface. Because oxalic acid is potent, you want it to interact with the stains, not the finish of the steel itself.
Rinsing and Polishing
After applying the paste, scrub gently in a circular motion. You will see the stain begin to dissolve almost immediately. Once the burnt areas are clear, rinse the pan under cold, running water. It is vital to ensure that every trace of the product is removed. Finally, dry the pan with a clean, lint-free cloth. You will notice that the pan not only looks clean but feels smooth to the touch, indicating that you have successfully removed the burnt carbon without damaging the polished surface of your cookware.
Preventing Future Burns
The best way to handle a burnt pan is, of course, to avoid burning it in the first place. This requires a deeper understanding of heat conductivity and fat management. Many home cooks use too much heat because they are impatient, turning their burners to the highest setting in hopes of a faster cook. This is the primary reason for burnt food. Stainless steel is an excellent conductor, and when properly preheated, it requires only medium or medium-low heat to achieve a perfect sear.
The Leidenfrost Effect
To test if your pan is ready for cooking, perform the water droplet test. Heat your pan over medium heat for about two to three minutes. Drop a tiny amount of water into the center. If the water sizzles and evaporates immediately, the pan is not hot enough. If the water beads up and dances across the surface of the pan, you have achieved the Leidenfrost effect. This is the sweet spot. When you see this, turn the heat down slightly, add your fat (oil or butter), and wait for it to shimmer before adding your ingredients.
The Role of Fat
Always allow your fat to reach the correct temperature before adding food. If you add food to a cold pan with cold oil, the food will stick to the metal as the oil heats up. If you add food to a hot pan without enough fat, the food will dehydrate and bond to the surface. A thin, consistent layer of oil acts as a barrier between the protein and the steel. By ensuring your pan is properly seasoned and your fat is at the right temperature, you minimize the risk of sticking and burning by a significant margin.
Mastering heat is the hallmark of a great chef. When you learn to listen to your pan, you stop being a victim of burned meals and start becoming a master of your culinary environment.
Advanced Maintenance: Restoring the Luster
Sometimes, even after the burnt food is removed, a stainless steel pan can look dull or have a rainbow-like discoloration. This is often caused by heat tinting, which occurs when the chromium in the stainless steel reacts with oxygen at high temperatures. While this is purely aesthetic and does not affect the performance of your pan, many of us take pride in the appearance of our kitchen equipment.
The Vinegar Bath
For general dullness or light discoloration, a quick wash with undiluted white vinegar can work wonders. The acid in the vinegar neutralizes the mineral deposits and light heat tinting. Simply pour a small amount of vinegar into the pan, swirl it around for a minute, and then rinse with warm water and dry immediately. You will find that the natural, bright luster of the stainless steel returns almost instantly.
Why You Should Avoid Steel Wool
Many novice cooks reach for steel wool or heavy-duty scouring pads when they encounter a burn. This is a mistake. Steel wool is too aggressive and will leave microscopic scratches on the surface of your pan. These scratches provide more surface area for food to stick to in the future, creating a cycle where your pan becomes progressively harder to clean. Stick to non-scratch sponges, soft cloths, or the back of a plastic spatula to maintain the integrity of your cookware for years to come.
Professional Tips for Longevity
In professional kitchens, we treat our equipment like an extension of our hands. A chef is only as good as their tools, and the care we provide for our pans determines how they respond to our cooking. Here are a few final tips to ensure your stainless steel remains in top condition for decades.
Cooling Down
Never run a hot stainless steel pan under cold water. This can cause thermal shock, which may result in the metal warping. A warped pan will not sit flat on your burner, causing uneven heat distribution and even more burnt spots in the future. Always let your pan return to room temperature before washing it. It requires a bit of patience, but your cookware will reward you with a longer lifespan and better performance.
Storage Practices
How you store your pans is just as important as how you clean them. Avoid stacking heavy cast iron or other metal pans directly on top of your stainless steel surfaces. The weight can cause pressure points that might dent or scratch the surface. If you must stack, use a soft cloth or a paper towel between each pan to prevent contact scratches. By treating your pans with the same respect you show your ingredients, you ensure that you are always ready for the next culinary challenge.
Conclusion
Cleaning a burnt stainless steel pan is not a chore—it is an act of maintenance that keeps your kitchen running at the highest level. By understanding the chemical nature of the burn, utilizing the right tools like baking soda, vinegar, and oxalic acid, and mastering the art of heat management, you can recover from any cooking mishap. The goal is to move beyond the frustration of a ruined pan and embrace the process of restoring your equipment.
Remember that stainless steel is designed to be tough, and with the right care, it will remain one of your most reliable allies in the kitchen. When you focus on proper preheating, consistent fat application, and gentle cleaning techniques, you minimize the risk of future burns and maximize your potential as a home cook. Do not be intimidated by a blackened pan; instead, see it as an opportunity to practice the techniques that separate a casual enthusiast from a dedicated culinarian.
Keep your pans clean, your heat controlled, and your passion for cooking high. Every chef has a graveyard of burnt meals, but the ones who truly excel are those who learn how to wash the pan and start again the next day with the same intensity and precision. Your stainless steel is a canvas; treat it with the respect it deserves, and it will provide you with a lifetime of perfectly seared proteins, perfectly sautéed vegetables, and the satisfaction that comes with knowing you have mastered the fundamentals of the trade. Now, grab that scrub sponge, prepare your paste, and get back to the burner—there is always another dish to be created.

Get the Next Recipe
Weekly recipes, techniques, and gear picks — straight to your inbox.
