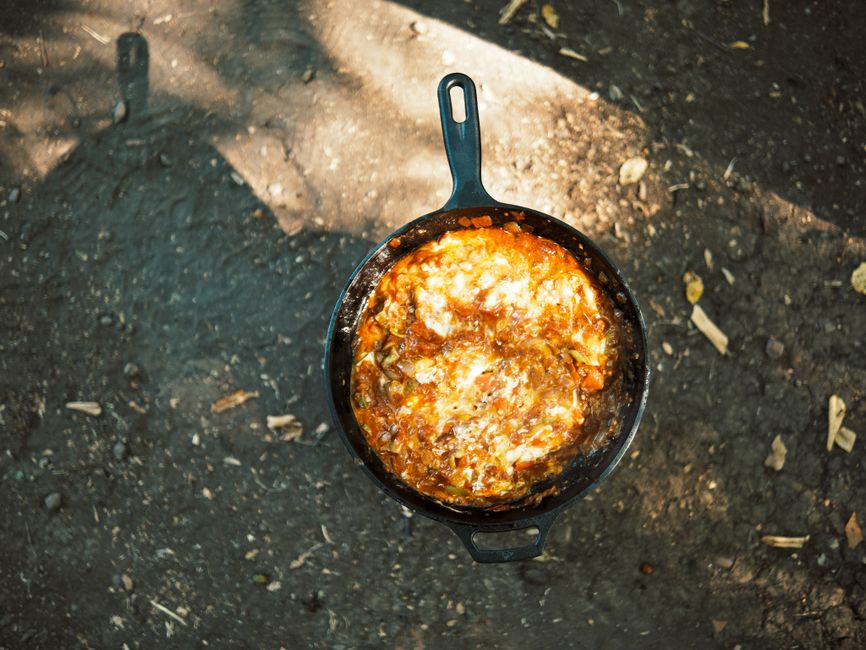
How to Clean a Cast Iron Skillet Without Ruining It
There is a persistent, almost villainous myth circulating in the culinary world that suggests a cast iron skillet is a delicate, temperamental artifact that demands to be handled like a fragile heirloom. You have likely heard the horror stories of well-meaning home cooks who accidentally stripped their pan’s hard-earned seasoning by daring to let a drop of soap touch its surface, or worse, by leaving it to soak in the sink overnight. As a professional chef, I am here to tell you that these fears are entirely unfounded and frankly counterproductive to the joy of cooking. A cast iron pan is not a museum piece; it is a rugged, nearly indestructible tool designed for high-heat searing, deep frying, and daily labor. When you treat your pan with the respect of a workhorse rather than the anxiety of a curator, you begin to unlock the true potential of your kitchen equipment.
The secret to a long-lasting, non-stick surface is not found in avoiding cleaning at all costs, but rather in understanding the fundamental chemistry of polymerization. When we talk about seasoning, we are discussing the process of heating oil to its smoke point, causing it to bond with the iron surface to create a hard, hydrophobic layer that prevents rust and food adhesion. This layer is remarkably resilient, far more so than most novice cooks realize. By adopting a systematic, no-nonsense cleaning regimen, you ensure that your skillet stays in peak condition for generations, getting better with every single meal you prepare. It is time to let go of the apprehension and embrace the practical reality of maintaining a tool that will eventually outlive your own time in the kitchen.
In this guide, we are going to dismantle the misinformation that has kept your skillet hiding in the back of your cupboard. We will explore the science behind why soap is actually your friend rather than your enemy, how to handle the inevitable buildup of charred proteins, and the precise steps required to restore a pan that has fallen into a state of neglect. Whether you are dealing with a light layer of stuck-on crust or a pan that has developed a rusty patch due to improper storage, the techniques discussed here are tried, tested, and approved by professional kitchens everywhere. Grab your apron, preheat your oven, and let’s get down to the business of mastering the maintenance of the king of all cookware.
The Chemistry of Soap and Your Skillet
One of the most persistent myths in the culinary world is that you must never, under any circumstances, use dish soap on your cast iron. This fear stems from the early days of soap production when harsh, lye-based soaps were common. Lye is indeed a potent alkaline substance that could strip away the polymerized oil layer of a seasoned pan with aggressive ease. However, the modern dish detergents we use today are essentially mild surfactants designed to break down grease without attacking the durable, polymerized coating of your skillet. If your seasoning is properly developed, a gentle wash with a drop of liquid soap is perfectly safe and often necessary to maintain a hygienic surface.
Why Cleanliness is Essential for Performance
Beyond the safety of your seasoning, there is the issue of flavor profile. If you have ever cooked a piece of fish in a pan that still held the lingering aroma of the spicy sausage you fried the night before, you know that residual oils can wreak havoc on your culinary efforts. A clean pan is a neutral canvas. By thoroughly washing the surface after each use, you ensure that the flavors of your current dish are not tainted by the remnants of the past. Using a small amount of soap allows you to lift those leftover oils and proteins without scrubbing away the essential patina that you have worked so hard to build.
The Role of Surfactants
Surfactants work by lowering the surface tension of water, allowing it to penetrate and lift oil-based debris from the surface of your pan. While you want to keep the polymerized oil bonded to the iron, you absolutely want to remove the raw, sticky oil that remains after cooking a meal. If you leave that raw oil behind, it can become sticky or rancid over time, leading to a gummy surface rather than a smooth, non-stick one. The goal is to remove the excess fat while leaving the hardened, dark-brown or black seasoning layer firmly intact. This is the hallmark of a well-maintained piece of equipment.
"A cast iron skillet is a tool for life, not a chore for the weekend. Treat it like the professional equipment it is, clean it properly, and it will serve you faithfully for decades."
Immediate Maintenance After Cooking
The most critical window for maintaining your skillet occurs within the first ten minutes after you take it off the heat. While the iron is still warm—not necessarily scorching hot, but warm to the touch—the residues from your cooking are at their most pliable. This is the moment to act, before those proteins and sugars have a chance to harden into a stubborn, carbonized crust. By establishing a post-cooking routine, you drastically reduce the effort required for deep cleaning or potential stripping later on.
The Warm Water Rinse
When your pan has cooled just enough that you can handle the handle with a cloth, carry it over to the sink. Start with a rinse of warm water. The heat helps to loosen any softened fat that might still be clinging to the iron. If you have been searing a steak, you might notice a layer of rendered beef fat; simply washing this away under the tap with a sponge or a stiff-bristled brush is often enough to keep the pan pristine. Avoid using cold water on a very hot pan, as the rapid temperature change could potentially lead to thermal shock, which may cause your pan to crack or warp.
Dealing with Stubborn Fond
If you have a particularly stubborn bit of fond (the delicious, browned bits stuck to the bottom of the pan), do not reach for a metal scouring pad immediately. Instead, use a drop of mild dish soap and a non-abrasive scrubbing pad. If the residue is truly cemented, add about a half-inch of water to the pan and place it back on the burner. Bring the water to a gentle simmer for 2 to 3 minutes. The heat will release the stuck bits, allowing you to scrape them away easily with a wooden spatula or a chainmail scrubber. This technique, often called "deglazing the pan" during the cooking process, works just as well for cleaning.
The Importance of Drying
The absolute most important step in the entire process is drying. Cast iron is essentially iron and carbon, and it is highly susceptible to oxidation, or rust, if left wet. Once you have cleaned the pan, dry it thoroughly with a clean kitchen towel. Do not stop there. Place the damp pan back on the stove over medium-low heat for approximately 2 to 3 minutes. This final heating ensures that every microscopic pore in the iron is completely dry. Once the water has evaporated, your pan is prepped and ready for its protective oil coating.
Building and Maintaining the Seasoning Layer
Seasoning is not a one-time event; it is an ongoing practice. Think of your seasoning layer like a suit of armor for your skillet. Every time you cook with fats—especially those with high smoke points like grapeseed oil, avocado oil, or rendered lard—you are technically adding microscopic layers to the pan. However, the maintenance phase ensures that these layers are uniform and healthy rather than splotchy or uneven. Maintaining your seasoning is the difference between a pan that feels like Teflon and one that feels like sandpaper.
Selecting the Right Fats
Not all fats are created equal when it comes to seasoning. You want to choose fats that have a high smoke point and are high in unsaturated fats, which polymerize more effectively. Grapeseed oil is a chef favorite because it is relatively inexpensive, has a neutral flavor, and produces a very hard, durable finish. Avoid using butter or extra virgin olive oil for the purpose of seasoning, as their low smoke points will lead to burnt, sticky residues rather than a slick, hardened surface. Stick to refined oils for the maintenance phase.
The "Wipe-On, Wipe-Off" Technique
After your pan has been thoroughly dried on the stove, apply a very small amount of your chosen oil—literally a quarter of a teaspoon is sufficient for a 10-inch skillet. Use a lint-free cloth or a paper towel to spread the oil across the entire interior surface, including the sidewalls and the rim. Now, take a clean, dry paper towel and wipe as much of that oil away as you possibly can. You want the surface to look like it has been buffed, not greasy. If you leave too much oil, it will pool during the heating process and leave you with sticky, gummy spots.
The Final Curing Cycle
Once you have buffed the pan, leave it on the burner over medium heat until it just starts to wisps of smoke, or place it in a preheated oven at 450 degrees Fahrenheit for 30 to 60 minutes. This high heat forces the thin film of oil to cross-link and bond with the iron. If you do this every time you clean the pan, you will find that your skillet becomes increasingly non-stick and resistant to rust. It is a meditative process, one that connects you to the history of the pan and the craft of cooking.
"Seasoning isn't a coat of paint; it's a living, breathing extension of the iron. If you respect the heat and the oil, the pan will return the favor with a lifetime of flawless service."
Handling Rust and Deep Restoration
Even the best-maintained pans can occasionally fall victim to rust. Perhaps it was left in the rain during a camping trip, or maybe it sat in a humid pantry a bit too long. Regardless of the cause, rust is not a death sentence for your cast iron. Because cast iron is a solid metal, it can almost always be restored to its original glory. The process of stripping and re-seasoning is the ultimate "reset" button for your cookware, and it is a skill every home cook should master.
Mechanical Removal of Oxidation
If the rust is superficial, you can often scrub it away with a coarse salt scrub or a piece of fine-grade steel wool. Salt is an excellent abrasive that is gentle enough to spare the healthy seasoning around the rusted spot while effectively cutting through the oxidation. Simply pour a half-cup of kosher salt into the pan, add a teaspoon of neutral oil, and scrub vigorously with a paper towel. The rust will come away with the salt, leaving you with a clean, albeit slightly dull, iron surface.
Chemical Stripping for Severe Cases
In instances where the rust is deep or the seasoning has become unevenly thick and flaky, you may need to strip the pan down to bare metal. There are a few ways to achieve this. The most traditional method involves a long soak in a solution of water and lye (sodium hydroxide), but this is hazardous and requires extreme caution. A safer, albeit slower, method is to use an oven cleaner that contains lye. Place your pan in a heavy-duty trash bag, spray it generously with the cleaner, and let it sit for 24 to 48 hours. The chemicals will break down the aged carbon and rust, allowing you to wash the pan down to the raw iron.
The Re-Seasoning Process
Once your pan is stripped to the bare, light-grey iron, you must season it immediately to prevent flash rust. Wash the pan with hot water and dish soap, dry it thoroughly, and then follow the seasoning steps mentioned earlier—but repeat them at least three to five times. This initial "base layer" is crucial. By applying multiple thin coats of oil and baking them until they polymerize, you are essentially recreating the factory finish. Once you have built that initial foundation, you can return to your regular maintenance routine.
Professional Chef Tips for Longevity
When you work in a professional kitchen, efficiency and durability are the primary concerns. We don't have time to pamper equipment, but we certainly don't have the budget to replace it constantly. These professional-grade habits will ensure that your skillet performs at the highest level possible, day in and day out. If you follow these nuances, you will find that your cooking results improve significantly, as you will have better temperature control and consistent surface release.
Preheat Your Pan Correctly
One of the most common mistakes I see in home kitchens is putting food into a cold or lukewarm skillet. Cast iron has excellent thermal mass, meaning it holds onto heat well, but it is slow to conduct it initially. Always preheat your pan on the stove for at least 5 to 7 minutes before adding your fat or your food. If you are searing, you want the iron to be uniformly hot. Use an infrared thermometer if you want precision; for most searing, you are looking for a surface temperature of around 400 to 450 degrees Fahrenheit.
Use Proper Utensils
While cast iron is tough, it is not impervious to scratching. Using metal utensils is perfectly fine—in fact, a metal spatula with a flat edge is actually encouraged because it helps to scrape the surface clean as you cook, essentially acting as a micro-leveler for your seasoning. However, avoid using heavy, serrated metal tools that could gouge the surface. Wooden spoons are great for sautéing, but for scraping down that delicious, caramelized fond, a stainless steel spatula is your best friend.
Storage Considerations
Never store your cast iron pan in a place where it will be exposed to excessive humidity. If you stack your pans, place a paper towel or a piece of felt between them to prevent the bottom of one pan from scratching the seasoned surface of another. If you live in an area with high humidity, consider giving your pan a very light coating of oil before putting it away, even if you are not using it for a while. This thin barrier prevents moisture from the air from settling on the iron and creating rust spots.
The Versatility of the Skillet
To truly understand how to clean a cast iron skillet, you have to understand why we use them in the first place. These pans are masters of versatility. You can use them for everything from searing a thick ribeye steak to baking a delicate Dutch baby pancake. Because they are oven-safe, you can start a dish on the stovetop to develop a crust and then transfer it directly into the oven to finish cooking at 400 or 500 degrees. This ability to traverse heat sources is why cast iron is a staple in professional kitchens, and why learning to maintain one is a foundational culinary skill.
The Dutch Baby Technique
One of the best ways to test the quality of your seasoning is by baking something that is notorious for sticking, like a Dutch baby pancake. If your pan is clean, well-seasoned, and properly preheated, the pancake will release effortlessly from the edges and rise perfectly. If the pan is not clean or the seasoning is gummy, the batter will weld itself to the iron, and you will be left with a scrubbing nightmare. Successfully cooking a delicate egg-based dish is the ultimate proof that your cleaning technique is working correctly.
Deep Frying and Pan Frying
Cast iron is the preferred vessel for deep frying because of its ability to maintain a stable temperature. When you drop a cold item into a thin-gauge aluminum pan, the temperature plummets, leading to greasy, soggy food. The massive thermal capacity of a heavy cast iron skillet prevents that temperature drop, ensuring a crisp, golden-brown crust. However, deep frying can leave a messy residue. Do not be intimidated. As long as you follow the warm-water-and-soap cleaning method, you can fry to your heart's content without worrying about the long-term health of your pan.
The Legacy of the Pan
Think of your skillet as a long-term investment. Unlike non-stick pans that have a lifespan of a few years before the coatings begin to flake and degrade, cast iron only improves with age. The more you cook with it, the better the seasoning becomes. The more you care for it, the more responsive it becomes to your needs. When you finally pass your skillet down to a child or a friend, you are not just giving them a piece of metal; you are giving them decades of your own culinary history, seasoned by the meals you have prepared.
Conclusion
Mastering the care of a cast iron skillet is a rite of passage for any cook who takes their craft seriously. We have debunked the myths regarding soap, established the importance of thorough drying, and provided you with the technical steps to ensure your equipment remains in perfect working order. Remember that the goal is not to keep the pan pristine in a way that suggests it has never been used, but rather to maintain it in a way that suggests it is used constantly and effectively. Your skillet should be your most trusted partner in the kitchen, capable of handling everything from a quick morning scramble to an elaborate, slow-braised roast.
The confidence that comes from knowing you can handle any situation—from a bit of stuck-on fond to an unexpected patch of rust—is empowering. It changes the way you cook, freeing you from the anxiety of "ruining" your tools and allowing you to focus on the flavors, the textures, and the process of creating a meal. Keep your pan clean, keep it seasoned, and above all, keep it on the stovetop where it belongs. The more you use it, the less you have to worry about its maintenance, as the daily ritual of cooking will handle most of the heavy lifting for you.
As you move forward, continue to experiment with different fats and different cooking methods. You will soon discover that your skillet has a personality of its own, reacting to the heat and the ingredients in unique ways. Do not be afraid to push the limits of what your pan can do. Whether you are searing, roasting, frying, or baking, the techniques laid out here will ensure that your cast iron remains the centerpiece of your kitchen. Thank you for joining me on this deep dive into the art of cast iron maintenance; now, go forth and cook something delicious. Your skillet is waiting.

Get the Next Recipe
Weekly recipes, techniques, and gear picks — straight to your inbox.
