How to Feed a Sourdough Starter: Ratios & Schedule
Feeding a sourdough starter is perhaps the most fundamental ritual in the life of a home baker, representing the bridge between simple ingredients and the complex, airy crumb of a professional loaf. At its core, this living culture of wild yeast and beneficial bacteria requires consistent nourishment to remain active, vibrant, and capable of leavening dough effectively. Many beginners approach this process with a sense of trepidation, fearing that a missed feeding or an incorrect ratio will result in the total loss of their colony. However, once you understand the biology of fermentation and the specific environmental factors at play in your own kitchen, you will find that a starter is remarkably resilient and forgiving.
Mastery of this process is not about strict adherence to a single recipe, but rather about developing a deep, intuitive relationship with your flour and water mixture. Over time, you will learn to read the signs—the subtle rise, the faint scent of stone fruit or tangy yogurt, and the webbing of bubbles throughout the jar—that indicate your starter is ready to bake. This guide is designed to move you beyond the basics, offering precise ratios and schedules that take the guesswork out of the process. Whether you are aiming for a mild, creamy flavor profile or a sharp, acidic punch, the way you feed your starter will dictate the character of every loaf you bake thereafter.
Welcome to the inner sanctum of the "Blame The Chef" kitchen, where we demystify the science of sourdough so you can focus on the artistry of the bake. We believe that baking is a tactile experience that rewards patience and observation more than any fancy gadget or expensive equipment. By following the techniques outlined below, you will transition from merely keeping a culture alive to actively managing its fermentation cycle for optimal performance. Let us take this journey together, turning your countertop corner into a hub of artisanal production and, most importantly, extraordinary crust and flavor.
The Science of the Starter Culture
At the heart of every sourdough starter is a symbiotic relationship between wild yeast and lactic acid bacteria (LAB). When you combine flour and water, you are creating a microscopic ecosystem where these organisms thrive by consuming the starches and sugars present in the grain. As the yeast ferments, it produces carbon dioxide, which gives your bread its lift, while the bacteria produce organic acids that provide that signature tang. Understanding this balance is key to achieving consistent results in your kitchen.
Why Flour Matters
The quality of your flour directly dictates the health of your colony. While all-purpose flour can certainly sustain a starter, using a blend of whole wheat or rye flour provides a higher mineral content and a more diverse range of nutrients for the bacteria to thrive upon. These grains contain a wider spectrum of naturally occurring yeasts on their outer husks, effectively acting as an insurance policy for a sluggish starter. We highly recommend using organic, unbleached flours to avoid any chemical additives that might hinder the natural fermentation process.
Environmental Variables
Temperature is the invisible hand that guides your starter's speed. Yeast activity increases significantly as the temperature rises, typically peaking between 75°F and 82°F. If your kitchen is particularly cold, your starter will take longer to hit its peak, and you may find that the flavor profile shifts toward a sharper acidity due to increased bacterial activity. Conversely, in a sweltering summer kitchen, your starter may peak in as little as three hours. Tracking these changes with a digital thermometer is a professional habit that will elevate your baking consistency.
"A sourdough starter is not merely a tool for baking bread; it is a living entity that evolves alongside the baker, reflecting the unique micro-flora of your home and the rhythm of your daily life."
Establishing a Consistent Feeding Ratio
The feeding ratio is the relationship between your existing "seed" culture, the fresh flour, and the fresh water. A standard starting point is a 1:1:1 ratio, meaning one part starter, one part flour, and one part water by weight. Using weight rather than volume is non-negotiable for professional-level results, as flour density varies wildly depending on how it was packed into a measuring cup. Always use a digital scale for your feedings to ensure precision and reproducibility.
The 1:1:1 Ratio
This is your baseline for a "maintenance feeding." It is used when you intend to bake frequently or when you are building the strength of a new culture. At this ratio, the fresh "food" is consumed relatively quickly, usually within four to six hours in a room-temperature environment. This keeps the acidity level low and the yeast population dense and hungry, which is ideal for a lively, active starter ready to be incorporated into a leavened dough.
Expanding the Ratio
As your skills grow, you will learn to adjust your ratios to suit your baking schedule. If you plan to bake the following morning, you might use a 1:2:2 or 1:3:3 ratio in the evening. This provides the starter with more food, effectively slowing down the fermentation process so that it reaches its peak exactly when you are ready to begin your bulk fermentation. Mastering these ratios is the secret to scheduling your baking around your life, rather than being a slave to your jar.
Managing the Peak and the Decline
Timing your use of the starter is critical for bread volume. You are looking for the moment of peak activity, which occurs when the starter has reached its maximum volume and is just beginning to show signs of collapsing. If you mix your dough too early, the yeast population is insufficient; if you wait too long after the peak, the pH level drops, the gluten structure of your starter begins to degrade, and the flavor becomes excessively sour.
Reading the Signs of Readiness
A healthy, ripe starter should have a domed top, a bubbly surface, and a texture reminiscent of a thick, airy mousse. When you drop a teaspoon of it into a glass of room-temperature water, it should float, indicating that it is sufficiently aerated with carbon dioxide. If it sinks, it is either not ready or it has over-proofed and collapsed. Watching for these visual and physical cues will eventually become second nature, allowing you to bypass the "float test" entirely.
The Impact of Over-Proofing
If you find that your starter has collapsed and a layer of dark, hooch-like liquid has formed on top, do not panic. This is simply the result of the yeast consuming all available sugar and entering a dormant phase. While a bit of acidity is wonderful for flavor, an over-proofed starter can weaken your dough if used repeatedly. Simply pour off the dark liquid, discard a portion, and feed it again with a slightly higher ratio of fresh flour to reset the acidity levels.
"Consistency is the baker's greatest virtue. By feeding your starter at the same time and at the same temperature, you create a reliable rhythm that translates directly into the quality of your finished bread."
Maintenance vs. Refreshing for Baking
There is a distinct difference between maintaining a starter for daily storage and refreshing it to create a levain for a specific bake. Maintenance feedings are designed to keep the culture alive with minimal effort, while a levain is an intentional build designed to be at its absolute peak vigor when it meets your main dough mix. Many bakers keep a small amount of "mother" in the fridge and only refresh it when they are ready to bake.
Refrigerator Storage
If you are not a daily baker, you do not need to keep your starter on the counter. Once your starter is strong and established, store it in the refrigerator. The cold temperature slows down the metabolic rate of the yeast and bacteria, allowing you to feed it as infrequently as once a week. When you are ready to bake, pull it out, discard, and feed it at a 1:2:2 ratio to wake it up. It may take two consecutive feedings to regain its full strength after a long period of refrigeration.
The "Levain" Build
For a high-hydration loaf, treat your starter like a separate ingredient. Take a small portion of your mother culture and build a levain using the exact type of flour (e.g., stone-ground rye or high-protein bread flour) that will be the primary component of your loaf. This allows you to tailor the final flavor and performance of the starter to the specific recipe you are preparing. This is how professional bakers manage complex flavor profiles and crust structures in a controlled, repeatable manner.
Temperature control:* Use filtered or spring water to avoid chlorine, which can inhibit wild yeast.
The jar environment:* Use a straight-sided jar. This makes it significantly easier to judge the volume increase of your starter.
Hygiene:* Keep the rim of your jar clean. Dried crusts can attract unwanted mold, which will contaminate your colony.
Troubleshooting Your Starter
Every baker will eventually encounter a starter that refuses to rise or smells "off." In most cases, these issues are easily resolved with a few adjustments to your technique. If your starter smells like acetone or nail polish remover, it is simply very hungry and needs more frequent feedings. If it smells excessively fruity, it may be experiencing a bloom of specific types of bacteria that are flourishing in high-temperature environments.
Addressing Sluggishness
If your starter is sluggish, the first thing to check is your water. If you are using chlorinated tap water, the chemicals may be suppressing the yeast. Let your water sit out uncovered for an hour, or switch to filtered water to see if activity improves. You might also try increasing the percentage of rye flour in your feed, as rye contains nutrients that act like rocket fuel for a dormant or slow-starting culture.
Dealing with Mold
While a healthy starter is very acidic and naturally resistant to bad bacteria, contamination can happen. If you see fuzzy, colorful growth (green, orange, or black) on the surface or the sides of the jar, the culture is compromised. Throw it away, scrub your jar thoroughly, and start again. Never try to "scrape off" mold from the top, as the mycelium (the root system of the mold) will have already spread through the entire mixture.
Advanced Techniques: The Stiff Starter
While most home bakers use a liquid starter (100% hydration), many professional pastry chefs and European-style bread makers prefer a stiff starter. A stiff starter is maintained at a much lower hydration level, often 50% to 60%. Because there is less water available, the yeast and bacteria move through their growth cycle more slowly, which results in a milder, more complex flavor and a more durable culture that can withstand long fermentation times.
Benefits of Stiff Starters
The primary advantage of a stiff starter is its stability. Because it is denser, it creates an environment that is less prone to over-proofing, making it much easier to time your bakes. Furthermore, the lactic acid bacteria produce more acetic acid in a stiff environment, which gives the bread a slightly different flavor profile—less of that sharp "yogurt" tang and more of a mellow, nutty sweetness that pairs beautifully with enriched doughs like brioche or panettone.
How to Transition
To transition your current liquid starter to a stiff one, simply reduce the amount of water in your next few feedings. Aim for a ratio of 100g flour to 50g water. You will notice that the starter is more like a firm dough than a slurry. You will need to knead it briefly or stir it vigorously to ensure the flour is fully hydrated. Once you get used to working with a stiff starter, you will find it provides a level of predictability that is difficult to match with a standard liquid culture.
"Baking is a discipline of patience, and the sourdough starter is your teacher. Do not rush the process; let the culture dictate the timeline, and you will be rewarded with bread that possesses both depth and soul."
Preparing for the Long Haul
Maintaining a starter for years requires a shift in mindset. You are no longer just baking a loaf; you are acting as a guardian for a biological population. Many of the world’s most famous sourdough bakeries use starters that are decades—or even centuries—old. There is no biological reason for your starter to "die" as long as it is fed, stored, and managed with consistent care.
Developing Your Intuition
As you gain experience, stop relying entirely on the clock. Start relying on your senses. Learn the sound of a bubbling, active starter. Learn the smell of a perfectly ripe, hungry culture. Pay attention to how the volume changes in the jar when the humidity in your kitchen shifts. These small, data-driven observations are what distinguish a home baker from a true artisan. You are building a skill set that goes beyond recipes; you are building an understanding of how flour, water, and time interact.
Sharing the Culture
One of the most rewarding aspects of maintaining a sourdough starter is the ability to share it with others. If you find yourself with too much discard, consider dehydrating it. Simply spread a thin layer of starter onto a piece of parchment paper, let it dry until it is brittle, and then store it in an airtight container. This dried starter can be rehydrated weeks or months later. It makes for an excellent gift for fellow baking enthusiasts who want to begin their own sourdough journey.
Conclusion
Feeding a sourdough starter is the quiet, daily labor that makes the grand gesture of a finished loaf possible. We have covered the essentials—the ratios that govern growth, the temperatures that influence speed, and the techniques that ensure a healthy, active culture. By adopting a disciplined approach to your feedings, you eliminate the inconsistency that often plagues beginning bakers. Remember that every time you feed your jar, you are cultivating the character of your bread.
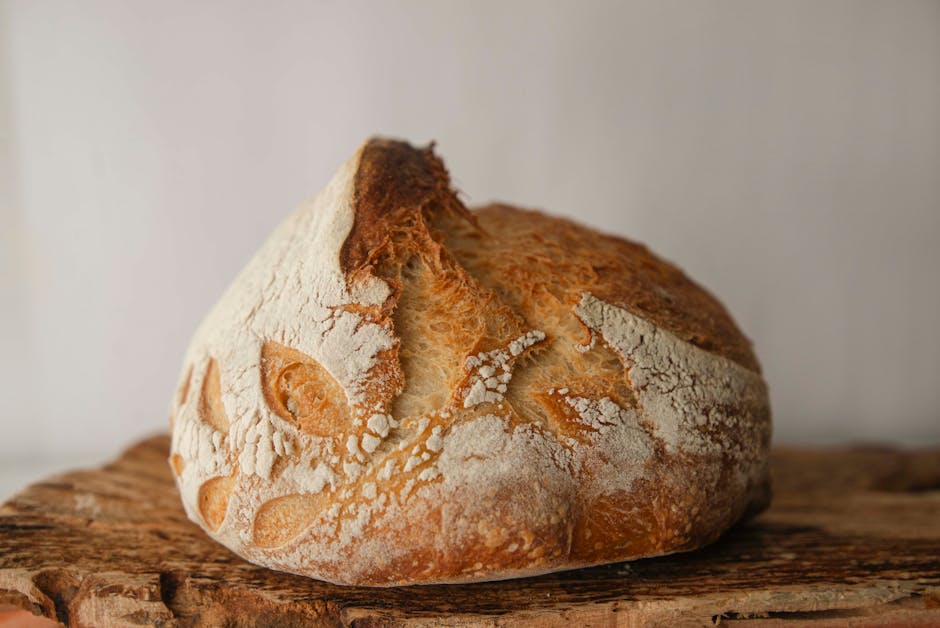
Whether you are baking a rustic sourdough boule with a crackling, scorched crust or a delicate, long-fermented loaf, the quality of your starter remains the foundation of your success. Take the time to observe your culture, experiment with different flour ratios, and adjust your scheduling to suit your lifestyle. You will find that this process, once intimidating, becomes a meditative and incredibly rewarding part of your kitchen routine.
"Blame the Chef" is here to support you as you refine these skills, but ultimately, the magic happens in your own hands. Do not be discouraged by a flat loaf or a slow rise; these are the lessons that teach you to adjust your hydration, monitor your temperature, and respect the biology of the wild. Keep your starter healthy, keep your expectations realistic, and keep baking. There is no greater joy in the culinary world than the smell of a fresh, hot sourdough loaf pulling apart to reveal a perfectly aerated crumb, born from nothing but flour, water, and your own dedicated care.
As you move forward, continue to refine your ratios. If you are struggling with excessive sourness, try increasing your feeding frequency. If you are struggling with a lack of flavor, experiment with adding a small percentage of whole-grain rye to your regular feeding rotation. The nuance is in the details, and the details are in the jar. Happy baking, and may your starters always stay strong, bubbly, and ready for the next bake. We will see you at the oven.
The journey of the sourdough baker is one that lasts a lifetime. You will encounter variables—seasonality, grain variations, and equipment changes—that keep the process fresh and challenging. Embrace these challenges as opportunities to grow. Every failure is merely a data point in your journey toward mastery. By documenting your feedings, the temperatures of your dough, and the resulting crumb structures, you are creating a manual of success that will serve you for years to come.
Remember that the goal is not perfection, but progress. A sourdough starter is a living organism that responds to the environment you provide. If you nurture it, it will provide you with leavening power that commercial yeast simply cannot replicate. The depth of flavor, the digestibility, and the textural integrity of sourdough bread are well worth the effort of the daily or weekly routine.
Finally, do not forget to share your bread. The act of baking is deeply communal. Whether it is a loaf for a neighbor, a friend, or simply to enjoy with your family, the act of sharing sourdough is as much a part of the tradition as the baking itself. Your starter is now a member of your culinary family, and it deserves to be treated with the same respect you would accord any high-quality ingredient.
We hope this guide has provided the clarity and confidence you need to take control of your starter. Baking is a craft that rewards the curious and the persistent. Now, go grab your flour, pull your starter from the fridge (or the counter), and prepare for your next bake. The perfect crumb is waiting for you, one feeding at a time. The kitchen is yours, the starter is ready, and the oven is preheated. Let us make something incredible together.
Keep track of your successes in a baker's journal. Note the time of the feeding, the ambient temperature, the type of flour used, and the hydration level. Over the course of a few months, you will see patterns emerge that no cookbook could ever capture perfectly for your specific kitchen environment. This is how you transition from a follower of recipes to a creator of bread. This is the path of the artisan.
Your starter is ready for its next meal. Feed it well, keep it consistent, and enjoy the profound satisfaction of working with a truly wild, living ingredient. We look forward to seeing your results. If you have questions or want to share your experiences, our community is always here to support your growth. Stay curious, stay hungry, and keep that fermentation active. The best loaf you have ever baked is likely only a few feedings away.
As a final tip, always ensure your container is properly sealed but allows for slight ventilation. While some bakers swear by airtight lids, others prefer a loose cloth or a lid that isn't fully tightened to allow the gases produced by the yeast to escape. Find what works best for your setup. And above all, never underestimate the power of a simple, consistent schedule. It is the secret ingredient that professional bakers have been using for centuries.
With the knowledge provided here, you now possess the tools to manage your sourdough culture with authority. We have covered the biology, the maintenance, the troubleshooting, and the professional techniques required to keep your colony thriving. You are now prepared to manage your fermentation cycles with the precision of a head baker. Now, put these methods into practice and watch your baking reach new heights.
The cycle of the starter is the cycle of the bakery. From the first feed to the final shaping of the dough, every step is a testament to your commitment to quality. We are proud to have you as part of our baking community here at "Blame The Chef." Take these lessons, experiment with confidence, and enjoy the incredible, crusty, tangy rewards of your hard work. Until next time, may your starter be bubbly and your loaves be beautiful.
If you ever find yourself losing your rhythm, remember to return to the basics. The 1:1:1 ratio is your safety net. No matter what happens, you can always hit the reset button and start fresh. That is the beauty of this craft—it is never truly over. It is always just the beginning of the next bake. Take care of your starter, and it will take care of you. Happy baking, everyone!




Get the Next Recipe
Weekly recipes, techniques, and gear picks — straight to your inbox.
