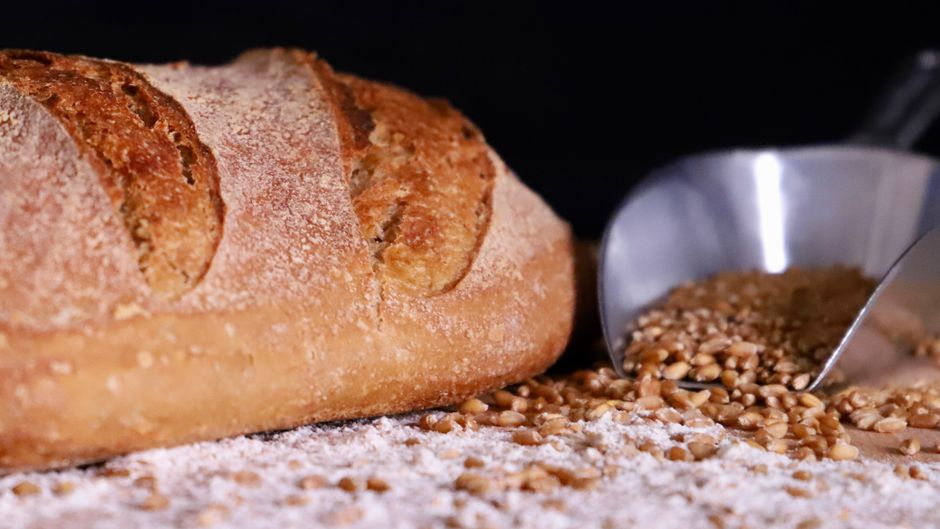
How to Get a Crispy Crust on Sourdough
There is a singular, auditory sensation that defines the triumph of a home baker: the crackle of a freshly pulled sourdough loaf as it rests on a wire rack. That crystalline, musical "song" of the crust cooling is the culmination of hours—often days—of patient fermentation and precise temperature control. Many novice bakers find themselves frustrated when their loaves emerge from the oven with a soft, leathery, or dull exterior rather than the mahogany, glass-like finish they see on social media. The secret to that professional-grade crunch isn't hidden in a secret ingredient, but rather in the physics of moisture management and heat distribution. By understanding how steam, protein structure, and starch gelatinization interact, you can transform your kitchen into a world-class bakery.
Mastering the crust is not merely about aesthetic appeal, although a beautiful ear and a blistered surface are certainly part of the allure. The crust acts as a protective vessel, trapping steam inside the loaf during the early stages of baking, which allows the crumb to expand to its full potential before the structure sets. Furthermore, the Maillard reaction—the chemical process that occurs between amino acids and reducing sugars—is responsible for the deep, toasted flavor profiles that distinguish a good loaf from a great one. When you focus on building a robust crust, you are simultaneously intensifying the depth of flavor in every slice. It is a dual pursuit of textural perfection and culinary complexity that rewards the meticulous baker.
In this guide, we will dismantle the common misconceptions surrounding oven spring and crust development. We will explore everything from the initial autolyse phase to the strategic use of Dutch ovens and steam injection methods. You will learn why hydration levels matter, how to manipulate the fermentation process, and the importance of high-heat baking environments. Put aside your fear of burning the crust; we are going to learn how to push the boundaries of color and texture to achieve that elusive, shattering crunch. Get your aprons ready, because it is time to take your sourdough game to the next level and stop blaming the oven for what your technique can fix.
The Foundation: Flour Choice and Hydration
The architecture of a great crust begins long before the dough hits the heat. The type of flour you choose is the primary variable that dictates the potential for a crispy finish. For a crust that provides a satisfying resistance, you need a high-protein bread flour. Proteins, specifically glutenin and gliadin, provide the structural integrity required to hold the gas bubbles that eventually become the airy crumb and the rigid crust. If your flour protein content is too low, the dough will struggle to maintain its shape, leading to a flatter loaf with a less defined crust. Always check your label; you are looking for a protein content of at least 12.5% to 13.5% for optimal results.
Hydration, the ratio of water to flour in your recipe, is the second pillar of crust development. While high-hydration doughs (80% and above) often produce a more open crumb, they can be notoriously difficult to manage and prone to a thinner, sometimes chewy, crust. For a more reliably crispy exterior, many bakers find a "sweet spot" between 72% and 75% hydration. This provides enough moisture to allow for starch gelatinization on the surface without turning the crust into a gummy, thick mess. Understanding how to handle these percentages through proper bulk fermentation is essential, as a slack, over-hydrated dough often results in a weak, drooping crust.
The Role of Protein
The protein in your flour doesn't just create the structure; it also contributes to the browning process. During the late stages of the bake, the proteins on the surface denature and interact with sugars. This is why a longer fermentation process, which breaks down starches into simpler sugars, often yields a more flavorful and deeply colored crust. If your dough is under-fermented, you won't have enough residual sugar on the surface to facilitate that deep, mahogany color. Consequently, the crust will remain pale and potentially tough, regardless of how long you bake it.
"The perfect crust is a dialogue between heat and time; if you rush the fermentation, you lose the sugars necessary to create the deep color and complex flavor we crave in artisanal bread."
The Art of the Autolyse
The autolyse is a resting period where you mix only the flour and water, allowing the flour to fully hydrate before adding your salt or sourdough starter. This stage is absolutely critical for crust development because it allows for the initial development of the gluten network without the interference of salt, which acts as a tightener. By allowing the flour to soak, you are creating a more extensible dough that will expand more readily in the oven. This increased expansion leads to a thinner, more refined crust that is less likely to be dense or leathery.
During this 30-to-60-minute window, the enzymes in the flour start to break down complex carbohydrates into simpler ones. This provides more food for the yeast and bacteria in your starter, leading to a more active fermentation and a better color on the finished loaf. When you skip this step, the dough can be tighter and less responsive to the sudden burst of heat in the oven, which often results in a crust that is too thick and unrefined. Treat the autolyse as a non-negotiable step in your workflow if you are chasing that professional-grade crunch.
Implementing the Autolyse
Managing Fermentation and Proofing
Your fermentation process determines the health and activity of your wild yeast. If the dough is under-proofed, it will not have the energy to expand rapidly upon entering the oven, which is the primary cause of a "tight" or "gummy" crust. Conversely, over-proofed dough loses its structure and will slump, resulting in a thin, pale, and lackluster crust. Aim for a bulk fermentation that results in an increase in volume of about 30% to 50%, depending on the flour type and room temperature. Temperature control is your greatest ally here; maintain your ambient environment between 74°F and 78°F for consistent results.
The final proofing stage is where the magic happens. Many bakers struggle with crust texture because they allow the loaf to over-proof during the final stage, leading to a collapse of the structure. I recommend using a cold retard in the refrigerator for the final proof. Not only does this develop a more complex, sour flavor profile, but it also makes the dough much easier to score. A chilled dough will hold its shape better when you create your decorative scores, allowing for a more controlled "oven spring." The cold surface of the dough also reacts better to the sudden heat of the oven, often creating more distinct blisters—those telltale signs of a high-quality, long-fermented loaf.
Why Cold Retardation Helps
Flavor Depth:* The yeast slows down, but the bacteria continue to produce organic acids, giving you that authentic sourdough tang.
Structural Integrity:* Cold dough is firm, making it easier to handle and score with precision.
Blistering:* The temperature differential between the cold dough and the hot oven can encourage the formation of small, crispy blisters on the surface of the crust.
The Physics of Steam and Heat
The most critical factor in achieving a crispy, glassy crust is steam. In a professional deck oven, steam is injected at the start of the bake to keep the surface of the loaf supple, allowing it to expand to its maximum volume before the crust sets. For the home baker, the Dutch oven is the best proxy for this technology. By trapping the moisture that evaporates from the dough, the Dutch oven creates its own steam chamber. This environment ensures the crust stays moist for the first 20 minutes of baking, preventing it from drying out and hardening prematurely, which would otherwise stunt the loaf's growth.
Once the loaf has finished its initial rise, you must remove the lid of the Dutch oven. This is the "dehydration phase." By exposing the loaf to the dry heat of the oven, you allow the surface to caramelize and harden into the crispy, crackling crust you desire. If you leave the lid on for too long, the crust will be pale and soft. If you take it off too early, the crust will set before the oven spring is finished, resulting in a stunted loaf. The timing here is precise: generally, 20 minutes with the lid on, followed by 15 to 25 minutes with the lid off, depending on your desired level of darkness.
Professional Tips for Steam
Preheat your vessel:* Always place your Dutch oven in the oven during the preheat phase. A cold pot will not give you the initial boost needed for a good spring.
The Ice Cube Trick:* Some bakers swear by tossing an ice cube into the hot Dutch oven alongside the loaf before closing the lid. This creates an immediate, concentrated burst of steam.
Handle with Care:* Always use high-heat-resistant gloves, as the steam escaping when you remove the lid is intense and can easily cause burns.
"If you are afraid of a dark, blistered crust, you are sabotaging your own loaf; embrace the mahogany color, for that is where the true flavor and the most satisfying crunch reside."
The Science of Scoring
Scoring is not just about aesthetics; it is a functional necessity. By making a deliberate cut into the dough, you are creating a point of weakness where the loaf is designed to expand. Without proper scoring, the loaf will burst in random, unattractive places, and the crust will not develop the "ear" that home bakers admire. The angle of your blade, or lame, is crucial here. A shallow, straight cut will result in a flat expansion, while a cut at a 45-degree angle will encourage the dough to pull away from itself, creating that beautiful, raised lip.
The depth of your score is just as important as the angle. If your cut is too shallow, the dough will struggle to break through the surface, leading to a lopsided or restricted loaf. If your cut is too deep, you risk deflating the dough. A depth of roughly 1/2 inch is usually ideal for a standard boule. Remember to score quickly and with confidence; hesitation leads to jagged lines and a messy finish. The goal is a clean, decisive stroke that guides the oven spring in the direction you choose.
Scoring Techniques for Success
Cooling and Storage: The Final Step
Many bakers make the mistake of cutting into their sourdough immediately after taking it out of the oven. This is a culinary tragedy. The interior of the loaf continues to cook and set through residual heat long after it leaves the oven. If you cut the loaf while it is still steaming hot, the moisture that is supposed to be redistributed throughout the crumb will escape as vapor, leaving you with a gummy, wet interior and a crust that quickly softens. You must allow the bread to cool completely on a wire rack—ideally for at least two hours.
The cooling process is where the crust actually "sets." As the loaf cools, the moisture levels between the crumb and the crust reach an equilibrium. If you cover the bread or store it in an airtight container while it is still warm, you are effectively steaming the crust, turning your hard-won crunch into a soft, chewy texture. Always store your bread in a way that allows the crust to breathe, such as a paper bag or a linen bread bag, rather than a plastic bag, which is the enemy of a crispy finish.
Best Practices for Storage
The Cooling Rack:* Do not leave your loaf on the hot baking tray; use a wire rack to ensure airflow around the entire loaf.
The Sound Test:* When you tap the bottom of a perfectly cooled loaf, it should sound hollow. This indicates a well-developed crumb and a thin, crispy crust.
Resurrecting the Crunch:* If your loaf loses its crunch after a day or two, simply place it in a 350°F oven for five to eight minutes to re-crisp the surface.
Conclusion
Achieving a professional-grade crust on your sourdough is a journey of refinement, patience, and attention to detail. By selecting the right high-protein flour, mastering your hydration percentages, and respecting the fermentation timeline, you provide the dough with the structural tools it needs to succeed. When you combine these fundamentals with the controlled environment of a steam-injected bake and the subsequent dry-heat caramelization phase, you are no longer just baking bread—you are crafting a culinary masterpiece.
Remember that every oven is different, and every kitchen environment presents its own set of variables. Do not be discouraged if your first few attempts do not yield the "shattering" crust you envisioned. Baking is a science, but it is also an art form that improves with every single loaf you pull from the oven. Keep a journal of your bakes, noting your fermentation times and temperatures, and adjust your variables slowly. Eventually, that perfect, crackling, mahogany-colored crust will become second nature, and you will find that the process of baking is as rewarding as the loaf itself.
The "Blame the Chef" philosophy is simple: we take ownership of the process so that we can improve the result. Stop blaming the lack of a professional deck oven and start focusing on the elements you can control. Invest in a good Dutch oven, sharpen your lames, and learn to listen to your dough. Your sourdough is waiting to reach its full potential, and with the techniques shared here, you are well on your way to becoming a master of the artisanal crust. Now, fire up your oven, get your starter active, and start baking. There is nothing quite like the smell of a perfect, crispy loaf filling your home. Happy baking!




Get the Next Recipe
Weekly recipes, techniques, and gear picks — straight to your inbox.
