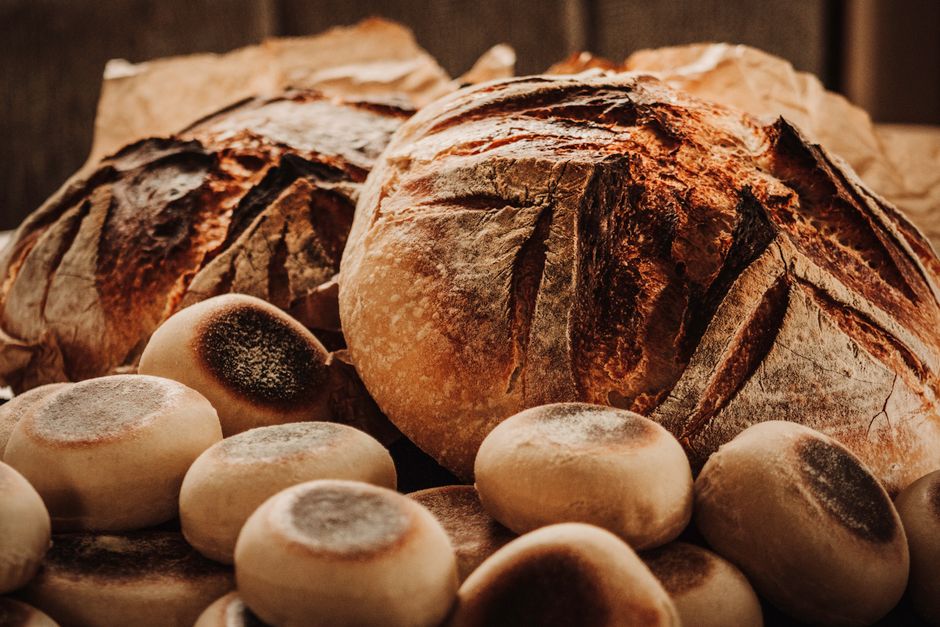
How to Get a Crispy Sourdough Crust
There is something profoundly transformative about pulling a loaf of sourdough from your oven that sings with a high-pitched crackle as it cools on the counter. Achieving that elusive, mahogany-colored, shattering crust is the primary goal of every home baker who dares to tangle with wild yeast. It is the hallmark of a professional-grade loaf, separating the soft, pale, and sad bread of a beginner from the artisanal masterpiece that makes friends and family stop in their tracks. To get there, you must move beyond simple recipes and begin to treat your dough like a living, breathing component of a high-stakes scientific experiment.
The science behind the crust is a delicate interplay of Maillard reaction, moisture evaporation, and ambient oven temperature. Many home cooks struggle because they treat the oven like a static box rather than a dynamic steam-injection environment. You aren't just baking bread; you are essentially building a protective, caramelized exterior that locks in the crumb's moisture while providing a structural shell that delights the senses. Every step of your process—from the initial mix to the final scoring—is an opportunity to either foster or sabotage the crunch you crave.
In this guide, we are going to break down the mechanics of the crust so that you can stop blaming your oven and start mastering your environment. We will cover everything from the importance of hydration ratios to the specific benefits of cold-retardation and the science of steam. By the end of this deep dive, you will have the knowledge to troubleshoot your bakes and ensure that every loaf you produce has a crust that is not only beautiful to look at but practically musical to slice. Let’s demystify the art of the shatter-worthy sourdough.
The Foundation of a Strong Crust
The Role of Hydration
The secret to a crisp crust often begins with the hydration level of your dough. A higher hydration—typically between 75% and 85%—allows for a more open crumb and, crucially, creates a wetter dough surface that caramelizes beautifully. When moisture evaporates from the surface of a high-hydration loaf during the initial stages of baking, it leaves behind a concentrated layer of sugars and proteins. These compounds undergo the Maillard reaction, which is the chemical process responsible for that deep, complex browning and rich, nutty flavor we associate with excellent sourdough.
However, be warned: high hydration is a double-edged sword. If you lack the skill to manage a sticky dough, your structure will collapse, resulting in a dense, gummy loaf that never develops a proper crust because it fails to expand. Aim for a hydration that you can comfortably handle with confidence. If you are a beginner, start at 70% and work your way up by 2% with each bake. Consistency in handling allows for better tension building, which is essential for that thin, crispy exterior.
Building Tension
Beyond hydration, the physical structure of your dough is paramount. If your loaf is slack, the crust will be thick, chewy, and tough rather than thin and crispy. You must develop gluten strength through sets of stretch-and-folds during the bulk fermentation. A tight, well-formed skin on your dough—achieved during the pre-shape and final shape—is what allows the bread to expand upwards rather than outwards. This tight skin acts as the scaffolding for the crust; when it is stretched taut, the surface dries out faster and browns more evenly in the oven.
The crust is the window into the soul of your loaf. If the window is cloudy and soft, the crumb inside has likely struggled to reach its full potential. Always prioritize tension during shaping to ensure a crisp, thin, and shattering exterior.
The Physics of Steam and Heat
Understanding the Steam Injection
Steam is the absolute best friend of the crust. When you load your dough into a hot oven, the steam prevents the surface of the bread from hardening too quickly. This keeps the exterior pliable, allowing the loaf to undergo a phenomenon called oven spring. Without enough steam, the crust sets prematurely, trapping the bread and causing it to bake into a stunted, dome-like shape with a hard, impenetrable exterior. Steam keeps that exterior moist, allowing for maximum expansion, and then, once the steam is removed, it facilitates the final darkening of the crust.
Professional ovens have steam injection systems, but at home, we must replicate this. The most efficient method is using a Dutch oven or a cast-iron combo cooker. By trapping the moisture released from the dough itself, you create a self-steaming environment. For those who prefer to bake on a stone, a pan of hot water or lava rocks placed at the bottom of the oven can suffice, though it is rarely as effective as the sealed environment of a heavy pot.
Precision Temperatures
For a truly crispy crust, you need a high initial heat, typically starting at 475°F to 500°F (245°C to 260°C). This extreme heat triggers the initial rise and begins the caramelization process. After the first 20 minutes, remove the lid of your Dutch oven—or remove the steam source—and drop the temperature to 425°F (220°C). This final phase is where the magic happens: the crust loses its remaining surface moisture and turns a deep, reddish-brown. If you pull the bread out too early, you end up with a pale, soft crust that will lose its crispness within an hour of cooling.
Scoring Techniques and Crust Integrity
The Mechanics of the Slash
Scoring your bread is not merely decorative; it is a tactical decision that dictates how the bread will open and how the crust will develop. A clean, deep lame score—typically at a 45-degree angle—allows the expanding gases to escape in a controlled manner. If you do not score your loaf, it will rupture at its weakest point, often resulting in an ugly, jagged tear that creates an uneven crust thickness. A well-placed ear, or "bunny ear," provides a thin, delicate area of the crust that becomes incredibly crispy because it is fully exposed to the oven's direct heat.
Blade Angle and Depth
The depth of your cut should generally be about one-quarter to one-half inch deep. If the cut is too shallow, the bread will fight the crust too much, resulting in a muffled, lackluster explosion. If the cut is too deep, the loaf may flatten out. Use a professional-grade lame with a fresh, sharp razor blade for every single bake. A dull blade drags through the dough, tearing the surface rather than slicing it, which ruins the structural integrity of the crust before the bread even hits the heat.
The Role of Fermentation and Cold Retardation
Bulk Fermentation Timing
The length of your bulk fermentation directly influences the final crust quality. If you under-proof your dough, the crust will be unevenly browned and potentially "blistered" in a way that feels tough rather than crunchy. Over-proofed dough will lack the strength to spring, leading to a dull, matte crust that lacks the vibrant color of a well-timed loaf. You want to aim for a fermentation stage where the dough has increased in volume by roughly 30% to 50%, with visible bubbles on the surface and along the sides of your container.
The Magic of the Fridge
Cold retardation—placing your shaped dough into the refrigerator for 8 to 24 hours—is a secret weapon for flavor and crust texture. The cold temperature slows down the yeast but allows the bacteria to produce organic acids, which contribute to a more complex flavor profile. More importantly, a cold loaf is much easier to score, and the differential between the cold dough and the screaming hot oven creates a more dramatic oven spring. This results in a crust that feels more refined, crackly, and less "bready" in its thickness.
When you chill your dough, you aren't just letting it sleep. You are allowing the enzymes to break down starches into simpler sugars, which are the fundamental building blocks of a dark, beautiful, and deeply caramelized crust.
Ingredients and Their Impact
The Flour Factor
The type of flour you use dictates the flavor and color of your crust. A standard bread flour provides the necessary protein content (typically 12.5% to 14%) to support the structure, but adding a portion of stone-ground whole wheat or rye flour can significantly enhance the color and depth of the crust. Whole grains contain more nutrients and enzymes that promote faster, deeper browning. If you want a crust that looks like it came from a Parisian boulangerie, experiment with adding 10% to 20% dark rye flour to your total flour weight.
The Sugar and Malt Additives
While traditional sourdough relies only on flour, water, salt, and starter, many professional bakers add a tiny touch of diastatic malt powder to their mix. This enzyme-rich powder helps break down starches into sugars, which provide extra fuel for the Maillard reaction. Even a teaspoon in a standard 500g flour recipe can yield a noticeably darker, glossier, and crunchier crust. Be careful not to add too much, or your crust will burn before the interior is fully cooked.
Bread Flour:* Provides the necessary gluten framework.
Whole Wheat/Rye:* Enhances flavor and promotes darker color.
Diastatic Malt:* Boosts sugar content for better browning.
Salt:* Regulates fermentation and tightens the gluten structure.
Troubleshooting Common Crust Failures
Why Is My Crust Soft?
If your bread comes out of the oven crispy but turns soft within an hour, you likely have a cooling problem. Bread continues to bake and release moisture long after it leaves the heat. If you slice into your bread while it is still warm, the steam trapped inside will rush out and soften the crust instantly. You must allow your loaf to cool on a wire rack for at least two to four hours before slicing. This allows the internal moisture to redistribute and the crust to "set" properly.
Why Is My Crust Pale?
A pale crust is almost always a result of insufficient heat or poor sugar development. Check your oven calibration with a separate thermometer—many home ovens run 25 to 50 degrees cooler than the display indicates. If your oven is accurate, try extending the bake time after you remove the lid. Do not be afraid of a dark color; what you perceive as "burnt" is often just a deep, complex caramelization that is essential for the best flavor. Aim for a chestnut brown, not a golden yellow.
Dealing with Tough, Leathery Crusts
A leathery crust usually indicates that the bread was baked at too low a temperature for too long. If you aren't using a Dutch oven, you might be losing too much heat, or your steam isn't effective. Ensure you are preheating your oven (and your Dutch oven) for at least one hour before baking. The initial blast of heat is non-negotiable. If you find your crust is still leathery, try lowering the hydration slightly, as very wet doughs can sometimes be difficult to finish drying out if your oven airflow is poor.
The Art of the Final Bake
Post-Lid Baking
Once you remove the lid of your Dutch oven, you enter the final phase of the process. This is the moment to watch your bread closely. The interior is essentially cooked, and now you are purely working on the crust. If you are baking multiple loaves, make sure they are not crowding each other, as this creates localized humidity pockets that prevent the crust from crisping. If your oven has a convection setting, you might consider using it during the final 10 to 15 minutes of the bake to circulate the dry, hot air and further dehydrate the surface.
Testing for Doneness
To ensure the crust has reached its structural peak, use the "knock test." Flip the loaf over and tap the bottom; it should sound hollow, like a drum. If it sounds dense or thuds, it needs more time. Additionally, trust your eyes. The color should be consistent across the entire loaf. If one side is darker than the other, rotate your bread halfway through the final browning phase. The patience you show in these final moments will define the quality of the bread you serve.
Maintaining the Crunch
Storage Best Practices
Never store your sourdough in a plastic bag unless you want the crust to vanish. Plastic traps moisture, which will turn your beautiful, crispy work of art into a soft, chewy sponge. If you must store it, use a paper bag, which allows for some air circulation while protecting the loaf from drying out entirely. For the best longevity, slice the bread and freeze it immediately, then toast your slices as needed. The toaster will revive that original, shattering crust perfectly every time.
Reviving a Tired Loaf
If you have a loaf that has lost its crunch, you can easily revive it. Preheat your oven to 375°F (190°C). Lightly mist the crust with a little bit of water and place the loaf directly on the oven rack for 5 to 8 minutes. This brief second heating will re-caramelize the surface and evaporate the excess moisture that accumulated during storage. Serve it warm, and it will be almost as good as the day it was baked. It is the ultimate chef’s trick for keeping sourdough at its peak performance for days after the initial bake.
Conclusion
Mastering the perfect sourdough crust is a journey that rewards curiosity and technical precision. By controlling your hydration, honoring the necessity of steam, and understanding the chemistry of heat, you can elevate your baking from a mere hobby to a refined craft. Remember that the crust is not just a protective barrier for the crumb; it is a flavor-packed, textured experience that defines the very character of the bread.
Do not be discouraged by a few pale, soft, or over-baked loaves. Every mistake is a data point that brings you closer to that perfect, mahogany-colored, musical crust. Keep detailed notes on your bakes, track your temperatures, and never stop experimenting with your process. When you finally pull that perfect, crackling loaf from the oven, take a moment to listen to it "sing" as it cools. That sound is the validation of your effort and the mark of a baker who has truly learned to control their craft. Keep baking, keep testing, and most importantly, never stop chasing that ultimate crunch. Your kitchen is your laboratory, and the sourdough is your masterpiece—take pride in every slice.




Get the Next Recipe
Weekly recipes, techniques, and gear picks — straight to your inbox.
