
How to Keep Parsley Fresh for 2 Weeks
There is nothing quite as disheartening in the culinary world as reaching into your vegetable crisper drawer, full of anticipation for a bright, herbaceous finish to a slow-simmered ragu, only to pull out a slimy, wilted mess of what used to be fresh parsley. As home cooks, we often prioritize our proteins and heavy starches, viewing herbs as a mere afterthought or a decorative garnish. However, the difference between a good dish and a professional-grade culinary masterpiece frequently boils down to the brightness and structural integrity of the fresh herbs you choose to incorporate. Parsley, while seemingly humble, is the backbone of the culinary arts, providing a clean, peppery, and earthy profile that cuts through fat and balances acidity with effortless elegance.
Understanding the biology of your ingredients is the first step toward true kitchen mastery, and parsley is a particularly resilient herb if treated with the proper level of respect. Whether you are dealing with the broad, bold leaves of flat-leaf Italian parsley or the tightly curled, decorative bunches of curly parsley, the secret to longevity lies in moisture management and oxygen circulation. Far too many home cooks make the amateur mistake of leaving their herbs tightly bound in those suffocating plastic bags from the grocery store, which effectively accelerates the decay process by trapping ethylene gas and promoting mold growth. By learning how to store this vibrant green staple properly, you are not just saving a few dollars at the checkout line; you are ensuring that your arsenal of flavors is always ready for service.
In this guide, we are going to dive deep into the professional techniques that allow chefs to keep their parsley crisp, vibrant, and aromatic for two weeks or longer. We will explore the nuances of temperature control, hydration techniques, and the importance of creating a micro-climate that mimics the cool, humid conditions of a high-end walk-in refrigerator. You will learn the difference between various storage containers, the impact of mineral content in your water, and why the "bouquet" method is the gold standard in professional kitchens globally. Put on your apron, sharpen your knife, and prepare to elevate your ingredient management skills, because when you master the basics, everything else on the plate begins to shine with a renewed sense of purpose.
The Science of Herb Preservation
Why Parsley Wilts So Quickly
The primary culprit behind the premature death of your parsley is the rapid loss of transpiration. When you detach a bundle of herbs from its root system, it continues to lose moisture through its leaves, but it no longer has a mechanism to replace that hydration unless you provide a substitute. If the leaves become exposed to dry air in your refrigerator, they will lose their turgor pressure—the internal fluid pressure that keeps the plant structure upright—and start to sag. This is the physiological state we identify as wilting, and once it begins, the cellular walls start to break down, inviting bacteria and oxidation that turn the leaves a dull, brownish yellow.
Furthermore, the plastic packaging provided by supermarkets is an enemy to longevity. These materials are rarely breathable, which means that the natural moisture released by the plant is trapped in a stagnant environment. When this warm, damp air sits against the leaves, it creates a breeding ground for microorganisms. To combat this, you must treat your parsley like a cut flower arrangement rather than a refrigerated produce item. By managing the airflow and the hydration source simultaneously, you can effectively pause the metabolic clock of the herb, keeping it in a state of suspended animation for an extended period.
The Role of Temperature and Humidity
Temperature is another critical variable that most home cooks fail to control with enough precision. Your average home refrigerator is often set to a temperature that fluctuates significantly, especially if the door is opened and closed frequently. Parsley thrives best in temperatures between 34°F and 38°F. If the environment is too cold, you risk frost damage on the delicate leaf structure, which results in blackened edges and mushy textures. Conversely, if it is too warm, you accelerate the growth of pathogens that cause the slime we all despise.
Humidity, however, is the most overlooked factor. You want a high-humidity environment for the stems, but a relatively dry environment for the leaves themselves. This is a delicate balance. If the leaves are soaking wet when they go into the fridge, they will rot; if they are bone dry, they will dehydrate. This is why the best storage methods involve a specific "tenting" technique that keeps the tops shielded from direct cold drafts while maintaining a consistent vapor barrier around the stems.
"A kitchen is only as good as the state of its ingredients. If you treat your herbs with the same care as a fine cut of Wagyu, you will notice an immediate change in the vibrancy and depth of your finished dishes."
The Professional Bouquet Method
The Setup and Trim
The most effective way to store parsley is to mimic the way a florist treats a fresh bouquet. Start by removing the rubber band or twist-tie that binds your parsley bunch together, as these are often too tight and can bruise the delicate stems. Once the bundle is loose, fill a mason jar or a sturdy water glass with about two inches of cool, filtered water. Using a sharp chef's knife, trim about half an inch off the bottom of the parsley stems at a 45-degree angle. This angled cut increases the surface area for the herb to absorb water, similar to how you would treat fresh roses.
It is absolutely vital to ensure that no leaves are submerged in the water. Leaves left in the water will inevitably rot, causing bacteria to spread through the entire bunch, which will kill your parsley in a matter of days. Take a few minutes to meticulously pick away any yellow or slimy leaves from the base of the stems before placing the bunch into the jar. This preventative cleaning is perhaps the most important step in the entire process; if you leave one damaged leaf in the bunch, it acts as a catalyst for decay.
The Tenting Technique
Once your parsley is positioned in the jar, you need to create a protective canopy. Use a loose-fitting plastic produce bag, ideally one that has a few small holes for minimal ventilation, to cover the leaves. You do not want the bag to be airtight. Secure the bag around the neck of the jar with a rubber band or a piece of twine. This creates a mini-greenhouse that maintains the ideal humidity levels for the parsley, preventing the leaves from drying out due to the desiccating fan of your refrigerator.
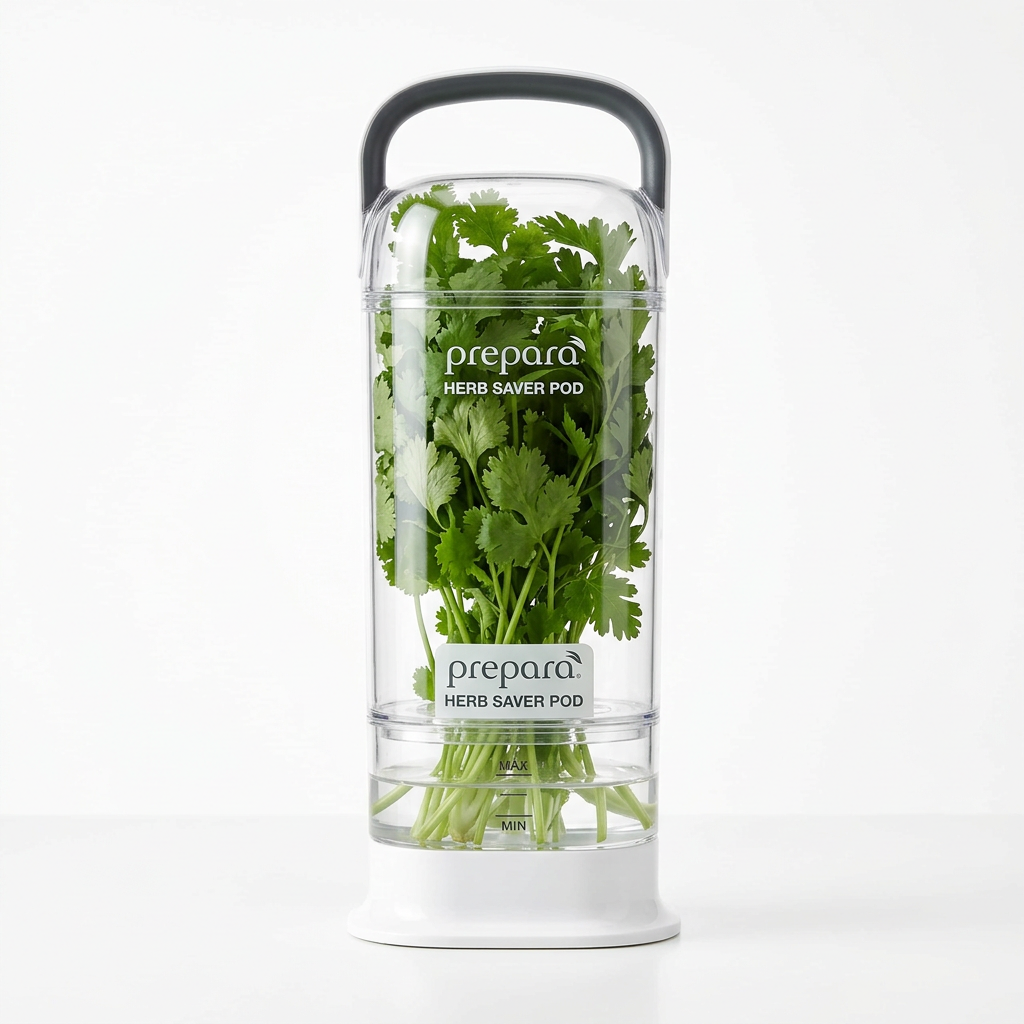
Professional chefs often use professional-grade herb keepers, which are specifically designed to suspend the stems in water while providing a vented, upright container. If you have the cabinet space, investing in one of these tools is a game-changer. However, a humble mason jar and a plastic bag work just as effectively if managed with care. Place your jar in the coolest part of your refrigerator—usually toward the back, away from the door and away from the vegetable drawer where ethylene-producing fruits like apples or pears might be lurking.
Managing Your Herb Inventory
The Rotation System
Even with perfect storage conditions, you need a system for rotation. Apply the FIFO principle (First In, First Out) to your parsley. If you buy a new bunch of parsley, do not simply shove it behind the old one. If you have an older bunch, use it for things like stocks, stews, or chimichurri where the aesthetic quality of the leaf matters less than the flavor. Save the fresher, more pristine-looking herbs for garnishes and salads.
You should also plan on changing the water in your jar every three to four days. As the parsley sits, it will naturally release compounds and cellular debris into the water, which can become cloudy. Fresh, filtered water provides the herb with a clean environment and prevents the growth of algae or bacterial buildup. When you change the water, perform a quick "health check" on the stems. If you notice any stems getting mushy, trim them back until you reach a crisp, firm section of the stem, or remove them entirely to protect the health of the remaining bunch.
Trimming for Longevity
Throughout the two weeks, your parsley will continue to try to grow. You may notice small white roots appearing at the base of the stems—this is a sign that your parsley is quite happy! You can leave these roots as they are, but if the stems seem to be stretching, feel free to give them another small trim if you need to fit the bunch under a shelf in your fridge. Always ensure your knife is razor-sharp. A dull blade will crush the vascular system of the herb, leading to brown, unsightly stem ends that don't take up water effectively.
Keep a close eye on the color of the leaves. Vibrant, deep green is the goal. If you see the edges starting to turn pale or yellow, this is your signal to use the parsley within the next 24 hours. Herbs are living things, and they have a shelf life regardless of how well you store them. By monitoring their color and texture daily, you can adjust your cooking plans to ensure you are always using your ingredients at their absolute peak of flavor.
"The secret to a chef's flavor profile isn't just in the spices they choose, but in the freshness of the aromatics they keep. Never settle for limp, sad herbs when you can have a vibrant garden in your own refrigerator."
Alternative Storage Strategies
The Oil Preservation Method
If you find yourself with an abundance of parsley that you cannot possibly use within two weeks, consider preserving it in high-quality olive oil. This is a traditional technique for creating a versatile "herb oil" that can be used to finish pasta, dress roasted vegetables, or serve as a base for sauces like salsa verde. To do this, pulse your washed and thoroughly dried parsley in a food processor with a neutral or fruity extra-virgin olive oil until it reaches a coarse consistency.
Place this mixture into ice cube trays and freeze it. Once frozen, pop the cubes into a freezer-safe bag. This allows you to have "fresh" parsley flavor available at a moment's notice for the next six months. It is an incredible way to avoid waste, and the flavor of the herb is perfectly preserved in the fat. When you are ready to use it, simply drop a cube into your hot pan—the oil will melt, and the parsley will bloom instantly.
Drying the "Right" Way
Many home cooks attempt to dry their parsley by hanging it upside down, but this often results in a flavorless, dusty product that loses its essential oils. If you must dry your parsley, use a low-heat oven method. Preheat your oven to its lowest possible setting—usually around 150°F to 170°F. Spread the leaves in a single layer on a parchment-lined baking sheet and leave them in the oven for about one to two hours, or until they are crisp to the touch.
Once they are dehydrated, crumble them by hand into an airtight glass jar and store them in a cool, dark cupboard. While this does not retain the bright, grassy flavor of fresh parsley, it is far superior to store-bought dried herbs. Keep in mind that when using dried parsley, you should use about one-third of the amount called for in a recipe compared to fresh herbs, as the flavors become significantly more concentrated during the drying process.
Common Mistakes to Avoid
Washing Too Early
One of the most frequent errors is washing your parsley immediately after bringing it home from the market. While it is true that you want to remove dirt, moisture is the enemy of shelf life. If you wash your parsley and do not ensure it is 100% dry before storing it, you are essentially accelerating the rot process. Instead, wait to wash the parsley until just before you are ready to use it. If the bunch is particularly dirty, wash only the amount you intend to use.
If you must wash the entire bunch because it is caked in mud, you must employ a salad spinner to remove every drop of excess moisture. After spinning, lay the herbs out on a clean, lint-free kitchen towel and pat them dry gently. Do not rub them, as this bruises the leaves and releases the essential oils prematurely, leaving you with a diminished product. Once they are dry, proceed with the bouquet method immediately.
The "Freezer Burn" Trap
Never place your fresh parsley directly into the freezer in a bag. The cellular structure of parsley is high in water content; when frozen rapidly and unprotected, the ice crystals will rupture the cell walls. When you thaw the parsley, it will turn into a brown, mushy, unappetizing slurry that has lost all its structural integrity. If you want to freeze it, you must either use the oil method mentioned earlier or blanch the leaves for ten seconds in boiling water before shocking them in ice water and freezing them.
Blanching helps to lock in the bright green chlorophyll, preventing the herb from turning brown during the freezing process. However, even with this method, you are better off using frozen parsley for cooked applications rather than garnishing. For a fresh garnish, there is no substitute for the techniques described in the bouquet method. Always maintain your focus on the balance between hydration and ventilation to ensure the best results.
Professional Chef Tips for Usage
The Importance of the Stem
Many home cooks mistakenly discard the parsley stems, viewing them as woody or unpalatable. In professional kitchens, the stems are considered flavor gold. They contain just as much, if not more, concentrated flavor as the leaves. Collect your trimmed stems in a freezer bag and store them for your next batch of homemade vegetable or chicken stock. They add an incredible depth and freshness to the liquid that you simply cannot achieve with dried herbs alone.
When prepping for a garnish, ensure you are using a very sharp knife to "chiffonade" or chop your herbs. If your knife is dull, it will crush the herbs, leaving green stains on your cutting board. Those green stains are actually the flavor of the herb leaving the plant and sticking to your board instead of your food. By keeping your knife sharp and using a clean, rhythmic motion, you keep the essential oils inside the herb, resulting in a much more flavorful and aromatic final plate.
Maximizing Flavor Release
To get the most out of your fresh parsley, always add it at the very end of the cooking process. High heat kills the volatile compounds that give parsley its signature flavor. Whether you are folding it into a warm pasta dish or sprinkling it over a piece of pan-seared fish, add the chopped parsley just seconds before serving. This preserves the brightness and the visual pop of the green, ensuring your presentation is as impressive as the taste.
If you are using parsley in a cold application, such as a vinaigrette or a tabbouleh, let the herbs sit in the dressing for at least 15 minutes before serving. This allows the acidity of the vinegar or lemon juice to soften the herb slightly and draw out the natural oils, creating a more cohesive flavor profile. It is these small, intentional steps that separate a home-cooked meal from a professional culinary experience.
"Cooking is an exercise in detail. When you respect the small things—the way you trim a stem, the temperature of your water, the timing of your garnish—the big picture of your cooking falls into place with remarkable ease."
Advanced Herb Management
Understanding Herb Varieties
Not all parsley behaves the same way in storage. Flat-leaf parsley, also known as Italian parsley, is generally more robust and holds up better to heat in cooking. It has a stronger, more herbaceous flavor profile. Curly parsley, which is often used more for its texture and visual appeal, has a slightly milder, sometimes bitter note. When choosing your bunch at the market, look for leaves that are bright, perky, and free of any spots.
If you find that your herbs are starting to lose their luster, don't throw them away. Even if the leaves aren't perfect for a fresh garnish, they are likely still packed with flavor. You can blend them into a simple green goddess dressing, mix them with butter and garlic to create a compound butter, or throw them into a blender with some olive oil and lemon juice to create a vibrant green oil that can be drizzled over soups or roasted meats.
Creating a Sustainable Routine
The key to maintaining fresh parsley for two weeks is making the process a part of your standard kitchen routine. When you return from the store, set a timer for five minutes. Wash your greens, prep your bouquet, and get it into the fridge immediately. By removing the "barrier to entry" for proper storage, you will find that you are much more likely to use these ingredients in your daily cooking.
Remember, parsley is a powerhouse of nutrition and flavor. It is packed with Vitamins A, C, and K, and it acts as a natural palate cleanser. By keeping it fresh, you are not just making your food look better—you are making it healthier and more vibrant. Use this guide as a template for other herbs as well; many soft herbs like cilantro or dill respond similarly to the bouquet method, though they may have slightly different lifespans.
Conclusion
Mastering the art of keeping parsley fresh for two weeks is a testament to the discipline and care that defines a true home chef. It is not merely about preventing waste; it is about cultivating an environment where high-quality ingredients can thrive. When you take the time to properly trim, hydrate, and store your parsley, you are respecting the product and ensuring that your culinary efforts are backed by the best possible flavors. The difference between a wilted, sad herb and one that snaps with life is the difference between a flat dish and a vibrant, balanced creation.
By implementing the bouquet method, monitoring your refrigerator's micro-climate, and adopting a professional mindset regarding ingredient rotation, you can ensure that your kitchen is always ready for service. Do not be discouraged if it takes a few tries to perfect your technique; culinary mastery is a journey of small, iterative improvements. As you continue to refine your skills, remember that the most important tool in your kitchen is your own attention to detail.
Treat your parsley with care, use your knives with precision, and always prioritize the freshness of your aromatics. Whether you are making a complex herb-crusted roast or a simple bowl of pasta, the presence of fresh, vibrant parsley will elevate your dish to new heights. You are now equipped with the knowledge to maintain one of the most important ingredients in your pantry. Go forth, keep your greens crisp, and continue to blame the chef—or in this case, applaud them—for the incredible meals you are about to create. Happy cooking!
Get the Next Recipe
Weekly recipes, techniques, and gear picks — straight to your inbox.
