
How to Re-Season Cast Iron with Flaxseed Oil
There is an enduring romance associated with the humble cast-iron skillet, a piece of equipment that has anchored kitchens across the globe for centuries. Unlike modern non-stick pans that inevitably degrade and end up in a landfill, a cast-iron skillet is a multigenerational heirloom that grows better, smoother, and more non-stick with every single meal you prepare. However, the path to a perfect, glass-like surface is often misunderstood, leading many home cooks to abandon their pans in frustration when food begins to stick or rust appears. The secret to unlocking the true potential of your skillet lies in the mastery of seasoning, a process of polymerizing fat to create a durable, protective layer. When executed correctly, this technique transforms a rough, porous iron surface into a sleek, dark canvas ready to handle everything from searing a ribeye steak to baking a delicate cornbread.
Many culinary enthusiasts find themselves intimidated by the maintenance requirements of cast iron, believing that these pans are temperamental or difficult to clean. In reality, cast iron is remarkably resilient, provided you understand the fundamental science behind the polymerization process. When we talk about seasoning, we are not simply greasing the pan; we are creating a chemical bond where oil molecules break down and cross-link under high heat to form a hard, plastic-like film. While traditional wisdom often suggested using animal fats like lard or bacon grease, modern food science has revealed that drying oils, specifically flaxseed oil, offer a superior, more durable matrix for this protective coating. By following a structured, deliberate approach to the seasoning process, you can ensure your cookware remains a reliable workhorse for decades to come.
In this comprehensive guide, we will delve into the nuances of re-seasoning your cast iron using flaxseed oil, an ingredient renowned for its high iodine value and its ability to harden into an incredibly stable finish. We will explore the necessary preparation, the precise temperature requirements, and the critical importance of thin, controlled layers. Whether you are reviving a rusty antique found at a flea market or simply refreshing a daily driver that has lost its luster, this technique will provide you with the professional-grade results you deserve. Put on your apron, preheat your oven, and prepare to elevate your home cooking by mastering the art of the perfect, resilient cast-iron finish.
Understanding the Chemistry of Polymerization
The process of seasoning is essentially a controlled form of alchemy. When you apply a thin layer of fat to iron and expose it to temperatures exceeding the smoke point of that oil, you initiate a transition from a liquid state to a solid, stable polymer. This film is what prevents food from bonding directly to the porous iron surface. If the oil is too thick, it will pool, turn sticky, and eventually flake off, which is a common complaint among those who have tried and failed to season their pans. The goal is to achieve an extremely thin layer, barely visible to the naked eye, that allows the iron to breathe while remaining sealed.
The Role of Flaxseed Oil
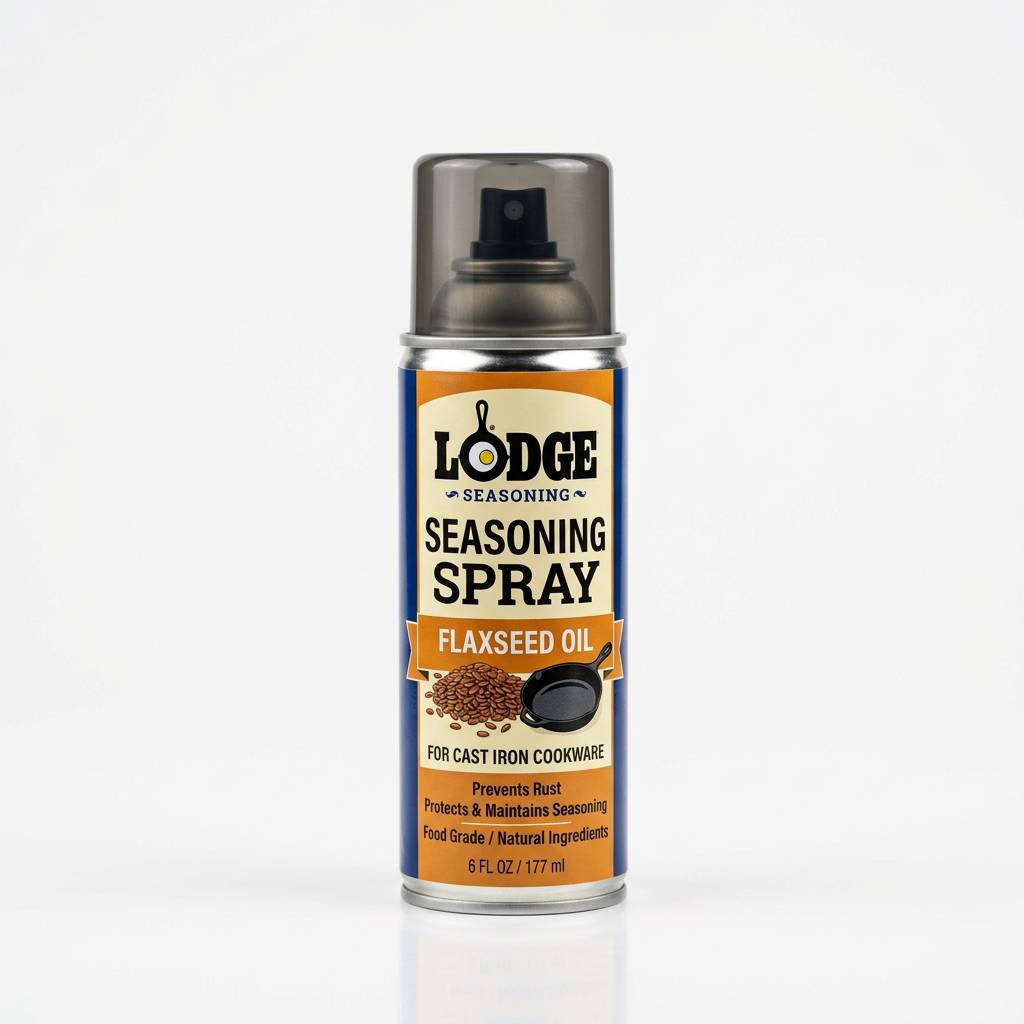
Flaxseed oil is categorized as a "drying oil," which means it has a high concentration of polyunsaturated fatty acids. These fatty acids are uniquely capable of reacting with oxygen and heat to form a cross-linked structure that is harder and more durable than the coating produced by saturated fats. While it is more expensive than standard vegetable oils, its performance is unmatched when building a base layer of seasoning from scratch. It creates a dark, near-black finish that provides a distinct visual and functional indicator of a well-maintained pan.
The secret to a perfect cast-iron surface is not the amount of oil you use, but the discipline with which you remove it. A thinner layer is always superior to a thicker one when it comes to the integrity of the seasoning.
When shopping for your flaxseed oil, it is vital to ensure you purchase a 100% pure, food-grade version, preferably one kept in the refrigerator section of the store. Because flaxseed oil is sensitive to heat and light, freshness matters. A rancid oil will not polymerize effectively and will result in a sticky, unpleasant surface that smells off. Once you have acquired your oil, store it in the refrigerator to prolong its life and ensure the integrity of your seasoning sessions remains consistent.
Preparing Your Cast Iron for Success
Before you begin the application of oil, the iron must be entirely stripped of any old, flaking seasoning or rust. If you are starting with a pan that has patchy, sticky residue, your new layer of seasoning will not adhere correctly to the iron, leading to uneven results. You want a clean, gray, or dark matte surface that is completely free of debris. Use a stiff wire brush, a heavy-duty scouring pad, or even an abrasive paste made of coarse sea salt and a touch of water to scrub the interior and exterior of the vessel thoroughly.
Cleaning Techniques
For heavily rusted pans, you may need to use a more aggressive method, such as a soak in a diluted vinegar bath or the use of a stainless-steel chainmail scrubber. Once the pan is clean, it is imperative that you rinse it with hot water and dry it immediately on the stovetop over low heat. Even the smallest amount of moisture can trigger flash rust, which will compromise your new seasoning layer. A pan that is bone-dry and slightly warm to the touch is the ideal starting point for the oil application.
The Application Process: Less is More
This is the most critical stage of the entire procedure. Most home cooks apply far too much oil, resulting in a gummy, tacky surface that attracts dust and makes cooking difficult. You want to apply a tiny amount of flaxseed oil to a lint-free cloth or a high-quality paper towel and rub it into the entire surface of the pan, including the handle and the bottom. Once you have coated the pan, take a second, clean cloth and buff the surface as if you are trying to remove all of the oil you just applied. You want the surface to look dull, not shiny or wet.
Why Buffing Matters
The oil remaining in the microscopic pores of the iron is exactly what you need. When this minuscule amount of oil is heated, it will polymerize into a smooth, hard surface. If you leave a visible pool of oil, the heat will cause the edges of the pool to harden while the center remains gooey. This leads to the infamous "sticky pan" syndrome that forces many people to reach for their non-stick aluminum pans instead. By buffing the pan to a near-dry state, you guarantee an even, long-lasting bond.
A seasoned pan should feel like smooth, polished stone. If your finger sticks to the surface after the pan has cooled, you have applied too much fat and failed to buff it adequately.
Remember that you are essentially building a microscopic layer of "plastic" over your iron. Every time you cook with fats like bacon grease, butter, or oil, you are adding to this layer. The initial re-seasoning with flaxseed oil creates the foundation. Once this base is established, you do not need to repeat this intensive oven-curing process frequently. Daily cooking and proper maintenance will do the heavy lifting for you as time goes on.
The Curing Phase: Precision Heat
Once your pan is buffed and ready, it is time to head to the oven. You should place the pan upside down on the middle rack to prevent any potential pooling of oil, although with the proper buffing technique, this should not be an issue. Place a sheet of aluminum foil on the rack below the pan to catch any accidental drips. Set your oven to a temperature approximately 25 to 50 degrees Fahrenheit above the smoke point of flaxseed oil, which is typically around 225 to 250 degrees Fahrenheit, though many professional chefs prefer to push this to 450-500 degrees Fahrenheit to ensure complete polymerization.
Managing the Oven Time
Let the pan bake for at least one hour at the target temperature. After the hour is up, turn the oven off, but do not remove the pan. It is crucial to allow the pan to cool slowly inside the oven. This cooling process helps the seasoning layer "set" or cure, creating a stronger bond with the iron. Rapid temperature changes can sometimes cause the seasoning to crack or lift, so patience is a virtue in this specific phase of the technique.
Preheat:* Ensure the oven is fully up to temperature before inserting the pan.
Duration:* One hour is the minimum; if you have the time, 90 minutes provides an even more robust finish.
Cooling:* Allow the pan to reach room temperature naturally in the closed oven for at least two hours.
After the pan has cooled, inspect the surface. It should feel smooth and look a deep, rich brown or black. If the pan feels sticky at all, you have applied too much oil. Do not despair; simply scrub it gently and start the application process over. It is perfectly normal to repeat this entire process three to five times to build an truly exceptional initial layer. Many professional chefs swear by the "five-layer method" for a brand-new skillet.
Maintaining Your Seasoned Masterpiece
Once you have successfully achieved a beautiful, dark seasoning, the real work begins: daily maintenance. Many people wrongly assume that cast iron cannot be washed with soap. This is a myth left over from the days when lye-based soaps could indeed strip a pan's finish. Modern dish soap is pH-neutral and gentle; it is perfectly safe to use a small amount to clean your pan after cooking. The key is to avoid soaking the pan in water for long periods or letting it air-dry, as both of these habits will lead to rust.
The Daily Cleaning Routine
Immediately after cooking, while the pan is still warm, wash it with a brush or a non-abrasive sponge. If there is stubborn, stuck-on food, use a bit of coarse salt and oil as an abrasive paste to gently scrub the area clean. Once clean, rinse the pan, dry it thoroughly with a towel, and then place it back on the stove burner on low heat for a minute or two to ensure all lingering moisture is gone. While it is still warm, wipe a tiny drop of high-smoke-point oil (like grapeseed or avocado oil) over the cooking surface to keep it supple and protected.
By following this routine, you will rarely need to perform a full re-seasoning. The seasoning will continue to darken and improve over time, eventually becoming a non-stick surface that rivals any expensive, Teflon-coated pan on the market. Cast iron is a living component of your kitchen; it responds to how you treat it, and over time, it will develop a personality and a performance level that is unique to your specific cooking style.
Addressing Common Problems
Even the most seasoned chefs encounter issues with cast iron from time to time. Perhaps you left the pan in the sink overnight, or maybe you cooked a highly acidic dish like tomato sauce, which stripped away some of your hard-earned layers. Do not view these setbacks as a failure of your equipment. Cast iron is exceptionally forgiving, and almost any damage can be reversed with a bit of elbow grease and a fresh application of oil. If your pan looks patchy, focus your re-seasoning efforts on the specific area rather than stripping the whole piece.
Acidic Ingredients and Your Pan
Many home cooks are warned never to cook tomatoes, wine, or citrus in cast iron. While it is true that these acidic ingredients can react with the iron—potentially imparting a metallic taste to your food and wearing away your seasoning—they are not forbidden. If you are searing a steak with a red wine reduction, your seasoning will likely survive. If you are simmering a long-cooked marinara sauce for three hours, you will almost certainly need to re-season the pan afterward. Use your judgment, and if you notice the pan looking dull after an acidic meal, simply clean it and perform a quick stovetop seasoning.
The beauty of cast iron is its infinite recoverability. You can strip it down to raw metal and rebuild it a thousand times, and it will still perform just as well as the day it was forged.
Remember that the pan’s color will evolve. A brand-new, re-seasoned pan will often look dark, but as it is used, it may take on a bronze or variegated appearance. This is normal. A perfectly uniform, jet-black surface is the goal, but it is a journey. Do not become so obsessed with the aesthetics of the pan that you stop using it for its primary purpose: creating delicious, soul-warming food.
Troubleshooting the Sticky Pan
If you have followed all the steps—thin layers, high heat, and patient cooling—but your pan still feels sticky, you are likely dealing with under-polymerized oil. This happens when the oil is heated to the right temperature but for too short a time, or when the initial application was just slightly too thick. The "tacky" feeling is the oil in a transition state. To fix this, simply place the pan back into the oven at 450 degrees Fahrenheit for another hour. Often, this additional exposure to heat will push the polymerization to completion and solve the stickiness issue entirely.
Environmental Factors
Consider the humidity in your kitchen. If you live in an extremely humid climate, oil can sometimes react with moisture in the air during the cooling process, creating a slightly tacky residue. In these cases, it is helpful to place the pan in a warm, dry area while it cools, or use a slightly higher temperature in the oven to ensure that any moisture trapped in the seasoning matrix is fully driven off.
Check the Oven Thermostat:* Many home ovens are not calibrated correctly. Use an oven thermometer to verify the actual temperature.
Oil Quality:* Ensure your flaxseed oil has not passed its expiration date.
Cloth Choice:* Avoid paper towels that leave lint behind. High-quality cotton rags or specialized linen cloths work best for buffing.
As you become more comfortable with these techniques, you will find that the process of maintaining your cast iron becomes a meditative, satisfying ritual. It is a connection to the past, a practice of care, and a demonstration of culinary competence. There is a profound sense of satisfaction in knowing that the equipment you use is not only durable but also perfectly optimized for your specific style of cooking. Whether you are frying eggs, searing chops, or baking sourdough, your cast iron will be your most dependable partner in the kitchen.
Conclusion
Mastering the re-seasoning of your cast iron using flaxseed oil is a rite of passage for any dedicated home cook. It requires patience, attention to detail, and an appreciation for the physical properties of the materials we use every day. By understanding the science of polymerization, you transition from being a passive consumer of kitchen goods to an active curator of your culinary environment. The effort you put into establishing that initial base of seasoning will pay dividends for years, providing you with a non-stick surface that improves with every single use.
Remember that perfection is not a destination, but a continuous practice. Your skillet is meant to be used, heated, scrubbed, and oiled repeatedly. Do not be afraid to subject it to the rigors of your kitchen. If it gets a little rust, scrub it away; if it loses its shine, apply another layer of oil and heat. These are not signs of failure, but rather the marks of a pan that is being put to good use. Keep your flaxseed oil in the fridge, keep your layers thin, and always prioritize the process over the product.
As you continue your culinary journey, you will find that the confidence you gain from mastering these technical details spills over into every other aspect of your cooking. When you no longer have to worry about your food sticking, your attention can fully turn to flavor profiles, heat management, and the enjoyment of the cooking process itself. Cast iron is the great equalizer; it does not care how expensive your range is or how fancy your utensils are. It only cares that you respect the iron and provide it with the fuel it needs to remain non-stick.
We hope this guide has provided you with the clarity and confidence to tackle your next kitchen project with renewed vigor. The world of cast iron is vast and deeply rewarding, and you are now equipped with the knowledge to maintain your collection to a professional standard. Stay curious, keep exploring, and never stop pushing the boundaries of what you can create with your own two hands. Your skillet is waiting, and with the right care, it will outlive us all, ready to pass on the traditions and flavors of your home to the next generation of chefs. Happy cooking, and may your seasoning always be perfectly polymerized.

Get the Next Recipe
Weekly recipes, techniques, and gear picks — straight to your inbox.
