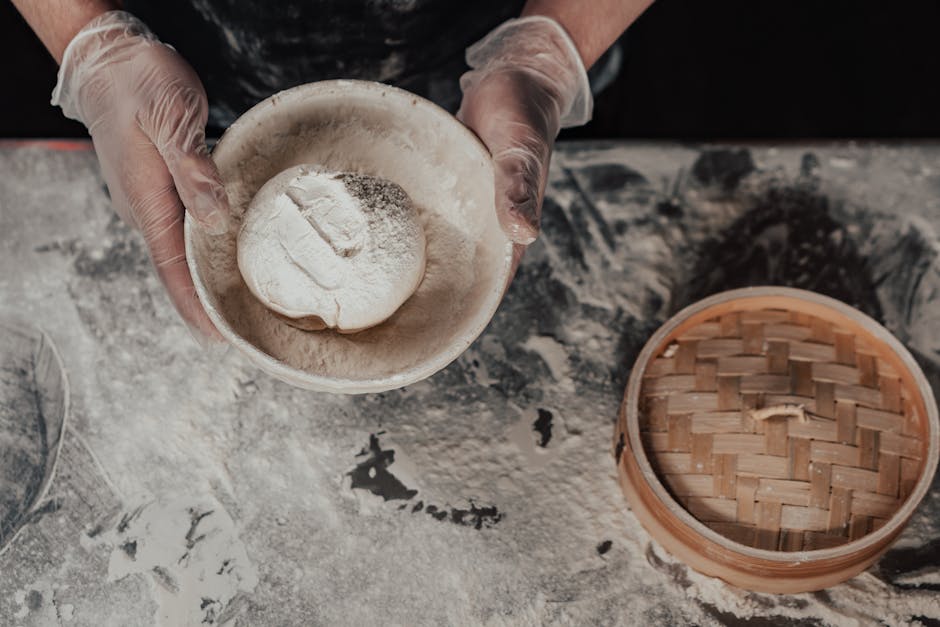
How to Save Overproofed Sourdough
There is perhaps no greater heartbreak in the domestic kitchen than pulling a proofing basket from the counter only to discover that your once-promising sourdough boule has transformed into a flattened, wrinkly mess. You followed the steps, you fed your starter, and you autolyzed your flour, yet somehow, the clock moved faster than your dough. Overproofing is a rite of passage for every baker, a silent, structural collapse that occurs when the wild yeast and bacteria consume too much of the available sugars, effectively digesting the very gluten network that gives your bread its loft. Do not view this as a failure of your capabilities as a baker, but rather as an essential lesson in the delicate, temperamental chemistry of fermentation. When the dough loses its tension and begins to feel like a puddle of loose bubbles, many home cooks reach for the trash bin, but I am here to tell you that the battle is not lost until the loaf hits the oven.
To master sourdough, one must accept that it is not merely a recipe but a living, breathing ecosystem that responds to the environment of your kitchen. Factors like ambient temperature, humidity, and the specific vigor of your sourdough culture can cause a fermentation schedule to accelerate rapidly, leaving you behind if you are not paying close attention. When dough overproofs, the gluten matrix weakens, and the yeast has already spent its explosive energy during the bulk fermentation stage, meaning there is little "oven spring" left to give. This creates a loaf that is dense, pale, and prone to spreading outward rather than rising upward. Understanding this phenomenon is the hallmark of a serious baker who seeks consistency, and once you learn to identify the signs of a dough that has crossed the line, you gain the agency to pivot and save your work.
In this guide, we will explore the nuances of rescuing an overproofed loaf and, more importantly, how to prevent it from happening in the future. We will discuss the specific sensory cues—the wobble, the smell, and the tactile resistance of the dough—that tell you exactly what is happening inside the bowl. We will also delve into recovery techniques that allow you to salvage the dough even after it appears to have gone too far, turning a potential disaster into a flavorful, rustic triumph. Baking is an iterative process, and by leaning into the challenges presented by your ingredients, you cultivate a deeper relationship with your craft. Let us stop blaming the chef and start mastering the dough, transforming those overproofed mistakes into lessons that yield the best bread of your life.
Understanding the Science of Overproofing
The Mechanics of Fermentation
At its core, sourdough baking is the art of balancing enzymatic activity and yeast reproduction. During the bulk fermentation, enzymes like protease begin to break down the proteins in your flour, which provides food for the yeast but also begins to soften the gluten strands. If this process continues for too long, the protease activity eventually outweighs the structural integrity of the dough, leading to a breakdown of the gluten network. Once the gluten becomes too slack, it can no longer trap the carbon dioxide produced by the yeast, resulting in a dough that is sticky, tear-prone, and unable to hold its shape during the final bake.
The yeast population in your sourdough starter is incredibly sensitive to thermal changes, and even a minor shift in your kitchen temperature can shave hours off your fermentation window. When the dough is warm, the fermentation rate increases exponentially, often catching bakers by surprise. You might think you have four hours of room, but if your kitchen is 78°F instead of 70°F, your dough might be ready in two. Identifying this "sweet spot"—that moment when the dough has increased in volume by about 30 to 50 percent and shows visible surface bubbles—is the most critical skill a baker can develop.
Sensory Cues to Watch For
To identify overproofing before it becomes a crisis, you must learn to read the physical language of your dough. An appropriately proofed dough will feel lively, with a subtle spring-back when gently poked with a floured finger. If you poke the dough and the indentation stays indefinitely or the dough begins to deflate further upon touch, you are deep in the territory of overproofing. Additionally, pay attention to the surface texture; if it looks like a loose, wet web of bubbles rather than a tight, pillowy dome, the structure is failing.
The most important tool in a baker's arsenal is not the thermometer, but the fingertips; the dough will tell you its story if you are patient enough to listen to the tactile feedback it provides.
Smell is also a reliable, albeit often overlooked, indicator of the dough’s state. A healthy, active sourdough should have a pleasant, slightly acidic, and fruity aroma. If the dough begins to smell sharply of vinegar, acetone, or pure alcohol, it is a sign that the yeast has exhausted its food source and is entering a state of stress. This is the "danger zone," and while you might be able to salvage the bread for flavor, you will likely struggle with the structural integrity of the crumb.
Immediate Rescue Techniques
The "Cold Retard" Intervention
If you realize your dough has proofed too long but has not yet turned into a soup-like mess, your first line of defense is a rapid decrease in temperature. By moving the dough into the refrigerator immediately, you essentially hit the "pause" button on the fermentation process. The cold environment slows the yeast activity to a crawl, allowing the gluten structure to firm up slightly. This can provide enough structural stability to allow you to shape the dough with more confidence, even if it is a bit fragile.
When you decide to use this technique, do not attempt to manipulate the dough too aggressively. It is already structurally compromised, so treat it with the care you would use for a delicate pastry. Carefully tip the dough onto a lightly floured surface, minimize your handling, and perform a gentle envelope fold to build just enough tension to hold the loaf together. Once shaped, place it into a floured banneton and allow it to rest in the fridge for at least 45 to 60 minutes before scoring and baking. This short, final chill can do wonders for the crust development and the ability of the bread to maintain its shape in the heat of the oven.
Modifying the Baking Approach
If the dough is truly on the edge, adjust your baking method to compensate for the loss of structural integrity. One of the most effective ways to support a weak dough is to utilize a Dutch oven or a heavy-duty cloche. By baking in a confined, humid environment, you allow the bread to experience a burst of steam-assisted rising before the crust hardens. This ensures that the loaf expands outward and upward as much as possible before the internal structure sets.
Do not be afraid to decrease your baking temperature slightly while increasing the time. If the dough has been overproofed, the sugars are likely depleted, which means the loaf will brown much faster than usual due to the increased concentration of simple sugars left over by the yeast. A lower temperature helps prevent the crust from turning burnt or bitter before the crumb has had a chance to set properly. This "low and slow" approach is a professional secret for salvaging breads that have reached their limits during proofing.
When to Pivot: Alternative Uses
Turning Failure into Focaccia
Sometimes, no matter how much care you take, the dough has simply passed the point of no return. In these instances, rather than forcing a boule that will never rise, pivot your strategy entirely. An overproofed dough that has lost its strength makes an exceptional base for focaccia or a rustic pan-baked flatbread. Because these styles of bread do not require the same vertical structural support as a boule, the "slackness" of the overproofed dough actually works in your favor.
Simply transfer the dough into a well-oiled baking tray, allow it to spread out naturally, and use your fingertips to create deep dimples across the surface. Drizzle generously with high-quality olive oil, sprinkle with flaky sea salt and fresh herbs like rosemary or thyme, and bake at a high temperature. The result will be a light, airy, and incredibly flavorful bread that hides the fact that it was originally destined for a different form. This is not a failure; it is a creative redirection that highlights the versatility of sourdough.
The Art of the Sourdough Cracker
If your dough is far too loose for a standard loaf or even a focaccia, do not throw it away—turn it into sourdough crackers. By rolling the overproofed dough until it is paper-thin on a baking sheet, you remove the need for structural rising entirely. You can season the dough with sesame seeds, poppy seeds, or even a dusting of parmesan cheese before sliding it into the oven.
These crackers take advantage of the long fermentation, resulting in a depth of flavor that is unattainable with store-bought varieties. Once baked until crisp, they store well for weeks in an airtight container and serve as a perfect appetizer for cheese boards. This is the ultimate "no waste" kitchen philosophy, where even the most disastrous fermentation error can be transformed into a gourmet treat that your guests will admire.
Preventing Future Overproofing
Mastering the Temperature Variable
To avoid repeating the frustration of overproofing, you must exert more control over the ambient temperature of your fermentation environment. Professional bakeries often use dedicated proofing cabinets set to precise temperatures, but home cooks can achieve similar results with a simple "proof box" setup. A styrofoam cooler with a small jar of warm water can act as a controlled environment to maintain a consistent 72°F to 75°F, which is ideal for a standard four-to-six-hour bulk fermentation.
"Consistency in the kitchen is not a matter of luck; it is a matter of measurement and the disciplined observation of how environmental variables impact your living ingredients."
Invest in a digital ambient thermometer that you can keep inside your kitchen or near your proofing spot. If you know that your kitchen hits 80°F in the afternoon, you must adjust your recipe to use a lower percentage of starter or slightly colder water. By manipulating these small variables, you remove the guesswork from the equation and move toward a more predictable, consistent result every time you mix a batch of dough.
Timing and the "Float Test"
Many bakers rely heavily on fixed timers, but this is a mistake. Yeast is a biological organism, not a mechanical one, and its activity level can fluctuate based on the health of your starter and the freshness of your flour. Instead of relying solely on the clock, start using the "float test" and visual volume markers. If you have a clear, straight-sided container for your bulk fermentation, you can easily track exactly how much the dough has expanded, which is a much more accurate metric than time alone.
Professional Tips for Refined Sourdough
Hydration Management
One of the most common reasons for overproofing leading to total collapse is high-hydration dough. While high-hydration (80% or higher) sourdough is trendy and produces beautiful, open crumbs, it is also incredibly unforgiving. If you are struggling with overproofing, there is no shame in dropping your hydration level to 70% or 72%. A lower hydration dough is structurally stronger and easier to shape, giving you a wider margin for error if you accidentally let the fermentation go five or ten minutes too long.
Once you have mastered the art of handling 70% hydration dough, you can incrementally increase the water content. The goal is to build your confidence and your technique so that you are not constantly fighting the dough. Remember, a slightly denser, perfectly shaped loaf is far superior to a puddle of sticky dough that refused to hold its structure. Focus on mastering the laminating and coil folding techniques before jumping into the deep end of high-hydration baking.
The Role of Flour Quality
Not all flours are created equal. If you are using a low-protein flour, your gluten network will be naturally weaker, making it much more susceptible to the structural breakdown associated with overproofing. Ensure that you are using a high-quality bread flour with at least 12.5% to 13.5% protein content. The added protein provides the structural scaffolding necessary to hold the carbon dioxide produced by the wild yeast.
You might also consider incorporating a small percentage of whole wheat or rye flour into your mix. These flours contain minerals and enzymes that can actually strengthen the dough and provide a more robust flavor profile. However, be aware that whole grains also ferment faster than white flour, so you may need to reduce your fermentation time accordingly. It is all about finding that perfect harmony between your ingredients and your timing.
Troubleshooting Your Process
The Importance of Tension
Even if your fermentation is perfectly timed, if you fail to build sufficient surface tension during the shaping process, your loaf will spread. This is often confused with overproofing. To test this, place your dough on the bench and use a bench scraper to pull it toward you, creating a tight, smooth skin on the exterior of the boule. If the dough resists and stays in a rounded shape, you have built the tension correctly. If it immediately sags, you likely have an issue with your gluten development or your hydration levels.
Practice your shaping technique on a day when you are not worried about a specific bake. Take a simple batch of dough and spend time shaping it over and over again, watching how the gluten reacts to your movements. The goal is to create a "taut" surface without tearing the gluten. Once you master this skill, you will find that even if your dough is slightly overproofed, you can still coax it into a beautiful shape that holds its own in the oven.
Recognizing the "Sourdough Stare"
Finally, don't ignore the signs of a fatigued starter. If your starter takes more than six hours to double after a feed, it may be struggling with its own vitality. A weak starter leads to a slow, inconsistent fermentation that often results in the "overproofed look" despite the dough not actually being over-fermented. Always ensure your starter is robust, bubbly, and smells fresh before you mix it into your dough. If your starter isn't ready, your bread won't be either.
A sourdough baker who understands their starter is like a musician who knows their instrument; the nuances of the performance depend entirely on the condition of the tool.
Take the time to feed your starter regularly and keep it at an optimal temperature. If you find yourself in a situation where the bread is consistently failing to rise, look at your starter first. It is the heart of the entire process, and if it is weak, no amount of shaping technique will save your loaf from falling flat. Keep a log of your bakes, noting the temperature, the time, and the results, and you will soon find the patterns that lead to consistent success.
Conclusion
The journey to sourdough mastery is rarely a straight line; it is paved with deflated loaves, gummy crumbs, and the occasional feeling of defeat. However, as we have explored, overproofing is not the end of the road. With the right interventions—be it a timely cold retard, a creative shift into focaccia, or simply refining your observational skills—you can turn every baking mishap into a learning experience. The "Blame The Chef" philosophy is built on the belief that we are constant students of the oven. We do not blame ourselves when things go wrong; we analyze the variables, adjust our approach, and try again with more knowledge than we had before.
Remember that baking is meant to be a joyful, sensory experience. If you are constantly stressed about the timing of your dough, take a step back and simplify your process. Use a slightly smaller amount of starter to slow down the fermentation, or bake at a cooler time of day. By removing the pressure of perfection, you open the door to true creativity. The next time you see that dough looking a little too flat or feeling a little too soft, take a deep breath. You now have the toolkit to save the loaf, the wisdom to repurpose it, and the insight to fix the process for the next time. Happy baking, and may your crusts always be golden.
Final Thoughts
As you continue your sourdough journey, keep in mind that every baker you admire—the ones with the perfect, open-crumb loaves you see on social media—has likely produced a mountain of failures behind the scenes. The difference between an amateur and a master is simply the persistence to keep kneading, folding, and observing. Each loaf you bake contributes to your internal database of knowledge. When you finally reach that point where you can identify the state of the dough simply by the way it feels under your hands, you will realize that all those previous "mistakes" were actually the building blocks of your expertise.
Keep your kitchen tools clean, your starter fed, and your mind curious. Do not be afraid to experiment with hydration, different flour blends, or longer proofing times in the cold. The beauty of sourdough lies in its infinite variability. It is a living craft that requires your full presence and attention, but it rewards that attention with the most nourishing, delicious bread you can create in a home kitchen. Whether it is a perfect boule or a rustic tray of focaccia, the joy of feeding yourself and others is the ultimate goal. Keep practicing, keep listening to your dough, and above all, keep the oven preheated. There is always another loaf waiting to be baked.




Get the Next Recipe
Weekly recipes, techniques, and gear picks — straight to your inbox.
