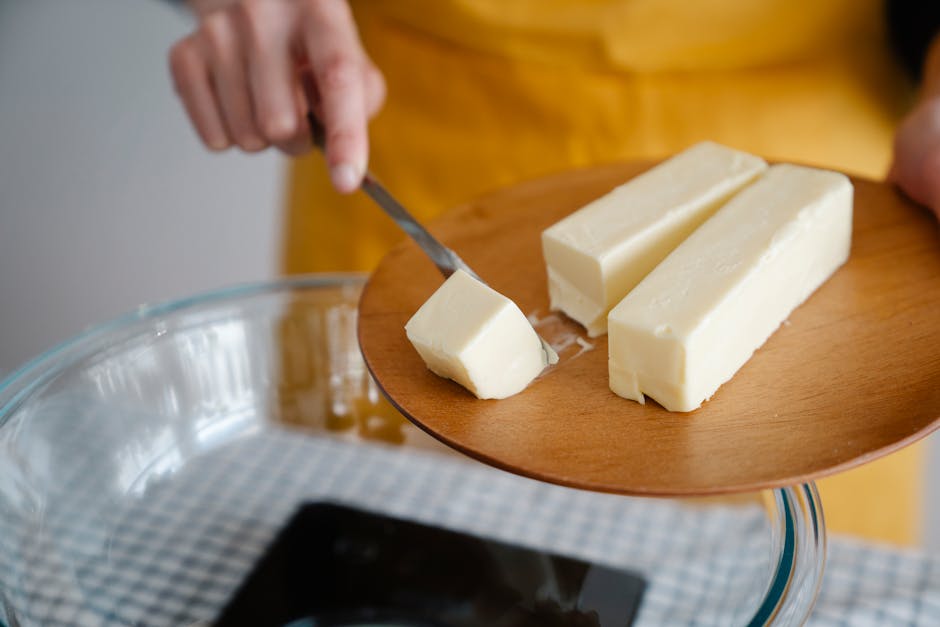
How to Soften Butter Quickly (5 Fast Ways)
Every home baker knows the singular frustration of staring at a recipe that calls for room-temperature butter while staring down a block of stone-cold dairy straight from the refrigerator. You have the flour measured, the sugar sifted, and the oven preheating, but that essential foundation of a good cookie or cake remains stubbornly rock-hard. This is the moment where many aspiring bakers decide to cut corners, either by rushing the process or, worse, skipping the softening step altogether. Understanding the physical state of butter is not just a technicality; it is the difference between a delicate, aerated crumb and a greasy, flat mess. Achieving the perfect consistency requires a blend of patience, science, and the right tools.
Softened butter, often referred to as "room temperature" butter, is the unsung hero of baking. It acts as the structural scaffolding for your baked goods, trapping air bubbles during the creaming process that expand in the heat of the oven to create lift. If your butter is too cold, it will not incorporate properly with sugar, leading to uneven texture and dense results. If it is too warm or melted, it loses its ability to hold those air bubbles, resulting in cookies that spread into thin, oily puddles on your baking sheet. Mastering the art of softening butter quickly is a hallmark of an organized kitchen and a proficient baker.
Throughout this guide, we will explore the nuances of temperature control and how to manipulate your ingredients to work in your favor. You do not need to be a professional pastry chef to understand the thermodynamics of fat, but you do need to be intentional about how you treat your ingredients before they ever touch the mixing bowl. We will delve into five proven methods that allow you to go from refrigerator cold to perfectly pliable in a fraction of the usual time. Whether you are prepping for a spontaneous weekend bake or a last-minute dinner party dessert, these techniques will ensure your butter is ready when you are. Let us refine your prep work and elevate your baking game to a level where you never have to blame the chef for a sunken cake again.
The Science of Creaming and Temperature
Before diving into the mechanics of softening, we must respect the chemistry of the cream. When a recipe asks for softened butter, it is specifically looking for that point where the butter is pliable enough to be indented with a finger but still holds its shape and carries a cool, firm core. This is usually between 65 and 68 degrees Fahrenheit. At this specific range, the butterfat crystals are stable enough to shear against the sharp edges of sugar crystals, a process known as creaming. This friction creates millions of microscopic air pockets in the fat, which is the primary source of leavening in cakes and cookies.
Why Temperature Control Matters
If the butter is too cold, the sugar crystals simply cut through the butter without creating aeration, resulting in a gritty texture. Conversely, if the butter has begun to melt into an oily state, the emulsion will break. An emulsion is the stable mixture of fat and water; when butter melts, the water separates, and the fat becomes liquid, losing its ability to hold air. You want to maintain the solid state of the fats while achieving a texture that is spreadable.
"Baking is chemistry, and butter is the variable that dictates whether your creation will stand tall or collapse under its own weight. Always respect the temperature of your fat."
Achieving this "room temperature" state is often the most overlooked step in the home kitchen. Many home cooks assume that five minutes on the counter is enough, but in a chilled kitchen, it can take well over an hour for a whole stick of butter to reach the ideal equilibrium. By understanding the mechanical necessity of this state, you become more conscious of your prep time and less likely to fall into the trap of using cold butter for delicate recipes.
Method 1: The Cubing Technique
The most effective and reliable way to speed up the softening process is to increase the surface area of the butter. A whole stick of butter is an insulated block of fat; it takes a significant amount of time for the ambient temperature of your kitchen to penetrate to the center. By cutting the butter into small cubes, usually about half an inch in size, you allow the warm air to reach every side of the butter simultaneously. This is the professional standard for quick softening.
Execution for Success
To perform this technique, unwrap your butter and use a sharp chef’s knife to slice it into small, uniform cubes. Spread these cubes out on a piece of parchment paper or a cutting board, ensuring they are not touching one another. The more space you provide between the pieces, the faster they will soften. This method typically takes about 10 to 15 minutes, depending on the ambient temperature of your kitchen.
* Step 1: Slice the butter into 1/2-inch cubes.
* Step 2: Spread them across a wide surface area.
* Step 3: Allow to sit in a warm spot, such as near the preheating oven.
* Step 4: Check for pliability by pressing a cube; it should give way without feeling greasy.
This approach is superior to others because it is gentle. It does not introduce the risk of accidental melting that comes with heat-based methods. It is the preferred method for high-stakes baking, such as delicate sponges or laminated doughs where the integrity of the fat structure is paramount to the final texture.
Method 2: The Glass and Water Trick
If you are truly in a rush and cannot wait fifteen minutes, the Glass and Water Trick is a clever bit of kitchen physics that uses radiant heat to soften your butter. This method is incredibly popular among home cooks because it is fun to perform and yields results in under five minutes. By creating a warm, humid environment inside a glass bowl, you are essentially creating a mini-sauna for your butter.
How to Execute Safely
Take a sturdy glass or heat-proof bowl that is large enough to cover your stick of butter completely. Boil a cup of water, either on the stovetop or in the microwave. Carefully pour the boiling water into a separate glass, then place the empty, warmed glass (or bowl) upside down over the stick of butter on a plate. The steam and residual heat from the glass will soften the exterior of the butter without melting it.
* Boil 1 cup of water.
* Pour water into a glass.
* Wait 60 seconds to warm the glass.
* Empty the glass and place it over the butter.
* Let sit for 3-4 minutes.
"The goal of softening is to reach the state of 'plasticity'—where the fat can be molded and whipped without losing its crystalline structure. Shortcuts should never compromise this integrity."
You must be careful not to keep the glass over the butter for too long. If you leave it for more than five minutes, the heat will penetrate the butter too deeply and result in a liquid mess at the bottom of the plate. This method is best reserved for when you are making cookies or muffins where a slight variation in texture will not ruin the final product.
Method 3: The Rolling Pin Method
The Rolling Pin Method is a tactile, mechanical approach that is excellent for those who want to exert control over the process. This is common in professional kitchens when a chef needs to make butter pliable for pastry work. By pounding the butter, you are physically breaking down the fat molecules and warming them up through kinetic energy and friction, rather than direct heat.
Step-by-Step Guide
Place your stick of butter between two sheets of wax paper or parchment paper. Use a heavy rolling pin to firmly smack the butter, flattening it out. Once it is flattened, fold the paper over to re-stack the butter and roll it out again. Repeat this process three or four times. The physical action effectively makes the butter pliable and spreadable in just a few moments.
* Keep the butter wrapped in parchment for hygiene.
* Use a firm, steady hand to pound the butter.
* Roll into a thin sheet to maximize surface area.
* Fold, pound, and repeat until the desired consistency is achieved.
This technique is fantastic because it allows you to feel the texture change under the rolling pin. You can stop exactly when the butter reaches the right resistance. It also ensures that the entire stick of butter is evenly softened, avoiding the "hard core" that sometimes happens with microwave or steam methods.
Method 4: The Micro-Wave Pulse
The microwave is often the most dangerous tool in the kitchen for softening butter, yet it is also the most convenient if managed correctly. The common mistake is setting the microwave for 30 seconds on high power, which invariably leads to a pool of yellow liquid with a cold, solid center. To use this method effectively, you must understand the pulse technique.
Mastering the Pulse
Set your microwave to its lowest power setting—usually 10% or 20% power. Place the butter on a microwave-safe plate and heat it in 5-second intervals, flipping the stick of butter after every interval. This slow, gentle approach allows the heat to distribute evenly throughout the block. You are looking for a soft, uniform texture, not a puddle.
* Low power is mandatory.
* Intervals must be very short (5 seconds max).
* Flip the butter frequently to ensure even heat distribution.
* Stop as soon as the butter is soft to the touch.
If you happen to melt a small portion of the butter, do not despair. You can still use it, but you should pop it in the freezer for about 2 to 3 minutes to firm up the melted portion before proceeding with your recipe. While not ideal, it is a decent recovery strategy for the hurried baker.
Method 5: The Grating Technique
For those who are planning ahead but still short on time, the Grating Technique is a brilliant, unconventional method. By using a standard box grater, you can turn a hard stick of butter into hundreds of tiny ribbons. Because the surface area is increased by a factor of hundreds, these ribbons will reach room temperature almost instantly, often within two to three minutes.
Why This Works
When you grate cold butter, you are creating tiny shards that have very little thermal mass. They soften individually and rapidly. This method is particularly useful when you need to "cut in" butter for recipes like biscuits, pie crusts, or scones, where you actually want the butter to remain cool but be distributed easily through the flour. If you are creaming butter for a cake, simply grate the butter into your bowl, wait three minutes, and then begin beating it with your sugar.
* Ensure the butter is very cold before grating.
* Use the largest holes on your box grater.
* Grate directly into the mixing bowl for efficiency.
* Allow the ribbons to sit for 3 minutes before adding other ingredients.
This technique is perhaps the most precise of all. It eliminates the guesswork of heating and provides you with a uniform ingredient that is ready to be incorporated immediately. It is a professional-grade tip that changes the workflow for many home bakers who struggle with consistency.
Troubleshooting Common Butter Issues
Even with the best techniques, accidents happen. Perhaps you left the butter in the microwave for a second too long, or the kitchen was simply too hot on a summer day. Understanding how to fix these issues is just as important as knowing how to soften the butter in the first place. If you find your butter has become too soft or slightly melted, the refrigerator is your best friend.
Recovery Strategies
If your butter is too warm, place the bowl in the refrigerator for 5 to 10 minutes. Do not leave it too long, or it will become rock hard again. Check it frequently. If you are in the middle of creaming and realize the butter is too warm, adding a tablespoon of cold flour can help stabilize the mixture by absorbing some of the excess moisture and fat.
"A kitchen is not a place for perfection, but for recovery. Knowing how to adjust when things don't go according to plan is what separates a novice from a seasoned cook."
When you are creaming, keep an eye on the color of the butter. As you incorporate the sugar, the color should lighten from a deep yellow to a pale, off-white hue. This color change is a visual indicator that you have successfully created enough aeration. If the color does not change, it likely means your butter was either too cold to accept the sugar or too warm to hold the air.
Conclusion
Mastering the quick softening of butter is a fundamental skill that elevates your baking from hit-or-miss to consistent excellence. By understanding the science behind the fat, you gain the confidence to handle any recipe, regardless of how prepared you were when you started. Whether you choose the cubing method for its precision, the grating method for its speed, or the glass trick for its convenience, the key is always to remain attentive and respectful of the ingredient’s temperature.
Baking should be a joyful, rewarding experience, not a source of stress. When you take control of your prep work, you remove the barriers between you and a perfect end product. Armed with these five methods, you can confidently approach any recipe, knowing that you have the expertise to make your butter work for you. Put these techniques into practice, observe the changes in your cakes, cookies, and pastries, and enjoy the professional-grade results that come from paying attention to the small details. Remember that at the end of the day, you are the architect of your own kitchen, and with these tips, you will never have a reason to blame the chef for a baking mishap again. Happy baking!



Get the Next Recipe
Weekly recipes, techniques, and gear picks — straight to your inbox.
