How to Store Garlic So It Lasts All Year
There is a specific, pungent alchemy that occurs when you pull a perfectly dried head of garlic from your pantry, crack the papery skin, and release that volatile, sharp aroma into your kitchen. For many home cooks, garlic is the foundational architecture of flavor, a humble bulb that bridges the gap between a simple sauté and a transcendent dining experience. However, there is a recurring tragedy I see in kitchens across the country: the dreaded "soft bulb." Finding a withered, sprouted, or moldy head of garlic when you are halfway through a recipe is the culinary equivalent of a flat tire on a rainy highway. It is frustrating, entirely preventable, and frankly, an insult to the ingredient itself.
Mastering the art of garlic storage is not merely about keeping groceries for a few extra days; it is about respecting the integrity of the produce and ensuring that your culinary toolkit is always ready for action. Whether you are an occasional home cook who uses a clove or two a week or a serious gourmand who burns through heads of garlic like firewood, the principles of preservation remain the same. The goal is to simulate a state of dormancy, slowing down the plant's natural drive to sprout and preventing the degradation that turns a firm, juicy clove into a shriveled, bitter husk. It requires an understanding of light, air circulation, and temperature, three variables that dictate the lifespan of every Allium in your cupboard.
In this guide, we are going to move beyond the haphazard "toss it in the basket" mentality and embrace professional-grade preservation techniques. I will walk you through the science of what makes garlic tick, how to identify the signs of spoilage, and how to create a controlled environment that will keep your bulbs plump and flavorful for months—if not the entire year. By the time we finish this deep dive, you will never look at a head of garlic as a perishable commodity again, but rather as an investment in flavor that you have mastered the art of protecting. We are going to cover everything from the importance of curing to the intricacies of freezing, pickling, and oil-infused preservation.
The Anatomy of the Bulb and the Importance of Curing
Understanding how to store garlic begins with understanding how it was grown and harvested. Before a bulb ever reaches your countertop, it must undergo a process known as curing. Curing is essentially the process of drying the garlic in a temperature-controlled environment to allow the papery skins to tighten around the cloves and the stem to dry out completely. If garlic is harvested and immediately sent to market without proper curing, the moisture trapped within the bulb will lead to rapid decay. As a home cook, you are largely at the mercy of the grower, but you can always gauge the quality of your garlic by feeling the weight and the tightness of the outer layers.
Why Moisture is the Enemy
Moisture is the primary catalyst for both sprouting and rot. When garlic is stored in an environment with high humidity, it perceives that conditions are favorable for growth. The internal sugars begin to convert into starches designed to fuel a new plant, leading to the dreaded green sprout in the center of the clove. This sprout, while technically edible, introduces a harsh, acrid bite that can ruin the delicate balance of a balanced sauce or a subtle vinaigrette. To combat this, we must prioritize low humidity above almost all other factors.
Selecting the Right Bulbs at the Market
Not all garlic is created equal. When you are picking out bulbs at the grocery store or a farmers' market, look for heads that feel heavy for their size and have completely dry, papery skins. If the cloves feel soft or squishy under gentle pressure, put it back. You should also examine the root end for any signs of mold, which often manifests as a fuzzy, white, or gray substance. A high-quality, properly cured bulb will feel solid, like a small, dense stone, with no "give" when you squeeze it.
"The difference between a mediocre meal and a memorable one often lies in the quality of your aromatics; if your garlic is compromised before it even hits the pan, you are starting your recipe with a deficit."
Creating the Ideal Storage Environment
Once you have secured high-quality, well-cured garlic, your primary mission is to maintain that state of dormancy. The ideal storage environment for garlic is a cool, dark, and—most importantly—well-ventilated space. Most people make the mistake of storing garlic under the sink or in a cramped, humid drawer near the stove. These locations are essentially greenhouses for mold and rot. Instead, look for a spot in your pantry or a dedicated cupboard that stays between 55 and 65 degrees Fahrenheit.
The Problem with Air-Tight Containers
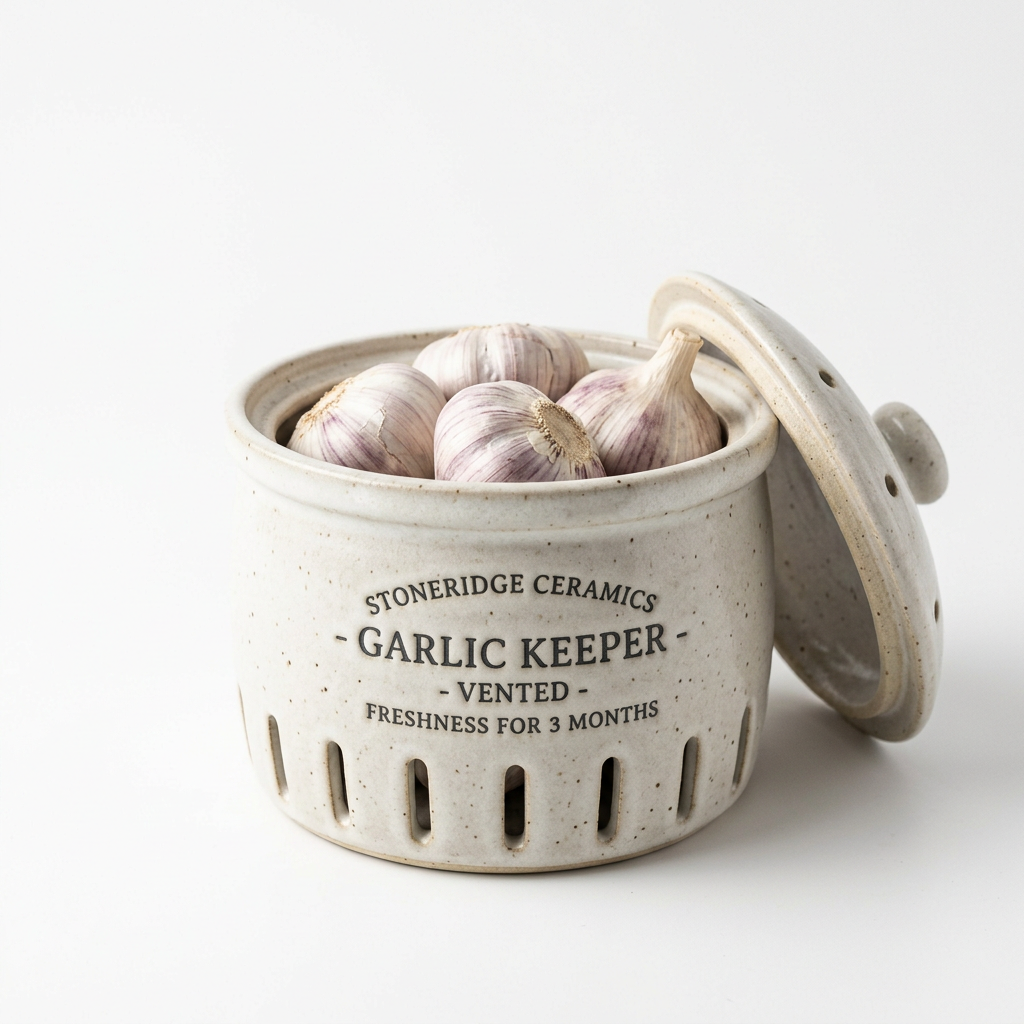
One of the most frequent mistakes I witness is the use of glass jars or sealed plastic bags for garlic storage. Garlic is a living thing, even after it has been pulled from the ground. It requires airflow to prevent the buildup of ethylene gas and moisture. When you lock garlic in a sealed container, you are creating a micro-climate of stagnant air. Within days, you will notice a distinct, unpleasant odor, followed quickly by the softening of the cloves. Always opt for mesh bags, perforated paper bags, or open ceramic jars designed specifically for garlic.
Light and Temperature Management
While most people associate dark places with cold, you should avoid the refrigerator at all costs. The cold, moist environment of a fridge mimics the conditions of winter, which triggers the garlic’s biological clock to sprout the moment it returns to room temperature. Furthermore, the refrigerator is a high-humidity environment that will cause the garlic to lose its firm texture. Store your garlic away from windows and direct sunlight, as light exposure can stimulate the biological processes within the bulb and cause the skin to discolor and the cloves to degrade.
Advanced Preservation: Freezing and Oils
If you have a surplus of garlic and you know you won't be able to use it all within a few months, it is time to look at long-term preservation techniques. While fresh storage is ideal for the flavor profile of raw garlic, freezing is an excellent way to maintain the integrity of garlic destined for cooked applications. You can freeze whole cloves, chopped garlic, or even garlic paste. The key is to minimize air exposure to prevent freezer burn, which will turn your beautiful aromatics into flavorless, icy remnants.
The Technique of Oil-Infused Preservation
There is a lot of debate in the culinary world about storing garlic in oil. Let me be perfectly clear: The risk of botulism is real. Clostridium botulinum is a bacteria that thrives in anaerobic (oxygen-free) environments, such as a submerged garlic clove. To safely store garlic in oil, you must either keep it in the freezer for immediate use or acidify the garlic before putting it into the oil. For the home cook, I recommend the frozen garlic cube method. Process your garlic with a splash of olive oil into a paste, spoon it into an ice cube tray, freeze, and then transfer the cubes to a freezer-safe bag.
Dehydration for Garlic Powder
For those who want to reach the pinnacle of kitchen self-reliance, dehydrating your own garlic is a game-changer. Commercial garlic powder often tastes like nothing more than dust and fillers, but homemade powder is vibrant, sweet, and intensely potent. Slice your peeled cloves into thin, uniform rounds and place them in a dehydrator at 125 degrees Fahrenheit until they are brittle and snap easily when bent. Once they are completely cool, pulse them in a high-speed blender or coffee grinder until you achieve a fine, fragrant powder that will last for months in an airtight jar.
"Do not underestimate the power of a frozen garlic cube. When you are rushing to get dinner on the table, having pre-prepped, aromatic garlic ready to drop into a hot pan is the kind of professional efficiency that changes how you cook."
Recognizing and Managing Spoilage
Even with the best intentions, occasionally a bulb will turn on you. Learning to read the signs of spoilage is a skill that will save you from throwing out an entire pantry of groceries. A slight sprout is not a death sentence; if the bulb is still firm, you can simply peel the clove, slice it in half, and remove the green center germ. The flavor of the clove will still be usable for slow-cooked stews or roasted dishes, though I would avoid using it for raw preparations like aioli or pesto, where the bitterness of the germ would be magnified.
The Soft Bulb Warning
If the bulb has become soft, mushy, or exudes any kind of liquid or foul odor, it is time to discard it. Do not attempt to "trim away" the bad parts of a mushy bulb, as the rot has likely permeated the structure of the remaining cloves. Furthermore, be wary of gray or blue-green mold, which indicates a fungal issue that can spread to other nearby produce. Always keep your garlic away from onions, as the ethylene gas produced by onions can accelerate the spoilage rate of your garlic.
Proper Rotation
To ensure you aren't stuck with an old, dried-out bulb when you need a fresh one, adopt the First-In, First-Out (FIFO) method. When you bring new garlic home from the market, place it at the back of your storage container. As you use your existing stock, always pull from the front. This simple inventory management system is what keeps professional kitchens running smoothly and ensures that you are always utilizing your ingredients at their peak freshness.
The Role of Roasted Garlic in Storage
Roasting garlic is one of the most effective ways to preserve a large quantity of bulbs while simultaneously creating a versatile, gourmet ingredient. When you roast garlic, you are essentially caramelizing the natural sugars, which mellows the pungency and creates a spreadable, buttery consistency. Once roasted, garlic can be kept in the refrigerator for up to a week, or frozen for several months. This is an excellent way to handle a "use it or lose it" situation when you notice your bulbs starting to soften.
The Perfect Roast
To achieve the perfect roasted garlic, cut the top off an entire head of garlic, exposing the cloves. Drizzle with high-quality olive oil, sprinkle with sea salt, and wrap it tightly in aluminum foil. Roast in an oven preheated to 400 degrees Fahrenheit for approximately 40 to 45 minutes, or until the cloves are golden brown and soft to the touch. Once the head has cooled, you can squeeze the roasted cloves out of their skins into a small container.
Culinary Applications
Roasted garlic is a workhorse in the kitchen. It can be whisked into mashed potatoes, spread onto crusty sourdough bread, stirred into pasta sauces, or used as the base for a creamy roasted garlic soup. By transforming raw garlic into a roasted form, you are not only saving the ingredient from the compost bin, but you are also adding a layer of depth to your cooking that is difficult to achieve with raw garlic alone. It is a win-win scenario that rewards you for being proactive with your storage.
* Always roast at a temperature that allows for slow caramelization rather than burning.
* The oil used for roasting becomes infused with flavor—do not discard it; use it for sautéing vegetables.
* Frozen roasted garlic cloves can be popped directly into soups or stocks without thawing.
Troubleshooting Common Storage Questions
Many home cooks are plagued by urban legends regarding garlic storage. You may have heard that you should keep it in the microwave or that you should wrap it in foil. Let us put those myths to rest. Microwaves provide no benefit to storage and may accidentally introduce heat that initiates spoilage. Foil traps moisture and prevents the airflow that garlic desperately needs. The most effective method is almost always the simplest: cool, dry, and dark.
Addressing the Sprouting Issue
If you notice that your garlic is consistently sprouting despite your best efforts, you might be keeping it in a room that is too warm. In many modern homes, the kitchen is the warmest room in the house due to the presence of ovens, refrigerators, and dishwashers. Try moving your garlic storage to a pantry in a hallway or a coat closet—somewhere that is physically separated from the kitchen's heat cycle. If you live in a particularly warm or humid climate, your best bet is to move your storage into a cool cupboard or, if necessary, the crisper drawer of your refrigerator—but only if you plan to use it within a very short time frame.
Is It Okay to Store Peeled Garlic?
If you have already peeled a head of garlic, the clock starts ticking immediately. Peeled cloves have lost their natural, papery armor and will begin to oxidize and lose their volatile oils. If you have peeled too much, place the cloves in a small, airtight container and submerge them in high-quality olive oil. Keep this in the refrigerator and use it within 24 to 48 hours. Any longer, and the risk of pathogen growth becomes a concern. Alternatively, place the peeled cloves directly into the freezer in a sealed silicone bag; they will be perfectly fine for your next stir-fry or curry.
Final Thoughts
The path to culinary mastery is often paved with small, deliberate habits. Storing garlic properly is one of those habits that seems minor, but the cumulative effect on the quality of your cooking is profound. When you have fresh, firm, and aromatic garlic at your fingertips at all times, you are more likely to reach for it, more likely to experiment with it, and ultimately, more likely to create better food. By controlling the environment, respecting the biological needs of the bulb, and utilizing preservation techniques like freezing and roasting, you are ensuring that the foundation of your flavor profiles is always stable.
Treat your kitchen as a professional space, even if it is only a few square feet. Understand the ingredients that sustain your cooking. Stop viewing garlic as a disposable item that you buy in a panic and start viewing it as a valuable resource that you manage with care. When you take the time to organize your pantry, check your stocks, and properly store your aromatics, you are showing a level of respect for your craft that will inevitably translate into the taste of your dishes.
Go forth and organize your pantry with these principles in mind. Throw out those sealed plastic bags, find a cool, dark, and airy corner of your home, and start treating your garlic like the gold standard of flavor that it truly is. Your future self—the one who is standing in the middle of a recipe at 7:00 PM on a Tuesday—will thank you profusely when you pull out a perfect, fragrant, and pristine head of garlic. Happy cooking, and remember: keep it cool, keep it dry, and keep your kitchen running like a well-oiled, highly aromatic machine.
***
Summary of Best Practices
By adhering to these simple, professional-grade guidelines, you will elevate your culinary game and ensure that your kitchen is always stocked with the ingredients required to build world-class flavor. It is not just about storage; it is about the philosophy of the kitchen. Every bulb matters, every clove has potential, and every storage decision you make is a decision for the quality of your next meal. Stay organized, stay curious, and always, always keep the garlic fresh.
We have explored the nuances of curing, the dangers of moisture, the science of airflow, and the tactical advantages of freezing and roasting. You now possess the knowledge to curate a supply of garlic that will last throughout the seasons. Whether you are dealing with a bumper crop from the garden or a simple three-pack from the market, these principles will guide you to success. There is a deep, primal satisfaction in having a well-stocked pantry, and with your garlic storage now optimized, you are one step closer to true culinary independence. Continue to refine your process, continue to taste your ingredients, and never let a head of garlic go to waste again. The art of the kitchen is in the details, and you have mastered this one. Enjoy the process of creating, and may every meal you prepare be bolstered by the vibrant, pungent, and perfect essence of well-preserved garlic.
Get the Next Recipe
Weekly recipes, techniques, and gear picks — straight to your inbox.