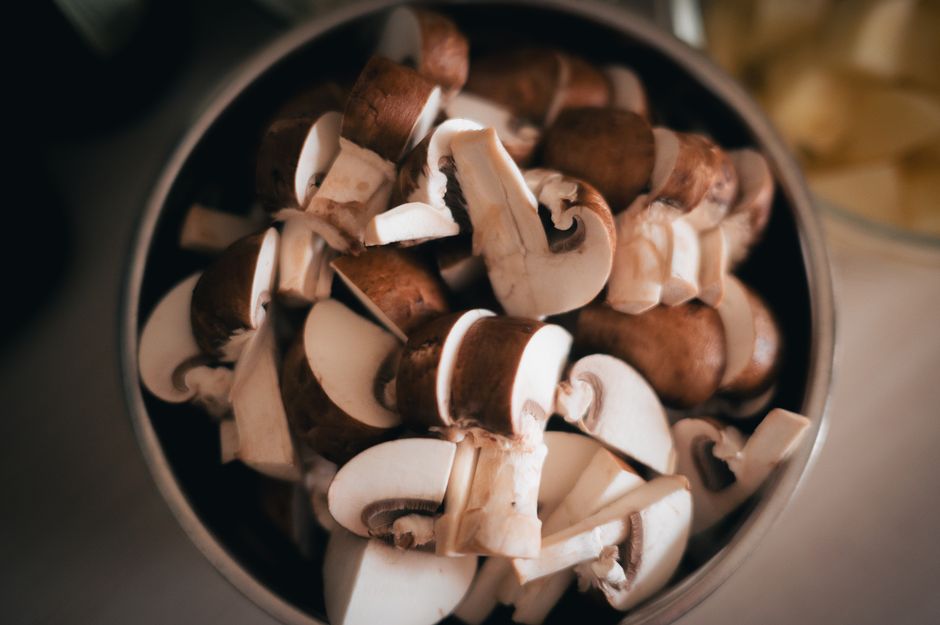
How to Store Mushrooms So They Don't Get Slimy
Mushrooms are the elusive chameleons of the culinary world, prized for their deep, earthy umami and their incredible ability to absorb flavors while maintaining a satisfying, meaty texture. However, every home cook has experienced the tragic frustration of reaching into the refrigerator drawer, only to find a bag of once-firm fungi transformed into a glistening, unappealing mass of slime. This rapid degradation is not necessarily a reflection of your shopping habits, but rather a misunderstanding of the unique biological requirements of mushrooms. Because mushrooms are composed of over 90 percent water, they are incredibly sensitive to environmental humidity, light, and airflow. Understanding how to manage these variables is the difference between a gourmet risotto and a compost-bound disappointment.
In this guide, we are going to peel back the curtain on professional storage techniques that go far beyond the plastic-wrapped containers found in the produce aisle. When you bring your mushrooms home from the market, the clock starts ticking immediately, but by following a few simple protocols, you can significantly extend their shelf life and maintain that coveted "snap" that makes them so versatile. We will explore the science of moisture control, the optimal atmosphere for different varieties, and why the packaging provided by grocery stores is often the primary culprit behind premature spoilage. By implementing these professional strategies, you will ensure that your kitchen remains stocked with high-quality ingredients ready for any culinary endeavor you decide to pursue.
As we dive into these techniques, remember that no two mushrooms are created equal, and while the general rules of storage remain consistent, the nuances of your specific environment matter. Whether you are dealing with delicate oyster mushrooms or robust portobellos, the goal is always to balance hydration with ventilation. We are going to look at the transition from farm-to-fridge, the proper way to prepare mushrooms for storage, and the specific signs that indicate it is time to discard rather than sauté. Prepare to transform your approach to kitchen organization and never again have to wonder why your mushrooms turned into a puddle of goo overnight.
The Anatomy of Spoilage: Why Mushrooms Turn Slimy
To effectively prevent your mushrooms from becoming slimy, you must first understand why it happens in the first place. Mushrooms are not plants in the botanical sense; they are the fruiting bodies of fungi, and they have an incredibly high rate of respiration even after they have been harvested. When you place them in a plastic bag or an airtight container, you are essentially trapping the moisture they release during this respiration process. This creates a humid, stagnant micro-environment that encourages bacterial growth and the breakdown of cell walls, leading directly to the slimy texture that everyone detests.
The Role of Moisture and Airflow
The primary enemy of mushroom freshness is trapped humidity. When moisture condenses on the surface of the mushroom, it creates the perfect breeding ground for spoilage microbes. Professional kitchens prioritize airflow above all else because it allows excess moisture to evaporate rather than settle back onto the surface of the mushroom. If you keep them in the plastic wrapping from the store, you are essentially suffocating them, trapping both their own respiration moisture and the ethylene gas they may emit.
Understanding Ethylene Sensitivity
While mushrooms do not produce high levels of ethylene gas—the hormone that accelerates ripening in many fruits—they are notoriously sensitive to it. If your mushrooms are stored in the same crisper drawer as apples, bananas, or tomatoes, they will absorb that gas and degrade much faster. Keeping your mushrooms isolated from high-ethylene producers is a pro-tip that most home cooks overlook. By creating a dedicated space for your fungi, you prevent the cross-contamination of gases that can turn a firm mushroom soft within a matter of days.
"The secret to mushroom longevity isn't a magical preservation technique; it's simply respecting their biology by managing moisture and ensuring consistent airflow, which prevents the accelerated cellular breakdown we call sliminess."
The Ideal Storage Environment: Temperature and Humidity
Mushrooms thrive in cool, dark, and relatively dry conditions. While most refrigerators have a crisper drawer intended for produce, it is often too humid for delicate fungi. You are looking for a "Goldilocks zone" where the temperature remains steady between 34 and 38 degrees Fahrenheit. Any warmer and bacterial growth accelerates exponentially; any colder, especially near the back of the fridge where ice crystals can form, and you risk rupturing the cellular structure of the mushrooms, which leads to mushiness upon thawing.
Avoiding the Humidity Trap
If you must use the refrigerator crisper drawer, ensure it is set to the lowest humidity setting. Many modern fridges have adjustable vents that allow you to control the exchange of air. If your drawer does not have this feature, keep it slightly cracked open or ensure you are storing the mushrooms in a container that breathes. Never store mushrooms in a vacuum-sealed bag, as this is the fastest way to turn them into a degraded mess.
The Importance of Darkness
Light exposure can also degrade the quality of mushrooms, particularly sensitive wild varieties like chanterelles or black trumpets. When exposed to light, mushrooms can undergo oxidation, which changes their color and, eventually, their flavor profile. While the interior of your refrigerator is dark, be mindful of how long you leave the fridge door open while searching for ingredients. A consistent, dark, and cool environment is essential for maintaining the integrity of the chitin and proteins that give mushrooms their structural support.
Paper Bags vs. Plastic: The Great Debate
When you walk into a grocery store, you will almost always see mushrooms sold in plastic-wrapped cardboard trays. This is done for aesthetic reasons and to prevent bruising during transport, but it is the worst possible way to store them at home. Once you get them to your kitchen, your first priority should be to remove them from that plastic. Plastic creates a greenhouse effect, trapping every drop of moisture, which is the direct catalyst for the sliminess we are trying to avoid.
The Power of Brown Paper
The best friend of a mushroom is a simple brown paper bag. Paper is porous, which means it allows the mushrooms to breathe while simultaneously absorbing any excess moisture that would otherwise settle on the caps and stems. When you place mushrooms in a paper bag, fold the top down slightly to keep out odors from other foods, but do not seal it tightly. This creates a perfect equilibrium that keeps the mushrooms firm and dry for a significantly longer period.
Using Paper Towels for Layering
If you find that your mushrooms are still slightly damp after purchasing, or if you are storing them for more than a few days, incorporate paper towels into the paper bag. Place a clean, dry paper towel at the bottom of the bag, add a layer of mushrooms, and then add another paper towel on top. This technique, often used by professional chefs when sourcing bulk mushrooms, acts as a secondary moisture barrier that keeps the caps pristine.
"Packaging is often the cause of failure. If you leave your mushrooms in the manufacturer's plastic wrap, you are essentially sealing them in a tomb of condensation. Always transfer them to paper."
Handling and Cleaning: Preparation for Storage
One of the most common mistakes home cooks make is washing their mushrooms before they store them. Mushrooms act like little sponges; they are incredibly porous and will absorb any liquid they come into contact with. If you rinse your mushrooms under the tap before storing them, you are introducing external moisture that will stay trapped, leading to almost immediate sliminess. Never wash mushrooms until the very moment you are ready to cook them.
Dry Cleaning Techniques
To clean your mushrooms, use a soft, dry pastry brush or a clean cloth to gently whisk away any debris or growing medium from the caps and gills. If you encounter stubborn soil, a lightly dampened paper towel is acceptable for spot-cleaning, but never soak the mushrooms in water. Once you have cleaned them, place them directly into your storage container. If you have already washed them, lay them out on a baking sheet lined with paper towels for at least 30 minutes to allow the surface moisture to evaporate before moving them to the fridge.
Trimming Stems
If you have mushrooms with woody or dried-out stems, such as shiitakes or oyster mushrooms, you can trim the ends before storing them. However, for button or cremini mushrooms, it is often better to leave the stem intact until the last possible second. The more surface area you expose by cutting, the faster the mushroom will oxidize and dry out. Keep your mushrooms as "whole" as possible for the longest shelf life.
Troubleshooting and Signs of Spoilage
Even with the most diligent storage practices, mushrooms are a perishable commodity. It is important to know when to cut your losses. A fresh mushroom should feel firm, smell like a clean forest floor, and look uniform in color. If you detect a strong, fermented, or sour odor, it is time to discard them immediately. While a slight darkening of the gills is normal as the mushroom ages, an overall slimy or sticky surface that does not disappear with a light rub is a clear sign that bacterial colonies have taken over.
The "Slimy" Test
If your mushrooms are starting to feel slightly tacky but do not smell bad, they may still be safe to eat if you cook them immediately. However, if they have developed a visible, slimy film that persists after wiping, they have crossed the threshold of safety. Do not attempt to "salvage" them by rinsing them in hot water or soaking them in vinegar; once the breakdown process has begun, the flavor and texture will be irreversibly compromised.
Repurposing Over-Mature Mushrooms
If your mushrooms are slightly past their prime—perhaps a little wrinkled or darkened but still firm and smelling fresh—they are perfect for long-cooked preparations. Instead of a quick sauté, use them in a beef bourguignon, a slow-simmered mushroom ragu, or as part of a Duxelles. By cooking them down with aromatics, wine, and butter, you can hide the slight degradation in texture while still utilizing that deep, concentrated umami flavor.
Advanced Storage: Freezing and Dehydration
If you find yourself with an abundance of mushrooms that you cannot eat within the standard 5-to-7-day window, you have options beyond the refrigerator. Freezing is an excellent way to preserve mushrooms, but they must be prepared correctly to avoid a watery, mushy mess when thawed. The key is to sauté them first. By cooking the mushrooms in a small amount of butter or oil until they release their moisture and it evaporates, you concentrate the flavor and prevent the cell walls from bursting when they freeze.
Step-by-Step Freezing Guide
The Art of Dehydration
Dehydrating is another professional-level technique that intensifies the savory notes of the mushroom. Dried mushrooms have a much longer shelf life than fresh ones and can be rehydrated in warm water or stock to create an incredibly flavorful liquid base for soups and sauces. To dehydrate, slice your mushrooms thinly, place them in a single layer on a drying rack, and set your oven to its lowest setting (usually 150-170 degrees Fahrenheit) for 4-8 hours until they are brittle.
"Freezing raw mushrooms is a mistake that leads to disappointment. Always sauté them until dry; you are essentially flash-preserving the umami, which creates a flavor bomb ready for any sauce or stew."
Maximizing Culinary Utility
Now that you know how to store your mushrooms properly, it is time to focus on how to use them to their full potential. When you are ready to cook, treat your mushrooms with the respect they deserve. Many home cooks make the mistake of overcrowding their pan, which results in steaming the mushrooms rather than searing them. Always use a large enough skillet to ensure the mushrooms have plenty of space, and use a combination of oil and butter to achieve that perfect, golden-brown crust.
Achieving the Perfect Sauté
Start your pan on high heat. Add your mushrooms and let them sit undisturbed for 2-3 minutes. This allows the heat to work its magic and initiates the Maillard reaction, which is responsible for the rich, nutty flavor profile. Only after they have achieved a beautiful color should you add your salt, pepper, and herbs like thyme or rosemary. Adding salt too early will draw out the water prematurely, preventing the browning process.
Understanding the Umami Factor
Mushrooms are a powerhouse of naturally occurring glutamates. By using the proper storage and cooking techniques, you are preserving these compounds. Whether you are using them as a substitute for meat in a vegetarian dish or as a flavor enhancer in a hearty beef stew, the quality of your mushroom storage will directly impact the final depth of the dish. Think of mushrooms not just as a vegetable, but as an essential seasoning agent in your kitchen toolkit.
Conclusion
Mastering the storage of mushrooms is one of those small, subtle shifts in your culinary routine that yields outsized results. By moving away from the plastic-bound habits of the past and embracing breathable storage, careful moisture management, and proactive preparation, you ensure that these versatile ingredients are always ready to elevate your meals. A well-stored mushroom is a foundation for success, providing the earthy backbone that defines restaurant-quality cooking at home.
As you integrate these practices into your kitchen, remember that consistency is key. Treat your mushrooms with the same care you would accord an expensive cut of meat or a delicate herb. Observe them, smell them, and respect their natural life cycle. When you put in the effort to manage their environment, the reward is a pantry—or rather, a refrigerator—that empowers you to cook with confidence and creativity.
The next time you head to the farmers' market or the produce aisle, bring your paper bags and your newfound knowledge of moisture control. You no longer have to fear the dreaded slime; instead, you can look forward to the rich, golden, and umami-packed dishes that start with a perfectly preserved mushroom. Happy cooking, and may your produce drawers always be filled with the freshest ingredients imaginable.
Final Thoughts
The journey of a chef is a never-ending exploration of ingredients, and while mushrooms may seem like a simple commodity, they are truly one of the most rewarding items to master. From the way you select them at the store to the way you store and finally sear them, every step contributes to the final profile of your dish. At "Blame The Chef," we believe that great cooking is built on these foundational habits.
By taking the time to understand the science behind why mushrooms degrade, you have transformed yourself from a passive shopper into an active curator of your kitchen ingredients. Keep experimenting with different varieties—from the humble button mushroom to the complex morel or maitake—and continue to refine your technique. The culinary arts are deeply personal, and your kitchen is your laboratory for greatness. Stay curious, keep your blades sharp, and above all, keep your mushrooms dry and ventilated.
Remember that every time you save a batch of beautiful produce from spoilage, you are reducing waste and honoring the work that went into growing those ingredients. It is a small act of sustainability that connects you closer to the food you put on your table. We hope this guide has provided you with the clarity and professional insight needed to tackle your mushroom storage with confidence. There is nothing quite like the satisfaction of opening your fridge and seeing a bounty of fresh, firm, and ready-to-use ingredients. Now, get back into that kitchen and create something magnificent. Your dinner guests, and your own palate, will thank you for the diligence.
Get the Next Recipe
Weekly recipes, techniques, and gear picks — straight to your inbox.
