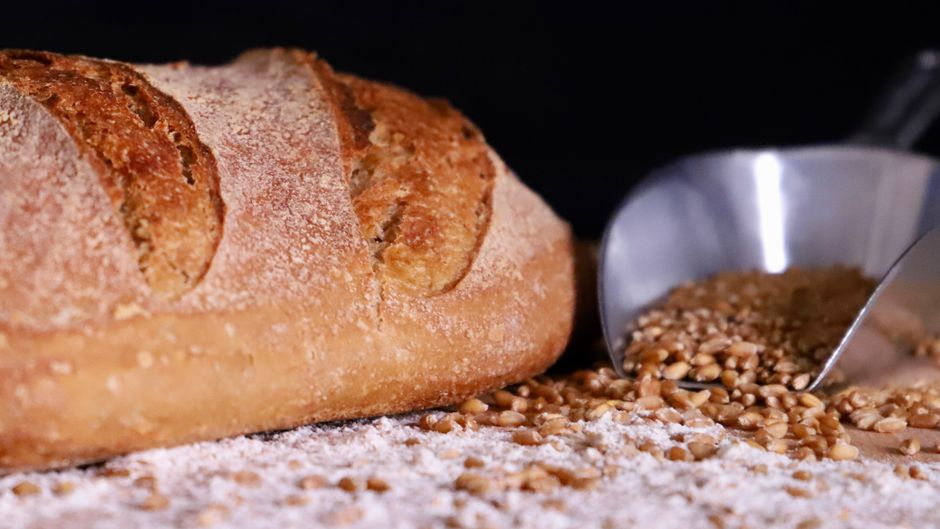
How to Store Sourdough Bread So It Stays Fresh
There is nothing quite as satisfying as the sound of a perfectly baked loaf of sourdough bread coming out of the oven. The crackle of the crust as it cools, the distinct aroma of wild yeast, and the soft, airy crumb inside make all those hours of fermentation well worth the effort. However, the true test of a baker isn't just in the bake itself; it is in how you manage that loaf once it has cooled to room temperature. Many home bakers put so much heart and soul into their sourdough, only to see it turn into a brick or a moldy mess within forty-eight hours because they stored it incorrectly. Storing bread is as much of a craft as mixing the dough, and understanding the science of moisture migration is the secret to keeping your loaves fresh for days.
The primary enemy of a crusty sourdough loaf is the refrigerator, while the secondary enemy is the humble plastic bag. Many beginners instinctively reach for the nearest plastic grocery bag to keep their bread from drying out, but this is a fatal error. Plastic traps moisture, which softens the once-crisp crust and creates a humid environment that invites mold to take hold of your sourdough much faster than you would expect. On the other hand, leaving the bread exposed to open air will cause the internal moisture to evaporate rapidly, leading to a rock-hard loaf that is only useful for breadcrumbs or croutons. You need to find the "Goldilocks zone"—a storage method that protects the crumb without compromising the integrity of the crust.
In this comprehensive guide, we will explore the professional techniques used by commercial bakers to maintain the texture and flavor profiles of sourdough over time. We will look at the specific storage requirements for different types of loaves, the role of humidity in your kitchen, and the best ways to revive a loaf that has lost its initial spark. Whether you are a weekend hobbyist or a budding sourdough artisan, the following techniques will help you extend the life of your bread significantly. By treating your bread with the respect it deserves after it leaves the oven, you ensure that every slice is as delightful as the first one you cut after the cooling period. Let us dive into the mechanics of preservation and keep your kitchen smelling like a bakery all week long.
The Science of Starch Retrogradation
To understand why your bread goes stale, you must first understand the process of starch retrogradation. When you bake bread, the heat causes the starch molecules to absorb water and swell, a process known as gelatinization. As the loaf cools, these starch molecules begin to align themselves back into a crystalline structure, pushing out moisture as they do so. This is the fundamental reason bread hardens over time. It is not necessarily losing moisture to the environment, but rather rearranging it internally. This process occurs most rapidly at temperatures between 32°F and 50°F, which is exactly why the refrigerator is the worst place to store your fresh sourdough.
Why the Fridge Accelerates Staling
Many people think that putting bread in the fridge will keep it fresh, but the science suggests the exact opposite. Because the refrigerator sits right in that "danger zone" for staling, the starch molecules crystallize at a significantly faster rate than they would on your countertop. A loaf of sourdough that would stay soft for three days on the counter might become noticeably leathery and tough after just twenty-four hours in the fridge. Unless you are planning to store the bread for an extended period and intend to toast every single slice, keep the bread out of the cold.
The refrigerator is the enemy of the crust; the cold temperature encourages the starch to crystallize, essentially accelerating the staling process by several times compared to room temperature storage.
Controlling the Environment
Temperature stability is just as important as the actual temperature. If you live in a climate with extreme humidity, your sourdough might develop mold, while an arid climate will dehydrate it in hours. The ideal storage environment is a cool, dry place away from direct sunlight and heat sources like the oven or the stove. If your kitchen is consistently humid, you might need to adjust your storage method to allow for more airflow, whereas in dry climates, you need to create a barrier that holds in just enough moisture to prevent the crust from becoming brittle.
The Best Methods for Countertop Storage
When you are planning to eat your loaf within the first two or three days, the countertop is your best friend. The goal here is to maintain a balance where the crust stays crisp but the crumb remains supple. Professional bakers often recommend storing bread cut-side down on a wooden cutting board. This simple technique acts as a natural seal for the crumb, preventing air from circulating into the loaf while allowing the crust to breathe. It is a time-tested method that works exceptionally well for round loaves or boules.
Using Linen Bread Bags
If you prefer a more contained environment, a linen bread bag is an excellent investment. Unlike plastic, linen is a breathable, natural fiber that allows excess moisture to escape while maintaining a protective microclimate around the loaf. It prevents the crust from becoming soft and soggy while keeping the crumb from drying out too quickly. For best results, look for high-quality, dense-weave linen. You can even find bags that are lined with a wax or TPU coating on the outside to provide extra protection against environmental dryness without sacrificing the breathability of the interior fabric.
The Paper Bag Approach
If you don't have a linen bag, a simple brown paper bag is a surprisingly effective alternative. Paper bags are excellent for keeping the crust crisp for the first 24 hours. Because the paper is porous, it doesn't trap humidity like plastic, but it does protect the bread from drafts and dust. This is the traditional way many French boulangeries deliver bread to customers. Note that once the loaf is cut, you should wrap the cut side in a bit of parchment or wax paper before placing it back into the paper bag to minimize surface evaporation.
* Avoid plastic at all costs for short-term storage.
Always let your sourdough cool completely*—at least 2 to 4 hours—before covering it.
* Store the loaf in a cool, dry, dark area of the pantry.
* Keep the cut side facing downward on a porous surface.
Freezing Sourdough for Long-Term Freshness
If you find that you cannot finish your sourdough loaf within the recommended three-day window, the freezer is the only place you should consider for long-term storage. Freezing is the most effective way to "pause" the staling process entirely. The key to freezing bread successfully is to do it properly so that the bread doesn't suffer from freezer burn or take on the odors of other foods in your freezer. You want to act quickly, as soon as the bread has cooled completely, to lock in that fresh-baked quality.
Preparation for the Freezer
You have two main options when freezing: freezing the whole loaf or freezing pre-sliced portions. For the average home cook, pre-slicing the entire loaf is the most convenient method. Once the bread is sliced, you can place a small piece of parchment paper between each slice before putting them back together in a loaf shape. This makes it incredibly easy to pull out exactly as many slices as you need for a quick toast or a sandwich without having to defrost the entire loaf.
The Double-Bagging Technique
To prevent freezer burn, you must wrap the bread securely. First, wrap the loaf (or the stacked slices) tightly in plastic wrap or aluminum foil. This acts as a barrier against air. Then, place this wrapped bundle inside a heavy-duty freezer-safe storage bag and squeeze out as much air as possible before sealing it. This double-layer approach is essential for maintaining the integrity of the sourdough crumb. When stored this way, your sourdough will remain in near-perfect condition for up to three months.
Proper freezing is not about the cold; it is about the seal. By minimizing the surface area exposed to air, you prevent the moisture from migrating out of the crumb and forming ice crystals, which is the primary cause of freezer-related degradation.
Reviving Stale or Frozen Sourdough
It is almost inevitable that at some point, you will have a loaf that has gone a bit too hard. Don't throw it away! Sourdough is remarkably resilient and can often be brought back to life with a bit of moisture and heat. If your bread has simply gone stale on the counter, you can revitalize it by misting the crust lightly with water and popping it into a preheated 350°F oven for about five to seven minutes. The steam created by the water rehydrates the starches, and the heat crisps the crust back to life.
Defrosting Without a Toaster
If you have frozen slices, there is no need to wait for them to thaw at room temperature. For the best texture, place your frozen slices directly into a preheated oven or a toaster. If you are using an oven, toast them at 375°F for about four to six minutes. This gives you that perfect contrast of a crunchy exterior and a soft, chewy interior. If you are using a toaster, use the "defrost" setting if your machine has one; otherwise, use a slightly lower heat setting and a longer duration to ensure the middle of the slice is fully thawed.
Repurposing Bread That is Too Far Gone
Sometimes, the bread is just past the point of being a good sandwich loaf. If you find your sourdough has truly reached the end of its life, do not discard it. Sourdough makes the best croutons, breadcrumbs, or French toast you will ever eat. The natural acidity and deep flavor profile of the sourdough add complexity to these dishes that regular commercial bread simply cannot match. Toss cubes of stale sourdough with olive oil, herbs, and sea salt, then bake until golden for a salad topping that will ruin all other croutons for you.
The Role of Sourdough Hydration in Shelf Life
One factor often overlooked by bakers is how the hydration percentage of the dough affects its longevity. A higher hydration loaf (above 80% hydration) will inherently stay softer for longer because there is more free water in the crumb. While these loaves are notoriously harder to shape and score, they provide a much longer window of moist, tender eating. Conversely, a lower hydration "country loaf" (around 65% to 70%) will have a tighter crumb and a sturdier structure, but it will lose its softness much faster.
Understanding Crumb Structure
When you are aiming for a long-lasting loaf, consider your flour choice. Whole grain flours, such as rye or whole wheat, absorb more water and can actually help a loaf retain moisture over time. Even a small percentage of rye flour—perhaps 10% of your total flour weight—can act as a preservative. The enzymes in the rye flour help break down starches more slowly, resulting in a bread that remains fresher for longer than a loaf made exclusively with high-protein bread flour.
Professional Tips for Longevity
If you want to bake loaves that are specifically designed for long-term enjoyment, consider adding a small amount of fat to your dough, such as a tablespoon of olive oil or butter. While traditional sourdough recipes are often just flour, water, salt, and starter, adding a touch of fat softens the crumb and slows down the retrogradation process. This is why brioche or challah stays soft for days. You don't need much—even a 3-5% fat ratio can make a noticeable difference in how the bread feels on day three.
Understanding Humidity and Storage Success
Your kitchen environment is the third, invisible ingredient in your sourdough. If you live in a coastal area with high humidity, your bread will struggle to stay crisp. In these environments, you may find that store-bought plastic is actually a hindrance, causing the loaf to become limp within hours. Instead, try storing your bread in a ceramic bread crock. The ceramic material helps regulate the humidity levels, providing a stable, breathable environment that keeps the crust from turning chewy while preventing the crumb from drying out.
Testing Your Environment
To determine the best storage method for your specific kitchen, try the "two-day test." Keep one half of a loaf in a linen bag and the other half exposed on a wooden board. Check both after 24 and 48 hours. You will quickly see which method performs better for your specific home conditions. If both loaves dry out, you are likely living in a very arid environment, and you might consider placing a small piece of apple or a slice of fresh potato in the container with your bread. The bread will pull just enough moisture from these items to stay soft without compromising the texture.
Preventing Mold Growth
Mold loves warmth and moisture. If you notice mold developing, it is usually because the bread was wrapped before it was fully cooled, or it was stored in an area with poor airflow. Always ensure your bread has cooled to room temperature for at least three hours before putting it away. If you are baking during the summer months, be extra vigilant. High temperatures can cause condensation to form inside even the most breathable bags, which is a recipe for mold. In these cases, opting for the freezer is a much safer bet.
The most overlooked step in the entire baking process is the cooling phase; if you cut into a loaf while it is still warm, you trap steam that will eventually turn into liquid, leading to a gummy texture and a high risk of mold growth.
Creative Storage Solutions for Home Bakers
If you are a serious bread baker, you might want to look into professional-grade storage equipment. While a simple linen bag is great, some bakers invest in dedicated bread boxes made of wood or bamboo. These boxes provide the ideal balance of airflow and protection. The natural wood absorbs excess moisture while preventing the bread from drying out completely. It also keeps the loaf away from direct light, which can affect the flavor of the crust over time.
The Bread Box Advantage
A high-quality wooden bread box creates a controlled environment that mimics the conditions of a professional bakery's storage area. By keeping the bread in a dark, slightly ventilated space, you maintain the sourdough's distinct flavor profile. Just remember that you must clean your bread box regularly to prevent flour dust and old crumbs from harboring bacteria or mold spores. A quick wipe down with a mild vinegar solution once a month is sufficient to keep it hygienic.
Organizing Your Inventory
If you bake multiple loaves at once, keep a log of when you baked each one. Label your frozen bags with the date and the type of sourdough (e.g., "Sourdough Boule - 80% Hydration"). This prevents the "mystery loaf" problem where you find a frozen block of dough months later and aren't sure how to handle it. Keeping a small notebook or using a digital app to track your baking schedule and storage status will make you a much more efficient and successful baker in the long run.
* Always date your frozen loaves using masking tape or a permanent marker on the bag.
* Keep your bread box in a cool spot; never place it near the oven or a heat-producing appliance.
* When moving bread from the freezer to the counter, keep it in the bag until it is fully thawed to prevent condensation from softening the crust.
* Clean your bread box or linen bag thoroughly between every loaf to ensure no residual mold spores remain.
Final Thoughts
The journey of sourdough does not end when you pull the golden-brown loaf from the oven. In many ways, the storage phase is the final act of your baking performance. By understanding the science of staling, respecting the cooling process, and utilizing the right tools for your specific kitchen environment, you can ensure that your hard work results in many days of delicious, fresh-tasting bread. Whether you choose the simplicity of a linen bag on the counter or the convenience of the freezer, the goal remains the same: preserving the integrity of that beautiful, wild-yeast creation.
Remember that sourdough is alive in more ways than one. It requires patience and attention, even after the baking is complete. Do not be discouraged if your first few attempts at storing bread lead to a slightly tougher or softer loaf than you expected; it is all part of the learning process. Adjust your hydration levels, experiment with different storage vessels, and pay attention to how your specific kitchen responds to the changing seasons. With time, you will develop an intuitive sense for the best way to keep your bread at its peak.
Ultimately, the best way to enjoy sourdough is to bake it, share it, and eat it with the people you love. If you find yourself with too much bread, don't worry about keeping it perfect for a week—give it to a neighbor or toast it into croutons for a friend. Baking is a communal act, and the joy of a perfect slice of sourdough is best when it is shared. Keep your starter active, your oven hot, and your bread stored properly, and you will find that the art of the sourdough loaf becomes one of the most rewarding parts of your culinary life. Happy baking, and may your loaves always have that perfect, airy, open crumb.




Get the Next Recipe
Weekly recipes, techniques, and gear picks — straight to your inbox.
