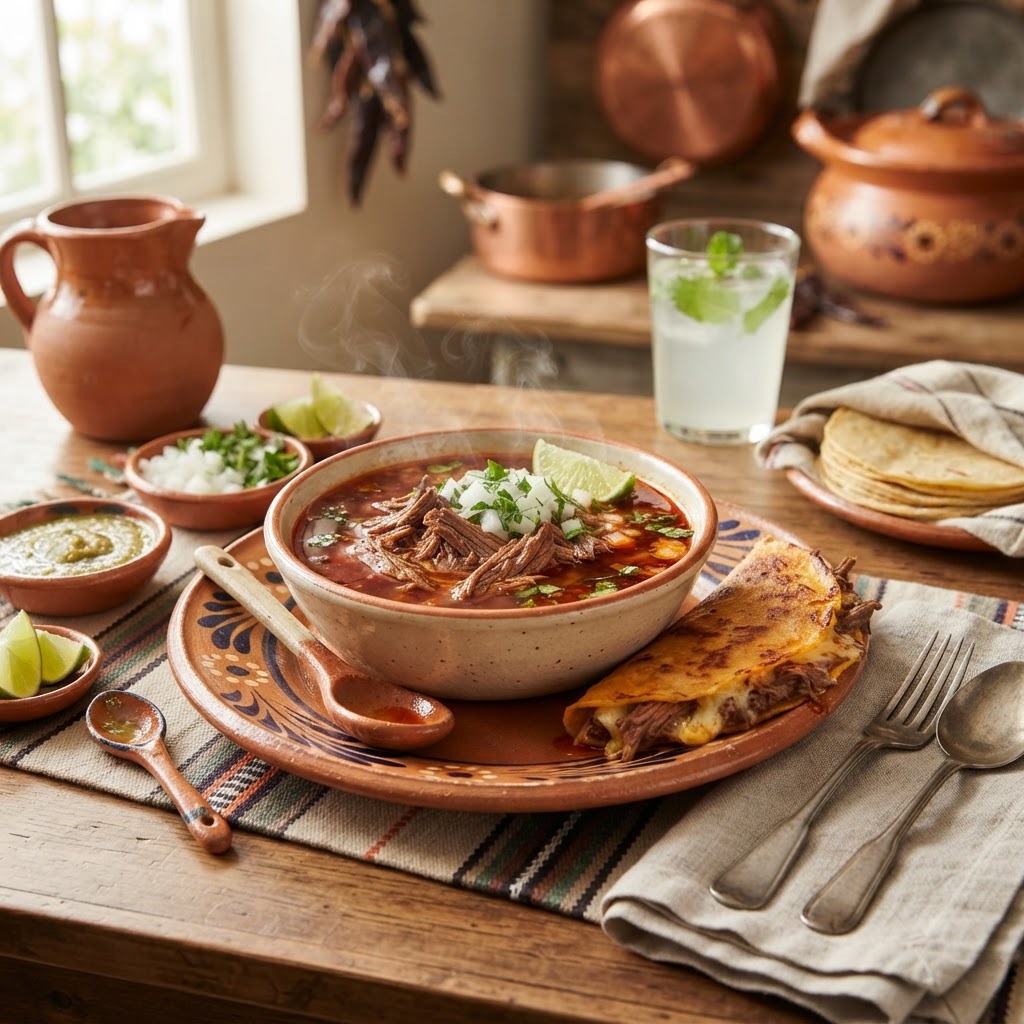
Mastering Authentic Mexican Birria: A Step-by-Step Guide to Tender Meat and Rich Consomé
There are few dishes in the Mexican culinary canon as deeply soulful, as visually striking, or as misunderstood by home cooks outside of Mexico as birria. Born in the state of Jalisco during the colonial era, birria began as a resourceful answer to unwanted livestock—the Spanish introduced goats that proliferated and damaged crops, and Indigenous cooks transformed this tough, gamey meat into something transcendent through patience, chiles, and earthy spices. What emerged is a dish that balances heat, acidity, sweetness, and deep umami, with fall-apart meat enveloped in a ruby-red consomé so rich it borders on decadent. If you have only ever had birria as a crispy taco stuffed with cheese and a side of dipping broth at a trendy food truck, you owe it to yourself to understand the traditional preparation.
Making authentic birria at home is not difficult, but it does demand respect for process. You cannot rush the braise, you cannot skip the toasting of chiles, and you absolutely cannot treat the consomé as an afterthought. The consomé is, in many ways, the soul of the dish—the concentrated, strained cooking liquid that carries every bit of flavor the meat has surrendered during its long, slow transformation. When done right, a bowl of birria with its consomé is a complete meal: tender meat you can shred with a fork, a deeply savory broth you sip between bites, and the option to fold it all into tacos dorados with a slick of that crimson fat on the tortilla.
In this guide, I am going to walk you through the method I have refined over years of cooking birria in both restaurant and home kitchens. We will cover selecting the right meat, building the chile base, layering aromatics, choosing your cooking vessel, and finishing the dish with the proper garnishes. I will give you exact temperatures, timings, and ratios so you can reproduce this with confidence. By the end, you will have a pot of birria that would make a cocinera in Jalisco nod with approval—and you will understand why this dish has endured for nearly five centuries.
Understanding Birria: Origins and Regional Variations
Birria is, at its core, a celebration of resourcefulness. The word itself is believed to derive from the Spanish "birria," meaning something of little value or a mishmash—a joking nod to the fact that this now-revered dish was born from meat the colonizers considered worthless. Indigenous communities in the highlands of Jalisco took those tough goats and applied their deep knowledge of chiles, herbs, and slow cooking to create something extraordinary. Over time, birria spread throughout western Mexico and beyond, with each region imprinting its own character.
Jalisco-Style Goat Birria
The most traditional and arguably the most celebrated version comes from Jalisco, where chivo (goat) is the protein of choice. Jalisco birria is characterized by its aggressive use of chiles—particularly guajillo, ancho, and morita—and the inclusion of warming spices like cinnamon, cloves, and black pepper. The meat is marinated in a vibrant chile paste, then slow-cooked until it surrenders completely. The finished dish is served in deep bowls with the consomé ladled generously over the meat, garnished with chopped onion, cilantro, and lime, with warm tortillas on the side.
Other Regional Expressions
In Aguascalientes, you will often find birria made with lamb, while in Michoacán, pork and even beef appear in variations that lean slightly sweeter and less spicy. In Tijuana, the famous quesabirria was born—a taco where the tortilla is dipped in the chile-rich fat from the consomé, griddled until crispy, filled with meat and cheese, and served with a side of broth for dipping. This is the version that exploded on social media and brought birria to global attention, but it is a recent innovation, not the traditional dish. Understanding this distinction matters: the quesabirria is delicious, but it is a child of the original, and you cannot make a great quesabirria without first mastering the birria beneath it.
Birria is not a quick dinner—it is an event. The best pots are the ones you start in the morning and finish by late afternoon, the kitchen thick with the smell of toasted chiles and rendered fat.
Selecting and Preparing the Meat
The single most important decision you will make is your choice of protein. Traditional birria uses goat, and if you have access to a good butcher or Latin market that carries it, I strongly encourage you to use it. Goat has a distinct, slightly earthy flavor that pairs perfectly with the aggressive chile profile. However, goat can be difficult to source, and beef makes an excellent and entirely respectable substitute—this is what most home cooks in the United States will use.
Choosing the Right Cuts
For beef birria, I recommend a combination of chuck roast and short ribs, roughly a 2:1 ratio by weight. The chuck provides the bulk of shreddable meat, while the short ribs contribute bone, collagen, and fat that enrich the consomé immeasurably. If you can find beef shank, add a pound or two; the marrow bone will give the broth an unctuous quality that cannot be replicated. Avoid lean cuts like sirloin or round—they will dry out during the long braise and contribute nothing to the broth.
For goat, look for a mix of shoulder and leg, bone-in if possible. Bone-in meat is non-negotiable for authentic birria because the marrow and collagen are what give the consomé its body and silky texture. If your butcher only has boneless cuts, ask if they can give you soup bones to toss into the pot. You are aiming for about 4 pounds of meat total for a standard batch that will serve 6 to 8 people generously.
Preparing the Meat
Trim excess exterior fat, but do not remove all of it—fat carries flavor and contributes to the rich layer that will float on top of your consomé. Cut large roasts into 4-to-6-inch chunks; this increases surface area for the marinade and ensures even cooking. Season the meat generously with kosher salt at least an hour before cooking, or ideally overnight. If you have time, let the seasoned meat sit uncovered on a rack in the refrigerator—this dries the surface slightly and helps develop deeper flavor during the initial sear.
Building the Chile Base: The Heart of Birria's Flavor
If the meat is the body of birria, the chile base is its soul. This is where most home cooks go wrong—either by using the wrong chiles, skipping the toasting step, or under-blending the paste. The chile base should be deeply complex: smoky, slightly sweet, moderately spicy, and thick enough to coat the meat in a vivid crimson layer.
Selecting Your Chiles
For a standard 4-pound batch of meat, you will need the following dried chiles, stems and seeds removed:
Toasting and Rehydrating
Heat a large, dry cast-iron skillet over medium heat. Working in batches, toast the chiles flat-side down for about 15 to 30 seconds per side, pressing them gently with a spatula. You are looking for them to become fragrant and slightly pliable, with small bubbles forming on the skin. Do not let them char or turn black—burnt chiles will make your entire pot bitter and acrid, and there is no recovering from it.
Transfer the toasted chiles to a large bowl and cover with boiling water. Let them soak for 20 to 30 minutes, until completely softened. Reserve about 2 cups of the soaking liquid—this is infused with chile flavor and will be used to thin your paste. Strain it through a fine-mesh sieve to catch any stray seeds.
Blending the Chile Paste
In a high-powered blender, combine the rehydrated chiles, the reserved soaking liquid, and the following aromatics and spices:
Blend on high for 2 to 3 minutes, until completely smooth. The paste should be thick but pourable, with a color somewhere between brick red and sunset orange. Taste it—it should be intense, slightly sweet, smoky, and pleasantly spicy. Adjust salt if needed.
The chile paste should taste almost too strong on its own. Remember, it will be diluted by the braising liquid and absorbed by pounds of meat—what seems aggressive now will be perfectly balanced in the final dish.
Marinating and Searing the Meat
Now we bring meat and chile together. Pour about two-thirds of the chile paste over the seasoned meat in a large bowl or non-reactive container, and toss thoroughly to coat every piece. Cover and refrigerate for at least 4 hours, preferably overnight. The acid in the vinegar and the enzymes in the chiles will begin to break down the meat fibers, and the flavor will penetrate more deeply with time. Reserve the remaining paste for the braising liquid.
Searing for Depth
When you are ready to cook, remove the meat from the refrigerator and let it sit at room temperature for 30 to 45 minutes. Cold meat in a hot pan will steam rather than sear, and we want a deep brown crust to build the fond—those caramelized bits on the bottom of the pot that will dissolve into the consomé and add enormous flavor.
Heat a heavy-bottomed Dutch oven or Mexican clay pot over medium-high heat and add 2 tablespoons of neutral oil. Working in batches to avoid crowding, sear the meat pieces for 3 to 4 minutes per side, until deeply browned. Do not move them around—let them sit and develop that crust. Transfer each batch to a plate as you finish. If the bottom of the pot gets too dark, deglaze with a splash of water or stock and scrape up the fond before continuing.
The Braise: Low, Slow, and Patient
With the meat seared and set aside, it is time to build the braising liquid and commit to the long cook. This is where birria transforms from seasoned meat into something transcendent.
Building the Broth
In the same pot, still with those beautiful browned bits on the bottom, add:
Sauté the aromatics for 5 to 7 minutes, until the onion is softened and fragrant, scraping the bottom of the pot to release the fond. Then add:
Bring everything to a boil, then return the seared meat and any accumulated juices to the pot. The liquid should come about two-thirds up the sides of the meat but not completely submerge it. If it is too low, add more stock or water; if too high, remove some.
Cooking Temperature and Time
Cover the pot and transfer it to a 325°F (160°C) oven. This moderate, steady heat is ideal for a long braise. Cook for 3 to 3.5 hours, checking every hour to ensure the liquid is at a gentle simmer, not a rolling boil. You want lazy bubbles breaking the surface occasionally.
After about 2.5 hours, begin checking the meat. It should be fork-tender and shredding easily when pressed against the side of the pot. If it still feels tight or rubbery, give it another 30 to 60 minutes. Tough cuts like chuck and goat shoulder contain a lot of collagen, and there is a window where they go from chewy to meltingly tender—patience here is everything.
Finishing the Consomé: The Soul of the Dish
When the meat is tender, remove the pot from the oven. Using a slotted spoon, carefully transfer the meat and large vegetable pieces to a large platter or baking sheet. Strain the braising liquid through a fine-mesh sieve set over a large bowl, pressing hard on the solids to extract every drop of flavor. Discard the solids—or, if you are like me, snack on the softened carrots and onion while you work.
Skimming and Adjusting
You will notice a layer of vibrant red fat floating on top of the strained consomé. Do not skim it all off. This chile-infused fat is liquid gold—it is what you will use to fry your tacos dorados, and it carries an enormous amount of flavor. However, you may want to remove some if the layer is very thick. Use a ladle to carefully skim off about half, and reserve it in a small container.
Taste the consomé. It should be deeply savory, slightly tangy, with a gentle heat that builds. Adjust with salt, a squeeze of fresh lime juice, or a splash of vinegar if it needs brightness. If it feels too thin, return it to a saucepan and reduce over medium heat for 10 to 15 minutes until it coats the back of a spoon. A properly finished consomé should have body—not thin like broth, but not as thick as gravy.
Shredding the Meat
Once the meat is cool enough to handle, shred it using two forks, discarding any large pieces of fat, connective tissue, or bone. The texture should be tender and moist, not stringy or dry. If the meat seems dry, ladle a few spoonfuls of consomé over it and toss to combine. The meat should glisten and be deeply flavored all the way through.
Serving Birria: Traditional and Modern Presentations
How you serve your birria depends on the occasion, but I urge you to try the traditional presentation first. There is a reason it has endured.
The Classic Bowl
Ladle a generous amount of hot consomé into a deep bowl. Add a portion of shredded meat, and garnish with:
Serve with warm corn tortillas—preferably hand-made or from a good tortillería. The tortillas are essential for scooping up the meat and soaking up the broth. A sprinkle of Mexican oregano on top of the consomé is a traditional touch that adds an earthy, citrusy note.
Quesabirria Tacos
For the viral version that took the internet by storm, you will need:
Heat a cast-iron skillet over medium heat. Dip a tortilla lightly into the chile fat, then place it in the skillet. Sprinkle a handful of cheese over half of the tortilla, add a portion of shredded birria meat, and fold the tortilla in half. Press gently with a spatula and cook for 2 to 3 minutes per side, until the tortilla is crispy and the cheese is fully melted and bubbling.
Serve immediately with a small bowl of consomé for dipping. The contrast of the crispy, chile-flecked tortilla, the gooey cheese, the tender meat, and the rich broth is nothing short of addictive.
The first time you dip a crispy quesabirria taco into the consomé and take a bite, you will understand why this dish became a global phenomenon. But the bowl of birria that preceded it is where the real magic lives.
Make-Ahead, Storage, and Reheating
Like most braised dishes, birria is actually better the next day. The flavors meld and deepen, the meat absorbs more of the consomé, and the fat flavors integrate. If you are cooking for a gathering, make it a day ahead and reheat gently.
Storing
Store the meat and consomé together in an airtight container in the refrigerator for up to 4 days. The fat will solidify on top, forming a protective seal that preserves freshness. If you prefer, you can separate the meat from the broth for storage, but I find they keep best together.
Freezing
Birria freezes beautifully for up to 3 months. Transfer to freezer-safe containers, leaving some headspace for expansion, and label with the date. Thaw overnight in the refrigerator before reheating. The texture of the meat may soften slightly, but the flavor will remain excellent.
Reheating
Reheat gently in a pot over medium-low heat, stirring occasionally, until heated through. Avoid boiling vigorously, which can toughen the meat. Add a splash of water or stock if the consomé has thickened too much in storage. Taste and adjust seasoning before serving, as flavors can dull slightly upon reheating.
Common Mistakes and How to Avoid Them
Even experienced cooks stumble with birria. Here are the pitfalls I see most often:
Skipping the Chile Toasting
This is the most common error. Raw, untoasted chiles have a flat, grassy flavor that will make your birria taste one-dimensional. That 30 seconds per side in a dry skillet is transformative—it releases essential oils and creates complexity. Never skip it.
Using Lean Meat
Birria demands collagen-rich, fatty cuts. Lean meat will dry out and leave your consomé thin and lackluster. Embrace the chuck, short ribs, shank, and bone-in cuts. The fat and connective tissue are features, not bugs.
Rushing the Braise
If you try to cook birria at a higher temperature to save time, you will end up with tough, rubbery meat. Collagen needs time at a moderate temperature to break down into gelatin. Respect the 325°F oven and the 3 to 3.5-hour window. The meat will tell you when it is ready.
Overlooking the Consomé
Many cooks treat the braising liquid as an afterthought, serving it as-is without straining, skimming, or adjusting. The consomé requires its own attention: strain it, taste it, adjust it, and reduce it if necessary. It should be as carefully finished as the meat itself.
Pairing Suggestions and Accompaniments
Birria is a rich, deeply flavored dish, and it benefits from accompaniments that provide contrast. Here are some classic and modern pairings:
Final Thoughts
Mastering birria is about more than following a recipe—it is about understanding a culinary tradition that stretches back centuries and learning to respect each step of the process. From the careful selection of chiles to the patient, low-and-slow braise, every stage contributes something irreplaceable. When you finally ladle that crimson consomé into a bowl, top it with tender, deeply flavored meat, and sit down to eat, you are participating in a ritual that has nourished families in western Mexico for generations.
The beauty of birria is that it scales effortlessly. You can make a small pot for a quiet weeknight dinner, or you can multiply the recipe and feed a crowd at a celebration. The leftovers improve with time, the components can be repurposed into tacos, tortas, or even enchiladas, and the consomé alone is worth the price of admission. Once you have a reliable method and understand the principles behind it, you can experiment—adjusting the chile blend to your heat tolerance, swapping proteins, or adding your own touches.
What I hope you take away from this guide is that authentic birria is not beyond your reach as a home cook. It requires no special equipment beyond a heavy pot and a blender, no exotic ingredients you cannot order online, and no advanced techniques. What it demands is attention, patience, and a willingness to let time do its work. So clear an afternoon, toast those chiles, and commit to the braise. Your kitchen will smell extraordinary, your pot will be full, and your table will be set with one of the great dishes of Mexican cooking. That is worth every minute.


Get the Next Recipe
Weekly recipes, techniques, and gear picks — straight to your inbox.
