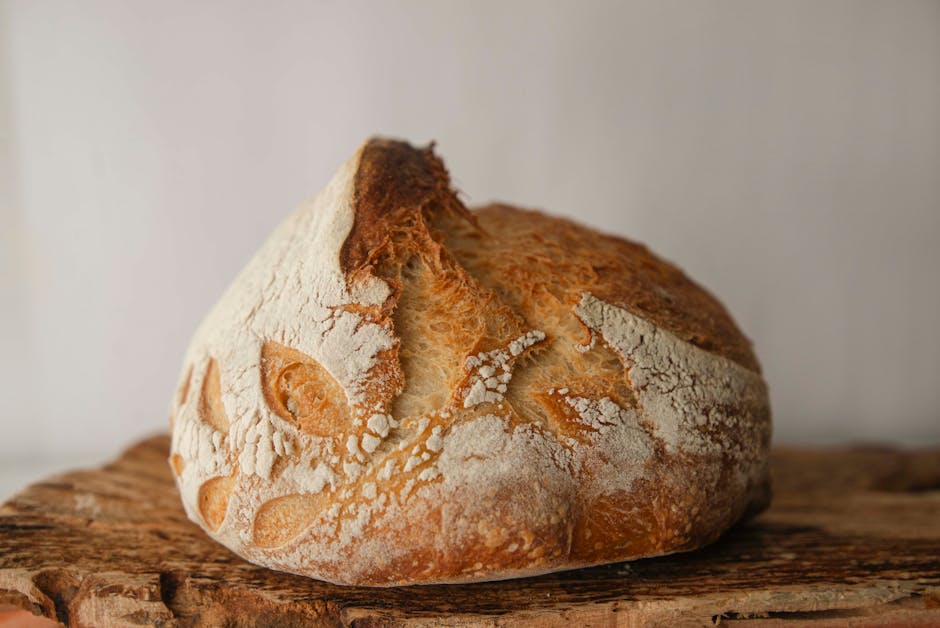
Mastering Sourdough: The Perfect Crust
As you embark on the journey of mastering sourdough, it's essential to appreciate the integral role that the crust plays in the overall appeal of your bread. The crust is not just a protective outer layer; it provides texture, flavor, and visual impact that can transform a simple loaf into a masterpiece. When people think of sourdough, they envision that beautiful golden-brown crust, crackling under the pressure of slicing, inviting them to experience the chewiness and flavor within. Achieving the perfect crust, however, requires an understanding of various factors including hydration levels, oven settings, steam generation, and even the type of flour you’re using.
A crisp crust is often seen as the hallmark of artisanal bread, and it's no coincidence that many home bakers strive for this characteristic. While it may seem daunting at first, the process becomes clearer with the right techniques and a little practice. The satisfying crunch of a well-baked crust is ultimately rewarding and speaks volumes about the skill and attention you have dedicated to your baking. In this blog post, we will take a deep dive into the science and art of creating the perfect sourdough crust, along with the steps to ensure that every loaf emerges from your oven looking and tasting fantastic.
Whether you’re a beginner eager to learn or a seasoned baker looking to refine your skills, mastering the crust of your sourdough is an exciting endeavor. Alongside providing you with practical methods and tips, we’ll explore the concept of hydration percentages, the importance of ovens and steam, and how to tailor your bread to achieve the texture and flavor profiles you desire. By the end of this post, you’ll feel equipped and inspired to experiment with your sourdough, taking pride in the fact that from now on, you can blame the chef if things go awry!
Understanding the Basics of Sourdough
To achieve the ideal crust, one must first grasp the essential principles of sourdough bread. Understanding the fermentation process, the role of gluten, and the interactions between the ingredients will help guide you in creating exceptional breads with delightful crusts.
The Role of Fermentation
Fermentation is the heart of sourdough. During this process, wild yeast and bacteria interact with flour and water to create a unique flavor profile and texture. The sour taste characteristic of sourdough comes from lactic acid bacteria and acetic acid bacteria, which contribute not only flavor but also structure to the dough.
Successful fermentation is marked by a visibly increased dough volume and a slightly domed shape. Using a levain—a mixture of flour, water, and an active sourdough starter—can enhance the flavor complexity and, consequently, impact the crust. Fermentation times can vary based on temperature and the specific recipe, but a good rule of thumb is allowing the dough to rise until it has doubled, which can take anywhere from 4 to 12 hours depending on the ambient conditions.
Flour Selection Matters
The type of flour you use has a profound effect on the final product, from the loaf structure to the crust texture.
The higher the protein in your flour, the better the gluten network that develops, leading to a more robust structure that holds air bubbles during baking, crucial for creating a crispy crust.
Hydration Levels
Hydration refers to the proportion of water in your dough relative to flour. Higher hydration levels usually create a lighter, airier crumb, but can make dough handling more challenging. Here’s a quick guide to hydration percentages:
Keep in mind that higher hydration levels often lead to a more crispy crust due to the steam produced during baking. Finding that balance is crucial and often entails trial and error until you find what works best for your style and taste preferences.
The Science of Crust Formation
To truly master sourdough, digging into the science of crust formation can be invaluable. Crust development is influenced by a variety of factors, including temperature, steam, and baking technique.
Maillard Reaction
The Maillard reaction is a chemical process that occurs when proteins and sugars undergo complex interactions at high temperatures, resulting in the browning and flavor development that gives crust its desirable characteristics. Understanding this reaction can help you control the color and flavor of your crust.
Factors affecting the Maillard reaction include:
Steaming Your Bread
Steam is crucial in developing a good crust. It delays crust formation and allows the loaf to expand fully before the outer layer solidifies. Here’s a straightforward method to create steam in your home oven:
“The secret to a delicious crust lies within the dance of steam and heat—refine it, and your sourdough will shine.”
Baking Technique
Every oven is unique; knowing your specific appliance will aid in achieving the desired crust. Here are a few baking techniques to consider:
Shaping Your Dough for the Best Crust
Shaping your sourdough properly not only affects the loaf’s height and structure but also influences the final crust. A well-shaped loaf will have an even rise and consistent crust.
The Importance of Tension
Creating surface tension when shaping your dough helps achieve height and an even bake. Here’s how to create tension in your sourdough:
Types of Shaping Methods
There are multiple ways to shape a sourdough loaf, but here are the most common techniques:
Each shaping technique will lead to different results in crust texture, so you might want to experiment to see which works best resulting in both a great rise and a stunning crust.
Experimenting with Additional Ingredients
While a basic sourdough bread is phenomenal on its own, incorporating additional ingredients can elevate the flavor and crust complexity. However, these additions should be carefully considered and balanced with the main recipe.
Seeds and Grains
Incorporating a variety of seeds or grains can add texture and flavor to your crust, resulting in visually appealing loaves.
Flavor Enhancers
Adding ingredients like malt, honey, or even a splash of vinegar can change the flavor profile of your sourdough and influence crust development.
Herbs and Spices
Incorporating herbs or spices can result in an aromatic loaf. Consider options such as rosemary, sea salt, and garlic, adding complexity without compromising the core recipe.
“Innovation is the spice of life—don’t hesitate to add your personal touch to the classic sourdough recipe.”
Troubleshooting Your Crust
Even the most seasoned bakers face issues when trying to achieve the perfect crust. Here are some common problems along with their solutions.
Problem: Thick or Hard Crust
If you find your crust too thick or hard, consider the following:
Problem: Soft or Pale Crust
If your crust is sorely lacking in color or crunchiness, try these techniques:
Problem: Uneven Crust
Uneven crusts are often caused by poor shaping or baking techniques. Here’s how to fix it:
Conclusion
Mastering the perfect crust on your sourdough bread is an rewarding endeavor that combines science and art. Reflecting on the essential factors such as flour selection, hydration, fermentation, steaming techniques, and shaping can significantly influence your baking outcome. Remember that every loaf tells a story of experimentation and dedication.
Whether you’re gathering knowledge from this culinary guide or diving into hands-on learning through practice, your journey to achieving that perfect golden crust is packed with opportunity for creativity and growth. Ultimately, the satisfaction of pulling a beautifully crusted sourdough loaf from your oven is a testament to your skill and patience. The next time you bake, trust in your practice and blame the chef—after all, the chef is you. Happy baking!




Get the Next Recipe
Weekly recipes, techniques, and gear picks — straight to your inbox.
