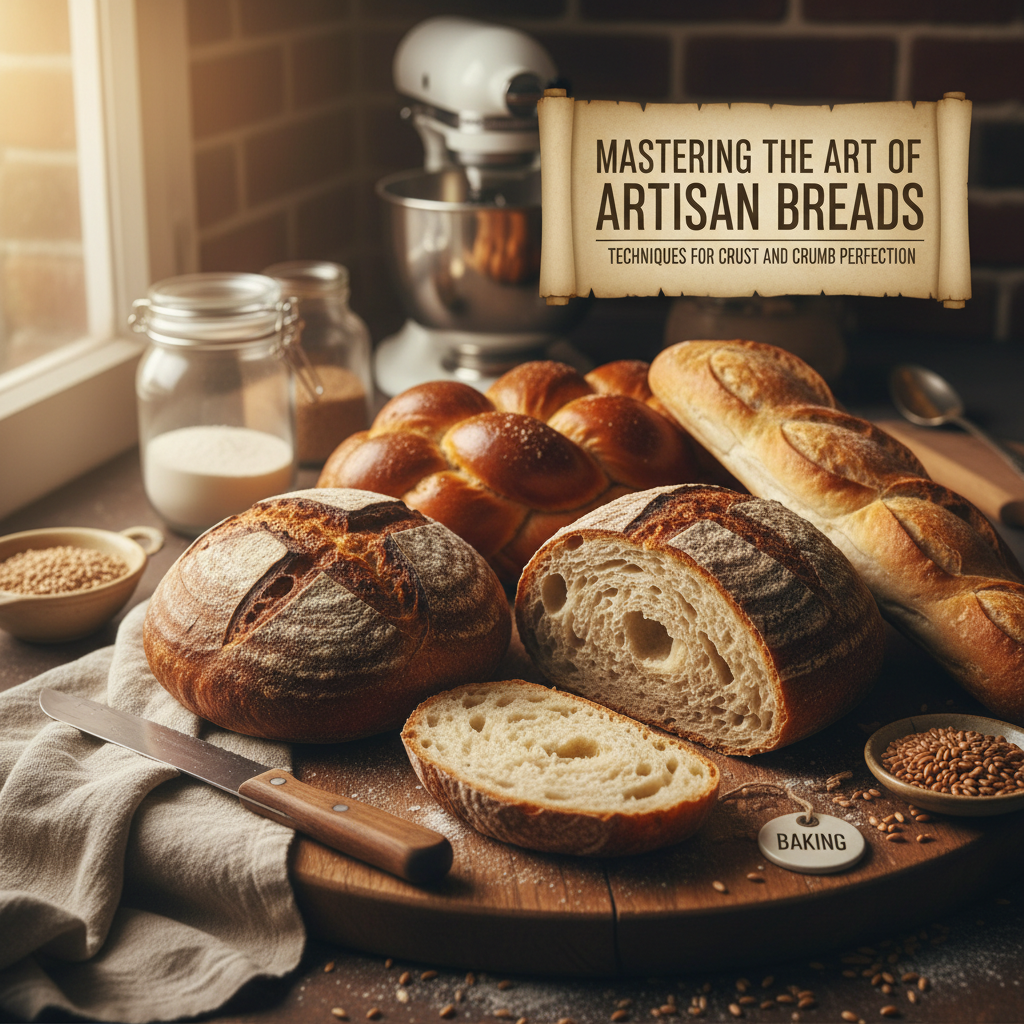
Mastering the Art of Artisan Breads: Techniques for Crust and Crumb Perfection
Baking artisan bread is both an ancient craft and a modern passion project that elevates the humble loaf into an extraordinary experience. The enticing aroma that fills your kitchen as a loaf bakes can ignite pride and joy in any home cook, but the journey to mastering bread-making involves much more than just a good recipe. It’s about understanding the science behind the ingredients, exploring various techniques, and developing an intuition for how dough behaves under different conditions. For many, baking can be intimidating, but with dedication and practice, anyone can create masterpieces that beg to be shared.
At the heart of artisan bread lies the delicate balance between crust and crumb. The crust, that golden-brown exterior, provides texture and flavor, whereas the crumb refers to the interior structure—the soft, airy part that often dictates the overall mouthfeel. Every element, from the choice of flour to the fermentation process, plays a critical role in achieving the right balance. This guide will walk you through the fundamental techniques that will empower you to create breads that are not only visually stunning but also rich in flavor and texture.
As you delve into the realm of artisan bread, you'll discover that it's a journey filled with experimentation and creativity. Each loaf tells a story, shaped by the baker's hands and the environment in which it was made. Whether you're preparing a rustic country bread, a classic sourdough, or a focaccia bursting with herbs, the techniques you learn will serve as your toolkit for crafting high-quality breads that will impress both friends and family. So, roll up your sleeves, gather your ingredients, and prepare to embark on this rewarding culinary adventure.
The Ingredients: Building Blocks of Artisan Bread
The foundation of any great bread lies in its ingredients. While basic bread recipes usually require just four key components—flour, water, yeast, and salt—each ingredient plays a crucial role in the final outcome. Understanding these ingredients can drastically improve your baking results.
Flour
Flour is arguably the most important ingredient in bread-making, as it provides the structure and body to the loaf. Artisan bread typically benefits from high-protein flours, such as bread flour, which has a protein content of 12-14%. The higher protein content helps develop gluten, the network of proteins that gives bread its chewy texture.
- Bread Flour: Ideal for yeasted breads with good protein content.
- All-Purpose Flour: Versatile but lower in protein; good for softer bread.
- Whole Wheat Flour: Adds flavor and nutrition; requires hydration adjustments.
- Rye Flour: Offers depth of flavor; use in combination with other flours for balance.
When measuring flour, it's important to weigh rather than scoop to ensure accuracy. A standard cup of flour can weigh anywhere from 120 to 140 grams based on density and packing, which can lead to inconsistent results if measured incorrectly.
Water
Water is essential not only for hydrating the flour but also for activating the yeast and allowing gluten to develop. The quality of water matters; if your tap water has a strong chlorine taste, consider using filtered or bottled water.
- Ideally, water should be around 100-110°F (38-43°C) for activating yeast. Too hot, and you'll kill the yeast; too cold, and it may not activate properly.
Water also influences the dough's hydration level, which can radically change the texture of the final loaf.
Yeast
Yeast is the living organism responsible for fermentation, the process that gives bread its rise. There are various types of yeast available:
For beginners, active dry yeast is often the easiest to use, but experimenting with sourdough can yield incredible results and develop your skills.
Salt
Salt is critical for flavor and also for controlling yeast activity. It strengthens gluten and helps to create a more structured crumb. In general, you should use about 1.5-2% of the flour weight in salt.
Understanding and perfecting these foundational ingredients is the first step toward creating artisan bread that is not only delicious but also impressive.
The Techniques: From Mixing to Shaping
Once your ingredients are prepped and measured, the next step is to learn the key techniques that transform them into a beautiful loaf of artisan bread. Each stage of bread-making plays a vital role in developing flavor, texture, and structure.
Mixing the Dough
Mixing brings the ingredients together and begins the gluten development. This can be done by hand or with a stand mixer fitted with a dough hook.
1. Combine flour and salt in a large bowl.
2. In a separate bowl, mix water and yeast until dissolved.
3. Gradually add the yeast mixture to the flour, stirring with a wooden spoon or your hands until it forms a shaggy dough.
1. Attach the dough hook and add flour and salt to the bowl.
2. With the mixer on low speed, slowly add the yeast mixture until the dough forms an elastic ball.
Kneading is a critical step that develops gluten, which is essential for bread structure.
Kneading the Dough
Kneading is where the magic begins. As you knead the dough, you are developing the gluten structure that will trap gases from the fermenting yeast, creating a light and airy loaf.
1. Turn the dough out onto a floured surface.
2. Using the heel of your hand, push down and away from you.
3. Fold the dough back towards you and rotate a quarter turn.
4. Repeat the process for about 8-10 minutes until the dough is smooth and elastic.
The dough should pass the windowpane test; when pulled, it should stretch without tearing, indicating that gluten has developed effectively.
Fermentation: The Magic of Time
Fermentation is where the dough develops its flavor and structure. During this time, the yeast consumes the sugars in the flour, producing carbon dioxide and alcohol.
- Place the kneaded dough in a lightly greased bowl, cover with plastic wrap or a damp dish towel, and let it rise until doubled in size, usually about 1-2 hours at room temperature.
- You can also opt for a longer, slower rise in the refrigerator (cold fermentation) for 12-24 hours, which develops deeper flavors.
During the first rise, you can perform stretch and folds to strengthen the gluten. Every 30 minutes, gently stretch the dough and fold it over itself several times.
Shaping the Dough
Proper shaping is crucial for an artisan bread's final appearance and texture. The aim is to create surface tension on the loaf’s exterior while maintaining the integrity of the inside.
1. Once the dough has risen, turn it out onto a lightly floured surface.
2. Gently flatten it into a rectangle, being careful not to deflate it completely.
3. Fold the top third down to the center, then the bottom third up, creating a neat package.
4. Flip the dough over and shape it into a ball by cupping it and pulling it towards you on the surface.
Final Proofing
After shaping, the dough needs a second rise or proof before baking. This usually takes about 30-60 minutes.
Knowing when your dough is ready to bake is crucial. It should be puffy but not doubled in size and should spring back slowly when gently pressed.
Baking: The Crucial Step
The act of baking itself is vital in determining the final outcome of your artisan bread. There are several factors to consider that will affect the baking process, including temperature, steam, and timing.
The Importance of Oven Temperature
Baking artisan bread at the right temperature is essential for achieving the perfect crust. Preheat your oven to a high temperature, typically between 450°F to 500°F (232°C to 260°C). This allows for an initial burst of heat that helps the dough spring up, a phenomenon known as oven spring.
Introducing Steam
Steam in the oven during the first part of baking creates a moist environment that prevents the crust from hardening too quickly, leading to better oven spring and a desirable crust texture.
- Place a cast iron skillet on the bottom rack of the oven while preheating. When your bread goes in, pour a cup of hot water into the skillet to generate steam.
- Alternatively, you can use a spray bottle to mist the oven during the first few minutes of baking.
Baking Times and Testing for Doneness
The baking time will vary based on the type of bread and its size. A standard loaf will generally take about 25-35 minutes. You can check for doneness in a couple of ways:
Cooling the Bread
Once baked, allow your bread to cool on a wire rack. This step isn’t just about letting it cool; it also allows moisture to escape, preventing the crust from becoming soggy. Let it cool completely before slicing, usually at least 1 to 2 hours. This waiting period also allows the crumb to set.
Common Artisan Bread Mistakes and How to Avoid Them
Even experienced bakers encounter challenges in creating artisan bread. Understanding potential pitfalls can save you time and frustration, leading to more successful bakes.
Over-Kneading
While gluten development is crucial, over-kneading can lead to a tough or rubbery texture. If you’re using a stand mixer, it’s especially easy to overdo it.
Under-proofing
An under-proofed loaf can lead to dense bread that doesn't rise well during baking.
Using the Wrong Flour
Not all flours are created equal, and using the wrong type can drastically change your result.
Unpredictable Oven Conditions
Ovens can have hot or cold spots, which can lead to uneven baking.
Creative Variations on Artisan Breads
Once you’ve mastered the basics of artisan bread-making, the fun truly begins. There are countless ways to personalize your loaves, creating unique flavor profiles and textures that excite the palate.
Flavored Breads
Adding various ingredients can create delightful flavor variations. Here are a few ideas:
Sweet Bread Variations
Don’t be afraid to explore the sweeter side of artisan bread. Here are some options to consider:
Specialty Breads
Once you’re comfortable with basic techniques, challenge yourself with more complex forms:
Conclusion
Mastering the art of artisan bread is a fulfilling journey that rewards your efforts with the most delicious and aromatic creations. With a solid understanding of ingredients, techniques, and nuances of the baking process, you have the tools at your fingertips to create perfect loaves, whether you’re preparing a comforting sandwich bread or an impressive centerpiece for holiday gatherings. Remember that each loaf carries the influence of the time and techniques employed, allowing you to express your personality and creativity through every bake.
Engaging in this craft may require patience and practice, but with every loaf you make, you not only improve your skills but also deepen your love for baking. So, embrace the process, enjoy the scents that fill your kitchen, and before you know it, you'll be known as the artisan bread aficionado among your friends and family. Happy baking!
Word Count: 2,115




Get the Next Recipe
Weekly recipes, techniques, and gear picks — straight to your inbox.
