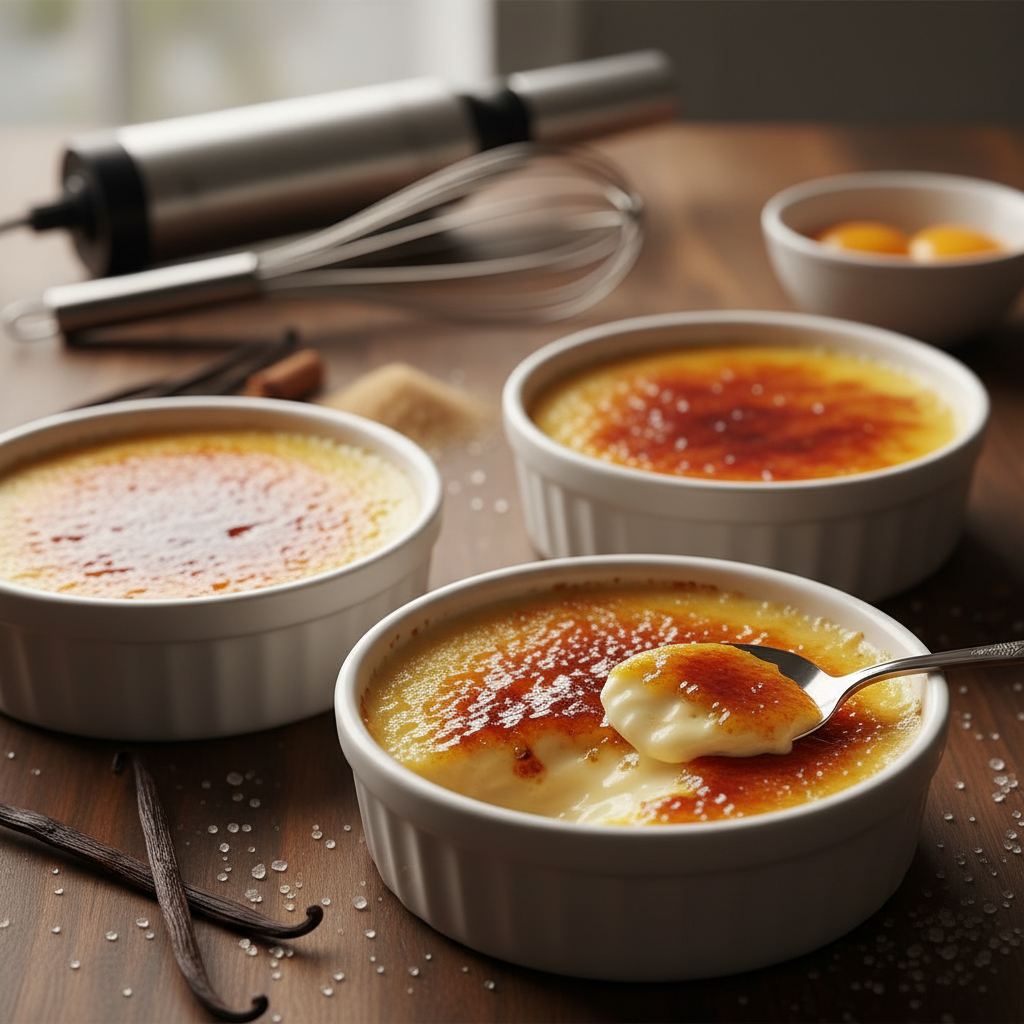
Mastering the Art of Crème Brûlée: Techniques for the Ultimate Custard and Caramelized Top
Crème brûlée, a beloved French dessert, elegantly combines a velvety custard base with a caramelized sugar topping that shatters like glass. Its French name translates to "burnt cream," which aptly describes the dessert's defining feature: the sweet, crispy layer of caramelized sugar that contrasts beautifully with the rich, creamy custard beneath. Despite its sophisticated visage, crème brûlée is surprisingly easy to master, making it a perfect choice for home cooks looking to impress dinner guests or simply indulge in a little self-care after a long day.
The allure of crème brûlée lies not only in its taste but also in the ritual of preparing it. As you whisk together eggs, cream, and sugar, you immerse yourself in the world of balance: sweet and rich custard paired with the slightly bitter crunch of caramelized sugar. The transformation from a silky batter to a luxuriously smooth custard takes both attention and patience, while the ritual of caramelizing the sugar invokes a sense of theatricality that elevates this humble dessert into something extraordinary. To truly embrace the art of making crème brûlée, one must respect the techniques that yield the perfect texture, flavor, and finish.
In this comprehensive guide, we will explore the art of making crème brûlée from start to finish—breaking down the essential techniques, ingredient ratios, and expert tips that you need to create the ultimate custard and achieve a flawless caramelized top. Whether you are a seasoned home cook or just beginning your culinary journey, this guide will equip you with the knowledge and skills to confidently whip up this classic dessert. Prepare to wield your blowtorch and discover the secrets behind achieving that perfect crack—the first gratifying moment of enjoying a well-made crème brûlée.
Understanding the Ingredients
Before diving into the techniques of making crème brûlée, it is crucial to understand the key ingredients that play a role in this dessert's success. Each ingredient contributes its unique flavor and texture to the final product, so quality is paramount. Let's break down each component to appreciate its importance fully.
Cream
Heavy cream is the star of the show in crème brûlée, providing rich flavor and smooth texture. The ideal fat content for heavy cream is around 36%, which lends the custard its luxurious mouthfeel. While some recipes may suggest substituting half-and-half, be warned that this will compromise the richness and overall silkiness of the custard. For a truly indulgent crème brûlée, always opt for the highest quality heavy cream you can find.
Egg Yolks
Egg yolks are essential for creating the custard's rich consistency. Typically, a standard crème brûlée recipe calls for four to six yolks, depending on the amount of cream used. The yolks not only thick the custard but also add a depth of flavor that enhances the dessert's overall allure. When choosing eggs, look for fresh, organic yolks with a vibrant yellow hue, as this indicates quality.
Sugar
Granulated sugar is the main sweetener in the custard mixture and is also used for the caramelized top. For optimal results, use fine granulated sugar to ensure it dissolves easily in the cream and egg yolks. You will need about one-half cup of sugar for a standard batch, but feel free to adjust to your taste preferences. Additionally, consider experimenting with vanilla sugar or other flavored sugars for a unique twist.
Flavoring
Traditionally, crème brûlée is infused with vanilla, often in the form of a whole vanilla bean or pure vanilla extract. Using a vanilla bean adds delightful flecks to the custard and a more rounded flavor profile. If using a bean, split it lengthwise and scrape the seeds into the cream, allowing it to steep before mixing with the egg yolks. If you're in a pinch, quality vanilla extract will suffice, though it may lack the same complexity. Furthermore, for adventurous cooks, consider flavoring your crème brûlée with espresso, citrus zest, or herbs like rosemary or lavender for a creative twist.
The Custard Base
With a solid understanding of the ingredients, let’s delve into the process of crafting the perfect custard base for your crème brûlée. Achieving the right consistency in your custard is crucial for a successful outcome.
Step-by-Step Process
Straining and Cooling
Once the custard is cooked to perfection, the next steps are equally important for a smooth texture.
Baking and Setting the Custard
Achieving the perfect texture is a dance of time and temperature. Baking crème brûlée is an art that can seem intimidating, but with the right approach, you can create a custard that is smooth and creamy.
Water Bath Technique
A water bath (or bain-marie) is essential in ensuring that your crème brûlée custard sets evenly without overcooking. Here’s how to set it up:
Baking Time
Once your setup is ready, place the baking dish in the oven and bake for about 25-30 minutes. The custard is ready when it is set around the edges but still slightly jiggly in the center.
To check for doneness, gently shake the ramekin—if the center has a slight jiggle, it's perfect! Overbaking will lead to a grainy texture, so vigilance is key.
Chilling
After baking, remove the ramekins from the water bath and let them cool at room temperature for about 30 minutes. Once cooled, cover them with plastic wrap and refrigerate for at least two hours or up to two days. Chilling not only allows the flavors to develop but also gives you a refreshing cold dessert to enjoy.
Caramelizing the Sugar Top
The moment of truth in crème brûlée preparation comes when it’s time to caramelize the sugar topping. This is where the magic happens, and the dessert transforms into its final form.
Preparing the Topping
The Caramelization Methods
There are two popular methods for caramelizing the sugar topping: using a kitchen blowtorch or broiling in the oven.
#### Using a Blowtorch
The preferred method for many home cooks is the blowtorch, as it allows for precise control over the caramelization process.
#### Oven Broiling Method
Alternatively, if you don’t have a blowtorch, you can use the broiler—though it requires more attentiveness.
"The perfect crème brûlée is a testament to balance—the richness of the custard and the light crack of the caramelized sugar work in harmony.”
Serving Your Crème Brûlée
Now that your crème brûlée is ready, let’s explore some appealing ways to serve this elegant dessert. Presentation is key when it comes to impressing guests, and crème brûlée lends itself beautifully to creativity.
Design Considerations
- Fresh berries (raspberries or strawberries)
- A sprig of mint
- A dusting of cocoa powder
- A drizzle of chocolate sauce
Complementary Flavors
Pairing your crème brûlée with complementary flavors can enhance the dining experience. Consider serving it alongside:
Serving Temperature
The beauty of crème brûlée lies in its contrast between the cold custard and warm caramelized sugar. Serve immediately after achieving that perfect crust so diners can enjoy the delightful interplay between temperatures.
Troubleshooting Common Issues
Even with the best intentions, issues can crop up in the process of making crème brûlée. Here are common problems and how to address them.
Curdled Custard
If your custard has a grainy texture, it’s likely that it was overheated during cooking. To avoid this, always monitor your cooking temperature carefully with a thermometer, keeping the custard between 170-175°F (77-80°C).
Floppy Caramel Top
If the sugar does not harden properly after caramelization, you may have applied too much sugar or not let it cool long enough. Remember, thin layers of sugar are easier to caramelize and achieve a satisfying crunch.
Uneven Cooking
If you find that your custard has set unevenly, it may not have been cooked in the water bath correctly. Ensure that the water comes halfway up the sides of the ramekins and that they are not overcrowded in the baking dish.
"Like any culinary art, mastering crème brûlée requires practice and patience. Each attempt teaches you something new about balance and flavor."
Final Thoughts
In conclusion, mastering the art of crème brûlée is not just about following a recipe—it's about appreciating the process and perfecting the techniques involved. The delightful interplay of flavors and textures in this classic dessert embodies the essence of French cuisine. With careful attention to high-quality ingredients, proper cooking methods, and a flair for presentation, you too can create a stunning version of crème brûlée that will leave your guests awestruck.
As you embark on your crème brûlée journey, remember that practice makes perfect. Don’t be discouraged by any mishaps along the way; instead, use them as opportunities to learn and refine your skills. With each batch, you will develop a deeper understanding of custard science and the art of caramelization. Whether enjoyed as a celebratory finish to a dinner party or a simple indulgence on a quiet evening, crème brûlée is a dessert that rewards patience and passion. So embrace the challenge, and prepare to impress with your newfound skills in this timeless culinary classic!


Get the Next Recipe
Weekly recipes, techniques, and gear picks — straight to your inbox.
