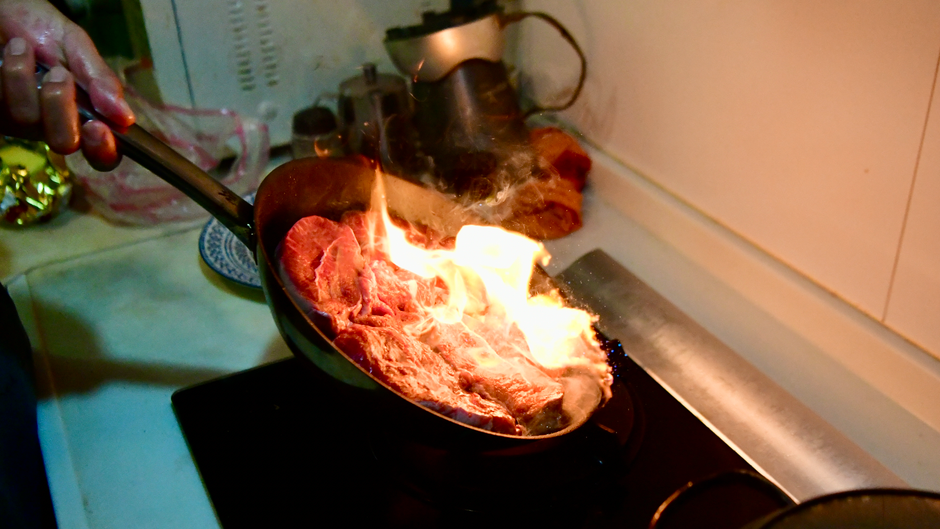
Mastering the Art of Pan Searing: Temperature, Timing, and Technique
Mastering the art of pan searing is a skill that every home cook should strive to achieve. This cooking technique not only elevates the flavor profile of proteins, but it also adds a beautiful, appetizing crust that is the hallmark of well-prepared meals. The magic of pan searing lies in its simplicity, yet it requires a delicate balance of temperature, timing, and technique. Understanding how to harness these elements will empower you to create stunning dishes that are both restaurant-worthy and impressively easy to prepare.
At the core of pan searing is the Maillard reaction, a chemical process that occurs when proteins and sugars undergo a series of reactions at high temperatures, resulting in deliciously complex flavors and that tantalizing golden crust. The true beauty of pan searing emerges when you harness the right cooking temperatures and pan choices, allowing you to transform a simple cut of meat or vegetables into a culinary masterpiece. Whether you're a beginner looking to improve your skills or an experienced cook wanting to refine your technique, this guide will equip you with the essential knowledge to master pan searing.
As you embark on this culinary journey, you will learn about the various types of pans available, the optimal temperatures for different proteins, and how to ensure that your food is perfectly cooked throughout. You’ll also discover tips from professional chefs and insights into the science behind cooking. With practice, patience, and an understanding of the fundamental concepts, you’ll capture the essence of pan searing and wow your family and friends at your next meal.
Understanding the Basics of Pan Searing
Before diving into the nitty-gritty of pan searing, it's important to have a solid understanding of the fundamentals. Knowing what pan to use, how heat is applied, and the role of oil will lay a strong foundation for your cooking skills.
The Right Pan for the Job
Choosing the right pan can significantly affect the outcome of your dish. While you might be tempted to use any skillet you have on hand, the best choices for pan searing are typically heavy-bottomed pans. Here are the top options:
- Retains heat exceptionally well, allowing for even cooking and excellent crust formation.
- Requires seasoning but offers unparalleled cooking results once maintained.
- Offers superior performance, especially for high-heat cooking.
- Heats evenly and is non-reactive, which is great for acidic foods.
- Not ideal for high-temperature searing, but can be used for delicate proteins such as fish.
- Convenient for easy cleanup, though it may not provide the same depth of flavor.
Heat is Everything
The intensity of heat is crucial when it comes to pan searing. When the temperature is just right, moisture evaporates quickly, allowing the exterior to caramelize beautifully while keeping the inside tender and juicy. Here are key points to consider:
- Regardless of the pan chosen, preheat your pan until it's hot enough to slightly smoke. Generally, this is around 375°F to 400°F (190°C to 204°C) for most proteins.
- For beef, lamb, and pork, aim for temperatures around 400°F (204°C).
- For chicken and turkey, a slightly lower temperature of around 375°F (190°C) is generally sufficient.
- For seafood, especially delicate fish, try around 350°F (175°C) to avoid sticking and tearing.
Choosing the Right Oil
Oil not only adds flavor but also helps in achieving that perfect sear. Here’s what you need to know about using oil effectively:
- Use oils with high smoke points such as canola, grapeseed, or avocado oil. Avoid oils like olive oil, which has a lower smoke point and may burn at high temperatures.
- You don’t need much to start with—just enough to lightly coat the bottom of your pan. Typically, 1 to 2 tablespoons will suffice.
- For an added flavor boost, consider adding a pat of butter towards the end of cooking. It can enhance the richness of your dish and promote browning.
“A perfectly seared dish is often the result of patience and a willingness to let the heat do its work.”
The Searing Process: Step-by-Step
Now that you have a grip on the basics, it’s time to delve into the actual searing process. Below, you'll find a step-by-step guide that takes you through every step required for perfect results.
Step 1: Prepare Your Protein
Preparation is key when it comes to achieving that perfect sear. Ensure you have the following preparations in place:
- Allow your protein to sit at room temperature for about 30 minutes before cooking. This encourages even cooking throughout.
- Use paper towels to remove excess moisture. A dry surface helps achieve a perfect sear.
- Generously season your protein with salt and pepper on both sides. This not only enhances flavor but also helps create a flavorful crust.
Step 2: Preheat Your Pan
With your protein ready, it’s time to preheat your pan. Here’s how to do it correctly:
- Place your selected pan on medium to medium-high heat. Give it a few minutes to heat up.
- Flick a few drops of water into the pan; if they dance and evaporate quickly, it’s hot enough!
Step 3: Add Oil and Protein
Once your pan is properly heated, you can proceed to add the oil and protein.
- Pour in 1 to 2 tablespoons of your chosen oil, ensuring it coats the bottom evenly.
- Place your protein into the pan away from you to avoid splatters. Let it sit without moving it to establish a good sear.
Step 4: Timing is Crucial
Timing can make or break your searing efforts. Different proteins require different cooking times:
- For medium-rare, sear for about 3 to 4 minutes per side for cuts around 1 inch thick. Adjust based on desired doneness.
- A standard chicken breast should be seared for about 5-7 minutes on one side before flipping, cooking an additional 5-7 minutes on the other side.
- Sear fish for about 2-4 minutes on the first side and then another 2-3 minutes after flipping.
Step 5: Resting Your Protein
After achieving that golden crust, it’s essential to let your protein rest.
- Transfer your seared protein to a plate and cover it loosely with foil to keep warm.
- Allow it to rest for 5 to 10 minutes. This redistributes the juices, resulting in tender, juicy meat.
“Patience is key. Let it rest, and you’ll reap the rewards when you cut in.”
Advanced Techniques for Perfect Searing
For those who wish to elevate their searing technique even further, there are several advanced methods you can adopt for unparalleled results in your culinary pursuits.
Basting for Flavor
Basting allows flavors to penetrate the meat further while also preventing it from drying out. To effectively baste, follow these steps:
- When your protein is nearly done, add a couple of tablespoons of butter and aromatics like garlic, thyme, or rosemary to the pan.
- Tilt the pan slightly, allowing the melted butter to pool on one side.
- Using a spoon, baste the melted butter over your protein as it cooks. This not only enhances flavor but also creates a richer, deeper sear.
Using a Two-Step Method
For thicker cuts of meat, utilizing a two-step method can ensure perfectly cooked steak every time.
- Start by searing your protein in a hot pan for 3-4 minutes on each side.
- Transfer the pan to a preheated oven at 400°F (204°C) to finish cooking the meat for an additional 10-15 minutes depending on thickness.
Achieving Different Doneness Levels
Sometimes, it’s crucial to achieve different levels of doneness in various proteins. Here’s how to navigate this in your cooking:
- Beef:
- Rare: 120°F to 125°F (49°C to 52°C)
- Medium-Rare: 130°F to 135°F (54°C to 57°C)
- Medium: 140°F to 145°F (60°C to 63°C)
- Pork:
- Must reach 145°F (63°C) for safety.
- Chicken:
- Safe to eat at 165°F (74°C).
Common Mistakes to Avoid When Pan Searing
Even experienced cooks can fall prey to common pitfalls when pan searing. Recognizing and avoiding these can save your dish and boost your culinary confidence.
Overcrowding the Pan
One of the biggest mistakes is overcrowding the pan. This leads to steaming rather than searing.
- Cooking in batches can help maintain the ideal temperature during the cooking process.
- Ensure there’s adequate space between each piece to allow for proper browning.
Not Allowing Proper Resting Time
It’s tempting to remember a dish as soon as it's cooked, but this impatience can negatively affect the juiciness of your protein.
- Always allow your meat to rest. Expand this time further for thicker cuts.
Using Low Heat
Starting with too low a heat can lead to insufficient searing, producing a lack of flavor and texture.
- Don’t be afraid of heat. High temperatures are essential for achieving a proper sear.
Versatile Applications of Pan Searing
Once you have mastered the art of pan searing, the applications are virtually limitless. You can sear proteins such as meats, poultry, or fish, and even special vegetables to elevate their flavors. Here are some versatile applications worth exploring.
Searing Meats and Poultry
Meat provides the most straightforward and rewarding canvas for searing technique. From steaks to pork chops, the principles remain consistent.
Searing Fish
Fish can be delicate but incredibly rewarding. Follow these specific pointers for fish:
- Opt for thicker cuts like salmon or tuna, which can withstand high heat without falling apart.
- Allow the first side to sear without moving it to create that golden crust.
- Searing with the skin side down first gives flavor and texture.
Searing Vegetables
Pan-searing isn't reserved solely for proteins; many vegetables benefit from this method, providing a caramelized, richly flavorful edge.
Remember: The technique of pan-searing can also be applied to dishes like frittatas or paellas, embracing the same principles to create depth in flavor and texture.
Conclusion
Mastering the art of pan-searing is a gateway to elevating your culinary skills. Through understanding the importance of temperature, timing, and technique, you can achieve mouthwatering results that delight the senses. With practice, you’ll develop the intuitive grasp of heat management, pan selection, and seasoning necessary to create professional-quality seared dishes at home.
Whether it's a perfectly golden steak, succulent chicken, or tender fish, the key to a successful sear lies in your preparation and patience. Keep in mind advanced techniques like basting, the two-step method for thick cuts, and the correct internal temperatures for doneness.
As you continue to explore the world of cooking, let the mastery of pan searing be a fundamental skill that you build upon. With each practice, you'll not only perfect the method but also gain a deeper appreciation for the intricate dance of heat and flavor that occurs in your kitchen.
Now, roll up your sleeves, grab your favorite pan, and start searing your way to culinary excellence. Happy cooking!




Get the Next Recipe
Weekly recipes, techniques, and gear picks — straight to your inbox.
