Mastering the Heat: A Home Cook’s Guide to Understanding Stovetop Temperature Control
Cooking on a stovetop may seem straightforward—turn on the burner, wait a moment, and then cook—but mastering temperature control can elevate your home cooking from good to exceptional. Whether you’re searing a steak, simmering a delicate sauce, or gently sautéing vegetables, understanding how heat moves through your cooktop and how to regulate it precisely is essential. Many home cooks underestimate the importance of temperature management, often relying on guesswork rather than proven techniques, which can lead to uneven cooking, burnt edges, or undercooked centers. Learning the nuances of stove heat allows you to cook smarter, faster, and with more confidence.
Every stovetop is slightly different—whether gas, electric, or induction—and each type responds uniquely to adjustments. This variability means it’s crucial to familiarize yourself with the characteristics of your particular setup. Recognizing how your burners or plates react to different zones and settings will help you develop a more intuitive sense of when to turn the heat up or down. The goal is to harness precise, consistent heat, creating an environment where your ingredients cook evenly, flavors develop fully, and your dishes reach their ideal texture and flavor profile. That mastery begins with understanding fundamental temperature ranges and how to control them effectively.
In this comprehensive guide, we’ll delve into the science behind stovetop heat, practical methods for controlling and monitoring temperature, and expert tips to help you cook like a pro. Whether you’re simmering stew or searing scallops, the principles remain the same: know your heat, manage it well, and always pay attention to your ingredients. The secret to perfect cooking isn’t just about following recipes—it’s about developing a keen sense of heat and how to manipulate it to serve your culinary goals.
Understanding Your Stovetop Types and Heat Sources
The foundation of mastering temperature control starts with understanding your specific stovetop. Different heat sources respond uniquely to adjustments and possess distinct characteristics that affect how you cook. Knowing the nuances of gas, electric, and induction cooktops will give you a critical advantage.
Gas Stoves
Gas stoves are favored by professional chefs and home cooks alike because they offer immediate, visual feedback. You can see the flame and instantly adjust the heat by turning the knob. Gas burners provide a wide range of temperatures, from a gentle simmer to a high, roaring flame for rapid boiling or searing.
However, gas burners can be less precise than some modern induction stoves. The size and strength of the flame can vary depending on the burner and the regulator. Additionally, the heat distribution may not be as uniform, especially with older or less expensive models. A good rule of thumb when cooking with gas is to observe the size and intensity of the flame rather than rely solely on numbers, which are often arbitrary on the knob.
**Pro Tip:** Always match your cookware to the size of your burners. A large pot on a small flame wastes energy and can lead to uneven heating.
Electric Stoves
Electric stoves have a different response curve—they tend to heat up more slowly and cool down at a slower rate when turned off or reduced. The heating elements glow red or are marked with numbered settings, typically from 1 to 10 or 1 to 12. Adjusting the dials changes the resistance in the coil or the power delivered, resulting in variations in temperature.
Electric stoves are appreciated for their steady, reliable heat once they reach the desired temperature. However, their slower response makes managing dynamic cooking tasks like sautéing or stirring more challenging. It’s common to experience lag—the result of residual heat stored in the coil—even after reducing the heat.
**Chef’s Tip:** Always give your electric stove a few moments to adjust after changing temperature settings, especially when switching from a high to a low heat.
Induction Cooktops
Induction technology is a game-changer for home cooks seeking precise and rapid heat control. Instead of heating the cooktop surface, induction uses electromagnetic fields to directly heat compatible pots and pans. As a result, temperature adjustments are instantaneous—you turn the knob or digital control, and the heat responds immediately.
Moreover, induction stoves often provide more accurate temperature readings and a greater range of control. Many models allow you to set exact temperatures (e.g., 135°F for simmering or 375°F for frying) or specify power levels with great precision. This level of control enables chefs to execute delicate techniques like tempering chocolate or simmering delicate sauces with ease.
**Important:** Ensure your cookware is **induction-compatible**—ferrous metals like cast iron or certain stainless steels work best.
Comparing Differences in Response and Control
| Feature | Gas | Electric | Induction |
|---------------------------|----------------------------|----------------------------|------------------------------|
| Response Time | Immediate to quick | Slow to moderate | Instantaneous |
| Precision of Control | Good, but manual visual cue| Moderate, dial-based | Excellent, digital settings |
| Heat Range | Wide, from simmer to high | Wide, from 1 to 10+ | Very precise with specific temps |
| Ease of Monitoring | Visual flame | Visual coil glow | Digital readouts and timers |
Understanding these differences helps home cooks choose techniques best suited to their equipment and cooking style. Regardless of your stovetop type, the key is to develop a sense of how your heat responds when making adjustments, which leads us to the next critical skill: estimating and controlling heat levels.
The Science of Heat and Temperature Ranges
Cooking involves transforming raw ingredients into flavorful dishes through controlled application of heat. The science behind heat transfer—conduction, convection, and radiation—dictates how heat affects your ingredients. Grasping these principles will help you tailor your techniques for perfect results.
The Basics of Temperature and Cooking
In culinary terms, temperature ranges can be broadly divided into several zones, each suited to different techniques:
How Your Stove Implements These Ranges
Different stoves and burners will correspond to these temperature zones uniquely. For example:
To truly master temperature control, you need to learn how your specific stove responds to different settings and how those settings translate into actual food temperatures.
**Professional Tip:** Use an **infrared thermometer** to test the surface temperature of your pans. This gives you real data to calibrate your understanding of what each setting delivers.
The Relationship Between Temperature and Doneness
One of the most common questions home cooks have is: “What temperature should I aim for?” The answer depends heavily on what you’re cooking. For example:
Knowing the desired internal temperature of your ingredients—for meats, for example—is crucial for food safety and perfect texture.
**Expert insight:** Use a **digital meat thermometer** for precise readings when roasting or pan-frying proteins.
Understanding these temperature ranges and their impact on your dish is essential for effective heat management. But how do you translate this knowledge into practical control? That’s what we’ll explore next.
Techniques for Managing and Monitoring Temperature
Achieving the right temperature starts with technique—how you turn your knobs, how you preheat your pans, and how you respond to your stove's reactions. Developing a tactile sense for heat is a skill honed with practice, but there are also specific tools and methods you can employ to control and monitor your cooking more precisely.
Turning the Heat: Adjusting Your Burner Knob or Control
Step 1: Start with a baseline—set your burner to a medium heat (around 4-6 on a scale of 1-10 or a medium setting on dial-controlled stoves). Observe the response:
Step 2: Make incremental adjustments rather than drastic turns, especially when trying to reach specific temperatures. Use these guidelines:
Tip: For electric and induction stoves, changes are often more linear, but for gas stoves, watch the flame size as a visual cue for heat.
**Important:** Always anticipate the delay in response. Electric and induction cooktops may take several seconds to reflect a change, while gas responds immediately.
Preheating and Its Role in Temperature Control
Preheating your cookware ensures uniform heat distribution right from the start, reducing hot spots and helping maintain consistent temperature during cooking.
**Chef’s tip:** For delicate sauces or melting chocolate, lower your heat after preheating to prevent scorching.
Using Tools to Monitor Temperatures
While intuition and visual cues are valuable, tools can aid in achieving precise control:
**Expert advice:** Combining visual cues with temperature readings yields the best control—trust your senses, but verify with tools.
Managing Heat During Cooking
As you cook, remember that your ingredients and cookware can influence heat transfer:
By practicing these techniques, you'll develop a more instinctive sense of heat and learn when to turn the dial up or down.
The Art of Searing, Sautéing, and Beyond
Precision in temperature control becomes most apparent when executing specific techniques. Proper searing, sautéing, boiling, and simmering depend heavily on understanding and managing heat precisely.
Searing: High Heat for a Perfect Crust
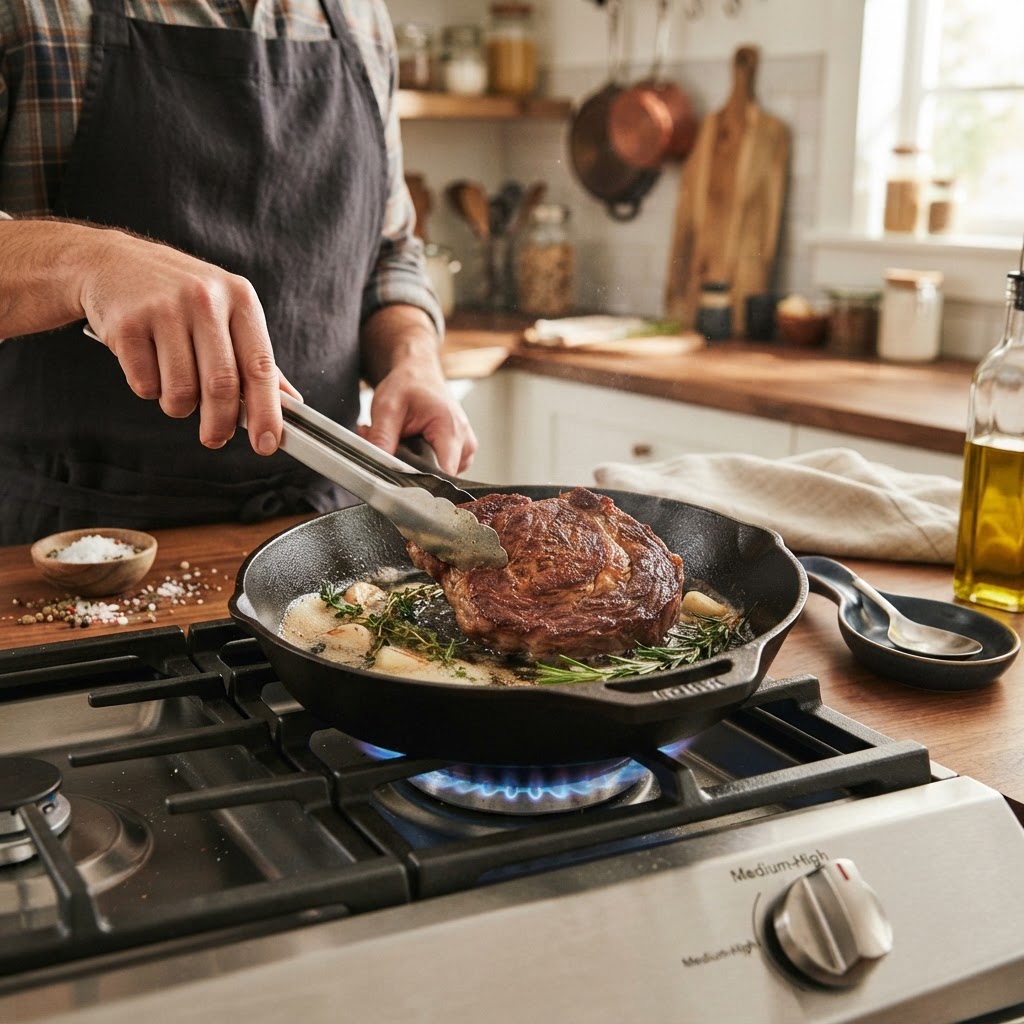
Searing is about achieving a caramelized surface—a Maillard reaction—which occurs best at high temperatures (around 375°F to 450°F).
**Tip:** Do not move the food around immediately. Let it develop a crust, which typically takes 1–3 minutes per side, depending on thickness.
Sautéing and Stir-Frying: Managing Quick, Controlled Heat
For sautéing vegetables or stir-frying, maintaining medium-high heat is essential. This zone, typically around 375°F, allows for rapid cooking without burning.
**Chef’s tip:** Use a **wok or wide skillet** to maximize heat retention and surface area, facilitating even cooking.
Simmering and Gentle Cooking
When simmering sauces, stocks, or braises, aim for noxious bubbles that break the surface slowly—around 185°F to 205°F.
**Technique note:** Use a **lid** for faster heating, but lift periodically to check and stir.
Temperature Control During Boiling and Reduced Sauces
Faster boiling occurs at near or above 212°F (100°C), where water turns to vapor. For rapid boiling:
Controlling this properly prevents over-reduction or evaporation of delicate flavors.
Troubleshooting Common Heat-Related Problems
Even seasoned cooks encounter challenges when managing heat—burning, sticking, undercooking. Here are common issues and how to fix them through better temperature control.
Burning and Overcooking
Cause: Heat too high or ingredients left unattended.
Solution:
Sticking and Burning Food
Cause: Insufficient preheating, low-quality cookware, or excessive heat.
Solution:
Under- or Over-cooked Items
Cause: Inconsistent heat, uneven heat distribution, or misjudged timing.
Solution:
Final Thoughts
Mastering stovetop temperature control embodies both science and art. It requires an understanding of your specific equipment, the physical principles behind heat transfer, and developing an intuitive sense of how your ingredients respond to different levels of heat. By observing visual cues—such as bubbling, sizzling, and color changes—and supplementing those observations with simple tools like thermometers, you can achieve perfect results in a variety of techniques.
Remember, practice makes perfect. Spend time experimenting with different settings, testing your equipment's responses, and becoming familiar with how each adjustment affects your dish. Over time, you'll build confidence, reduce guesswork, and craft more flavorful, beautifully cooked meals consistently. Cooking is about patience, attentiveness, and understanding—master the heat, and you master the craft.
Key Takeaways
Keep practicing, stay curious, and turn your stovetop into an extension of your culinary intuition. With mastering the heat, you’ll unlock a new level of confidence and precision in your home cooking journey.

Get the Next Recipe
Weekly recipes, techniques, and gear picks — straight to your inbox.
