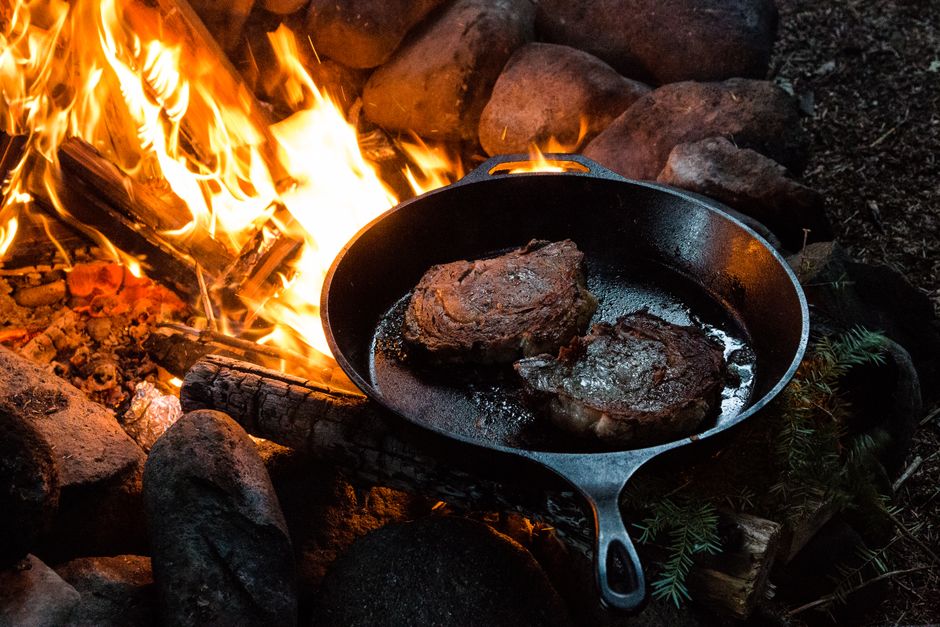
Mastering the Perfect Sear: The Science Behind Restaurant-Quality Crust
Achieving that elusive restaurant-quality crust at home may seem daunting, but it’s entirely within reach as long as you understand the science behind a perfect sear. When you cook protein—be it meat, fish, or even tofu—the goal is to achieve a rich, flavorful exterior while maintaining a tender interior. This golden, crusty layer isn't just for aesthetics; it adds texture, enhances flavor, and creates a pleasing contrast with the moistness inside. Unfortunately, many home cooks often miss the mark, either ending up with a pale, soggy exterior or, conversely, an overcooked, charred surface.
The key to achieving a fantastic sear lies in several fundamental principles: heat, timing, and technique. Each element plays a crucial role: the right temperature allows the Maillard reaction to occur, which is responsible for the browning and flavor development that we associate with expertly seared food. Timing is equally important; knowing how long to leave your protein in contact with the hot surface without prematurely flipping or moving it is vital. Lastly, techniques like patting your meat dry, using the right fat, and understanding your cookware can dramatically affect your results.
In this post, we will delve into the specifics of mastering the perfect sear, breaking down each element in detail. From the science behind the Maillard reaction to practical tips for home kitchens, we aim to equip you with the knowledge needed to elevate your culinary game. So grab your apron, and let’s get started on this flavorful journey.
The Science of Searing
Understanding the Maillard Reaction
Searing is all about flavor, and the Maillard reaction is the unsung hero behind that distinct crust. This complex chemical reaction occurs between amino acids and reducing sugars when food is exposed to heat. The result? A myriad of flavors and aromas that elevate your dish from ordinary to extraordinary. When you drop a steak onto a hot skillet, it's the Maillard reaction that starts transforming the surface, creating a gorgeous brown crust.
The Maillard reaction is best achieved at temperatures between 300°F to 500°F (150°C to 260°C). At lower temperatures, you might find some caramelization of sugars occurring, but the full development of rich, savory flavors won’t happen until you crank up the heat. That said, be cautious; temperatures exceeding 500°F (260°C) can lead to burning rather than browning.
Being mindful of heat application is critical. Using a heavy-bottomed skillet or a cast iron pan can help distribute heat evenly, ensuring that every part of your protein gets that crucial sear. Additionally, preheating your pan is vital; a well-heated surface will give your protein that instant sizzle, locking in moisture and creating the golden crust we all desire.
The Role of Temperature
Getting the right temperature for both your meat and the cooking surface cannot be overstated. For most proteins, you want to start with them at room temperature before they hit the pan. For instance, if you’re cooking a steak, pulling it out of the refrigerator about 30 minutes prior to cooking allows it to warm up and ensures even cooking throughout. A cold piece of protein hitting a hot pan can result in an undercooked center and an overcooked exterior.
A food thermometer is an invaluable tool for achieving perfect doneness and the right sear. Here are some recommended internal temperatures for popular meats:
Remember, proteins will continue to cook slightly after being removed from heat due to residual heat. For example, if you want a medium-rare steak that reaches 135°F (57°C), consider taking it off the heat at around 130°F (54°C).
Timing and Patience
Nobody likes a raw or undercooked piece of meat, so many home cooks tend to flip and prod their proteins, often resulting in a lackluster crust. The best way to achieve a beautiful sear is to let your protein be. The rule of thumb is simple: once food is placed in a hot pan, allow it to cook undisturbed for at least two to three minutes depending on the thickness. This waiting period enables the Maillard reaction to take place effectively.
When you do decide to flip, make sure to use a good pair of tongs rather than a fork. Piercing the meat will release precious juices, leading to a less juicy final product. Instead, slide your tongs under the protein gently, and flip it over carefully.
Essential Techniques for the Perfect Sear
Selecting the Right Fat
The choice of cooking fat plays a crucial role in achieving that desired crust. Not all fats behave the same way under heat. Low smoke-point oils like olive oil may impart a lovely flavor but burn quickly, leading to a bitter taste. Conversely, oils with higher smoke points, such as canola, grapeseed, or avocado oil, can withstand higher temperatures and allow for better searing. For an added layer of flavor, consider combining a high smoke point oil with a small amount of butter. Butter adds richness but has a lower smoke point, so it’s best used in conjunction with a higher smoke point oil.
Here’s a quick reference for the smoke points of common cooking fats:
Pat Dry Before Cooking
One of the simplest yet often overlooked steps is patting your protein dry with paper towels. Moisture on the surface can create steam, preventing that beautiful browning from taking place. When you sear, you want the heat to be in direct contact with the surface of the meat. Drier surfaces create a better sear, so before you even think about seasoning, make sure your protein is as dry as possible.
Don’t Overcrowd the Pan
When it comes to searing, less is more. Overcrowding the pan can drop the temperature drastically, preventing the Maillard reaction from happening effectively. For optimal results, cook in batches if necessary. Ensure there is ample space between each piece, allowing heat to circulate properly. Remember, this is not just about looks; it’s about getting the beautifully caramelized exterior every cook aspires to achieve.
Using the Right Cookware
The cookware you choose can significantly impact the final outcome. Heavy-bottomed pans like cast iron or stainless steel are preferred due to their ability to retain heat and provide even cooking. Non-stick pans generally do not reach the necessary temperatures for proper searing, meaning they often won’t deliver that deeply flavorful crust.
Cast iron is an excellent choice for beginners and advanced cooks alike, as it not only provides great heat retention but can also go from stovetop to oven seamlessly, making it versatile for various recipes. Always remember to preheat your pan for several minutes before adding your fat.
Resting Your Protein
After achieving that perfect sear, don’t rush to cut into your protein. Resting is a crucial step that allows the juices to redistribute throughout the meat. Cutting too soon will result in a dry dish. This is especially important for larger cuts of meat.
A good rule of thumb is to allow your protein to rest for about five minutes for smaller cuts and up to 20 minutes for larger roasts. Tent it loosely with foil to keep it warm while resting.
Tips and Tricks for Home Cooks
Seasoning Effectively
Just because the crust is key doesn’t mean we should neglect seasoning. A good sear relies on salt and pepper to draw moisture out, which accelerates the Maillard reaction. Salt should be applied liberally: consider a 1:1 ratio of salt to protein weight for optimal flavor (i.e., 1 teaspoon of salt per pound of meat).
While seasoning before cooking is standard practice, some chefs prefer to season their proteins right after they’ve seared them, allowing additional flavors to infuse while resting. Regardless of your choice, be sure to avoid seasoning too early, as salt can draw moisture and lead to a wet surface.
Experimenting with Marinades and Spices
Marinades can add layers of flavor but watch the acid levels; too much can make the meat mushy. A balanced marinade typically consists of:
Here is a quick marinade recipe example:
Combine all ingredients and marinate your protein for at least 30 minutes to overnight for richer flavors.
Using a Sous Vide for Perfect Control
While sous vide cooking is often reserved for advanced applications, it offers a foolproof method to achieve perfectly cooked proteins every time. Vacuum-sealing your protein and cooking it at a controlled low temperature allows for uniform doneness from edge to edge while the sear can be performed last to achieve that crispy exterior.
Using sous vide is an effective way to take control over the cooking process, minimizing guesswork and enhancing your culinary prowess.
Types of Protein to Sear
Red Meats
When it comes to red meats like beef or lamb, the cut of meat can significantly impact your searing technique. The ribeye, strip steak, and sirloin are excellent for searing because they have enough fat content, which enhances flavor during cooking.
Chicken
For chicken, thighs are generally better for searing due to their higher fat content compared to breasts. Always be sure to sear skin-on pieces to achieve that delightful crispiness, ensuring the skin is dry and well-seasoned before it hits the pan.
Fish
Fish like salmon or swordfish can deliver beautiful sears as well if treated properly. Make sure the skin-side is dry and seasoned; start cooking skin-side down in a moderately hot pan. For best results, use the following steps:
This technique will yield crispy skin while preserving moisture in the flesh.
Tofu and Vegetables
Even non-meat proteins like tofu can be beautifully seared. Many home cooks skip searing tofu due to its natural moisture, but with pressing to remove excess liquid and marinating beforehand, you can achieve a delightful crust:
Vegetables such as eggplant or roasted bell peppers also respond well to this technique. The principles are similar; ensure they are dry and seasoned properly for the best sear.
Conclusion
Mastering the perfect sear is more than just a cooking technique; it's an art form that combines science, timing, and a bit of culinary intuition. By understanding the principles that govern flavors and textures, you can elevate your home cooking to restaurant-level quality. From selecting the right fats and ensuring your protein is adequately prepped to using suitable cookware and perfecting techniques, every step counts.
Practicing these methods consistently will allow you to experiment with various proteins and establish a routine that capitalizes on the heart of any dish: that delicious, flavorful crust. Whether you’re preparing a classic steak dinner or a marinated tofu dish, the key principles of searing remain the same. Don't shy away from making mistakes along the way; every misstep teaches you something invaluable.
Equipped with this knowledge and an adventurous spirit, you’re ready to take your culinary skills beyond what you thought was possible. Always remember: it’s not just about the sear; it’s about the experience of cooking, understanding your ingredients, and creating something truly exceptional. So go ahead and ignite that flame—your perfect sear awaits!


Get the Next Recipe
Weekly recipes, techniques, and gear picks — straight to your inbox.
