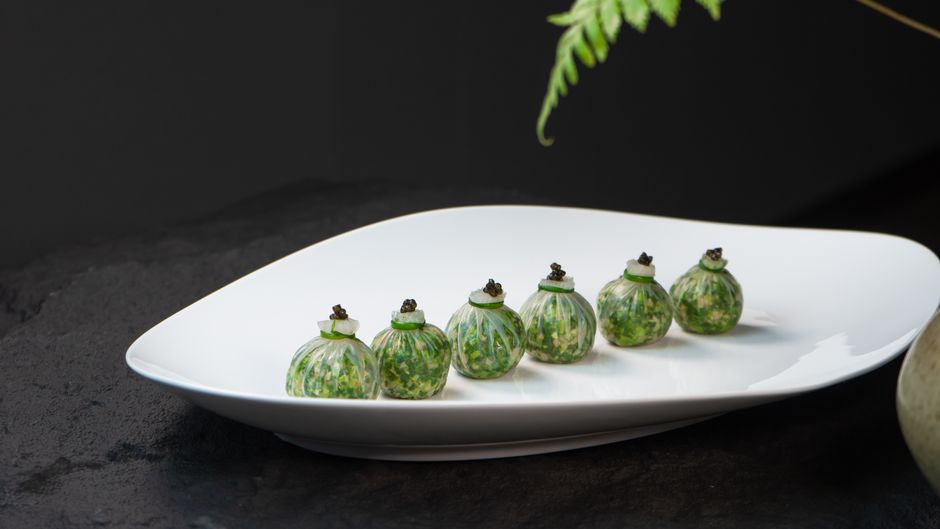
Molecular Gastronomy: Spheres, Gels, and Liquid Nitrogen
Molecular gastronomy has captured the imaginations of chefs and food enthusiasts alike, pushing the boundaries of traditional cooking. This avant-garde technique combines science and art, transforming ingredients in ways most home cooks may never have attempted. Through the use of precise temperatures, creative techniques, and sometimes unconventional tools, chefs create visually stunning dishes that engage the senses, making dining an extraordinary experience. Yet, as intimidating as this culinary frontier may seem, it is increasingly becoming accessible to those eager to elevate their cooking skills.
At its core, molecular gastronomy seeks to explore the physical and chemical transformations that occur during cooking. Understanding these processes can help home cooks enhance flavor, texture, and presentation in their dishes. Techniques like spherification, gelification, and the use of liquid nitrogen open the door to new culinary possibilities. We aren't merely rehashing old recipes; instead, we are enshrining the entire process of cooking into a world of experimentation and innovation. The kitchen becomes a laboratory where cooks can play with flavors and textures, drawing on principles from both gastronomy and food science.
As we dive deep into the world of molecular gastronomy, the commitment to understanding the science behind the techniques is paramount. It allows cooks to gain mastery over their craft, transforming their kitchens into creative spaces where recipes are mere guidelines for experimentation. By mastering these techniques and methods, you're not just cooking—you're creating art, eliciting joy, and connecting with those who share your passion for food.
The Fundamentals of Molecular Gastronomy
Before embarking on this culinary adventure, it’s essential to grasp the underlying principles of molecular gastronomy. This section will touch upon key concepts and define terms that are vital for any home cook interested in this cutting-edge art.
Understanding the Science
Molecular gastronomy involves various scientific disciplines, including chemistry, physics, and biology. Here are some key concepts that define this culinary art:
"In molecular gastronomy, precision is paramount; even a slight deviation in temperature can lead to a different outcome."
Essential Tools and Ingredients
Investing in some essential tools can significantly enhance your molecular gastronomy journey. Here’s a list of items that should be in your kitchen arsenal:
Common Techniques Introduced
Molecular gastronomy uses a variety of prominent techniques. Here are a few that are essential for every home cook interested in this culinary realm:
Equipping yourself with this foundational knowledge will empower you to experiment boldly. Whether you aim to whip up an impressive dinner party dish or want to elevate your everyday cooking, mastering these techniques provides you the runway for creative flight.
Spherification: The Art of Liquid Pearls
One of the most exciting techniques in molecular gastronomy is spherification, a method that allows you to encapsulate liquids in a gel-like sphere. The result is a burst of flavor when the sphere is bitten into, creating a delightful sensory experience.
The Spherification Process
To successfully create spheres, you’ll need to keep a few key components in mind. The two main ingredients are sodium alginate and calcium chloride, which facilitate the chemical reaction needed to form the gel. Here’s a simple overview of the spherification process:
“Experimenting with different liquids for spherification can lead to unforgettable flavor bursts.”
Flavor Combinations to Try
The beauty of spherification lies in the myriad of possible flavors. Here are a few combinations to spark your creativity:
Troubleshooting Common Issues
While spherification is relatively straightforward, you may encounter challenges along the way. Here are some common pitfalls and tips on how to overcome them:
Mastering spherification can be an incredibly rewarding and fun pursuit, offering a unique experience for guests and elevating your dinner parties to new heights.
Gelification: Textural Transformation
Gelification is another cornerstone of molecular gastronomy, transforming liquids into jellies or gels through agents like agar-agar or gelatin.
Choosing the Right Gelling Agent
Several gelling agents are available, and the choice will depend on your specific needs:
The Gelification Process
Creating a gel requires precise measurements and patience. Here’s a basic recipe to get you started:
- For agar-agar, mix 1 tablespoon of agar with 2 cups of liquid, bring the mixture to a boil, and stir until dissolved.
- For gelatin, bloom 1 tablespoon of gelatin in 1/4 cup of cold water and then add to the heated liquid.
"Utilizing gelification effectively can add an incredible visual impact to your dishes."
Creative Gelification Ideas
Experimenting with gelification can lead to innovative presentations. Here are some ideas:
Gelification opens up a world of texture and flavor that can enhance many dishes, turning simple meals into works of art.
Foams and Emulsions: Light and Airy Innovations
Foams and emulsions present an exciting avenue in molecular gastronomy, allowing you to add an airy dimension to your dishes. These techniques can transform simple juices, broths, or sauces into ethereal components that truly bring a dish to life.
How to Create Foams
Foams can be made using a variety of bases, including juices, broths, and even dairy products. The process generally involves three key steps:
The Art of Emulsion
An emulsion is a mixture of two immiscible liquids, typically oil and water, that creates a homogeneous blend. Techniques like making vinaigrettes or sauces like mayonnaises can showcase the beauty of emulsification.
Basic Emulsification Steps:
"Mastering the art of emulsions can dramatically change how you think about sauces and dressings."
Flavoring Foams and Emulsions
Innovative flavor combinations can enhance your foams and emulsions. Here are some ideas to inspire you:
Mastering foams and emulsions not only adds flair to your dishes but also elevates them, making even the simplest meal feel gourmet.
The Chill Factor: Liquid Nitrogen
One of the most intriguing elements in molecular gastronomy is liquid nitrogen. This ultra-cold substance can instantly freeze ingredients, creating textures and presentations that are both fun and flavorful.
Safety First
Using liquid nitrogen requires caution. Here are some essential safety tips:
Techniques for Using Liquid Nitrogen
Liquid nitrogen can be utilized in various ways, including freezing ingredients, creating unique presentations, or making instant ice creams. Here’s a basic overview:
"Liquid nitrogen not only chills but transforms ingredients, creating textures unlike anything you've seen before."
Creative Ice Cream Ideas
The possibilities are endless with liquid nitrogen. Here are some exciting flavor ideas for your homemade ice cream:
Experimenting with liquid nitrogen can yield astonishing results, transforming ordinary ingredients into extraordinary delicacies.
Flavor Pairings and Presentation Techniques
Beyond techniques, molecular gastronomy embraces the art of flavor pairing and presentation. Understanding how to combine ingredients harmoniously creates a memorable dining experience.
Flavor Pairings Demystified
When experimenting with molecular gastronomy, here are some classic pairings to consider:
Elevating Presentation
Once you’ve created these unique culinary treats, presentation plays a crucial role. Here are some techniques to elevate your plating:
“Visual presentation is key; it invites your guests into the experience before they even take a bite.”
Conclusion
Molecular gastronomy may seem daunting at first, but with patience, practice, and a little bit of creativity, it’s possible to create stunning culinary experiences in your own kitchen. By understanding the science, mastering key techniques, and exploring flavor combinations, you can elevate your cooking to artistic levels.
As you explore methods like spherification, gelification, foams, and the use of liquid nitrogen, remember to have fun and allow your instinct as a home cook to guide you. The world of molecular gastronomy opens a door to creativity where everyday ingredients can be transformed into extraordinary dishes, bringing both joy and surprise to your dining table.
So, gather your tools, experiment with flavors, and don't shy away from making mistakes along the way; after all, the essence of cooking is exploration. Embrace this adventure, and soon you'll be crafting dishes that not only taste fantastic but also delight and surprise those lucky enough to enjoy your culinary creations.


Get the Next Recipe
Weekly recipes, techniques, and gear picks — straight to your inbox.
