No-Knead Sourdough: Transform Your Bread with Time and Patience
There's something remarkably satisfying about baking your own bread, especially when it comes to crafting a beautiful sourdough. With its rich, complex flavor profile and crusty exterior, sourdough has earned its place in the hearts—and kitchens—of many home cooks. Often, however, the thought of preparing homemade bread might induce a bit of anxiety, especially when confronted with recipes that demand a vigorous kneading process. That's where no-knead sourdough comes in, a method that allows anyone, regardless of baking experience, to create a delicious loaf without the intimidation of traditional kneading.
At its core, no-knead sourdough relies on the magic of time instead of elbow grease. Slow fermentation helps to develop flavor and structure in the dough, resulting in a beautifully airy crumb with a crispy crust, all while being accommodating to your schedule. You don't need a fancy mixer or hours to spend hunched over the countertop. Instead, with the right balance of water, flour, and starter, along with some planning, you can let nature work its wonders. And the best part? You don’t have to be a seasoned baker to achieve impressive results.
As we dive into the art of no-knead sourdough, you’ll discover how simple it can be to transform basic ingredients into an artisan loaf. We’ll cover essential concepts, techniques, and tips you can implement right away in your kitchen. This method honors the elemental nature of bread-making while allowing for flexibility in your busy life. Let’s get started on this flavorful journey where patience and creativity reign supreme.
Understanding Sourdough
What is Sourdough?
Sourdough is unique among bread varieties because it relies on wild yeast and lactic acid bacteria for fermentation, unlike conventional bread that uses commercial yeast. This fermentation process not only gives sourdough its signature tangy flavor but also enhances its digestibility. The sourdough culture—or starter—contains wild yeast spores and bacteria that naturally occur in your environment and can be cultivated at home. By nurturing this live culture, you create a thriving ecosystem that transforms flour and water into delicious bread.
One of the distinguishing features of sourdough is its long fermentation period, contributing to its depth of flavor and distinctive crumb. Unlike quick-bake bread, which delivers an immediate product, sourdough calls for a slower process, allowing time for both fermentation and development of the gluten structure. The result? An impressive loaf with a chewy texture, complex flavor layers, and a delightful crust.
Sourdough isn't just food; it's a medium brimming with potential. No two loaves are ever the same, especially when you consider variables like humidity, temperature, or even the type of flour used. As you grow more comfortable with this baking technique, you can experiment with flavor variations—herbs, seeds, and even whole grains, all contributing to a deeper connection between you, the bread, and the ingredients.
The Benefits of No-Knead Sourdough
For many home bakers, the term “no-knead” sounds almost too good to be true. However, this technique isn’t merely a marketing gimmick; it offers many practical benefits. First and foremost, simplicity is key. Eliminating the need for a lengthy kneading process makes it approachable, even for novices who might feel intimidated by traditional bread-making techniques.
These advantages make no-knead sourdough ideal for anyone seeking to elevate their home baking game without the labor-intensive processes typically associated with traditional bread-making.
Essential Ingredients
Flour
Flour is the backbone of any bread, and choosing the right type is crucial for the success of your no-knead sourdough. Bread flour, with its higher protein content (12-14%), is preferred, as it creates a stronger gluten framework. However, you may also choose to incorporate all-purpose flour or even whole grain flour into your mix for additional flavor and texture.
Water
Water is equally essential as it hydrates the flour, activating proteins involved in gluten development. The key point here is to use filtered water if possible, as chlorine and other chemicals found in tap water can inhibit yeast activity.
Sourdough Starter
Your starter is a liquid culture of flour and water, housing those wild yeasts and bacteria that will enable fermentation. You can make your own starter or source one from a friend or bakery. For optimal flourishing, remember to feed your starter regularly to keep it healthy; this involves adding equal parts flour and water.
When using a starter, its health and activity level directly affect the outcome of your sourdough, so make sure to feed it at least once within 12 hours before using it in your recipe.
Salt
Salt plays a dual role in bread-making: it enhances flavor and controls fermentation speed. It’s essential for balancing the overall taste of your bread while preventing yeast from overactive fermentation. Typically, use approximately 1.5% of the total flour weight when measuring salt.
The Basic Recipe
Now that we’ve discussed the essential ingredients, let’s look into the basic ratios for a no-knead sourdough loaf:
As you grow comfortable with the baking process, feel free to adjust these ratios according to your preferences or specific dietary needs.
The No-Knead Process
Step 1: Mixing the Ingredients
Before you even begin mixing, it’s vital to prep. Gather all your ingredients and tools, including a large mixing bowl, a spatula, a kitchen scale, and a damp cloth. In your mixing bowl, combine the flour and salt.
The dough might look shaggy and sticky, which is completely normal. You’re not looking for a smooth ball of dough at this stage; you want everything to be incorporated evenly. Cover the bowl with a damp cloth and let it rest for 30 minutes. This resting period, known as autolyse, helps the flour absorb the water, improving gluten formation.
Step 2: The First Rise
After the autolyse, it’s time for the dough to rise. Place your bowl in a warm, draft-free location—ideal temperatures for rising are around 75°F to 82°F (24°C to 28°C). Over the next 4 to 12 hours, the dough will undergo fermentation. During this time, it will expand, becoming bubbly and slightly more robust.
Every hour or so, perform a series of stretch and folds to build gluten strength. Using wet hands, grab one side of the dough, stretch it upwards, and fold it over to the opposite side of the bowl. Rotate the bowl and repeat this process 3-4 times. This gentle technique allows air to incorporate into the dough, promoting development without the need for traditional kneading.
Step 3: Shaping the Dough
Once the dough has risen and developed a bubbly surface (indicative of a vibrant fermentation process), you’ll need to shape it. Lightly flour a work surface and carefully turn the dough out onto it.
To achieve a more pronounced shape, you can then flip the dough back over and shape it again into a tighter round. Use your hands like a claw to tuck the edges in, gradually creating tension on the surface.
Step 4: The Second Rise
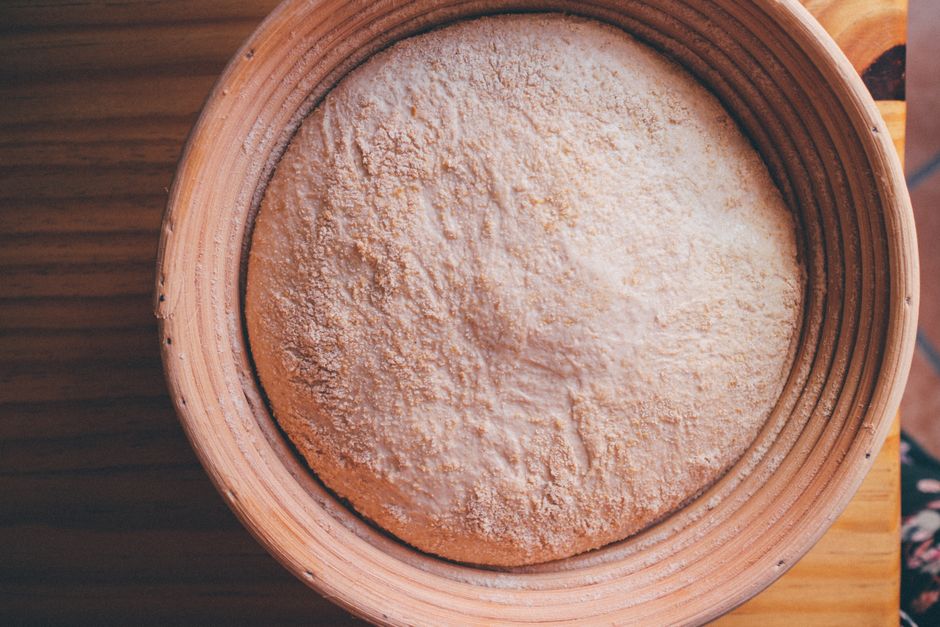
Transfer the dough to a floured proofing basket or bowl lined with floured parchment paper, seam side up. Cover again with a damp cloth or plastic wrap. Let it rise for another 1 to 2 hours at room temperature, or you can opt for a cold fermentation in the fridge for a 12-24 hour period. Cold fermentation will deepen the flavors even further.
If opting for cold fermentation, ensure to bring the dough back to room temperature before baking.
Step 5: Prepare Your Oven
About 30 minutes before you’re ready to bake, preheat your oven to 450°F (232°C). If you have a baking stone or cast iron Dutch oven, place it in the oven to preheat as well. This helps create steam, which allows the bread to expand further during the initial moments of baking.
Step 6: Scoring and Baking
When your oven is preheated and the dough is ready, it's time to score the dough. Use a sharp razor blade or bread lame to cut a shallow slit or design on the surface. This allows the bread to expand, creating that gorgeous oven spring.
Bake covered for 30 minutes. After that, remove the lid and bake an additional 15-20 minutes until the crust turns golden brown and crackly.
Pull Quote
"The transformation of mere flour, water, and salt into a loaf of bread is nothing short of magic. With patience and practice, anyone can weave that magic in their own kitchen."
Step 7: Cooling
When the bread is finished baking, remove it from the oven and allow it to cool on a wire rack for at least 1 hour before slicing. This is crucial, as cutting into warm bread can lead to a gummy texture and less-than-stellar crumb structure.
Flavor Variations and Add-ins
Creative Enhancements
Once you've mastered the basic no-knead sourdough, you can begin to get creative. There’s no shortage of ways to impart unique flavors into your bread. Some popular enhancements include:
Creating Unique Shapes
The beauty of sourdough lies not just in its method but also in its adaptability. Once you've become comfortable with shaping your dough, experiment with different loaves or rolls. Boules, batards, or even breadsticks are all achievable with an understanding of the foundational process.
Customized Flours
When it comes to flour, don’t hesitate to mix and match. Begin with the foundational breads flour, then experiment with replacing a percentage with whole grain or specialty flours like einkorn, spelt, or rye. Just keep in mind that varying protentional outcomes, hydration levels, and also flavor profiles may require adjustments in your water ratios.
Troubleshooting Common Issues
Dense or Gummy Bread
If your bread turns out dense or gummy, a few factors could be at play. First, ensure your starter is active and bubbly before using it. If you used a cold starter from the fridge, it’s essential that it has been fed and warmed up prior to mixing into the dough.
Additionally, under-fermentation can lead to gummy and dense results. Always keep an eye on dough activity; it should be noticeably larger and puffy before shaping.
Crust Is Too Hard
If your crust is excessively tough, consider managing your oven temperature or altering your baking time. After covering the bread for the initial baking period, you can lower the temperature slightly as it continues to bake uncovered to lessen the severity of the crust.
Uneven Crumb Structure
An uneven crumb may result from two primary issues: either the dough was improperly shaped, or it was allowed to rise too long. When shaping your dough, aim for a tight surface and proper tension to foster an even structure. Also, pay attention to fermentation times; over-proofed dough can lead to a structure that collapses.
Conclusion
Embarking on the journey of no-knead sourdough is as rewarding as it is delicious. With patience and practice, the simple act of combining flour, water, salt, and a bit of starter can yield loaves that are not only visually stunning but also full of flavor and texture. Remember, the beauty of sourdough lies in its forgiveness; even when things don’t go as planned, there’s often still a way to salvage some joy from the process.
Through understanding the art and science of fermentation, embracing your creative spirit, and utilizing your newfound skills in the kitchen, you pave the way for a baking experience that transforms your home routine into something extraordinary. Whether you stick to the classic recipe or venture out into exciting enhancements and variations, you’re sure to find a rhythm that suits your lifestyle and tantalizes your taste buds.
So gather your ingredients, clear your schedule, and let the world of no-knead sourdough unfold in your kitchen. Happy baking!




Get the Next Recipe
Weekly recipes, techniques, and gear picks — straight to your inbox.
