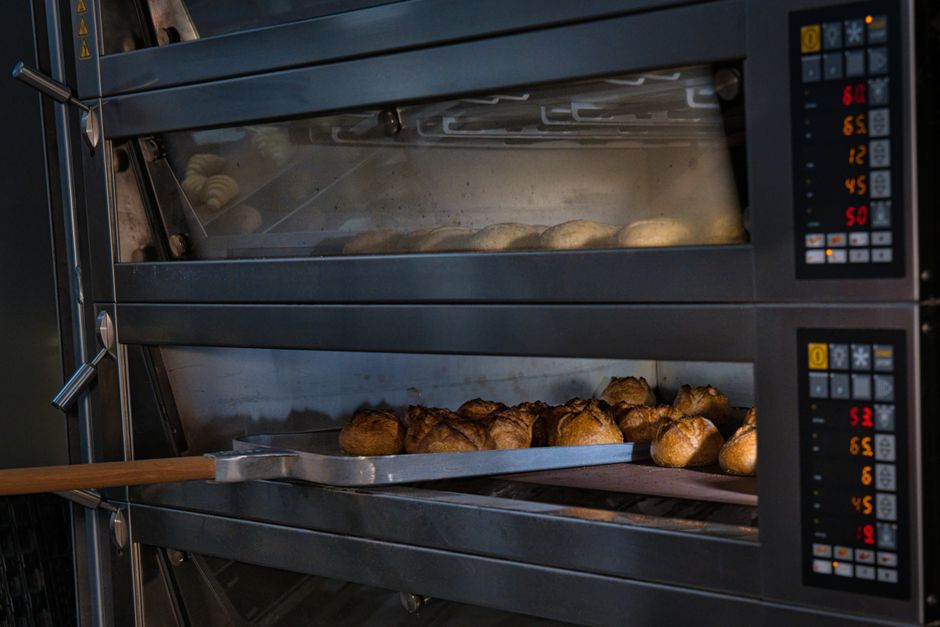
Oven Temperature Conversion Chart (F to C Guide)
Have you ever found yourself standing in the middle of your kitchen, flour dusting your apron, staring down a vintage recipe book or an international culinary blog that lists oven temperatures in a unit you don't recognize? It is a frustration that every home cook encounters eventually, particularly when the siren call of a perfect French macaron or a crusty sourdough boule leads you to recipes originating from outside your own borders. The science of baking is inherently precise, relying on the delicate balance of chemistry and heat to transform humble pantry staples into golden, airy masterpieces. When you do not speak the language of the recipe—whether it is Fahrenheit or Celsius—your confidence in the kitchen can shatter before you have even preheated the oven. This guide exists to bridge that gap, ensuring that your culinary experiments are dictated by your passion, not by the limitations of your thermometer.
At "Blame The Chef," we believe that the kitchen should be a laboratory of joy rather than a source of stress, and mastering the fundamentals of temperature is the first step toward true culinary autonomy. Understanding why an oven needs to be exactly 350°F (177°C) for a sponge cake versus 425°F (218°C) for a puff pastry is the difference between a soggy, unrisen mess and a structural work of art. Temperature control is the silent conductor of the baking symphony, dictating how proteins coagulate, how starches gelatinize, and how leavening agents like baking powder and yeast expand. By familiarizing yourself with these conversions, you are not just memorizing numbers; you are learning how to calibrate your environment to suit the needs of your ingredients. We are moving beyond the guess-work of "low," "medium," and "high" to achieve the professional consistency you crave.
Before we dive into the nitty-gritty of charts and calculations, take a deep breath and remember that precision is a muscle you build over time. Most modern ovens, even the high-end digital models, suffer from minor calibration drift, meaning the number on the dial isn’t always the reality inside the cavity. We will discuss how to mitigate these discrepancies using oven thermometers, which are arguably the most important, yet undervalued, tool in any baker's arsenal. Whether you are baking in a convection oven or a traditional gas range, this comprehensive guide will serve as your go-to reference. Let us demystify the heat, sharpen your skills, and ensure that from this point forward, the only thing you will have to blame the chef for is the lack of leftovers.
The Fundamentals of Thermal Precision
Baking is, at its core, a form of applied chemistry, where the oven acts as the vessel for controlled reaction. When you set your oven to a specific temperature, you are dictating the rate at which heat penetrates the dough or batter. If the heat is too low, the structure of your bread or cake may collapse before the proteins have set, resulting in a dense, gummy interior. If the temperature is too high, the exterior will scorch and harden into a crust before the center has had the chance to rise, leaving you with a raw, gooey core. This is why temperature conversion is not merely a convenience but a necessity for consistency.
The Fahrenheit scale, while standard in the United States, uses a baseline where 32°F is the freezing point of water and 212°F is the boiling point. In contrast, the Celsius scale—used by the vast majority of the world—is based on the metric system where 0°C is the freezing point and 100°C is the boiling point. Because these scales have different starting points and different increments, a simple "one-to-one" conversion does not exist. However, bakers rarely need to worry about the complex formulas used by physicists. Instead, we rely on standard oven settings that have been rounded for practical, everyday use in the domestic kitchen.
The Mathematics of Conversion
To convert Fahrenheit (F) to Celsius (C), the mathematical formula is: (F - 32) x 5/9 = C. While this is great for a classroom, it is cumbersome for a baker covered in dough. Instead, we use a set of widely accepted baking standards that round these figures to the nearest five or ten degrees. For instance, the most common baking temperature, 350°F, converts precisely to 176.6°C, but practically every recipe in the world calls for 175°C or 180°C. By learning these common reference points, you can navigate any recipe without reaching for a calculator.
"Precision is the difference between an amateur who hopes for the best and a chef who orchestrates the outcome. Do not let a change in units stop your progress; embrace the logic of the oven and watch your consistency soar."
Essential Oven Temperature Conversion Chart
To help you manage your kitchen workflow, we have compiled a quick-reference guide. Keep this printed or saved on your phone for immediate access during those high-pressure moments when you are halfway through a cake batter and realize your recipe is in the wrong format. Note that while these conversions are standard, you should always monitor your bake visually. Ovens vary in their thermal retention, especially if they are heavily insulated or prone to hot spots.
The Standard Reference Table
225°F* = 110°C (Slow roasting, dehydrating)
250°F* = 120°C (Low and slow cooking, meringue drying)
275°F* = 140°C (Gentle roasting, delicate cookies)
300°F* = 150°C (Cheesecake, delicate custards)
325°F* = 160°C (Cakes, moist quick breads)
350°F* = 180°C (Standard baking, cookies, muffins)
375°F* = 190°C (Pastries, pizzas, crusty breads)
400°F* = 200°C (Roasted vegetables, puff pastry)
425°F* = 220°C (High-heat searing, artisan bread)
450°F* = 230°C (Hard crusts, intensive browning)
Fine-Tuning Your Bake
It is important to remember that these are nominal temperatures. If your recipe specifically calls for 355°F, and you are using a Celsius-only oven, setting it to 180°C is perfectly acceptable. Baking is forgiving within a 5-degree margin. However, when working with highly sensitive items like macarons or soufflés, even a 5-degree shift can impact the delicate structure. In these instances, always start on the lower end of the suggested temperature and use your senses—the smell of browning butter or the sound of the crust setting—to guide your final timing.
The Role of Convection vs. Conventional Ovens
One of the most frequently asked questions in our community is how to handle convection (fan-assisted) settings. A convection oven uses a fan to circulate hot air around the food, which speeds up the cooking process and promotes more even browning. Because the air is constantly moving, it transfers heat to the surface of the food more efficiently than the stagnant air of a conventional oven. Consequently, you generally need to lower your temperature by 25°F or 15-20°C when using the fan-forced setting, or reduce your baking time by about 20%.
Adapting Recipes for Fans
If you have a convection oven, do not be afraid to use it, but understand that it changes the physics of your bake. For cakes and delicate sponges, convection can sometimes lead to an uneven rise if the fan speed is too high. Conversely, for items that require a distinct, crispy crust—like a sourdough boule or a batch of croissants—convection is your best friend. It creates a powerful initial burst of heat that helps the oven spring while drying out the surface of the dough to facilitate that characteristic snap.
Monitoring Airflow
Always ensure your oven is not overcrowded when using the convection setting. The fan needs space to circulate the air; if the racks are packed with too many pans, the air cannot flow freely, resulting in "dead zones" where the food remains undercooked while other areas are charred. Arrange your baking sheets with at least two inches of space between them and the walls of the oven to ensure consistent results. This airflow is just as crucial as the temperature setting itself.
"A convection oven is not just a heat source; it is a thermal environment. Master the airflow, and you master the art of the perfect, golden-brown crust."
Professional Tips for Temperature Accuracy
Even if you know your Fahrenheit from your Celsius, your oven might be lying to you. Professional chefs rarely trust the numbers on the oven display. Instead, they use a standalone oven thermometer hung from the middle rack. This provides an independent reading of the ambient temperature within the baking chamber, bypassing the often-inaccurate sensors built into domestic appliances. If you find your oven is consistently running 15 degrees cool, you now know to adjust your dial accordingly, regardless of the numerical setting.
Troubleshooting Hot Spots
Most ovens have a "hot spot," which is usually the back-right corner or the area closest to the heating element. To avoid burning the bottom of your cookies or the edges of your cakes, learn to rotate your pans halfway through the baking cycle. This simple act of manual intervention compensates for the architectural flaws of your oven and ensures that every single cookie on the sheet emerges with the same golden-brown hue. Do not be lazy; those 30 seconds of moving the pans are the difference between excellence and mediocrity.
Preheating is Non-Negotiable
We cannot stress this enough: always preheat your oven for at least 20 to 30 minutes before putting your food inside. Even if the light indicates the oven has reached the desired temperature, the walls of the oven cavity and the racks often need more time to fully absorb the heat. If you put your delicate puff pastry into an oven that has only "just" reached temperature, the initial heat transfer will be insufficient, causing the butter to melt before the steam can puff the layers. Patience during the preheat phase is a fundamental professional secret.
Managing Moisture and Steam
Temperature is only one side of the coin; moisture content is the other. In many professional recipes, particularly for artisan breads or certain European pastries, the temperature is paired with a specific humidity level. When you are baking at higher temperatures, like 425°F or higher, the dry air of an oven can cause the surface of your dough to form a crust too quickly, which inhibits the final expansion. This is why bakers use steam injection or "dutch ovens" to trap moisture in the early stages of the bake.
Using a Dutch Oven
If you do not have a professional steam-injected deck oven, a cast-iron dutch oven is the home baker's greatest tool for mimicking those conditions. By placing your loaf inside a preheated dutch oven with the lid on, you capture the moisture evaporating from the dough. This creates a localized, high-humidity environment that allows the crust to remain soft and flexible while the bread rises to its full potential. You then remove the lid for the final 10 to 15 minutes to allow the heat to caramelize the sugars and create a deep, mahogany crust.
The Importance of Sugar Content
When working with recipes that call for high sugar, such as fruit tarts or meringues, your temperature sensitivity must be even higher. Sugars begin to caramelize at around 320°F and can turn to bitter, burnt charcoal very quickly if the oven spikes. If you find your bakes are browning too fast on the outside, do not hesitate to lower your oven temperature by 10-15 degrees and extend the baking time. This "slow and low" approach is often the secret to achieving a deep, complex flavor profile without the risk of acrid, charred edges.
Ingredient Ratios and Thermal Reaction
Baking, unlike cooking, is an exact science where ingredient ratios determine the outcome. When you convert temperatures, you must also be aware of how your ingredients interact with heat. For example, high-fat doughs, such as shortbread or pie crusts, require a colder start to prevent the butter from leaking out, while high-protein doughs, such as ciabatta, thrive in high-heat environments to achieve their airy, open crumb. Your oven temperature is the trigger for the leavening process, whether that comes from steam, baking powder, or yeast.
The Science of Leavening
Baking powder and baking soda require a specific heat intensity to release carbon dioxide efficiently. If the temperature is too low, the reaction will be sluggish, leading to a flat, dense texture. Conversely, if the temperature is too high, the outer structure will set before the leavening gases have fully expanded, creating a "dome" that might collapse once taken out of the oven. Knowing the target temperature is only half the battle; knowing why that temperature is necessary allows you to troubleshoot your recipes when things do not go according to plan.
Protein Denaturation
Proteins in eggs and flour start to denature and coagulate around 140°F to 160°F. This is the "set point" for cakes and custards. If you pull your creation out of the oven before the center has reached this internal threshold, it will inevitably collapse. A digital probe thermometer is a highly recommended tool for ensuring that your cakes, breads, and quiches have reached the proper internal temperature before you remove them from the heat. Don't rely on time alone; rely on the science of the ingredient.
Advanced Techniques for The Home Baker
Once you have mastered the conversion charts and the basics of thermal regulation, you can begin to experiment with advanced techniques like multi-stage baking. This involves starting your oven at a high temperature to encourage immediate expansion and browning, then dropping the temperature for the remainder of the bake to ensure the interior is cooked through without burning the exterior. This is common in artisanal bread baking, where the initial blast of 450°F sets the crust, and a drop to 400°F finishes the center.
Utilizing Residual Heat
Professional bakers understand that the oven remains hot even after the heating elements cycle off. You can use this to your advantage for items that need gentle, lingering heat, such as meringue nests or drying out herbs and decorative garnishes. Simply turn the oven off and leave the item inside for an hour or two. The temperature will slowly decline, gently removing the remaining moisture without the risk of browning. It is a subtle, elegant way to use the thermal inertia of your appliance.
Creating Your Own Calibration Log
We suggest keeping a small notebook in your kitchen—your very own "Chef's Log." Whenever you bake something new, note the recipe, the ambient temperature in your kitchen (which can affect fermentation times), your oven's target temperature, and the actual internal temperature of the product when it was finished. Over the course of a few months, you will build a database of what works for your specific equipment. This turns you from a person who follows recipes into a baker who understands their craft.
"A notebook is a chef’s best friend. When you track the variables of your kitchen, you stop guessing and start engineering your success."
Final Thoughts
The journey to becoming a proficient home baker is paved with trial, error, and the occasional burnt batch. Do not be discouraged by a recipe that presents numbers you do not recognize; instead, view it as an opportunity to deepen your understanding of the culinary arts. The ability to seamlessly convert between Fahrenheit and Celsius is a hallmark of a cook who is moving beyond the constraints of a cookbook and into a realm of genuine confidence. Remember that your oven is a tool, not a master, and with the proper temperature oversight, you hold the power to turn flour, water, eggs, and sugar into something extraordinary.
As you move forward, keep your reference charts handy, invest in a reliable external thermometer, and never stop questioning how the heat is interacting with your ingredients. Precision, while daunting at first, becomes second nature once you see the results in the consistency of your crumb, the perfection of your crust, and the overall joy that comes from pulling a masterpiece out of the oven. At "Blame The Chef," we hope this guide serves as a foundational pillar for your future bakes. You have the knowledge now—all that is left is to turn the dial and let the magic happen. May your ovens stay calibrated, your temperatures remain precise, and your kitchen always smell of something wonderful rising to perfection. Keep baking, keep learning, and don't forget to enjoy every delicious bite along the way.

Get the Next Recipe
Weekly recipes, techniques, and gear picks — straight to your inbox.
