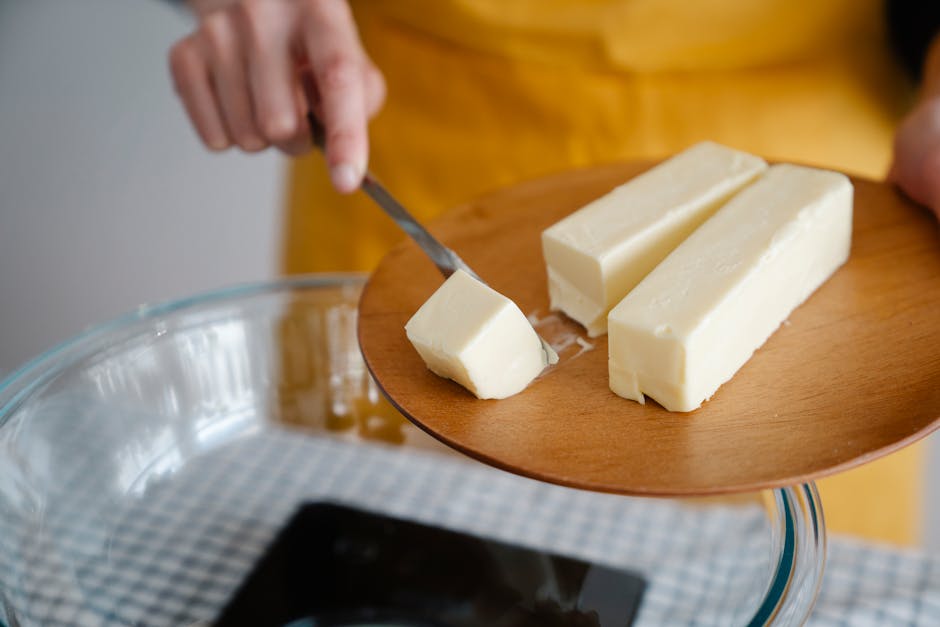
Rendering Animal Fats at Home: Tallow, Lard, and Schmaltz for Cooking With Unmatched Flavor
In the professional kitchen, the difference between a good dish and a transcendent one often comes down to the fat utilized in the pan. While modern home cooking has been dominated by highly processed vegetable oils, there is a culinary renaissance occurring that looks back to the foundations of flavor: animal fats. When you choose to render your own tallow, lard, or schmaltz, you are doing more than just saving scraps from the bin; you are reclaiming the most potent flavor carriers available to a cook. These fats provide a depth, mouthfeel, and stable smoke point that plant-based oils simply cannot replicate, acting as a secret weapon for searing, frying, and roasting.
Understanding the chemistry of fat is the first step toward mastering the art of the sear. Unlike refined oils that are stripped of their character, home-rendered animal fats retain the essence of the animal, providing a subtle, savory backbone that elevates vegetables, grains, and proteins alike. When you render fat, you are essentially separating the connective tissue and proteins from the pure adipose tissue, creating a shelf-stable ingredient that remains fresh for months. This process is time-honored, economical, and arguably the most rewarding project a home cook can undertake to build a repertoire of "chef-level" staples.
Before we dive into the specific techniques for each type of fat, it is important to understand the hierarchy of quality. The success of your rendering depends entirely on the source material; seek out the highest quality leaf fat or back fat from pasture-raised animals whenever possible. The cleaner your raw fat, the clearer and more neutral your final product will be, though a little bit of "character" from a pasture-raised animal is never a bad thing in the kitchen. By controlling the heat, filtration, and storage of these fats, you are essentially bottling the soul of your local butcher’s shop, ready to be deployed into your skillet at a moment’s notice.
The Art and Science of Rendering
Rendering is a process of gentle extraction. You are not trying to fry the fat; you are trying to melt it away from the connective tissue at a low, consistent temperature. If the heat becomes too high, you risk burning the proteins, which will give your rendered fat a scorched, bitter flavor rather than the clean, luxurious finish you desire. Patience is your most important tool in this endeavor, as rushing the process is the primary cause of poor results in home kitchens.
Understanding the Source Material
The type of fat you use will dictate your temperature control and end-use. Leaf fat, found around the kidneys of pigs and cows, is the highest grade of adipose tissue. It is pure, white, and yields a fat with the most neutral flavor profile, making it ideal for pastry work. Conversely, back fat or trimmings contain more connective tissue and surface seasoning, making them better suited for everyday cooking, searing meats, or roasting potatoes where a bit of savory intensity is welcomed.
Equipment Essentials
You do not need a professional kitchen to render fat, but you do need the right equipment. A heavy-bottomed Dutch oven is the gold standard because it provides excellent heat retention and even distribution, minimizing the risk of hot spots. You will also need a fine-mesh strainer or several layers of cheesecloth for the final filtration, and clean glass jars for storage. Always have a digital thermometer on hand to ensure your rendering temperature stays within the "sweet spot" of 200°F to 225°F.
Rendering fat is an exercise in patience; if you see the fat bubbling violently, you are cooking it too hard, and you will compromise the delicate, clean flavor of your final product.
Tallow: The King of Savory Fats
Beef tallow is arguably the most versatile fat in the chef’s arsenal. Because of its high smoke point, it is the superior choice for high-heat searing and deep frying. When you render beef fat, you are capturing the deep, umami-rich essence of the cow. If you have ever wondered why restaurant french fries taste so much better than the ones you make at home, the answer is almost certainly beef tallow.
Preparing the Fat for Rendering
Start by grinding or finely dicing your beef fat. The smaller the pieces, the faster and more efficiently the fat will render. Aim for uniform cubes of about a half-inch if you are cutting by hand, or pulse the cold fat in a food processor—just be careful not to turn it into a paste. Once prepared, add the fat to your Dutch oven with a splash of water, which helps the fat melt down evenly without scorching before the rendering process truly begins.
The Rendering Process
Set your stovetop to the lowest possible setting. As the water evaporates, the fat will begin to liquefy and turn clear. Keep an eye on the "cracklings"—the remaining bits of meat and connective tissue. You want these to turn a light golden brown and become crispy, but never dark brown or black. This process can take anywhere from two to four hours depending on the quantity of fat. Once the liquid is clear and the cracklings are golden, strain the fat through a fine-mesh sieve lined with cheesecloth into your sterilized jars.
Lard: The Pastry Chef's Secret
Many home cooks are intimidated by the word "lard," often associating it with older, shelf-stable versions that had a strong, porky smell. However, high-quality leaf lard is remarkably clean and has a neutral flavor, making it the secret to the world's flakiest pie crusts and biscuits. When fat crystals are larger and more stable, they create distinct layers in dough, preventing the gluten from over-developing and ensuring a tender result.
The Importance of Purity
To get that pure white, odor-free lard, you must start with the leaf fat. If your butcher offers a choice, always select the leaf fat over the back fat for baking. Before you begin the rendering process, soak the fat in cold water for a few hours, changing the water once or twice, to remove any trace of blood or impurities. This step is the difference between a lard that smells like a barnyard and a lard that tastes like pure, velvety goodness.
Applications Beyond Baking
While its reputation is cemented in the pastry world, do not underestimate lard for savory applications. Lard is the traditional fat for frying carnitas or confit, where the animal fat infuses the meat with a silkiness that no vegetable oil could ever achieve. Its ability to create a crusty, golden exterior on a pork chop while keeping the interior juicy is a testament to why it has been a staple in European and Latin American cuisines for centuries.
There is a profound elegance in using lard to create a biscuit; the fat does not just sit on the flour—it transforms the structure, building a delicate architecture of crunch and tenderness that butter alone struggles to achieve.
Schmaltz: The Essence of Poultry
Schmaltz, or rendered chicken fat, is the liquid gold of Jewish cuisine and a cornerstone of traditional European home cooking. It is aromatic, rich, and incredibly savory. Unlike beef tallow or pork lard, schmaltz has a lower melting point, meaning it stays liquid even at room temperature. This makes it an ideal finishing fat, perfect for drizzling over roasted vegetables, stirring into soups, or spreading on a thick slice of rye bread.
The Flavor of the Onion
Traditional recipes for schmaltz often involve rendering the chicken skin and fat with onions. As the chicken fat renders, the onions caramelize in the fat, infusing it with a sweet, aromatic depth that is truly unparalleled. To achieve this, finely chop a yellow onion and add it to your Dutch oven once the chicken fat has begun to melt. The onions will crisp up and act as a flavorful garnish, while the rendered fat takes on the onion's soul.
Culinary Uses for Schmaltz
Because schmaltz is intensely flavored, it should be treated as a seasoning rather than just a cooking medium. Try using it to sauté mushrooms, which creates an earthy, savory flavor bomb that pairs perfectly with pasta or steak. It is also the traditional fat for making matzo balls, giving them a lightness and flavor that is impossible to replicate with modern oils. Keep a jar in your fridge for when you need to "fatten up" a light vegetable broth or add a rich finish to a pan sauce.
Filtration and Storage Techniques
Once you have mastered the art of rendering, the next challenge is proper storage to ensure your fat remains stable and delicious. Even the best fat can go rancid if it is exposed to light, heat, or oxygen for too long. By following a few simple storage rules, you can extend the shelf life of your tallow, lard, and schmaltz for several months in the refrigerator or even longer in the freezer.
The Importance of Filtration
Double or even triple-strain your fat. Your first pass should be through a medium-mesh sieve to remove the bulk of the cracklings. Your second pass should be through several layers of damp cheesecloth to remove the microscopic particles of protein. If any protein remains in the fat, it will eventually spoil, creating off-flavors. Once strained, let the fat cool slightly before pouring it into clean, dry glass jars with tight-fitting lids.
Temperature and Shelf Stability
Once filled, place your jars in the refrigerator immediately. The rapid cooling helps to create a uniform, smooth texture. While rendered fat is shelf-stable for a short period, it will last infinitely longer in a cold environment. Label your jars with the date and the type of fat—it is incredibly frustrating to stare at a jar of white fat in the fridge and wonder if it is lard or tallow after three months. If you render a large batch, keep one jar in the fridge for daily use and freeze the rest in small portions.
Troubleshooting Common Rendering Issues
Even for the most experienced home cook, rendering can sometimes yield results that aren't quite perfect. Perhaps the fat has a slightly scorched aroma, or maybe it didn't set up as firmly as you expected. Don't worry; most of these issues are easily avoidable with a bit of knowledge and a few professional adjustments.
Why Your Fat Smells Burnt
If your rendered fat has a dark color and a burnt smell, your heat was simply too high. Rendering is not about speed; it is about gentle extraction. If you find your fat turning brown during the process, kill the heat immediately and allow it to cool down. You can sometimes "rescue" fat by reheating it very gently with a fresh slice of potato, which can absorb some of the off-flavors, but prevention is always the better route.
Texture and Consistency Problems
If your lard or tallow is grainy or too soft, it is likely due to the cooling process. If fat cools too slowly, the fatty acids crystallize unevenly, creating a gritty texture. For a smooth, creamy finish, place your jars in an ice bath once they have cooled enough to handle but are still liquid. This rapid cooling creates smaller, more uniform fat crystals, resulting in a superior texture that is a dream to work with in the kitchen.
When you render your own fat, you are participating in a cycle of culinary conservation; you are honoring the animal by ensuring that not a single gram of potential flavor goes to waste.
Elevating Your Daily Cooking
Now that you have jars of golden tallow, pristine lard, and aromatic schmaltz in your pantry, how do you actually use them to change your daily cooking? Start by replacing your usual neutral oils in your morning routine. A fried egg cooked in a teaspoon of schmaltz takes on a level of savory complexity that changes the entire breakfast experience. The fat creates a lacy, crispy edge on the egg white while the yolk remains rich and unctuous.
Roasting and Searing
Next, move to your dinner preparations. When roasting potatoes, toss them in melted tallow rather than olive oil. The high smoke point of tallow ensures that the potatoes develop an incredibly thick, crunchy crust, while the interior becomes creamy and infused with a deep, meaty flavor. Similarly, when searing a steak, use a tablespoon of tallow in the pan rather than butter; it will not burn as quickly as the milk solids in butter, allowing you to achieve a perfect, deep-brown crust without any acrid bitterness.
Pastry and Baking
Finally, don't be afraid to use your lard for baking. A pie crust made with half-lard and half-butter provides the best of both worlds: the flavor of butter and the structural integrity and flakiness of lard. The same applies to biscuits, savory scones, and even crusty rustic breads. By incorporating these fats into your baking, you are bringing a professional-level finish to your home kitchen that will leave your guests wondering exactly what your secret ingredient is.
The Professional Chef's Perspective
From a professional standpoint, the use of rendered fats is what separates a cook who follows recipes from a cook who understands flavor. When I am working on the line, I am constantly thinking about the "mouthfeel" of a dish. Fat is the primary vehicle for flavor; it coats the tongue and allows the savory compounds in your ingredients to linger. Vegetable oils, while functional, lack the molecular complexity that animal fats provide, which is why professional chefs so often return to these traditional methods.
The Philosophy of Waste Not
There is also a deeper, philosophical aspect to this work. In many professional kitchens, we pride ourselves on nose-to-tail cooking. Rendering fat is the logical extension of this ethos. When you purchase high-quality meat, you are paying for the fat as well; discarding it is essentially throwing away money and flavor. When you render it down, you are maximizing the value of your ingredients, making your kitchen more efficient, more sustainable, and ultimately, more delicious.
Building Your Culinary Library
I encourage you to begin keeping a "fat library" in your kitchen. Start with one, master the process, and then expand. Once you have a handle on the basic rendering technique, you can begin experimenting with infusions—adding rosemary, garlic, or peppercorns to your tallow as it renders to create custom finishing fats. This level of customization is what transforms a home kitchen into a true culinary lab where every meal is an opportunity to learn something new.
Conclusion
Rendering your own animal fats is one of the most rewarding transformations you can make as a home cook. It moves you away from the processed, industrial ingredients of the modern grocery store and into a more tactile, authentic relationship with your food. By taking the time to render tallow, lard, and schmaltz, you are learning to respect the ingredient, understand the chemistry of heat, and build a foundational library of flavors that will serve you for years to come.
As you embark on this journey, remember that the quality of your output is entirely dependent on the quality of your input. Seek out the best sources, take your time with the heat, and pay close attention to the filtration process. Do not be discouraged by a slightly less-than-perfect batch; each attempt is a lesson in the nuances of fat and heat. With every jar you line up on your pantry shelf, you are building a repository of taste that will elevate your roast chicken, your pie crusts, and your morning eggs to professional standards.
The next time you find yourself at the butcher counter, ask for the trimmings or the leaf fat. Treat it with the same respect you would a prime cut of meat. Once you have rendered that first batch of gold, you will never look at a tub of generic vegetable oil the same way again. Welcome to the world of true flavor—your kitchen is about to become the best place to eat in town.
Final Thoughts
The art of rendering is not just about the fat; it is about the return to fundamental techniques that define great cooking. It is a slow, quiet, and deeply satisfying process that grounds you in the kitchen. When you render animal fat, you are engaging in a tradition that spans generations, connecting your home to the historical lineage of cooks who knew that the fat was the most precious part of the animal.
Whether you are searing a ribeye, folding a flaky pastry, or simply sautéing onions for a weeknight meal, the presence of home-rendered fat adds a layer of depth that cannot be purchased in a bottle. You are the architect of your own flavor profile. By taking control of this essential ingredient, you have leveled up your skills in a way that is both tangible and delicious. Keep experimenting, keep rendering, and most importantly, keep cooking with the passion that makes "Blame The Chef" more than just a blog, but a community of culinary enthusiasts.
As you continue to refine your technique, share your experiences with others. Encourage your friends to ditch the processed fats and start their own jar of "liquid gold." There is nothing quite like the pride of pulling a perfect, golden, home-rendered fat from the fridge, knowing exactly what went into it and exactly how much life it is going to bring to your dinner. Happy rendering, and may your pans always be seasoned and your flavors always deep.


Get the Next Recipe
Weekly recipes, techniques, and gear picks — straight to your inbox.
