
Slow Roasted Perfection: The Science of Low Temperature Cooking
There is an unspoken hierarchy in the professional kitchen, a silent understanding that the most transformative results are rarely born from high-heat theatrics or frantic sear-work. While the sizzle of a screaming hot pan often steals the culinary spotlight, the true masters of the craft know that low-temperature cooking is where the magic of texture and flavor depth truly resides. Whether you are a weekend warrior or a dedicated home cook, moving away from the "hot and fast" mentality is the single most effective way to elevate your protein game from merely edible to truly transformative. By embracing the steady, patient application of gentle heat, you are not just cooking food; you are manipulating cellular structures to achieve a level of tenderness that is physically impossible to attain through traditional high-heat methods.
To understand why this approach works, we must first discard the outdated notion that searing is the only way to lock in moisture. In reality, the science of cooking is about the precise denaturation of proteins and the conversion of collagen into gelatin, a process that requires both time and environmental control. When we cook at lower temperatures, we allow the heat to penetrate the meat evenly, avoiding the dreaded "gray ring" of overcooked outer layers that occurs when we rush the process. This slow-roasting technique relies on the steady migration of heat, ensuring that the very center of your cut reaches the desired level of doneness exactly when the connective tissues begin to break down, resulting in a buttery, succulent bite that remains consistently moist from edge to edge.
Stepping into the realm of slow cooking requires a shift in philosophy, trading speed for precision and intuition. It is an invitation to engage with your ingredients on a deeper level, watching how time alters the density and moisture retention of everything from a massive beef brisket to a delicate piece of salmon. While it may require a little more foresight, the payoff is a kitchen environment that feels less like a war zone and more like a laboratory where consistency is the primary objective. As we explore the science behind these methods, you will find that the tools you already possess—your oven, a high-quality meat thermometer, and a bit of patience—are all you need to master what many professional chefs consider the gold standard of protein preparation.
The Chemistry of Tenderness and Connective Tissue
At the heart of every great slow-roasted dish is the structural integrity of the meat you are working with. Muscles are composed of fibers bundled together by connective tissue, primarily collagen. When subjected to high heat, collagen tightens rapidly, which is why a steak cooked too quickly can feel like a piece of rubber. Conversely, when we expose that same collagen to a lower, sustained heat, it begins a slow transition, eventually melting into gelatin. This gelatin is what gives slow-roasted meat that luxurious, mouth-coating quality we associate with professional-grade barbecue and restaurant-quality roasts.
Understanding Collagen Conversion
The magic number for this conversion is generally accepted to be between 160°F and 180°F (71°C to 82°C). However, the time required to complete this transformation is significant. Because this is a chemical reaction rather than a physical one, it is dependent on both temperature and time—a concept chefs often refer to as the "time-temperature relationship." If you attempt to rush this by cranking the heat, you will dehydrate the muscle fibers before the collagen has a chance to dissolve. By keeping your oven temperature low—typically between 225°F and 275°F (107°C to 135°C)—you allow the collagen to melt steadily, keeping the muscle fibers lubricated.
"The difference between a tough, chewy piece of meat and a fork-tender masterpiece is rarely the quality of the cut, but rather the patience of the cook behind the oven door."
Why Texture Matters
Texture is the primary indicator of a successful slow roast. When the collagen breaks down correctly, the meat doesn't just fall apart; it retains a specific, silky mouthfeel that high-heat searing simply destroys. In our "Blame The Chef" test kitchen, we focus heavily on the resting phase as part of the overall structural transformation. Allowing a roast to rest after the oven cycle allows the juices to redistribute and the proteins to firm up slightly, ensuring that the gelatin we just created doesn't simply run out onto the cutting board the moment you slice into the meat.
Precision Temperature Control: The Oven as an Instrument
Your oven is not just a hot box; it is an environment that you must learn to calibrate. Most home ovens are notoriously inaccurate, often fluctuating by as much as 25 to 50 degrees during a single cycle. This is the death knell for precision slow roasting. To achieve perfect results, you must first invest in a high-quality independent oven thermometer. Do not trust the dial on your oven. Knowing exactly what the temperature is inside the cavity allows you to set the stage for a consistent roast that won't fluctuate between "perfect" and "leathery."
Calibrating Your Environment
When slow roasting, we want to maintain an air temperature that is only slightly higher than our target internal temperature for the meat. This creates a very gentle gradient of heat, meaning the outside of the roast will never get significantly hotter than the inside. This is the secret to avoiding the gray ring. If your oven is set to 225°F, it is nearly impossible to overcook the outer edges, as the meat acts as a heat sink, absorbing the energy until it reaches equilibrium with the air surrounding it.
The Role of the Probe Thermometer
If you take only one piece of advice from this post, let it be this: use a probe thermometer. Relying on "cook time per pound" is an archaic practice that ignores the unique geometry and fat content of every piece of meat. A digital probe thermometer that sits inside the meat while it roasts allows you to monitor the internal temperature in real-time. You can set an alarm for 5 degrees before your target temperature, giving you ample time to pull the meat and prepare for the finish.
The Science of the Maillard Reaction at Low Temperatures
One of the biggest concerns home cooks have with low-temperature roasting is the lack of color. We are programmed to believe that a deep, mahogany crust is the result of high-heat roasting, and in many ways, that is true. The Maillard reaction—that complex chemical process between amino acids and reducing sugars that creates savory, toasted flavors—is significantly accelerated at temperatures above 300°F (150°C). However, the Maillard reaction does not simply stop at lower temperatures; it just occurs more slowly.
Achieving a Crust Without High Heat
If you are roasting for a long period, the moisture on the surface of the meat will eventually evaporate, even at low temperatures, creating the ideal conditions for browning. However, if you find that your roast is finished internally but lacks visual appeal, the best strategy is the reverse sear. This technique involves slow-cooking the meat to within 5-10 degrees of your desired final temperature, removing it from the oven, and then hitting it with a quick sear in a very hot cast-iron skillet or a blowtorch finish.
Surface Dehydration Techniques
To ensure the best crust, you must manage surface moisture. Before the meat even enters the oven, use a paper towel to pat it bone-dry. Better yet, salt your meat 24 hours in advance and leave it uncovered in the refrigerator. This process, known as dry brining, pulls moisture out, dissolves the salt, and then reabsorbs it into the muscle, all while dehydrating the surface layer. A dry surface browns exponentially faster than a wet one, meaning you can achieve a professional-grade crust even with a shorter final sear.
"A beautiful crust is not a sign of high heat, but a sign of proper preparation; it is the final act in a performance that began hours before."
Managing Fat Rendition and Flavor Depth
Fat is the conductor of flavor, and in slow roasting, it is your greatest ally. When we cook low and slow, we allow the intramuscular fat, or marbling, to slowly melt. Unlike the fat on the surface, which can become crispy, internal fat serves to baste the meat from the inside out. This is why cuts with higher fat content, such as pork shoulder or beef chuck, perform so well in this environment. They effectively self-baste as they reach higher internal temperatures.
Fat-Side Up vs. Fat-Side Down
There is a common debate in the culinary world regarding fat placement. In a standard oven, placing the fat-side up allows it to render down through the meat as it heats, providing constant moisture. However, if you are working with a delicate cut, you might want to place the fat-side down to protect the meat from the direct heat of the bottom heating element. As a rule of thumb, always position your roast so the thickest fat cap is on the top, allowing the melting fat to permeate the muscle fibers as it drips down.
Enhancing Flavor with Aromatics
Since the roasting process is so long, you have a unique opportunity to infuse flavor into the meat. Rather than relying on simple spice rubs, consider the "bed of aromatics" method. Place a layer of roughly chopped onions, celery, carrots, and whole garlic cloves in the bottom of your roasting pan. As the meat cooks, the juices and fat will drip onto these vegetables, creating a concentrated base for a pan sauce or jus. The steam rising from these aromatics will also gently flavor the meat from below.
Onions/Shallots:* For base sweetness.
Carrots:* To add depth and body.
Garlic:* Infuses the drippings with savory notes.
Fresh Herbs:* Rosemary and thyme release oils slowly, penetrating the meat over several hours.
Troubleshooting the "Blame The Chef" Roast
Even with the best science, things can go wrong. Perhaps the oven spiked in temperature, or the meat was thinner than expected. The most common error in slow roasting is the failure to account for carryover cooking. Even when you remove a roast from the oven, the residual heat continues to travel from the outer layers toward the center. For large roasts, this can cause the internal temperature to rise by as much as 10 to 15 degrees after you have taken it out of the oven.
The Importance of the Resting Period
If you pull your beef out of the oven at 135°F (medium-rare), and you don't account for carryover, it may climb to 150°F (medium) while resting. To prevent this, pull your meat at least 5-10 degrees early. The resting period is not just for the temperature to stabilize; it is the most critical time for the proteins to relax. If you slice into a roast the moment it comes out of the oven, the moisture that you worked so hard to keep trapped inside will bleed out onto your cutting board, leaving you with dry, flavorless meat.
Handling Unexpected Temperature Fluctuations
If your oven is unreliable, your best defense is a heavy-duty roasting pan or a Dutch oven. Cast iron or thick-gauge steel has high thermal mass, meaning it won't fluctuate temperature as rapidly as the air in the oven. If your oven temperature jumps, the heavy pan acts as a buffer, protecting the meat from the sudden heat surge. If you find the meat is getting too dark on the outside before it is finished on the inside, tent it loosely with aluminum foil. This blocks direct radiant heat and forces the meat to rely on the ambient heat of the oven.
Advanced Techniques: Beyond the Basics
Once you have mastered the standard slow roast, you can begin to experiment with more advanced techniques that manipulate the environment even further. One such technique is low-temp infusion. By wrapping your seasoned roast in plastic wrap or vacuum-sealing it with aromatics for a few hours before roasting, you allow the flavors to penetrate much deeper than a simple surface rub. This is an application of osmosis where the salt and spices migrate into the muscle tissue.
The Power of Sous-Vide Integration
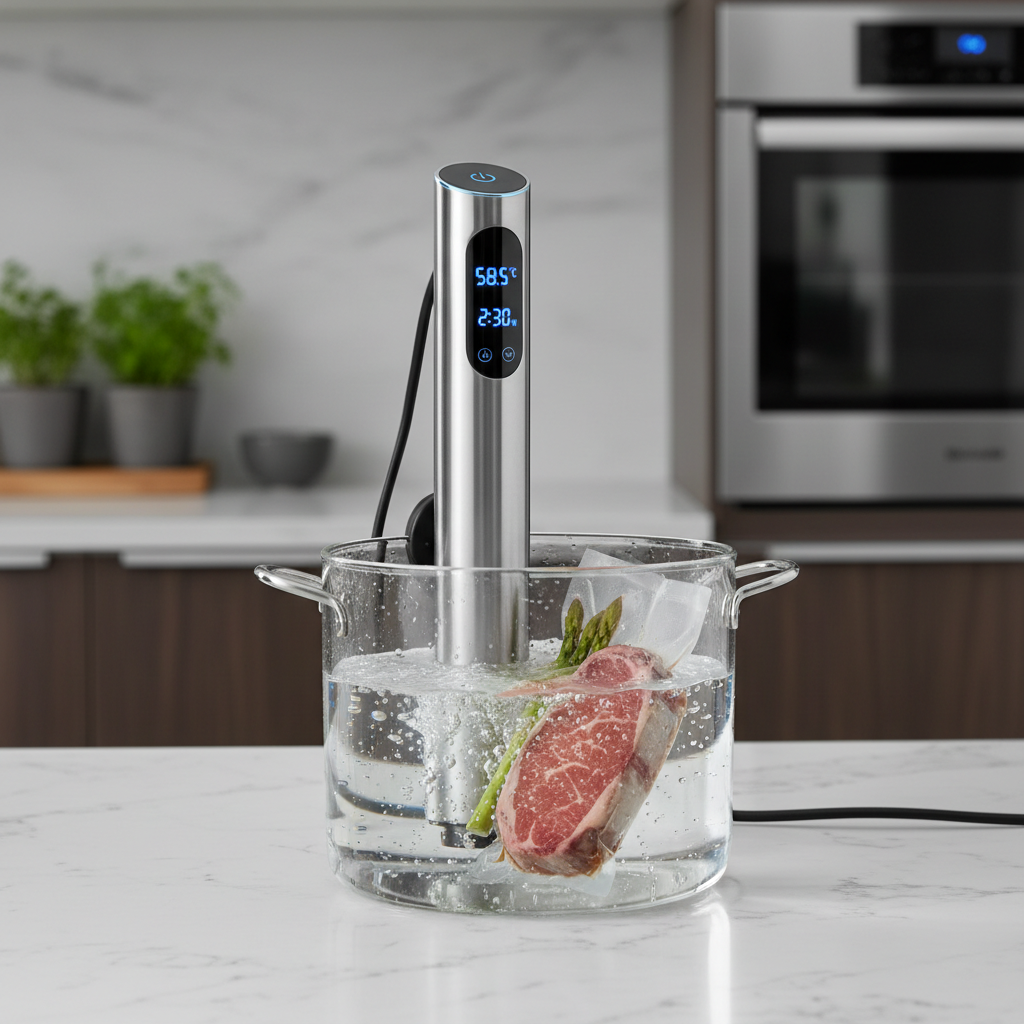
Many chefs now combine sous-vide with roasting. You can cook a large roast in a water bath for 24 hours to achieve perfect collagen breakdown and internal doneness, and then finish it with a high-heat sear. This removes all the guesswork from the equation. While this isn't "traditional" roasting in the sense of an oven-bound dish, the end result—a perfectly uniform pink interior with a crunchy crust—is the ultimate expression of the science of low-temperature cooking.
Controlling Humidity Levels
The environment inside your oven is either dry or humid. A dry environment is necessary for a good crust, but a humid environment is better for breaking down tough collagen. If you are roasting a particularly tough cut, consider adding a small pan of water to the bottom of the oven. This creates a steam-heavy environment that prevents the surface of the meat from drying out prematurely, allowing you to roast for longer periods without turning the exterior into leather.
"True culinary artistry isn't about how fast you can cook, but how much control you can exert over the transformation of your ingredients."
The Final Countdown: Executing the Perfect Roast
When you are ready to put this all into practice, prepare a checklist. Success in the kitchen is often the difference between those who wing it and those who prepare. For a high-quality cut of beef, such as a prime rib, your process should look something like this:
Why This Works
The reason this workflow is so effective is that it separates the two main goals of roasting: internal doneness and external texture. By handling them as separate, distinct phases, you remove the competition between them. You aren't trying to cook the center while simultaneously trying to crisp the outside—you are doing each at the optimal temperature and time. This is how the best restaurants operate, and it is the secret that will finally change the way you look at your oven.
Consistency Through Documentation
Finally, keep a journal. Write down the cut, the weight, the oven temperature, the final internal temperature, and the total time. Because every oven is different, your data is more valuable than any recipe you find in a cookbook. If your roast took 4 hours this time, you'll know that next time you can plan your day accordingly. With just a few entries, you will find that you no longer need recipes; you will have developed an intuitive understanding of how heat interacts with your specific equipment and ingredients.
Conclusion
Mastering the science of low-temperature roasting is perhaps the most rewarding journey a home cook can take. It moves you away from the anxiety of "is it done yet?" and replaces it with the confidence of knowing exactly what is happening inside the muscle fibers of your dinner. By respecting the time required for collagen to melt, utilizing the precision of probe thermometers, and learning to manage the dual goals of internal temperature and surface crust, you are elevating your culinary practice to a level that was once reserved for professional kitchens.
Remember, the goal is not to imitate the fast-paced, high-intensity cooking seen on television. The goal is to provide your ingredients with the time and care they need to reach their full potential. When you embrace the slowness, you discover that flavor and texture are not just ingredients; they are the result of patience and technical understanding. So, the next time you have a beautiful roast waiting on your counter, don't rush it. Take your time, lower the heat, and trust the process. You’ll find that when you take the stress out of the kitchen, the quality of your food—and your enjoyment of the process—increases tenfold. Blame the chef if you must, but after a few of these slow-roasted successes, you’ll find that there is nothing left to blame, only everything to celebrate. Keep experimenting, keep measuring, and most importantly, keep cooking with intent. The path to perfection is slow, but it is entirely within your reach.


Get the Next Recipe
Weekly recipes, techniques, and gear picks — straight to your inbox.
