Smoke and Fire: A Deep Dive Into American Barbecue Traditions
There is a primal magnetism to the dance of smoke and fire that has defined the American culinary landscape for generations. To understand American barbecue is to understand a history of patience, geography, and the transformation of humble cuts of meat into something approaching art. It is not merely a method of cooking; it is a ritualistic process that requires a surrender to time and the elements, turning the backyard pit into a theater of flavor. For the home cook, mastering this craft involves moving past the frantic energy of quick grilling and embracing the slow, steady burn of a low-heat fire. Whether you are aiming for the perfect bark on a brisket or the ideal pull on a pork shoulder, the journey begins with an appreciation for the science of heat.
Barbecue is arguably the most democratic of all American culinary traditions, yet it remains intensely regional, with each pocket of the country fiercely guarding its own methodology. From the vinegar-based tang of the Carolinas to the dry-rubbed ribs of Memphis and the heavy-smoke beef traditions of Texas, these styles represent a map of agricultural history and cultural exchange. When we "blame the chef," we are acknowledging that even with the best equipment, the success of the cook lies in their ability to interpret the smoke and monitor the meat. Achieving pitmaster status requires more than a recipe; it requires a deep-seated intuition for how temperature, humidity, and airflow interact to break down collagen and render fat. We are about to strip away the myths and delve into the technical reality of true barbecue.
As you embark on this culinary exploration, remember that every mistake is a lesson in thermodynamics. You will inevitably encounter the "stall," struggle with fire management during a storm, or find your fuel source lacking, but these are the moments that forge a cook’s character. We will walk through the essential gear, the chemistry of the wood-smoke flavor profile, and the specific timing required for the "big four" of American barbecue. Prepare to set aside your misconceptions and embrace the slow, meditative process of low-and-slow cooking. By the time we reach the end of this guide, you will be equipped to tackle your next pit session with the precision of a professional and the heart of a pitmaster.
The Foundation: Understanding Heat and Fuel
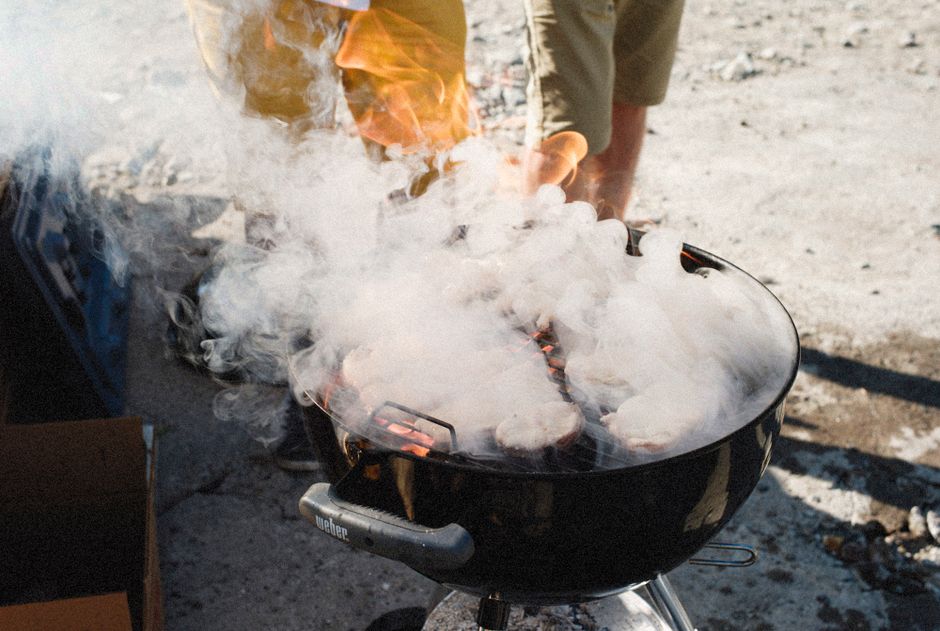
At the center of any great barbecue experience is the fire, and specifically, the type of fuel used to sustain that fire. Hardwood is the lifeblood of authentic barbecue, providing not just the heat, but the aromatic compounds that permeate the meat. While charcoal briquettes offer consistency and ease of use, they lack the nuanced flavor profile of seasoned oak, hickory, or fruit woods like apple and cherry. A professional pitmaster knows that the secret to a clean-burning fire is managing the ratio of fuel to oxygen. You want a thin, blue stream of smoke; thick, white, billowing smoke is often a sign of incomplete combustion, which will result in bitter, acrid-tasting meat that can ruin even the finest cuts.
When choosing wood, you must consider the intensity of the flavor profile you wish to achieve. Hickory is the gold standard for many, providing a strong, bacon-like, savory aroma that pairs beautifully with pork and brisket. Post Oak, the staple of Central Texas, offers a more moderate, clean smoke that doesn't overpower the natural flavor of premium beef. Fruit woods like apple or peach are much milder, offering a slightly sweet, subtle smoke that works wonders on poultry or delicate pork loin. It is a common misconception that you need to soak your wood chips; in fact, dry wood provides a much more efficient burn and allows for better temperature control.
"Barbecue is the art of turning fire into flavor. If you aren't willing to watch the fire as closely as the meat, you are merely grilling, not barbecuing."
Managing your firebox or charcoal grill temperature requires a consistent strategy for airflow. Most smokers use vents to control the intake and exhaust of air; a good rule of thumb is to keep your exhaust vent at least partially open to prevent smoke from stagnating and becoming bitter. Your target temperature for the "low and slow" method should almost always be between 225°F and 250°F. Anything hotter, and you risk searing the exterior before the connective tissue has had time to properly break down. Investing in a high-quality digital thermometer is non-negotiable; internal meat temperature and ambient pit temperature must be monitored constantly.
The Art of the Rub and the Chemistry of Bark
The bark of the barbecue—that dark, caramelized, spice-crusted exterior—is the result of the Maillard reaction combined with the complex interaction of smoke and seasoning. The rub is the first layer of defense and flavor, and it must be applied with intention. A rub should generally consist of salt, sugar, and various spices, though the ratio is where the chef’s personal identity shines. Salt is the most important element, as it penetrates the muscle tissue and denatures proteins, helping to retain moisture during the long, dry cooking process. Sugar, particularly brown sugar, is vital for crust formation, but it must be managed carefully; if your cooking temperature exceeds 275°F for too long, the sugar will char rather than caramelize.
Crafting Your Signature Rub
Applying the rub should happen well in advance of the fire. For large cuts like brisket or pork shoulder, a "dry brine" approach is highly effective. Apply your rub and let the meat sit in the refrigerator for at least two to four hours, or ideally overnight. This allows the salt to draw out a small amount of moisture, dissolve the spice mixture, and reabsorb it back into the meat as a brine. When you place the meat on the smoker, the surface will be tacky, which is the perfect condition for attracting smoke particles.
Do not be afraid of a heavy hand when applying your rub, especially on larger cuts. The surface area of a 12-pound packer brisket is significant, and only a portion of the seasoning will actually penetrate the deep muscle. Think of the rub as a flavor-delivery system for the crust. As the fat renders and drips onto the fire, the vaporized seasoning creates an aromatic steam that further seasons the meat from the outside in. This is why professional kitchens often use "mop" sauces—thin, vinegar or broth-based liquids brushed onto the meat periodically—to keep the surface moist and enhance the flavor profile during the final hours of the cook.
Decoding the Big Four: Brisket, Pork, Ribs, and Poultry
To master the American barbecue tradition, you must understand the specific needs of the four main categories of meat. Each requires a different approach to internal temperature and timing. The brisket is the mountain climber of barbecue; it is unforgiving and requires a high level of technical precision. The pork shoulder (or Boston butt) is the forgiving workhorse, ideal for pulled pork, as its high fat content makes it nearly impossible to dry out. Ribs require a "goldilocks" approach—they must be tender enough to pull clean from the bone but not so overcooked that they turn into mush. Poultry is the outlier, requiring higher heat to ensure the skin doesn't become rubbery.
The Brisket Protocol
Trim*: Remove excess hard fat (the "deckle"), leaving only about 1/4 inch of fat cap.
Injection*: Optional, but many chefs use beef tallow or broth to add moisture.
The Stall*: Expect the internal temperature to plateau around 160°F-165°F. This is where you might choose to wrap the meat in butcher paper.
Target*: Pull the brisket when it reaches an internal temperature of 203°F and feels like "warm butter" to the probe.
Pork shoulder, conversely, is perfect for the home cook who is just starting out. Because it is a heavily worked muscle from the shoulder of the pig, it is rich in collagen. When cooked low and slow, that collagen melts into gelatin, creating the signature succulent texture of authentic pulled pork. If you are doing a pork shoulder, aim for an internal temperature of 195°F to 205°F. The "bone test" is the ultimate indicator: if you can wiggle the blade bone and it pulls out with almost zero resistance, the meat is perfectly cooked.
"Cooking is a practice of patience. You cannot rush a brisket; it will tell you when it is ready, and you would do well to listen to the thermometer rather than your watch."
Ribs are a different beast entirely. Unlike the massive brisket, ribs have very little meat to protect them from the heat. The 3-2-1 method is a popular guide: three hours of smoke, two hours wrapped in foil with a bit of liquid (apple juice or vinegar), and one hour unwrapped to set the glaze. While this works, experienced pitmasters often deviate based on the thickness of the ribs and the heat of their fire. The key indicator is the "bend test"—if you lift the rack with tongs and the meat pulls back from the bones about a quarter-inch and bends easily, they are ready to be glazed and pulled.
The Science of the "Stall" and Managing Moisture
Every novice pitmaster remembers their first encounter with the dreaded "stall." You are watching your smoker thermometer, and the meat temperature is climbing steadily toward 160°F. Then, suddenly, it stops. It might stay there for two, three, or even four hours. Many beginners panic, assume the fire is dying, and crank up the heat. This is a mistake. The stall is a natural phenomenon caused by evaporative cooling. As the internal moisture of the meat rises to the surface, it evaporates, which cools the meat down just as fast as the smoker is heating it up.
To combat the stall, you have three primary choices: wait it out, wrap the meat, or increase the humidity in the pit. Waiting it out is the purist’s approach; it allows for the most consistent bark development because the surface remains dry for the duration of the cook. Wrapping, often called the "Texas Crutch," involves tightly sealing the meat in pink butcher paper or aluminum foil. This traps the moisture, bypassing the evaporative cooling and significantly speeding up the cooking time. While it makes the process faster, some purists argue that it softens the bark, turning that crispy exterior into something slightly more steamed.
Effective Moisture Management
Ultimately, the choice to wrap is yours. If you are cooking a massive brisket for a party and are short on time, the Texas Crutch is a reliable tool. If you have the luxury of time and are aiming for a competition-style bark, consider sticking with an unwrapped cook or using a very light wrap only during the final hour of the process. Always remember that the goal is to balance the internal breakdown of tissue with the development of the external flavor profile.
The Importance of the Rest: Why Patience Pays Off
In the world of barbecue, the cooking doesn't end when you pull the meat off the smoker. In fact, the rest period is arguably as important as the cook itself. When you take a large cut of meat off the fire, the muscle fibers are tight and the juices are localized in the center of the roast. If you cut into a brisket or a pork shoulder immediately, those juices will run out onto the cutting board, leaving the meat dry and fibrous. A proper rest allows the temperature to equalize, the juices to redistribute throughout the meat, and the fibers to relax.
For a brisket, a rest period of at least one to two hours is required. For a pork shoulder, 45 minutes to an hour is sufficient. You can hold the meat in an insulated cooler (a "faux Cambro") to keep it at a safe temperature while it rests. Simply place the wrapped meat in a clean cooler, fill any empty space with towels, and close the lid. This holds the heat beautifully, allowing the meat to sit in its own juices and become incredibly tender. Many professional chefs believe that the secret to the most tender barbecue isn't just the rub or the wood—it's the length of the rest.
"A well-rested brisket is the mark of a thoughtful pitmaster. Do not rush the finish; let the meat breathe, redistribute its juices, and transform from a hot hunk of protein into a masterpiece of texture."
During the resting phase, continue to monitor the internal temperature. You want the meat to stay above 140°F for food safety reasons, but you also want it to drop slightly before slicing. Trying to slice a 200°F piece of meat is a recipe for disaster; the structural integrity of the meat is at its weakest when it is piping hot. As it cools to around 150°F or 160°F, the gelatin begins to set slightly, making it much easier to slice into thin, uniform pieces without the meat falling apart in your hands.
Serving and Presentation: The Final Act
How you slice and serve your barbecue is the final expression of your work as a chef. For brisket, the direction of your slice is crucial. You must slice against the grain to ensure that each bite is as tender as possible. The brisket has two muscles: the "flat" and the "point." They have grain patterns that run in different directions, so you will need to rotate the meat after you have sliced the flat to ensure you are consistently cutting against the grain on the point. A sharp, serrated knife is essential for getting those clean, thin slices that show off the smoke ring and the bark.
When serving, remember that barbecue is a tactile experience. Offer a variety of sauces on the side—a vinegar-based Carolina sauce for the pork, a spicy red tomato-based sauce for the ribs, and perhaps a mustard-based sauce for those who prefer it. Keep the sauces warm, but don't drown the meat in them. The barbecue should be able to stand on its own merits, with the sauce serving as an accent rather than a mask.
A Pro-Chef Plating Strategy
The Slices*: Arrange slices in a shingle pattern to show off the smoke ring and the bark color.
The Pull*: Serve the pulled pork in a mound, ensuring some of the crispy "bark" pieces are mixed into the meat.
The Sides*: Classic sides like coleslaw, pickles, and white bread are not just decorations; they provide the acidic, crunch, and neutral elements needed to cleanse the palate between bites of rich, fatty meat.
The Temperature*: Ensure all service platters are warmed, especially if you are serving outdoors in a cooler environment.
The visual appeal of the smoke ring is the hallmark of a job well done. That pink layer of meat just beneath the surface is a chemical reaction between the gases in the smoke and the myoglobin in the meat. It does not necessarily indicate the quality of the barbecue, but it is the visual signature of a long, slow cook. When you display your meat, make sure to show off that ring. It tells your guests that you have mastered the fire, maintained the temperatures, and committed to the craft.
Conclusion
Mastering American barbecue is a lifelong endeavor that balances the rigid laws of physics with the creative flair of a chef. It is a process that rewards patience, precision, and an unwavering commitment to quality ingredients. By focusing on the fundamentals—the quality of your hardwood, the temperature control of your pit, and the resting period of your meat—you can elevate your backyard barbecue from a simple meal to an event. Remember that the "Blame the Chef" philosophy is all about accountability; own your fire, own your mistakes, and celebrate every victory that comes off your smoker.
There will be days when the wind shifts, the fire flares, or the meat doesn't behave. These are the moments that define a pitmaster. Do not shy away from the challenges; instead, treat them as data points to improve your next session. Keep a journal of your cooks—note the ambient temperature, the wood used, the meat weight, and the internal final temperature. Over time, these notes will reveal patterns that allow you to replicate your greatest successes and troubleshoot your most difficult days.
Ultimately, barbecue is about connection. It is the food of gatherings, celebrations, and lazy Sunday afternoons. When you invest hours into the process, you are doing more than just feeding people; you are sharing a tradition that has been nurtured by countless hands before yours. So, fire up the pit, keep your temperatures steady, and enjoy the transformative power of smoke and heat. Your kitchen, your backyard, and your guests will thank you for the effort. The smoke is calling, and it is time for you to take the lead.
Final Thoughts: The Path Forward
As you continue to refine your barbecue skills, keep in mind that the landscape of American barbecue is constantly evolving. Modern pitmasters are experimenting with everything from global spice blends to non-traditional smoking woods, pushing the boundaries of what we define as "authentic." While it is vital to respect the regional traditions that built this craft, do not be afraid to innovate. Use the techniques we have discussed here as your foundation, but let your own palate guide your flavor profiles.
If you find yourself stuck, go back to the basics. The beauty of this craft is that the simplest variables—salt, pepper, smoke, and heat—are the most powerful tools in your arsenal. Never underestimate the importance of a clean fire. If you find your meat tastes acrid, double-check your airflow and wood source before you blame the recipe. If your meat is tough, re-evaluate your resting process or your final pull temperature.
Finally, remember to enjoy the process. The reward is not just the end product; it is the time spent managing the fire, the aroma of the wood, and the quiet satisfaction of a job done well. Barbecue is a slow, methodical, and meditative practice that offers a break from the frantic pace of modern life. Treat each cook as a new opportunity to learn, a new chance to hone your intuition, and another step on the long, smoky path toward mastering the flame. Stay hungry, keep the fire burning, and never stop experimenting. Your best barbecue is always the next one you plan to make. Happy smoking.
Get the Next Recipe
Weekly recipes, techniques, and gear picks — straight to your inbox.
