Smoke and Fire: Mastering Your Grill for Bold Barbecue
There is a primal, almost ritualistic satisfaction in standing before an open flame, the scent of hardwood smoke curling into the evening air. For the home cook, the grill is not merely a tool for cooking dinner; it is a laboratory of chemistry, patience, and intuition. When you master the balance between heat, fuel, and time, you transition from someone who simply "cooks outside" to a true pitmaster. This blog post is designed to peel back the layers of barbecue mystery, providing you with the technical foundation necessary to produce restaurant-quality results in your own backyard. Whether you are searing a thick-cut ribeye or coaxing tenderness out of a tough brisket, the principles remain rooted in the sophisticated management of fire.
Barbecue is often misunderstood as a race against time, but in reality, it is a dance of slow transformation. The goal is rarely to hit the fastest cook time, but rather to achieve the most profound depth of flavor through the Maillard reaction and the steady rendering of intramuscular fat. As you embark on this journey, it is essential to view your grill as an extension of your own culinary personality. We will dive into the nuances of indirect versus direct heat, the selection of premium hardwoods, and the precise temperature thresholds that separate dry, overcooked meat from succulent, mouth-watering perfection. Prepare to sharpen your skills, adjust your mindset, and embrace the smoke.
In the sections that follow, we will dissect the anatomy of the fire, the science of the rub, and the critical resting periods that define a masterpiece. You will learn how to troubleshoot common pitfalls, from flame flare-ups to uneven heat distribution, and how to calibrate your gear for maximum consistency. Barbecue is an unforgiving medium if treated with carelessness, but it is deeply rewarding when approached with respect and technical rigor. Gather your tongs, verify your thermometers, and let us begin the work of elevating your barbecue game to the next level of expertise.
The Foundation: Understanding Your Heat Zones
Before you even think about tossing a piece of protein onto the grates, you must master the layout of your grill. Most home cooks make the mistake of treating the entire surface as a single, uniform heat zone. This is a recipe for uneven results and burnt edges. To achieve bold, consistent barbecue, you must establish a two-zone fire setup. This configuration allows you to sear meats quickly over high, direct heat while utilizing a cooler, indirect zone for slow roasting or finishing.
Direct vs. Indirect Heat
Direct heat is your best friend when it comes to the Maillard reaction, that complex chemical reaction between amino acids and reducing sugars that gives browned food its distinctive flavor. Use this zone for steaks, chops, and vegetables that require high heat for a short duration. Conversely, the indirect zone acts like an outdoor oven. By pushing your coals to one side—or turning off the burners on one side of a gas grill—you create a convective environment where the air circulates around the meat, allowing for a gentle, even cook.
The Role of Fuel
The fuel you choose dictates the flavor profile of your final dish. While charcoal briquettes offer a consistent burn time and steady temperature, lump charcoal provides a more intense heat and a cleaner, wood-fired flavor. For those serious about smoke, integrating hardwood chunks is non-negotiable. Oak, hickory, and pecan offer varying degrees of intensity, with mesquite being best reserved for short, aggressive cooks due to its potent, acrid smoke if overused.
"True barbecue is the marriage of patience and precision; if you rush the fire, you are merely heating meat, not crafting flavor."
The Art of the Rub and Marinade
The surface of your meat is the first thing your palate encounters, making the application of seasoning an essential technical step. A high-quality dry rub serves two purposes: it creates a savory crust, often referred to as "bark" in the world of low-and-slow barbecue, and it helps to draw moisture to the surface initially before the heat draws it back in. Understanding the balance of salt, sugar, heat, and aromatics is what separates a novice effort from a professional-grade dish.
Mastering the Ratio
When building your own rub, start with a foundational ratio of 4:2:1:1. That is four parts salt (use kosher salt for its grain size, which adheres better to meat), two parts coarse black pepper, one part brown sugar for caramelization, and one part aromatic spices like paprika, garlic powder, or cumin. Do not be afraid to be heavy-handed with your application. A thick, even coat is necessary to create that mahogany-colored exterior that signals a well-executed cook.
The Science of Marinades
Marinades are most effective when they contain a balance of acid, fat, and aromatics. While rubs sit on the surface, acidic marinades (using citrus, vinegar, or wine) can help tenderize thinner cuts of meat if given enough time. However, be cautious: acidic marinades left too long on delicate proteins like fish or thin steaks can turn the texture "mushy" due to the denaturation of proteins. Aim for 2 to 4 hours for most marinades, and never marinate in a reactive metal bowl; glass or food-grade plastic is the only way to go.
Temperature Control and Thermal Management
If heat is the heartbeat of your grill, then the thermometer is your most vital diagnostic tool. Relying on "the touch test" or visual cues is a gamble that professional chefs rarely take. To achieve consistency across every cook, you must invest in a high-quality instant-read digital thermometer. These devices eliminate the guesswork, allowing you to pull your protein off the heat at the exact moment the proteins have reached their target internal temperature.
Knowing Your Thresholds
The following internal temperatures are non-negotiable for success:
The Myth of the "Hot Grill"
Many home cooks think that hotter is always better. While high heat is perfect for searing, it is the enemy of larger cuts. If you are roasting a whole chicken or a rack of ribs, maintain a steady ambient temperature of 225°F to 275°F. This lower heat prevents the exterior from carbonizing before the center has had a chance to reach the desired tenderness. Using an ambient temperature probe clipped to your grate near the food will provide you with the data you need to manage your vents or burner output effectively.
The Rest: Patience is a Technique
One of the most overlooked steps in the entire grilling process is the rest. When meat is exposed to high heat, the muscle fibers contract and squeeze the moisture toward the center of the cut. If you slice into a steak the moment it comes off the grill, that flavorful juice will immediately run out onto your cutting board, leaving the meat dry and lackluster. Allowing your meat to rest is not just a suggestion; it is a critical component of culinary science.
The Mechanism of Redistribution
During the resting phase, the muscle fibers begin to relax, allowing the juices that were forced into the center of the meat to redistribute throughout the entire cut. For smaller items like steaks or chops, a 5 to 10-minute rest is sufficient. For larger cuts like brisket, pork butts, or whole roasts, you should plan for a rest of at least 30 to 60 minutes. Wrapping the meat loosely in butcher paper or foil—and perhaps placing it in an insulated cooler—will keep it at food-safe temperatures while allowing it to settle.
"A beautiful crust is merely a promise; the true quality of the barbecue is found in the succulence held within the fibers during that final, silent rest."
The Carry-Over Cooking Effect
Remember that temperature does not stop rising the moment you remove your meat from the grill. Carry-over cooking occurs as the outer, hotter layers of the meat continue to transfer heat to the cooler interior. Depending on the size and thickness of the cut, the internal temperature can rise another 5 to 10 degrees after leaving the heat. Factor this into your planning, and pull your meat off the heat just before it hits your target temperature.
Managing the Smoke Profile
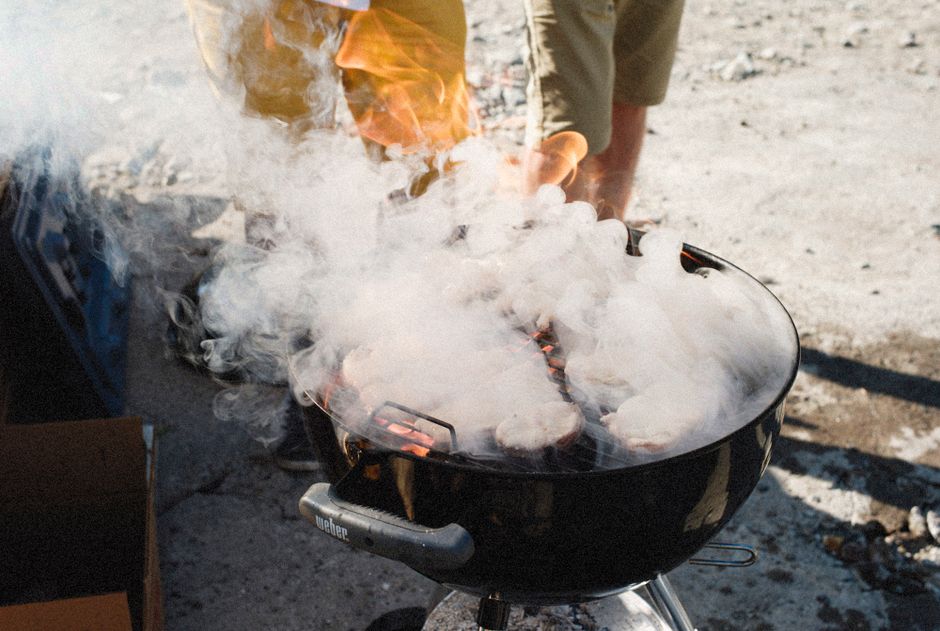
Smoke is a seasoning, and like any other ingredient, it can be abused. The goal is to produce "thin blue smoke," which is nearly invisible and provides a clean, refined flavor. If your smoke is thick, white, and billowy, it means your wood is smoldering inefficiently, which will leave a bitter, creosote-heavy finish on your food. This often happens when there is insufficient airflow to the firebox or when the wood is too wet (green wood).
Wood Selection Guide
Different woods impart different levels of character:
Fruit woods (Apple, Cherry):* These are mild, sweet, and subtle. They are perfect for pork, poultry, and fish.
Nut woods (Pecan, Hickory):* These provide a richer, bolder flavor. Hickory is the classic choice for ribs, while pecan offers a slightly mellower version of hickory.
Oaks (White, Post):* This is the "workhorse" of barbecue. It burns hot and clean, providing a robust, savory flavor that complements beef beautifully.
The Importance of Clean Fire
To ensure a clean burn, never add a massive log to your fire all at once, as this will drop the oxygen levels and cause the wood to smolder. Instead, add smaller pieces frequently. This keeps the temperature stable and ensures that the combustion remains efficient. Always pre-heat your wood chunks before placing them in the firebox; this prevents the fire from dipping in temperature and ensures that the wood ignites cleanly without releasing excessive, acrid soot.
Troubleshooting Common Grilling Pitfalls
Even the most experienced pitmasters run into issues. The key to mastering the grill is not just following a recipe, but understanding how to pivot when things don't go according to plan. Flare-ups are a common annoyance, usually caused by fat dripping onto the hot coals. To combat this, always keep a spray bottle of water nearby—but use it sparingly. A better solution is to trim your fat caps appropriately before the meat hits the heat, or to position the meat away from direct fat drippings.
Dealing with Stalls
If you are cooking low-and-slow, you will eventually hit "the stall," a point where the meat's internal temperature stops rising for an hour or more. This is caused by evaporative cooling; moisture is rising to the surface and evaporating, cooling the meat as it does so. While you can wait it out, many pros choose to wrap the meat in pink butcher paper or foil. This traps the moisture and heat, allowing you to push through the stall and reach your desired tenderness much faster.
Uneven Heat Distribution
If you find that one side of your grill is always hotter than the other, perform a simple bread test. Lay slices of white bread across the entire surface of the grill and let them toast for a few minutes. Where the bread burns, you have high heat; where it stays white, your grill is cool. This map will help you understand your grill's quirks, allowing you to rotate your meat intelligently throughout the cook to ensure uniform browning and cooking.
The Pitmaster’s Equipment Toolkit
While you can technically grill with nothing more than a pair of long-handled tongs, your life becomes significantly easier with the right gear. A stainless steel rib rack allows you to cook multiple racks of ribs vertically, which promotes better airflow and saves space. A heavy-duty grill brush with stiff wire bristles is essential for keeping your grates clean, as burnt-on debris can impart a metallic, charred flavor to your next meal.
Investing in Quality
Don't skimp on your thermometer. A high-quality, instant-read probe is the single most important investment you can make. When it comes to cleanup, invest in a good pair of heat-resistant gloves that allow you to handle hot grates and meat without sacrificing dexterity. Finally, keep a dedicated "pit notebook." Recording your temperatures, your timing, the type of wood used, and your results will allow you to replicate your successes and learn from your mistakes.
Safety First
Never lose sight of the fact that you are working with fire. Always have a fire extinguisher nearby that is rated for grease and wood fires. Ensure your grill is on a stable, non-flammable surface, and never leave an active fire unattended. By respecting the fire, you create a safer environment, which in turn allows you to focus on the nuance and technique of your cooking rather than worrying about managing a catastrophe.
"Barbecue is the art of controlled chaos; keep your fire clean, your thermometers calibrated, and your patience high, and you will never produce a bad meal."
Developing Your Culinary Voice
As you continue to master the grill, start to experiment with more than just traditional barbecue cuts. Move beyond the standard brisket and pork shoulder. Try grilling whole vegetables like eggplant or bell peppers to add a smokey depth to your sauces. Experiment with reverse searing—a technique where you bring the meat up to temperature in the indirect zone before finishing it with a final, high-heat sear. This method ensures an edge-to-edge consistency that is simply impossible to achieve with standard grilling.
The Role of Sauce
Sauce is meant to complement the meat, not mask it. A common amateur mistake is drenching a perfectly cooked piece of protein in an overly sweet, thick barbecue sauce. Apply sauce only in the final 10 to 15 minutes of the cook. This allows the sugars in the sauce to tack up and caramelize without burning. Remember, a well-smoked, well-seasoned piece of meat should stand on its own; the sauce is just the final accent, not the main event.
Building Your Legacy
Barbecue is, at its heart, a social activity. It brings people together, fills the air with the scent of comfort, and rewards the cook for their patience. Do not feel pressured to have everything perfect on your first go. The beauty of the grill is that every session is a lesson. By documenting your process and analyzing your outcomes, you are building a repository of knowledge that will serve you for years to come.
Conclusion
Mastering the grill is a lifelong pursuit, an evolving blend of science and soul. We have covered the fundamental pillars of the craft: the establishment of heat zones, the importance of precise temperature management, the chemistry of the rub, and the necessity of the resting period. These are not merely suggestions; they are the technical constraints that allow you to produce consistent, high-quality results. Whether you are using a charcoal kettle, a gas grill, or an offset smoker, the principles of thermodynamics remain the same.
The transition from a home cook to a pitmaster happens the moment you stop guessing and start measuring. When you approach your grill with an authoritative, analytical mindset, the mystery disappears, replaced by the reliable execution of heat and smoke. Keep your fire clean, respect the internal temperatures, and always—without exception—let your meat rest. As you continue to practice, you will develop an intuition for the process that transcends any recipe.
There is a profound sense of pride in serving a meal that has been carefully tended over the course of hours. The crackle of the wood, the golden brown of the bark, and the tender, juicy interior of the meat are the fruits of your dedication. Keep your equipment maintained, keep your ingredients high-quality, and never stop experimenting. The journey to the perfect barbecue is long, but with the techniques discussed here, you are well on your way to becoming the master of your own backyard flame. Enjoy the process, and may your grill always produce the results you strive for.
Get the Next Recipe
Weekly recipes, techniques, and gear picks — straight to your inbox.
