
Smoke and Fire: Understanding BBQ Smoking Methods
There is something primal and deeply satisfying about standing near a smoker on a cool morning, watching thin blue threads of smoke curl upward through the trees, smelling the sweet perfume of burning hardwood mingling with rendering fat. Barbecue smoking is not merely a cooking method — it is a slow, deliberate conversation between fire, wood, meat, and time. For the home cook willing to learn its language, smoking unlocks flavors that no oven, grill, or stovetop can reproduce. The transformation that takes place inside a smoker over six, ten, or even eighteen hours is nothing short of culinary alchemy, turning tough, humble cuts into tender, smoky masterpieces.
Yet for many home cooks, smoking remains intimidating. The equipment seems arcane, the temperatures imprecise, the timelines endless, and the variables — wood choice, airflow, humidity, fat content — overwhelming. It is easy to blame the chef when a brisket comes out dry or a pork shoulder never achieves that coveted bark. But the truth is that great barbecue is built on understanding, not luck. Once you grasp the core principles behind how smoke interacts with meat, how different smokers behave, and how to manage heat and oxygen, the whole craft opens up. You stop guessing and start cooking with intention.
In this deep dive for Blame The Chef, we are going to unpack the science, equipment, and technique behind barbecue smoking. We will cover the major smoker types, the wood varieties that define regional barbecue traditions, the critical importance of temperature control, and the step-by-step methods for achieving that prized bark and ring. Whether you are firing up a modest kettle grill for the first time or tuning a high-end offset rig, the principles here will sharpen your craft and give you the confidence to smoke anything from salmon to brisket. Let's walk through the smoke and the fire together.
The Science of Smoke: What Actually Happens
Smoke is not a single substance but a complex cocktail of gases, vapors, tars, and microscopic particulates produced when wood breaks down under heat. This process, called pyrolysis, begins around 500°F and intensifies as temperatures rise. The compounds that matter most to barbecue include phenols, which contribute aroma and antioxidant preservation; carbonyls, which drive browning and color development; and guaiacol and syringol, two phenolic compounds that give smoked foods their signature sweet, woody, and clove-like notes. Understanding these chemicals is not academic trivia — it directly informs how you build and maintain your fire.
The smoke ring that pitmasters prize — that vivid pink layer just beneath the bark — is a chemical reaction between nitric oxide and carbon monoxide from the smoke and the myoglobin in the meat. These gases bind to the myoglobin and lock in a pink color that does not indicate undercooking but rather successful smoke penetration. The smoke ring typically forms only during the first few hours of the cook, while the meat's surface is still cool and moist enough to absorb the gases. After about 140°F internal temperature, the reaction effectively halts.
Clean Smoke vs. Dirty Smoke
The single most common mistake new smokers make is running a smoldering, oxygen-starved fire that produces thick white smoke. This dirty smoke is loaded with creosote and bitter tars that coat the meat in an acrid, harsh flavor. Your goal is thin blue smoke — a nearly invisible wisp that carries aromatic compounds without the heavy, sooty residue. Thin blue smoke comes from a hot, clean-burning fire with adequate oxygen flow.
To achieve clean smoke, remember these rules:
"Smoke is not a seasoning you add at the end. It is a slow, patient ingredient that transforms the meat from the outside in. Treat it with the respect it deserves."
The Major Smoker Types: Choosing Your Rig
The smoker you choose shapes everything about your cook — the flavor, the labor, the learning curve, and the cost. There is no single "best" smoker; there is only the best smoker for your budget, your time, and your ambitions. Let's break down the five major categories that dominate backyard and competition barbecue today.
Offset Smokers
The offset smoker is the icon of traditional Texas barbecue. It features a horizontal cooking chamber with a firebox attached to one side. Heat and smoke flow from the firebox across the meat and out the chimney on the far end. Offset smokers reward the attentive cook with unmatched flavor and texture but punish the inattentive with uneven temperatures and dry results.
Operating an offset requires managing a live fire every 30 to 60 minutes throughout the cook. You add small splits of seasoned hardwood — typically oak, hickory, or pecan — to maintain a fire hot enough to burn cleanly but controlled enough to keep the cooking chamber between 225°F and 275°F. The cook must also rotate meat periodically to compensate for the temperature gradient from firebox to chimney. For those willing to commit, the offset produces barbecue with a depth of flavor that no other rig can quite match.
Kamado Grills
Kamado grills like the Big Green Egg and Kamado Joe are ceramic vessels descended from ancient Japanese cooking pots. Their thick ceramic walls provide extraordinary thermal mass, meaning they hold heat and moisture beautifully and recover quickly after the lid is opened. Kamados are extraordinarily versatile — they can smoke at 200°F, roast at 350°F, or sear at 800°F.
For smoking, kamados excel at long, unattended cooks. A full load of high-quality lump charcoal with a few chunks of hardwood can maintain 250°F for 12 to 18 hours with minimal intervention. The tight seal and precise vent control allow you to dial in temperatures within a few degrees. The downside is limited cooking space relative to their footprint, and the ceramic body is heavy, fragile, and expensive. For a home cook who wants "set it and mostly forget it" smoking with excellent results, a kamado is hard to beat.
Pellet Smokers
Pellet smokers represent the fusion of barbecue tradition and modern technology. A motor-driven auger feeds compressed hardwood pellets from a hopper into a small burn pot, where an igniter rod lights them and a fan sustains combustion. A digital controller reads the cooking chamber temperature and adjusts the auger and fan to maintain your setpoint.
The appeal is obvious: pellet smokers offer true "set it and forget it" convenience. You can dial in 225°F, load a brisket at midnight, and wake up to a house perfumed with smoke. They produce consistent, repeatable results and are ideal for cooks who work full-time jobs or host large gatherings. The tradeoffs are a milder smoke flavor compared to offsets and kamados, reliance on electricity, and the ongoing cost of food-grade pellets. For many home cooks, the convenience is worth it.
Bullet Smokers and Water Smokers
Bullet smokers like the Weber Smokey Mountain and ProQ are vertical, cylindrical rigs with a charcoal pan at the bottom, a water pan in the middle, and one or two cooking grates above. The water pan acts as a thermal buffer, stabilizing temperatures and adding humidity to the cooking chamber. Bullet smokers are relatively inexpensive, efficient with fuel, and capable of producing excellent barbecue for pork shoulder, ribs, and poultry.
The water pan is both blessing and curse. It prevents temperature spikes and keeps the meat moist, but it also means refilling water during long cooks and dealing with greasy water cleanup afterward. Some cooks replace the water with sand or clay saucers for a more stable, low-maintenance heat sink. Bullet smokers are a superb entry point for serious backyard barbecue.
Electric and Gas Smokers
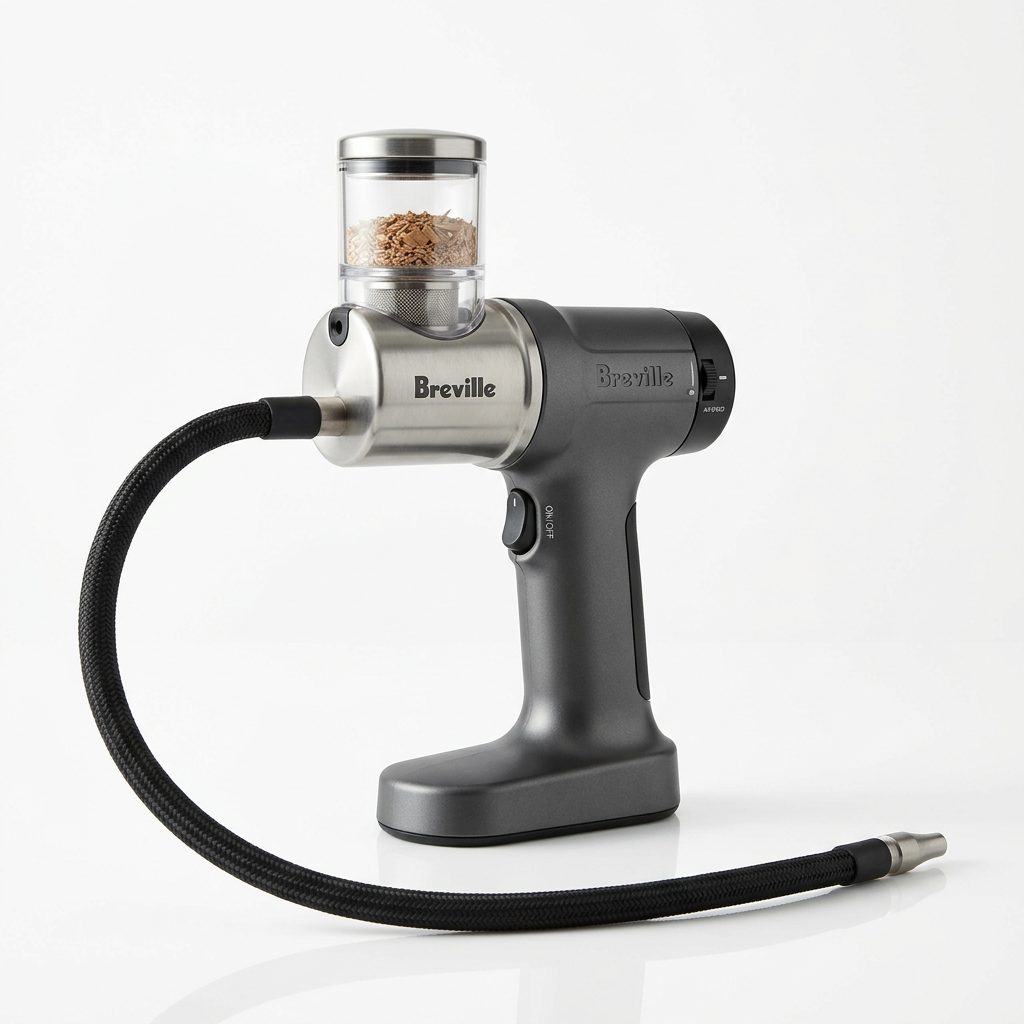
Electric smokers like those from Masterbuilt and Bradley use an electric heating element to warm a wood chip or pellet tray. Gas smokers use a propane burner for the same purpose. Both offer excellent temperature control and minimal fire management, making them attractive for apartment balconies or cooks who cannot tend a live fire.
The smoke flavor from electric and gas smokers tends to be lighter and less complex than from wood-fired rigs. However, modern units have improved significantly, and with good wood choices and proper technique, they can produce very respectable barbecue. They are also excellent for cold smoking cheese, fish, and nuts, where keeping temperatures below 90°F is essential.
Wood: The Soul of Smoke
If the smoker is the instrument, the wood is the melody. Different hardwoods impart distinctly different flavors, and regional barbecue traditions are built around the woods that grew locally. Understanding wood is understanding the character of your finished barbecue.
The Major Hardwoods
Oak is the backbone of Texas barbecue. It burns hot and clean, produces a medium-strong smoke flavor that is earthy and assertive without being overwhelming, and pairs beautifully with beef brisket. Post oak in particular is prized for its consistency and sweet, nutty undertones. Oak is often the default wood for offset smokers because it forms a reliable, hot coal bed.
Hickory is the classic American barbecue wood, dominant in the Carolinas, Missouri, and Tennessee. It delivers a strong, sweet, bacon-like smoke that is perfect for pork shoulder, ribs, and chicken. Hickory can be overpowering if overused, so many cooks blend it with lighter woods like apple or cherry. A 50/50 blend of hickory and oak is a versatile all-purpose choice.
Mesquite is the fierce, unmistakable wood of the American Southwest. It burns very hot and fast and produces a strong, earthy, almost spicy smoke. Mesquite is traditionally used in short, hot cooks over direct heat — think Texas hill country brisket cooked over an open pit — but for low-and-slow smoking, it can quickly turn bitter. Use mesquite sparingly or blended with oak.
Apple and cherry are fruitwoods that offer sweet, mild, fruity smoke perfect for poultry, pork, and fish. Cherry also imparts a beautiful deep mahogany color to the meat's surface. Pecan sits between hickory and fruitwoods — nutty, sweet, and moderately strong, excellent for pork and poultry. Maple offers a gentle, sweet smoke that pairs well with vegetables, cheese, and lighter meats.
Forms of Wood: Splits, Chunks, Chips, and Pellets
Wood comes in several forms, each suited to different smokers:
"A brisket cooked over post oak tastes like Texas. The same brisket cooked over hickory tastes like Memphis. The wood is not a detail — it is the region on your plate."
Temperature Control: The Pitmaster's Discipline
Every great barbecue cook is, at heart, a fire manager. Temperature control is the discipline that separates tender, juicy barbecue from dry, stringy disappointment. The good news is that with a few principles and some practice, any home cook can learn to hold temperatures steady for hours on end.
The Vent System: Intake and Exhaust
All wood and charcoal smokers rely on two airflow controls: the intake vent, which supplies oxygen to the fire, and the exhaust vent, which releases smoke and heat. The intake vent is your primary temperature control — more oxygen means a hotter fire; less oxygen means a cooler fire. The exhaust vent should generally remain at least half open during smoking to allow dirty smoke and stale air to escape.
A common beginner mistake is to chase temperature by constantly adjusting the exhaust vent. Instead, set the exhaust to mostly open and manage heat almost entirely with the intake. Make small adjustments — a quarter turn of the intake vent can shift your temperature by 25°F over the next 20 minutes. Patience is the pitmaster's most important tool.
The Minion Method for Long Cooks
For bullet smokers, kamados, and even kettle grills, the Minion Method allows long, unattended cooks with charcoal. The technique works as follows:
The Minion Method can sustain 225°F to 250°F for 12 hours or more from a single load of fuel. It is ideal for briskets, pork shoulders, and other long-smoke cuts.
The Stall and How to Manage It
At some point during a long cook — usually between 150°F and 170°F internal temperature — the meat's temperature will plateau for hours. This phenomenon, known as the stall, is caused by evaporative cooling: moisture from the meat's surface evaporates, cooling the meat as effectively as sweat cools a runner. The stall can last anywhere from two to six hours and terrifies inexperienced cooks into cranking up the heat.
There are two main approaches to the stall. The first is simply to wait it out — the stall is normal, and the meat will push through once surface moisture evaporates sufficiently. The second is the Texas crutch: wrapping the meat tightly in butcher paper or aluminum foil with a splash of liquid (broth, apple juice, or even beer) to trap moisture, halt evaporation, and power through the stall. Foil yields the fastest result but softens the bark; pink butcher paper is the compromise choice, allowing some vapor exchange while still accelerating the cook.
Building Bark and the Smoke Ring
Bark is the dark, crusty, peppery exterior of properly smoked brisket or pork shoulder. It is the texture and flavor contrast that makes barbecue transcendent rather than merely tasty. Bark forms through a combination of Maillard browning, caramelization, polymerization of fats, and deposition of smoke particles on a seasoned, dry-rubbed surface.
To develop great bark, start with a well-balanced dry rub. A classic Texas brisket rub is equal parts coarse black pepper and kosher salt by volume, applied generously to all surfaces at least one hour before smoking. Some cooks add granulated garlic and onion, paprika, and a touch of sugar, though purists stick to salt and pepper. The rub must be applied to a dry surface — pat the meat thoroughly with paper towels before seasoning.
Bark requires a dry cooking environment for at least the first several hours. This is why some pitmasters skip the water pan or remove it after the first few hours. High humidity softens bark; dry heat builds it. If you wrap the meat during the stall, be aware that the bark will soften somewhat. To restore crunch, unwrap the meat for the final 30 to 60 minutes of cooking and return it to the smoker to re-establish the crust.
Step-by-Step: Smoking a Brisket
Let's bring these principles together with a complete method for smoking a whole packer brisket — the ultimate test of barbecue skill. This method assumes a 12 to 14-pound USDA Choice or Prime packer brisket and a smoker capable of holding 250°F.
Preparation
The Cook
Resting and Slicing
"A brisket cooked at 275°F for ten hours is not better or worse than one cooked at 225°F for fourteen hours. It is simply a different expression of the same cut. The only wrong temperature is the one you cannot control."
Final Thoughts
Barbecue smoking is not a race, and it is not a recipe — it is a craft learned through repetition, observation, and a willingness to fail forward. Every brisket you smoke teaches you something about your rig, your wood, and your own instincts as a cook. The first few attempts may frustrate you. A brisket may come out dry. A pork shoulder may finish six hours earlier than you expected. Ribs may be tough or too tender. These are not failures; they are the tuition you pay to become a pitmaster.
The principles in this guide — clean smoke, temperature control, proper wood selection, patient bark building, and respectful resting — are your foundation. Build on them with your own experiments. Try a coffee-rubbed brisket. Cold smoke salmon over apple wood. Build a fire with nothing but post oak splits and see how the flavor differs from your usual hickory blend. Keep a cook log: temperatures, timings, wood quantities, results. Over a year of cooks, that log becomes your personal barbecue bible.
Above all, remember that barbecue is meant to be shared. Smoking meat is an act of generosity — a gift of time and attention to the people at your table. When the bark is right, when the smoke ring glows pink beneath a salt-and-pepper crust, when the flat slices like butter and the point melts on the tongue, you will understand why pitmasters devote their lives to this craft. The smoke and the fire demand patience, but they repay it a thousandfold. So fire up your smoker, trust the process, and never be afraid to blame the chef — especially when that chef is you, learning, one cook at a time.
Get the Next Recipe
Weekly recipes, techniques, and gear picks — straight to your inbox.
